Denon PMA-1600NE Service Manual
Hide thumbs
Also See for PMA-1600NE:
- Quick start manual ,
- Owner's manual (79 pages) ,
- Owner's manual (57 pages)
Table of Contents
Advertisement
Quick Links
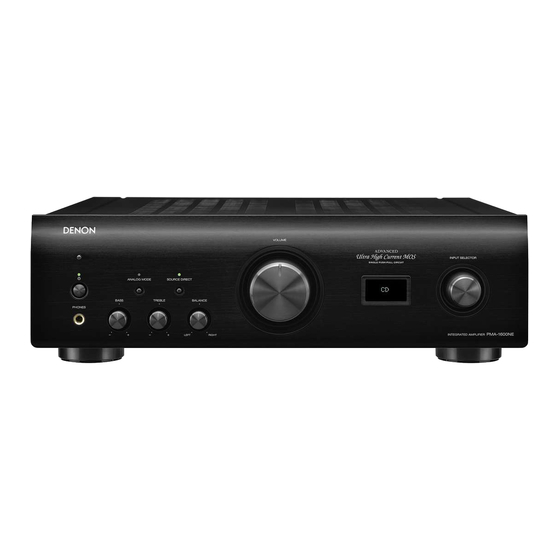
INTEGRATED AMPLIFIER
PMA-1600NE
• For purposes of improvement, specifications and design are subject to change without notice.
• Please use this service manual with referring to the operating instructions without fail.
• Some illustrations using in this service manual are slightly different from the actual set.
Service Manual
Click here!
On-line service parts list
http://dmedia.dmglobal.com/Document/DocumentDetails/23031
(P5 to P7)
Online Parts List
On-line owner's manual
http://manuals.denon.com/PMA1600NE/EU/EN/index.php
http://manuals.denon.com/PMA1600NE/AP/ZH/index.php
CAUTION IN SERVICING
ELECTRICAL
MECHANICAL
REPAIR INFORMATION
UPDATING
Please refer to the MODIFICATION NOTICE.
Confidential
Ver. 3
Advertisement
Table of Contents

Related Manuals for Denon PMA-1600NE


Summary of Contents for Denon PMA-1600NE
- Page 1 Service Manual Ver. 3 INTEGRATED AMPLIFIER Click here! PMA-1600NE On-line service parts list http://dmedia.dmglobal.com/Document/DocumentDetails/23031 (P5 to P7) Online Parts List On-line owner’s manual http://manuals.denon.com/PMA1600NE/EU/EN/index.php http://manuals.denon.com/PMA1600NE/AP/ZH/index.php CAUTION IN SERVICING ELECTRICAL MECHANICAL REPAIR INFORMATION UPDATING • For purposes of improvement, specifications and design are subject to change without notice. Please refer to the MODIFICATION NOTICE.
-
Page 2: Caution In Servicing
CAUTION IN SERVICING SAFETY PRECAUTIONS NOTE FOR SCHEMATIC DIAGRAM NOTE FOR PARTS LIST INSTRUCTIONS FOR HANDLING SEMICONDUCTORS AND OPTICAL UNIT Online Parts List Accessing the Parts List Logging in to New SDI and Accessing the Parts List Accessing the Part List from the Model Asset Screen PRINTED CIRCUIT BOARDS Parts Table Downloading the Parts List as an Excel File Revision History... -
Page 3: Safety Precautions
SAFETY PRECAUTIONS ◎ Make a safety check after servicing! The following items should be checked for continued protection of the customer and the service Check that all screws, parts and wires removed or disconnected when servicing have been put back technician. -
Page 4: Note For Schematic Diagram
NOTE FOR SCHEMATIC DIAGRAM WARNING: Parts indicated by the z mark have critical characteristics. Use ONLY replacement parts recommended by the manufacturer. CAUTION: Before returning the set to the customer, be sure to carry out either (1) a leakage current check or (2) a line to chassis resistance check. - Page 5 Online Parts List Accessing the Parts List Logging in to New SDI and Accessing the Parts List (1) Click the URL link on the cover of the service manual. (1) Access New SDI from the URL below. Examples of display <http://dmedia.dmglobal.com>...
- Page 6 Accessing the Part List from the Model Asset Screen Downloading the Parts List as an Excel File (1) Display Model Asset from New SDI. (1) Displays the Parts List. Click the Download icon. (2) Click the section displayed as ▼ Link to Part Lists under the model name. NOTE : If the ▼...
- Page 7 Searching Part Numbers or Ref. Numbers You can search a Parts List for part numbers or Ref. numbers. (1) Enter the part number or Ref. number in the search window of the Parts List, and press the search button. (2) The search results are displayed. The name of the sheet in which the search part is used and the part’s line are displayed.
-
Page 8: Jig For Servicing
CAUTION IN SERVICING. Initializing This Unit Make sure to initialize this unit after replacing the microcomputer or any peripheral equipment, or the PCB. 1. Press the power button to turn off the power. 2. While holding down the "ANALOG MODE" button, press the power button to turn on the power. 3. -
Page 9: Schematic Diagrams
ELECTRICAL SCHEMATIC DIAGRAMS BLOCK DIAGRAM SCH01_POWER AMP_HP SCH02_SELECTOR, FLD, TACT SW, P.LED, SUPPLY POWER DIAGRAM SCH03_INPUT SCH04_DAC WIRING DIAGRAM SCH05_VOLUME, TONE SCH06_DIGITAL UCOM SCH07_DIGITAL DIR SEMICONDUCTORS SCH08_DIGITAL FPGA SCH09_DIGITAL XMOS 1. IC's 2. FL DISPLAY PRINTED CIRCUIT BOARDS INPUT, TONE, VOLUME P.AMP, SUPPLY, AC, P.SW SELECTOR, FLD, TACT SW, P.LED, HP, DIGITAL SUPPLY Manufactured from March 2017... - Page 10 SCHEMATIC DIAGRAMS All Ref.No. has been described in the parts list are four digits. SCH01_POWER AMP_HP But there are less than four digits of printed Ref.No. on the PCB, and they have become four digits after the header by adding "0" in the parts list. Q5033 51.1V 50mm...
-
Page 11: Supply Unit
All Ref.No. has been described in the parts list are four digits. SCH02_SELECTOR, FLD, TACT SW, P.LED, SUPPLY But there are less than four digits of printed Ref.No. on the PCB, and they have become four digits after the header by adding "0" in the parts list. B8601 +8V_Dig OPEN. -
Page 12: Input Unit
8U-110226-1 AC_RELAY2 AC2_RL OUTPUT TO N1410 50mm 50mm 50mm 50mm Z3005 Z3001 Z3002 Z3003 STYLE-PIN STYLE-PIN STYLE-PIN STYLE-PIN PMA-1600NE INPUT PWB 8U-210226 632010226XXAD GND LINE POWER+ LINE POWER- LINE Rch SIGNAL Lch SIGNAL SPDIF PCM SIGNAL DSD SIGNAL STBY POWER... - Page 13 All Ref.No. has been described in the parts list are four digits. SCH04_DAC But there are less than four digits of printed Ref.No. on the PCB, and they have become four digits after the header by adding "0" in the parts list. Ref 401~...
-
Page 14: Volume Unit
R718 15K R702 OPEN BOOST C724 R716 BOOST 100P C718 (2/2) 0.1/50 U701 AZ4580MTR C712 R730 470 10/50 PMA-1600NE POWER AMP PWB 8U-110209 631010209XXAD GND LINE POWER+ LINE POWER- LINE Rch SIGNAL Lch SIGNAL SPDIF PCM SIGNAL DSD SIGNAL STBY POWER... -
Page 15: Digital Unit
All Ref.No. has been described in the parts list are four digits. SCH06_DIGITAL UCOM But there are less than four digits of printed Ref.No. on the PCB, and they have become four digits after the header by adding "0" in the parts list. Ref 101~... - Page 16 All Ref.No. has been described in the parts list are four digits. SCH07_DIGITAL DIR But there are less than four digits of printed Ref.No. on the PCB, and they have become four digits after the header by adding "0" in the parts list. Ref 501~...
- Page 17 All Ref.No. has been described in the parts list are four digits. SCH08_DIGITAL FPGA But there are less than four digits of printed Ref.No. on the PCB, and they have become four digits after the header by adding "0" in the parts list. 8U-310206 (Ref R205~) C321...
- Page 18 All Ref.No. has been described in the parts list are four digits. SCH09_DIGITAL XMOS But there are less than four digits of printed Ref.No. on the PCB, and they have become four digits after the header by adding "0" in the parts list. 差動Z = 90Ω...
- Page 19 PRINTED CIRCUIT BOARDS INPUT, TONE, VOLUME Lead-free Solder When soldering, use the Lead-free Solder (Sn-Ag-Cu). INPUT (A SIDE) INPUT (B SIDE) TONE (A SIDE) TONE (B SIDE) R714 C716 R733 R734 R735 R702 R701 R716 R713 R715 R726 R725 R718 R717 C715 R730...
- Page 20 P.AMP, SUPPLY, AC, P.SW P.AMP (A SIDE) P.AMP (B SIDE) SUPPLY (A SIDE) SUPPLY (B SIDE) C5002 N621 R5017 R5002 R5026 R5025 B8601 C8614 R5018 C8616 C8615 JV101 C8605 R5004 17.5 JV102 R5001 JV127 R5003 12.5 J8501 C8620 C8604 12.5 JV59 JV77 J8502...
- Page 21 SELECTOR, FLD, TACT SW, P.LED, HP, DIGITAL SELECTOR (A SIDE) SELECTOR (B SIDE) FLD (A SIDE) FLD (B SIDE) TACT SW (A SIDE) TACT SW (B SIDE) S1251 D1257 D1258 Z1301 R1262 R1258 R1263 B420 Z1206 N521 N1021 Z1205 N1211 N310 B1201 C1226...
- Page 22 SUPPLY Manufactured from March 2017 PMA1600NEBKE2 AHW15170100616 ~ PMA1600NESPE2 AHZ15170300471 ~ PMA1600NESP AHX15****00851 ~ PMA1600NESPE1C AHY15****00051 ~ SUPPLY (A SIDE) SUPPLY (B SIDE) B8601 C8614 C8616 C8615 JV101 C8605 17.5 JV127 12.5 J8501 C8620 C8604 J8502 JV88 D8601 12.5 Z8502 Z8503 C1206 R1204...
-
Page 23: Block Diagram
BLOCK DIAGRAM PMA-1600NE Block Diagram Clock 16MHz Memory Flash Clock 24MHz EPCQ16SI8N Line Detect Speaker Relay USB-B DSD Buffer USB-B I2S Advanced AL32 Plus USB DAC PCM DATA L Protection Function Relay XMOS FPGA Type B XS1_U8A_128_FB217 EP4CE15F17C8 +out PCM DATA R... -
Page 24: Power Diagram
POWER DIAGRAM... -
Page 25: Wiring Diagram
WIRING DIAGRAM 6P-EH 6P EH-SCN 10P EH-SCN 10P-EH B620 N621 B1030 N1031 P M A - 1 6 0 0 N E L CH L CH +16V S_GND S_GND A_GND R CH R CH W i r i n g D i a g r a m -16V 8U-210226-3 8U-210226-2... - Page 26 SEMICONDUCTORS Only major semiconductors are shown, general semiconductors etc. are omitted to list. The semiconductor which described a detailed drawing in a schematic diagram are omitted to list. 1. IC's PIN CONFIGURATION (top view) LC78212 (INPUT : U3051) M3062LFGPGP (DIGITAL: U0102) /CS0 /CS1 /CS2...
- Page 27 Terminal Function Pin Name Signal Name Initial Note Pin Name Signal Name Initial Note P3_6/A14 FRES FL Display Reset P3_5/A13 SPDIF MODE FPGA control SOURCR DIRECT Relay Control (H/L=Source Direc/ P9_4/DA1/TB4IN SO_DI P3_4/A12 ANA_LED LED control (Analog Mode LED ON/OFF = H/L) Tone) P3_3/A11 SO_DI_LED...
- Page 28 TC7WHU04FU (INPUT : U0403, DIGITAL : U0205, U0207) PCM9211 (DIGITAL : U0501) Block Diagram...
- Page 29 ADuM1285 (DIGITAL : U0208, U0209, U0210, U0211, U0212) Pin Discriptions...
- Page 30 XS1-U8A-128-FB217 (DIGITAL : U0701) Module Name Function Type Active Properties X0D14 P16A P32A — X0D15 — P16A P32A X0D16 — P16A X0D17 P16A — X1D05 X1D06 X1D07 X1D08 X1D09 X1D10 X1D11 X1D12 X1D13 X1D14 X1D15 X1D16 X1D17 X1D18 X1D19 X1D20 X1D21 X1D22 X1D23...
-
Page 31: Pin Configurations
MX25L4006EM1I-12G (DIGITAL : U0705) NAME DESCRIPTION PIN CONFIGURATIONS PIN DESCRIPTION System clock input(2) SYMBOL DESCRIPTION VCC1 — Analog power supply, 5 V 8-PIN SOP (150/200mil) 8-PIN PDIP (300mil) Chip Select VCC2L — Analog power supply (left channel DACFF), 5 V Serial Data Input (for 1 x I/O) / Serial Data HOLD# SI/SIO0... -
Page 32: Ordering Information
− 1000-V Charged- JESD 17 SN74AHCU04 . . . RGY PACKAGE SN54AHCU04 . . . J OR W PACKAGE (TOP VIEW) TC7WH157FU (INPUT : U0409, U0411, U0413) SN74AHCU04PWR (DIGITAL : U0952) SN74AHCU04 . . . D, DB, DGV, N, NS, OR PW PACKAGE (TOP VIEW) SN54AHCU04, SN74AHCU04... - Page 33 LB1930MC (DIGITAL : U0101) Block Diagram and Sample Application Circuit C1=1µF V CC 60kΩ OUT1 60kΩ OUT2 S-GND P-GND NJU7181RB1 (INPUT : U3072) Symbol Function AC Input AMP_OUT Amplifier Output TRIN External Trigger Input Ground CAP_D Delay Time Capacitor RES_D Delay Time Resister DC Output Supply Voltage...
- Page 34 PATTERN DETAIL 2. FL DISPLAY 42-1 43-1 44-1 45-1 46-1 47-1 48-1 FLD (GP1261AI) (Z1201) 42-2 43-2 44-2 45-2 46-2 47-2 48-2 42-3 43-3 44-3 45-3 46-3 47-3 48-3 42-4 43-4 44-4 45-4 46-4 47-4 48-4 42-5 43-5 44-5 45-5 46-5 47-5 48-5...
- Page 35 MECHANICAL DISASSEMBLY Flowchart 1. FRONT PANEL ASSY 2. AMP ASSY 3. DIGITAL ASSY 4. INPUT PCB 5. SUPPLY PCB 6. AC PCB 7. TRANS EXPLODED VIEW PACKING VIEW...
- Page 36 DISASSEMBLY Flowchart • Remove each part following the flow below. • Reassemble the removed parts in the reverse order. • Read "SAFETY PRECAUTIONS" before reassembling the removed parts. • If wire bundles are removed or moved during adjustment or part replacement, reshape the wires after completing the work. Failure to shape the wires correctly may cause problems such as noise. •...
-
Page 37: Front Panel Assy
Explanatory Photos for DISASSEMBLY 1. FRONT PANEL ASSY • For the shooting direction of each photos used in this manual, see the photo below. • A, B, C and D in the photo below indicate the shooting directions of photos. Proceeding : TOP COVER →... -
Page 38: Digital Assy
2. AMP ASSY 3. DIGITAL ASSY Proceeding : TOP COVER → AMP ASSY Proceeding : TOP COVER → DIGITAL ASSY (1) Remove the screws. (1) Remove the screws. N621 ↑Shooting direction: A↑ (2) Remove the screws. Remove the FFC. ↑Shooting direction: D↑ (2) Cut the wire clamps. -
Page 39: Input Pcb
4. INPUT PCB 5. SUPPLY PCB Proceeding : TOP COVER → DIGITAL ASSY → INPUT PCB Proceeding : TOP COVER → SUPPLY PCB (1) Remove the screws. (1) Remove the screws. ↑Shooting direction: A↑ ↑Shooting direction: A↑ (2) Remove the screws. Remove the connector. Remove the STYLE PIN. Remove the PCB HOLDER. (2) Remove the screws. - Page 40 6. AC PCB Proceeding : TOP COVER → SUPPLY PCB → AC PCB (1) Remove the screws. Remove the connector. Remove the STYLE PIN. Remove the CORD HOLDER. Cut the wire clamps. N631 N211 N221 N371 N381 ↑Shooting direction: C↑ 7.
-
Page 41: Exploded View
EXPLODED VIEW Parts List 熱帯仕向けのみ (Only Tropical) http://dmedia.dmglobal.com/Document/DocumentDetails/23031 ×2 ×2 ×2 Delete ×2 ×2 ×2 PMA1600NEBKE2 AHW15170100616 ~ PMA1600NESPE2 AHZ15170300471 ~ PMA1600NESP AHX15****00851 ~ M05-2 PMA1600NESPE1C AHY15****00051 ~ ×4 B1-1 M05-3 ×4 ×2 M05-1 ×2 M02-1 ★ M05-1 ★ M02-2 M02-3 ×2 ★... -
Page 42: Packing View
PACKING VIEW Parts List http://dmedia.dmglobal.com/Document/DocumentDetails/23031 “TOP”“REAR” “TOP”“FRONT” P11 P12 P13 “BOTTOM”“REAR” UK plug (UK Only) “BOTTOM”“FRONT”... -
Page 43: Repair Information
REPAIR INFORMATION TROUBLE SHOOTING 1. The power cannot be turned on (Power indicator LED is not lit) 2. The power cannot be turned on (Power indicator LED lights flashes) 3. The power turns on but no sound is output 4. DIGITAL PCB (Check of DIGITAL signal processing part) 5. - Page 44 TROUBLE SHOOTING 1. The power cannot be turned on (Power indicator LED is not lit) 2. The power cannot be turned on (Power indicator LED lights flashes) AC PCB Check insertion of each connector. Check insertion of the connector. POWER SW PCB Check that voltage is supplied to [F101] Blown fuse Check insertion of the connector.
- Page 45 Check that voltage is supplied Malfunction of [U8502, D8513 - Check that voltage is supplied Malfunction of [D8601]. to [N311 : 1pin] (U8503 output) 8520]. to [N1011 : 1, 2pin] Check that voltage is supplied Check that voltage is supplied Malfunction of [Q101, 104].
- Page 46 3. The power turns on but no sound is output Check the CD IN input and signal path Check the connection between the cable and con- nector Check the [N611 : 4, 6pin] signal Check soldering. ・[N611, N1111, K3001] ・[S3001, Q131] Check the connection between the cable and con- nector Check the [N621 : 1, 3pin] signal...
- Page 47 4. DIGITAL PCB (Check of DIGITAL signal processing part) Check the cable / connector and its connection. Check the AUDIO Signal output -2 Check Power Supply Check soldering. (Case of USB-DAC DSD2.8MHz) DIGITAL PCB • Use a tool such as a circuit tester to check the DIGITAL PCB Check the output voltage of [U201] 33_VCCIO : SHORT/OPEN state for the power supply and...
- Page 48 5. INPUT PCB (Check the INPUT PCB) Check Power Supply -1 INPUT PCB Check the soldering, cable and its connection. ・Check the output voltage of [N1821 : 13, 18pin] ・[N1821, N1820, N1010, N1011, N451, N450] +12V_A : 12V ・[U401, U402] -12V_A : 12V Check soldering.
- Page 49 6. DIGITAL PCB DIR BLOCK 7. DIGITAL PCB USB-DAC BLOCK Check Power Supply (DIR) Check the DC voltage Check the cable / connector and its connection. DIGITAL PCB DIGITAL PCB "2. The power cannot be turned on (Power Check soldering. Check the input voltage of [U501] [C770](+) (USBB3.3V) : +3.3V...
- Page 50 MEASURING METHOD AND WAVEFORMS 1. DIGITAL PCB test point USB-B (PCM) playback USB-B (DSD) playback It is recommended to use extension wires between the probe and test points. 1. DIGITAL PCB test point To check waveforms for the board, connect the GND (-) probe of the oscilloscope to the "Vref" point. q R736 q R736 •...
-
Page 51: Source Direct
SPECIAL MODE Special mode setting button b No. 1 - 6 : While holding down the "A" button, press the power button to turn on the power. Mode Button A Button B Descriptions The firmware version is shown on the display. SOURCE Version Display Mode DIRECT... - Page 52 1. Version Display Mode 2. Auto standby test mode 1.1. Actions Sets the auto standby timer to 4 minutes. Version information is displayed when the device is started in this mode. 2.1. Operations 1.2. Starting up Press and hold the "SOURCE DIRECT" button for over 1 second while in version display mode. "AutoStby Test"...
-
Page 53: Master Volume
ADJUSTMENT Adjusting Idling Current 1. Preparation (1) Prepare a DC voltmeter. (2) Place the unit under normal usage conditions, away from highly ventilated areas such as next to an air conditioning machine or electric fan. DC Voltmeter The set requires an ambient temperature of 15℃ to 30℃ and standard humidity. (3) Settings of This Unit •... - Page 54 UPDATING PROCEDURE AFTER REPLACING THE DIGITAL PCB. PROCEDURE AFTER REPLACING THE U-COM, ETC. FIRMWARE UPDATE PROCEDURE 1. Items necessary for update 2. Updating via USB-B (U0705) 3. Updating via System u-com (U0102)
- Page 55 PROCEDURE AFTER REPLACING THE DIGITAL PCB. PROCEDURE AFTER REPLACING THE U-COM, ETC. The procedure after replacing the DIGITAL PCB is as follows. The procedure after replacing the u-COM (microprocessor), flash ROM, etc. is as follows. (1) Change the resistor for setting the region. Procedure PCB Name Ref.
-
Page 56: Firmware Update Procedure
OLD JIG : SPK-581 WRITING KIT 8U- 210100S System u-com Update 7P FFC Straight 606050028012P FLASHSTA FLASHSTA.EXE Denon XM Windows Driver v3.X.X for Windows10 Personal Computer USB-B Update Denon XM Windows Driver v2.X.X for Windows8-1_8_7 USB cable (A type-B type) ModelName_DFU_MX25L4006E_vXXX.bin... - Page 57 (3) Move the dedicated driver to the installed folder. (If the installation location of the dedicated driver has not been changed, it is stored in ←ーー(7) "C:\Program Files\Denon\Denon_USB_Driver". ) (4) Rename the binary file for USB update as shown below. ModelName_DFU_MX25L4006E.bin (Ex.) PMA1600NE_DFU_MX25L4006E.bin (Do not include a hyphen in the model name.)
- Page 58 3. Updating via System u-com (U0102) 3.1. Items to Be Prepared 3.3. Run the FLASHSTA (1) Software suite to be written (FLASHSTA.exe, Update file.) (1) Double-click "FLASHSTA.EXE" to launch M16 Flash Start. (2) Personal Computer OS is Windows7 (Be installed "FLASHSTA.EXE") (3) RS-232C cable (9P (Male), Straight).
- Page 59 (4) Select the file and click [OPEN]. (6) Click [Setting...]. File Name : PMA1600NE_XXXXXXX.mot ModelName_Software ModelName_XXXXXX.mot ModelName_XXXXXX (5) The FilePath and ID are inputted automatically, and M16C/20 62 is automatically selected for the MCU Type. Click [OK]. **************** (7) Select 57600 as the baud rate. (DO NOT select the rate other than 57600.) Click [OK].
- Page 60 (8) Click [E.P.R...]. (10) Software is written onto the Internal Flash-ROM. It takes about 1 minute 30 seconds to complete the writing procedure. (9) Click [OK]. It takes about 50 seconds to complete checking the software. (11) Click [OK]. In case of failure, repeat the procedure from (8).
- Page 61 (12) Click [Exit]. (13) Remove the AC power plug and turn off the power. (14) Remove the (8U-210100S) form this unit. (15) After updating the firmware, check the version. "1. Version Display Mode"...
- Page 62 Copyright 2017 D&M Holdings Inc. All rights reserved.