Advertisement
Quick Links
User's Manual
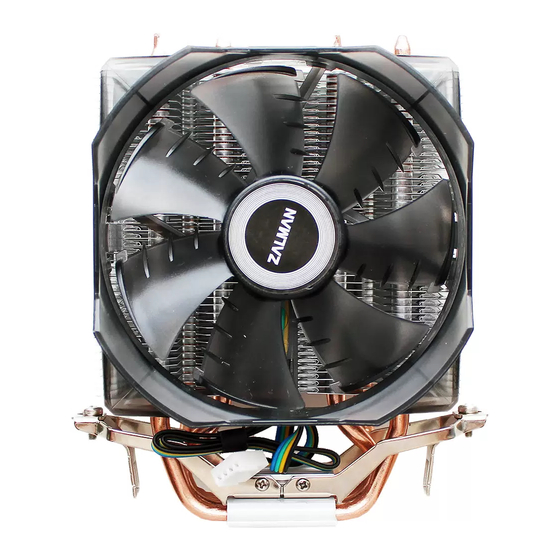
CNPS8X Optima
Intel Socket 115X / 775 CPUs
AMD Socket FM2+ / FM2 / FM1 / AM3+ / AM3 / AM2+ / AM2
CPU&APUs
To ensure safe and easy installation, please read the following precautions
Product design and specifications may be revised to improve quality and performance.
www.zalman.com
Ver.151007
Advertisement

Subscribe to Our Youtube Channel
Related Manuals for ZALMAN Optima CNPS8X


Summary of Contents for ZALMAN Optima CNPS8X
- Page 1 AMD Socket FM2+ / FM2 / FM1 / AM3+ / AM3 / AM2+ / AM2 CPU&APUs To ensure safe and easy installation, please read the following precautions Product design and specifications may be revised to improve quality and performance. www.zalman.com Ver.151007...
- Page 3 ■ Check the components list and condition of the product before installation. If any problem is found, contact the retailer to obtain a replacement. ■ During transportation of the system, the cooler must be removed. Zalman is not responsible for any damages that occur during the transport of a system.
- Page 4 Components / Composants / Komponenten Thermal Grease Cooler Clip Support & Pushpins User’s Manual [For LGA 115X /775] Installation Requirements / Points à vérifier avant l'installation / Vor der Installation Space Requirements The cooler’s installation requires an unobstructed space of 148.5㎜(width),81㎜(length) 81㎜...
- Page 5 Cooler Orientation As shown in the diagram below, it is recommended that the cooler be installed so that air flows from the cooler toward the enclosure’s rear exhaust fan to be released. ※ Recommended cooler orientation may differ according to the motherboard model. Orientation de montage du refroidisseur Il est recommandé...
- Page 6 Clear off any particles or residue from the CPU’s surface. Then spread a thorough layer of Thermal Grease on the CPU and the base of the cooler. Nettoyer la surface du CPU des débris, et puis appliquer la graisse thermique uniformément sur la surface du CPU.
- Page 7 Install the cooler on the Clip support as shown in the picture and connect the lug slot of the clip on to the lug on the clip support. Then fasten the bolts on each side a few turns at a time. Monter le refroidisseur au clip de soution comme le montre la figure, et serrer alternativement les boulons des deux côtés du clip après accrocher le trou de clip au clip de soution Den Kühler in die Halterung einbauen wie im Bild dargestellt und die Laschen an der Halterung...
- Page 8 Completely unfasten the 2 bolts already assembled on the clip and adjust the position to fit the AMD socket. Desserrer complètement les deux boulons déjà intégrés dans le clip, et ajuster la position du clip pour qu’il puisse s’adapter à la douille. Die 2 Schrauben an den Laschen vollständig lösen und nach dem Sockel-Typ umstellen.
- Page 10 Active la función PWM en la configuración del BIOS luego de instalar el producto Aviso legal: Zalman Tech Co., Ltd. no es responsable por daños debidos a causas externas, incluyendo, pero no limitado a uso indebido, problemas con la corriente eléctrica, accidentes, negligencia, alteración, reparación, instalación indebida y pruebas indebidas.
- Page 11 Componentes / Комплектация / 零件 Thermal Grease Cooler Clip Support & Pushpins User’s Manual [For LGA 115X / 775] Requerimientos de instalación / Подготовка к установке / 安装前确认事项 Requerimientos de espacio La instalación del disipador de calor requiere un espacio libre de 148.5 mm (ancho), 81 mm (largo) y 81㎜...
- Page 12 Orientación del disipador de calor Se recomienda instalar el disipador de calor de tal manera que el flujo de aire circule del disipador hacia el ventilador de escape trasero, tal como se muestra en el diagrama debajo. ※ La orientación recomendada del disipador de calor puede cambiar dependiendo del modelo del tablero Направление...
- Page 13 Limpiar la superficie del procesador de partículas o residuos. Aplicar una capa de grasa térmica al procesador y la base del disipador Очистите поверхность процессора от посторонних частиц. Нанесите термопасту равномерным слоем. 擦净CPU表面,去除异物,把导热硅脂均匀涂抹在 CPU表面。 Aflojar los dos pernos ya ensamblados en el clip y ajustar la posición para que encaje en el conector. Полностью...
- Page 14 Instalar el disipador de calor en el soporte del clip tal como se muestra en la figura y conectar la ranura del terminal del clip en el terminal del soporte del clip. Luego, ajustar los pernos en cada lado unas cuantas vueltas a la vez. После...
- Page 15 Aflojar los dos pernos ya ensamblados en el clip y ajustar la posición para que encaje en el conector. Полностью раскрутите два болта, закрепленные на установочной планке, чтобы отрегулировать положение системы охлаждения согласно платформе. 把在夹子上已组装好的两个螺栓完全松开,按照插座的类型正确调整位置。 Socket FM2+/ FM2/ FM1/ AM3+/ AM3/ AM2+/ AM2 Cuando vuelva a ensamblar el perno, asegurar que se ensamble sólo hasta la mitad de la longitud total...
- Page 17 ■ A Zalman Tech Co., Ltda não é responsável por quaisquer problemas causados por erro de instalação ou uso inadequado. ■ A Zalman Tech Co., Ltda não é responsável por danos de CPU e de sistema devido ao overclocking.
- Page 18 付属品 / 구성품 / Componentes Thermal Grease Cooler Clip Support & Pushpins User’s Manual [For LGA 115X / 775] 取付け前の確認事項 / 설치 전 확인사항 / Requisitos antes da Instalação クーラーを取付けるスペースを確認 クーラーを取付けるためには、CPUを中心に横 148.5mm、縦81mm、高さ110mm(CPUの高さは除く)の 81㎜ スペースが必要です。また、クーラーとODD及びパワ ーサプライなどの干渉を受けない環境が必要です。 쿨러 장착공간 확인 148.5㎜ 쿨러가 장착되기 위해서는 CPU를 중심으로 가로148.5㎜, 세로81㎜, 높이110㎜...
- Page 19 クーラーを取付ける方向 図のように、クーラーを通過した空気がケース 背面のファンを通じて排気されるように取付け ることをお勧めします ※ マザーボードの種類によってクーラーの装 着方向がガイドラインと異なる可能性があり ます。 쿨러 장착방향 그림과 같이 쿨러를 통과한 공기가 케이스 후면 팬을 통해 빠져나가도록 장착할 것을 권장합니다. ※ 마더보드 종류에 따라 쿨러 장착 방향이 권장방향과 다를 수 있습니다. Orientação da Instalação de Cooler Como mostrado no diagrama abaixo, a instalação é...
- Page 20 CPU表面の異物をきれいに取り除き、サーマルグ リースをCPU表面にまんべんなく塗布します。 CPU 표면의 이물질을 깨끗하게 제거하고 써멀 그리스를 CPU 표면에 골고루 도포합니다. Remova as partículas ou os resíduos da superfície da CPU e espalhe a pasta térmica na superfície da CPU クリップに既に組み立てられた取付けネジ2つを完全に解き、Soketに合わせて位置を調節します。 클립에 이미 조립되어 있는 볼트 2개를 완전히 풀어 Socket에 맞게 위치를 조정해 줍니다. Afrouxe os 2 parafusos que já...
- Page 21 クーラー図のようにクリップ支持台に取付け、クリップホールをクリップ支持台にかけた後、クリッ プの両方の取付けネジを交互に締めます。 쿨러를 그림과 같이 클립지지대에 장착하고 클립홀을 클립지지대에 걸어준 후 클립의 양쪽 볼트를 번갈아가며 조여 줍니다. Como mostrado no diagrama abaixo, instale o cooler no suporte de clipe e conecte o slot de clipe no seu suporte. Em seguida, aperte os parafusos de cada lado alternadamente. ファンコネクタをマザーボードのPWMコネ...
- Page 22 クリップに既に組み立てられた取付けネジ2つを完全に解き、Socketに合わせて位置を調節します。 클립에 이미 조립되어있는 볼트 2개를 완전히 풀어 Socket에 맞게 위치를 조정해 줍니다. Afrouxe os 2 parafusos que já estavam montados no clipe e ajuste a posição para ajustar a CPU. Socket FM2+/ FM2/ FM1/ AM3+/ AM3/ AM2+/ AM2 取付けネジを再度組み立てる際には、全長の半分程度を締めた後、 。...
- Page 23 ファンコネクタをマザーボードのPWMコネ クタ(4ピン)につなげます。 팬 커넥터를 마더보드의 PWM 커넥터(4핀)에 연결합니다. Conecte o conector de ventilador no conector PWM(4-pin) da placa mãe 품질보증 및 A/S 안내 1. 품질 보증기간 : 제품 구입일로부터 1년 (단, 구입영수증이 있을 때) 2. 무상 A/S : 품질 보증기간 내에 제품 자체 성능상의 하자 및 불량 발생시 3.
- Page 24 Polski Italiano...
- Page 25 ■ Controllate la lista dei componenti e le condizioni del prodotto prima di iniziare l'installazione. Se incontrate un qualsiasi problema, contattate il produttore per ottenere un ricambio. ■ Durante il trasporto del sistema, il raffreddatore deve essere rimosso. Zalman non è responsabile per un qualsiasi danno che potrebbe avvenire durante il trasporto del sistema.
- Page 26 Podzespoły / Componenti Pasta termoprzewodząca / Grasso Termico Klips zabezpieczający Cooler Instrukcja użytkownika / Supporto Clip e Perni / Manuale d'utilizzo [do LGA 115X /775] Requisitos de Instalação / Requisiti d'installazione Wymagane miejsce nstalacja coolera wymaga wolnej przestrzeni o wymiarach 148,5 mm (szerokość) x 81 mm (długość) 81㎜...
- Page 27 Ustawienie Coolera Zgodnie z poniższym rysunkiem, instalację coolera zaleca się w taki sposób, aby uwalniane przez niego powietrze dostawało się do tylnego wiatraka wylotowego.. ※ Zalecane ustawienie coolera może różnić się w zależności od modelu płyty głównej. Orientamento del raffreddatore Come mostrato nel grafico sottostante, si consiglia di installare il raffreddatore di modo che l'aria fluisca dal raffreddatore verso le...
- Page 28 Oczyść powierzchnię procesora z wszelkich nieczystości. Następnie nanieś odpowiednią warstwę pasty termoprzewodzącej na procesor i podstawę coolera. Pulite una qualsiasi particella o residuo dalla superficie della CPU. Quindi spalmate uno strato di Grasso Termico sulla CPU ed alla base del freddatore.
- Page 29 Zamontuj cooler na klipsie zabezpieczającym tak jak na rysunku i przyłącz gniazdo wypustowe do wypustu na klipsie zabezpieczającym. Następnie dokręć każdą ze śrub. Installate il raffreddatore sul Supporto Clip come mostrato nell'immagine, quindi collegate la fessura del clip a quella del supporto clip. Quindi serrate i bulloni ad ogni lato, qualche giro per volta. Podłącz 4-ro pinową...
- Page 30 Całkowicie odkręć dwie śruby, które uprzednio przykręciłeś do klipsa i dopasuj pozycję w gnieździe procesora AMD. Svitate completamente i 2 bulloni già montati al clip ed aggiustate la posizione per adattare al socket AMD. Socket FM2+/ FM2/ FM1/ AM3+/ AM3/ AM2+/ AM2 Podczas ponownego montażu śrub, upewnij się, żeby wkręcić...
- Page 31 MEMO...
Need help?
Do you have a question about the Optima CNPS8X and is the answer not in the manual?
Questions and answers