
Related Manuals for Fisher & Paykel DCS CAD36


Summary of Contents for Fisher & Paykel DCS CAD36
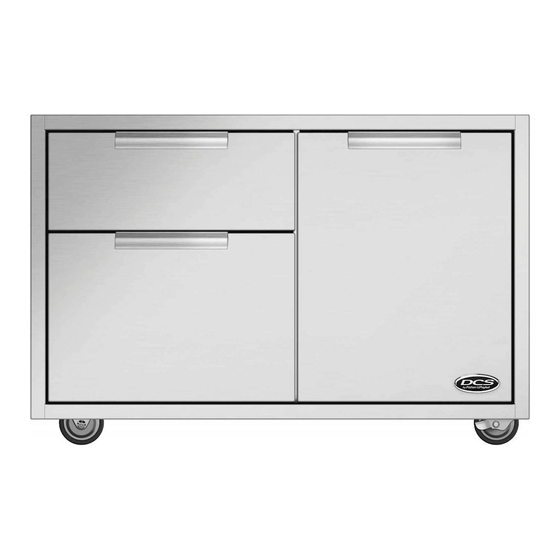
- Page 1 Professional grill cart Installation instructions CAD36 and CAD48 models User guide NZ AU...
- Page 3 A MESSAGE TO OUR CUSTOMERS Thank you for selecting this DCS by Fisher & Paykel Grill Cart. Because of this product’s unique features we have developed this manual. It contains valuable information on how to properly install and maintain your new Professional Grill Cart for years of safe and enjoyable use.
-
Page 4: Table Of Contents
TABLE OF CONTENTS SAFETY PRACTICES & PRECAUTIONS MODEL IDENTIFICATION & DIMENSIONS BEFORE INSTALLING YOUR APPLIANCE Shipping Inspection INSTALLATION Locating the Cart Cart Assembly Instructions Optional Attaching Side Shelf USING THE CART Removing Drawers Re-installing Drawers CARE AND MAINTENANCE SERVICE WARRANTY SAFETY PRACTICES AND PRECAUTIONS 1. -
Page 5: Model Identification & Dimensions
MODEL IDENTIFICATION & DIMENSIONS CAD-36 CAD-48 1219 mm 610 mm 610 mm 914 mm 114 mm 114 mm front view front view CAD-36/48 597 mm 816 mm 902 mm 86 mm 648 mm side view BEFORE INSTALLING YOUR APPLIANCE SHIPPING INSPECTION 1. -
Page 6: Installation
INSTALLATION CART ASSEMBLY INSTRUCTIONS CAUTION: DO NOT BLOCK VENTILATION OPENINGS Do not remove castor wheels from cart, as resting the cart directly on its base will block ventila- tion openings, causing a hazardous situation. Keep ventilation openings on side walls and base of cart unobstructed at all times. - Page 7 INSTALLATION CART ASSEMBLY INSTRUCTIONS STEP 2 Outdoor Appliance Head Preparation 1. First you will need to remove the angle brackets from the side of the unit and replace them with cart mount brackets (Fig. 04). Unit is shipped prepared for island installation. SCREWS 2.
- Page 8 INSTALLATION CART ASSEMBLY INSTRUCTIONS STEP 3 Head Placement onto Cart (2 Persons Required) 1. Remove drip tray/pan (Fig. 07) and other removable components (to lighten the load) such as grates, top burner caps and components, and griddle flue cover, radiant tray and grill burner for easier handling.
- Page 9 INSTALLATION CART ASSEMBLY INSTRUCTIONS 3. Position tabs on side bracket to fit into slots on the cart (be aware of pinch points)(Fig. 10 -12). When complete, the landing ledge should sit flush on the top of the cart (no gap). 4.
- Page 10 INSTALLATION CART ASSEMBLY INSTRUCTIONS STEP 5 Gas Hookup - LPG Attach LPG gas line connector hose assembly (as shown in “LPG Gas Hookup” section - of the outdoor grill manual) and then connect to LPG cylinder as shown. Fig. 16 Fig.
-
Page 11: Optional Attaching Side Shelf
INSTALLATION SIDE SHELF ASSEMBLY INSTRUCTIONS (OPTIONAL) STEP 6 Optional Attach Side Shelf Accessory on Either Side NOTE: Side shelf Model CAD-SK can be installed with the head already on the cart. SHOULDER BOLT SCREW HOLES 1. Screw shoulder bolts (2) into the bottom screws on the side of the cart (Fig. - Page 12 INSTALLATION SIDE SHELF ASSEMBLY INSTRUCTIONS (OPTIONAL) Fig. 19 Fig. 20 Fig. 21 Fig. 23 Fig. 22...
-
Page 13: Using The Cart
USING THE CART REMOVING DRAWERS 1. To remove the drawers, pull them out until their slider latch is visible. Carefully push the latch down on the left side while pulling up on the latch on the right side and pull the drawer completely out of the frame (Fig. -
Page 14: Re-Installing Drawers
USING THE CART RE-INSTALLING DRAWERS 1. Re-install the drawers by extending their guides as shown in Fig. 28. 2. While holding the drawer parallel to the cabinet, carefully align & engage the ends of the glides. Slide the drawer about 3 cm so that the glides are supporting the back of the drawer (Fig. 29). Drawer Glide properly Engaged. - Page 15 USING THE CART 5. Install the two (2) racks provided into the opening by sliding them onto the rollers on the sidewalls of the left cavity (Fig. 32). Rack & Rack Cover Drain drawer Fig. 32...
-
Page 16: Care And Maintenance
CARE AND MAINTENANCE All parts of the Professional Grill Cart can be cleaned with hot soapy water, rinsed, dried and buffed to a shine with a soft, heavy cloth. Always try this first, as it is the mildest cleaning procedure. 1. -
Page 17: Service
SERVICE For warranty service and to purchase replacement parts, please contact Customer Care. To arrange for service under warranty, please have the following information ready: • Model number* • Serial number* • Part number* • Date of installation • A brief description of the problem *these can be found on the serial label on the inside, left wall of the cylinder drawer CONTACT US THROUGH OUR LOCAL WEBSITE New Zealand... -
Page 18: Warranty
WARRANTY You receive a 2 year Manufacturer’s Warranty with this product. Fisher & Paykel Appliances will repair (or at its option replace) any part which is found to be defective within TWO YEARS from date of purchase, without cost to you for either parts or labour. - Page 19 WARRANTY (continued) To make a claim under any warranty, call customer care 1300 650 590. Or email aus.customercare@fisherpaykel.com. Service under any warranty must be provided by an authorised Fisher & Paykel Appliances Service provider. Used other than in accordance with the products user guide and other than for normal domestic use may invalidate any warranty.
- Page 21 www.fi sherpaykel.co.nz www.fi sherpaykel.com.au Copyright © Fisher & Paykel 2012. All rights reserved. The product specifications in this booklet apply to the specific products and models described at the date of issue. Under our policy of continuous product improvement, these specifications may change at any time. You should therefore check with your Dealer to ensure this booklet correctly describes the product currently available.