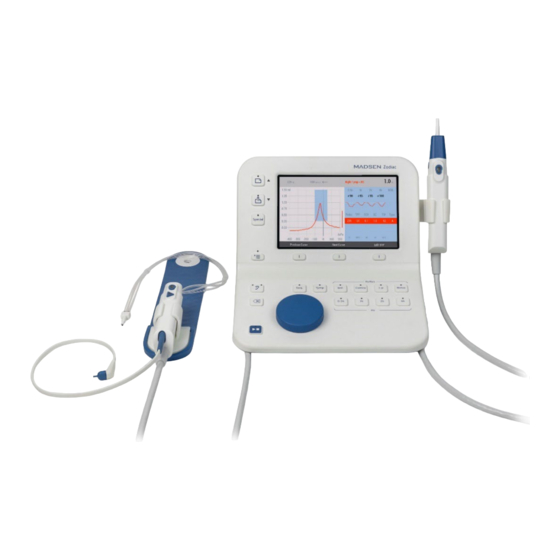
natus Madsen Zodiac User Manual
Diagnostic & clinical pc-based
Hide thumbs
Also See for Madsen Zodiac:
- Reference manual (149 pages) ,
- User manual (62 pages) ,
- User manual (60 pages)

Related Manuals for natus Madsen Zodiac


Summary of Contents for natus Madsen Zodiac
- Page 1 Madsen Zodiac Diagnostic & Clinical PC-based User Guide Doc. No.7-50-1730-EN/08 Part No.7-50-17300-EN...
- Page 2 Copyright notice © 2016, 2019, 2021 Natus Medical Denmark ApS. All rights reserved. ® Otometrics, the Otometrics Icon, AURICAL, Madsen, HI-PRO 2, Otoscan, ICS and HORTMANN are registered trademarks of Natus Medical Denmark ApS in the U.S.A. and/or other countries.
-
Page 3: Table Of Contents
The Zodiac probes Special tests Testing with Zodiac Diagnostic or Clinical - PC-based Printing test results from Otosuite Troubleshooting 10 Service, cleaning and calibration 11 Technical specifications 12 Standards and warnings 13 Other references 14 Manufacturer Disposal instructions Madsen Zodiac... -
Page 4: Overview
NOAH compatible, you can perform tests, monitor test results, create User Tests, store and export data, and print reports. Noah The Noah System is a HIMSA product for managing clients/patients, launching hearing test applications and fitting software, and storing audiological test results. Madsen Zodiac test results can be stored in the Noah database via Otosuite. Madsen Zodiac... -
Page 5: Intended Use
User Guide Intended use Madsen Zodiac is an auditory impedance tester intended to change the air pressure in the external auditory canal and measure and graph the mobility characteristics of the tympanic membrane to evaluate the functional condition of the middle ear. - Page 6 Note Indicates that you should take special notice. • To obtain a free printed copy of the user documentation, contact Natus Medical Denmark ApS (www.natus.com). Madsen Zodiac...
-
Page 7: Unpacking
Perform immittance testing in a quiet room. A sound cabin or sound treated room is not necessary. Wall-mounted installation To mount Madsen Zodiac on the wall, see the instructions supplied with the wall-mount installation kit. Probe At delivery, the probe is already connected to Madsen Zodiac. - Page 8 When you start the device, you can set the time manually or connect to Otosuite where the time is set automatically. Switching Madsen Zodiac on and off 1. To switch on Zodiac, press the On/Off button on the lower right side.
-
Page 9: The Zodiac Probes
Always fit an eartip on the probe before inserting it into the ear of the patient. Caution • An eartip can be used for both ears. If you suspect infection in one ear, use a new eartip and clean probe tip and probe ring before you continue testing on the other ear. Madsen Zodiac... - Page 10 The Classic probe The Comfort probe Caution • Always fit an eartip on the probe before inserting it into the ear of the patient. Probe types The Quick Check probe ► 9 The diagnostic probe and shoulder strap ► 11 Madsen Zodiac...
- Page 11 The shoulder strap is a flexible strap designed to fit across the patient’s shoulder. The strap ensures that the diagnostic probe stays in place during testing. Shoulder strap Hole for hanging shoulder strap Diagnostic probe Control pad Contralateral phone Probe cable connections Madsen Zodiac...
- Page 12 To activate a probe, press any one of the buttons on the probe to activate it. The contralateral phone To test for the contralateral reflex, use the contralateral phone to present the stimulus to the non-probe ear. Caution • Use care when connecting the probe with the contralateral phone to avoid connector damage. Madsen Zodiac...
- Page 13 Insert the eartip in the patient's ear until the outer surface of the eartip is flush with the ear canal entrance. The eartip will expand in the ear canal within a few seconds. Madsen Zodiac...
-
Page 14: Special Tests
Testing with Zodiac Diagnostic or Clinical - PC-based If you are using Otosuite for testing with Madsen Zodiac Diagnostic or Clinical, you can perform tympanometry testing and advanced types of reflex testing. You can find detailed descriptions of these tests in the Madsen Zodiac Reference Manual. - Page 15 The icons available in the toolbar depend on the test function that you have selected. Edit client details • Click to create a new session. Print default report • Click to print the default test report for the current patient. Probe Check • If needed, click to perform a probe check. Madsen Zodiac...
- Page 16 Click to select Broadband noise as a reflex stimulus. Reflex Threshold Reflex Decay Reflex Latency Ipsi (ipsilateral) • Click to select the stimulus presentation side for reflex testing of the probe ear. Contra (contralateral) • Click to select the stimulus presentation in the non-probe ear. Madsen Zodiac...
- Page 17 Tympanometry + Ipsi and Contra Reflex Thresholds at several frequencies. You can adjust any settings related to the tests included in the sequence. You can choose if you want to start sequences or individual tests on the shoulder pad. Madsen Zodiac...
- Page 18 Toggle to view the tympanogram in binaural or monaural mode. Retrieve data from device. Toggle to see the admittance components conductance and susceptance, or admittance data. Admittance is selected Susceptance/Conductance is selected Susceptance is selected Conductance is selected Madsen Zodiac...
- Page 19 Click to open the Test Selector window. This window enables you to load user defined tests, special test setups, and factory default tests. Fitting the eartip on the probe The Quick Check probe We recommend that you use an oversized eartip with the Quick Check probe. The diagnostic probe Fit the eartip on the probe. Madsen Zodiac...
- Page 20 The eartip can be used for both ears. If you suspect infection in one ear, use a clean eartip and probe tip before you continue testing on the other ear. Caution • Always use a suitably sized eartip. Using a probe with an unsuitably sized eartip or applying excessive force may cause unnecessary discomfort to the patient. Madsen Zodiac...
- Page 21 Probe status and leakage Note The test stops if a probe leak is detected or the probe is removed from the ear. The probe leak will show on the • screen. Madsen Zodiac...
- Page 22 1. In the Sequence area of the control panel click the Sequence Options button to select tests and specific settings. 2. Click the checkboxes next to the tests to include in the sequence. 3. If needed, modify the reflex settings to include in the automatic test sequences. Madsen Zodiac...
- Page 23 To overwrite a tympanogram, in the results table click to highlight the curve to overwrite. 7.7.1 The Tympanometry screen When the measurement starts, you will see the measurement being performed real-time on the screen. Control panel selections Tympanometry graph Results table Madsen Zodiac...
- Page 24 Move down the results table, right-click on the • measurement row to edit, and select • Set as Primary from the menu. • Change Type • Swap Ear... • Delete Curve • Delete all curves for this ear Madsen Zodiac...
- Page 25 User Guide ETF-I (Eustachian Tube Function - Intact) testing This test is available only if Madsen Zodiac supports diagnostic testing. Procedure Three result rows in the Tympanometry results table will be used for this test. To print the results, make sure that all three are selected in the Tympanometry results table.
- Page 26 The test will stop immediately. Already measured results are stored. Stopping the test The test stops automatically, but can be stopped manually, if needed. Click the Stop button on the Control Panel or the Start/Stop button on the probe. • The test is interrupted immediately. • Madsen Zodiac...
- Page 27 Stimulus side (Ipsi is the probe ear, and Contra is the opposite ear) • Stimulus frequency • Threshold level, if determined, or No Response, if determined If a specific threshold has not been determined, the measurement is indicated by a marker Madsen Zodiac...
- Page 28 The test will stop immediately. Already measured results are stored. Stopping the test The test stops automatically, but can be stopped manually, if needed. 1. Click the Stop button on the Control Panel or the Start/Stop button on the probe. 2. The test is interrupted immediately. Madsen Zodiac...
- Page 29 Click the individual measurements in the data table to view and edit the corresponding curves. This table shows the settings and measurement results. • Probe tone in Hz • Stimulus side Stimulus frequency • • Stimulus on/stimulus off markers Madsen Zodiac...
-
Page 30: Printing Test Results From Otosuite
Hairs in the ear canal get between the eartip and the wall of the ear canal The probe tip is occluded by debris or fluid • • Perform a probe check to rule out malfunction of the probe. Madsen Zodiac... -
Page 31: Service, Cleaning And Calibration
User Guide Service, cleaning and calibration Warning Do not disassemble Madsen Zodiac. Any service or repair should only be performed by an authorized • service personnel at authorized repair centers. 10.1 Service Service and repair of electro-medical equipment should be performed only by the equipment manufacturer or by service personnel at authorized repair centers. - Page 32 Check the channels of the probe tip every time you use the probe. Even small amounts of cerumen or vernix can block the probe channels. Warning Fit a new probe tip on the probe if you have been testing on an infected ear canal. Cleaning the probe ring • may also be necessary. Madsen Zodiac...
- Page 33 3. Check to see if the sound channels of the probe tip are blocked. You can fit a new probe tip on the probe or use the supplied probe tip flossing thread to clean the sound channels. A. Sound channels Madsen Zodiac...
- Page 34 Probe check Check the probe daily. Probe check ► Additional probe admittance checks can be performed. See the Madsen Zodiac Reference Manual. Annual calibration The device and probe(s) must be calibrated once a year by an authorized service department. Note The device and probe(s) must be calibrated once a year by an authorized service department, or after any potential •...
-
Page 35: Technical Specifications
The probe is checked for occlusion and leakage. If the probe check result shows a value of 1.9 - 2.1 mmho/cc/ml at 226 Hz, the probe is OK. If not, perform an admittance calibration. Additional probe admittance checks can be performed. See the Madsen Zodiac Reference Manual. If there is a probe error In case of a probe error, the probe may be occluded or faulty. - Page 36 BBN at 50 to 90 dB SPL * ±3 dB (* measured in calibration coupler) Step size dB 1, 2, 5, 10 dB Decay range 50 to 100 dB HL* (* artifacts may start to occur at levels above 95 dB HL in 0.5 cc) Madsen Zodiac...
- Page 37 Contra insert phone: 23 dB Tympanometry accuracy description (daPa/s) Pump speed Min.TW, 5% error Min. TW, 10% error Min. SA, 5% error Min. SA, 10% error (daPa) (daPa) (daPa) (daPa) 50 daPa/s 100 daPa/s 200 daPa/s 400 daPa/s 600 daPa/s Madsen Zodiac...
- Page 38 Contralateral insert earphone and ipsilateral probe Bandwidth: 1600 Hz (nominal -3 dB point) Slope: The slope is between +12 and +18 dB/octave above 1600 Hz, with an additional ±6 dB tolerance. Level: Noise level is indicated in dB HL. Tolerance ±5 dB. Madsen Zodiac...
- Page 39 12.5 14.5 Notes: From ANSI/ASA S3.6-2010, Table 5. From ANSI/ASA S3.6-2010, Table 7. Based on Natus internal data. Air pressure system Range: Normal +200 to -400 daPa/s. Extended +400 to -600 daPa/s Pressure sweep rate: 50, 100, 200, 400, 600 daPa/s ± 20% in 20% to 80% of the total pressure range Pressure accuracy: ±...
- Page 40 10 mm x 10 mm x 25 mm (0.4” x 0.4” x 1.0”), Cable length 2445 mm (96”) Weight Stand-alone version: 2.65 kg/5.85 lb PC-based version: 1.65 kg/3.64 lb Optional features (Stand-alone) Printer: Built-in printer. Prints 832 dot line/s on 112 mm paper width 2 cc coupler Madsen Zodiac...
- Page 41 User Guide Calibration Equipment should be calibrated regularly according to EN 60645-5 and ANSI S3.39 Essential performance Madsen Zodiac has no essential performance and accordingly, the applicable requirements are as stated in the Standards section: Standards Safety: IEC 60601-1:2005+AMD1:2012 EN 60601-1:2006+A1:2013 ANSI/AAMI ES60601-1:2005 + A1:2012 CAN/CSA-C22.2 NO.
- Page 42 User Guide 11.1 Accessories The accessories listed depend on the configuration of the Madsen Zodiac supplied. Group/Family Part Number Product Software 8-49-75800 1052 Otosuite DVD 8-66-10000 1096 Quick-Check Probe Probe 8-66-10100 1096 Diagnostic Classic Probe 8-66-10200 1096 Diagnostic Comfort Probe 8-68-31961 1096 Eartip 3-6 mm, Green, Tree Tip, (100 pcs.)
- Page 43 IEC 60601-1-2:2014 and EN 60601-1-2:2015 Guidance and manufacturer's declaration - electromagnetic emissions for all equipment and systems Madsen Zodiac is intended for use in the electromagnetic environment specified below. The Madsen Zodiac user should ensure that it is used in such an environment.
- Page 44 Guidance and manufacturer's declaration - electromagnetic immunity - for equipment and systems within Professional Healthcare use environment Madsen Zodiac is intended for use in the electromagnetic environment specified below. The Madsen Zodiac user should ensure that it is used in such an environment.
- Page 45 IEC 61000-3-3 Guidance and manufacturer's declaration - electromagnetic immunity for all equipment and systems Madsen Zodiac is intended for use in the electromagnetic environment specified below. The Madsen Zodiac user should ensure that it is used in such an environment.
- Page 46 TV broadcast cannot be predicted theoretically with accuracy. To assess the electromagnetic environment due to fixed RF transmitters, an electromagnetic site survey should be considered. If the measured field strength in the location in which Madsen Zodiac is used exceeds the applicable RF compliance level above, the Madsen Zodiac should be observed to verify normal operation.
-
Page 47: Standards And Warnings
User Guide Standards and warnings 12.1 Definition of symbols Madsen Zodiac and Otosuite Immittance module Symbol Title Standard as per Symbol Standard Title of Symbol Explanation Reference Referenced Standard Medical An indication of This product is a medical Device Medical Device device. - Page 48 2 requirements for basic safety instructions for use for and Essential performance. important cautionary information such as warnings and precautions that cannot, for a variety of reasons, be presented on the medical device itself. Madsen Zodiac...
- Page 49 5.3.1. (ISO shall be handled with care. 7000-0621) ISO 7000 / IEC Graphical symbols for use on Non-ionizing Indicates generally 60417 equipment electromagnetic elevated, potentially radiation hazardous, levels of non- Symbol 5140 ionizing radiation. Madsen Zodiac...
- Page 50 The following conditions or practices might present possible risk of death or serious injury to the user or patient: • Use Madsen Zodiac equipment only in a hospital or clinic under the guidance of a health care professional. • Any PC connected to Madsen Zodiac must comply with IEC-62368-1.
- Page 51 Make sure that there are no contraindications for performing the Reflex Decay Test. • Do not use Madsen Zodiac for purposes other than the applications defined in the intended use. • Use new ear tips for each patient to prevent cross-infection.
-
Page 52: Other References
Member State in which the user and/or patient is established. Other references For more information, see the online Help in Otosuite, which contains detailed reference information about Madsen Zodiac and the Otosuite modules. For Otosuite installation instructions, see the Otosuite Installation Guide, on the Otosuite installation medium. You can find in- depth information about using Madsen Zodiac in the Madsen Zodiac Reference Manual. -
Page 53: Disposal Instructions
WEEE is reused or recycled safely. In line with that commitment Natus Medical Incorporated may pass along the obligation for take back and recycling to the end user, unless other arrangements have been made.