natus Madsen Zodiac Reference Manual
Hide thumbs
Also See for Madsen Zodiac:
- User manual (62 pages) ,
- User manual (53 pages) ,
- User manual (60 pages)
Table of Contents
Advertisement
Quick Links
Advertisement
Table of Contents

Related Manuals for natus Madsen Zodiac


Summary of Contents for natus Madsen Zodiac
- Page 1 Madsen Zodiac Reference Manual Doc. No.7-50-1610-EN/08A Part No.7-50-16100-EN...
- Page 2 Copyright notice © 2016, 2020, 2021 Natus Medical Denmark ApS. All rights reserved. ® Otometrics, the Otometrics Icon, Aurical, Madsen, HI-PRO 2, Oto- scan, ICS and HORTMANN are registered trademarks of Natus Medical Denmark ApS in the U.S.A. and/or other countries.
-
Page 3: Table Of Contents
Storing ..................................10 Installing Zodiac............................... 10 2.3.1 Powering the device ............................11 2.3.2 Switching the Madsen Zodiac on and off ...................... 11 2.3.3 Connecting to the PC ............................. 12 2.3.4 Reconnecting to the device ..........................12 2.3.5 Configuring the device ..........................12 Communication between Otosuite and Zodiac ...................... - Page 4 The ETF-P screen ............................. 103 12.11 Tympanogram History ............................104 12.11.1 The Tymp History screen ........................105 13 Managing test results in Madsen Zodiac ........................107 14 Printing from Zodiac ..............................108 15 Transferring data to Otosuite ..........................109 Madsen Zodiac...
- Page 5 20 Technical specifications ............................127 21 Accessories ................................134 22 Notes on EMC (Electromagnetic Compatibility) ......................135 App. 1 Madsen Zodiac immittance methodology and features.................. 140 App. 1.1 An introduction to immittance ........................140 App. 1.1.1 Immittance testing ........................... 140 App.
-
Page 6: Introduction To Madsen Zodiac
Madsen Zodiac is a compact device for immittance testing. Madsen Zodiac is available both as a Quick Check device and as a diagnostic testing device. Both types can be operated either directly from the device (Stand-alone), and/or from the Otosuite Immittance module software (PC-based). -
Page 7: The Otosuite Immittance Module
Printing test results Some versions of Madsen Zodiac have a built-in thermal printer for printing test results. When Madsen Zodiac is used in connection with the Otosuite Immittance software module, test results can be transferred to Otosuite for printing as Otosuite reports. -
Page 8: Intended Use
Zodiac was offline Intended use Madsen Zodiac is an auditory impedance tester intended to change the air pressure in the external auditory canal and measure and graph the mobility characteristics of the tympanic membrane to evaluate the functional condition of the middle ear. -
Page 9: About This Manual
Read this manual and become familiar with Madsen Zodiac and how it operates with Otosuite before testing on a client. If you are using Otosuite with Noah, we recommend that you are familiar with the screens and functions provided in Noah. -
Page 10: Navigating This Manual
Options • Click the icon on the toolbar or select > Unpacking and installation To install and get started with Madsen Zodiac and the Otosuite Immittance module, follow the sequence below: • Unpack Madsen Zodiac (see Unpacking 10). • Install Otosuite on the PC. See the Otosuite Installation Manual on the Otosuite Installation disk. -
Page 11: Powering The Device
2 Unpacking and installation Wall-mounted installation To mount Madsen Zodiac on the wall, see the instructions supplied with the wall-mount installation kit. Probe At delivery, the probe is already connected to Madsen Zodiac. This also applies if the configuration includes both a Quick Check probe and a diagnostic probe. -
Page 12: Connecting To The Pc
The Otosuite Immittance software module automatically detects the device. 2.3.4 Reconnecting to the device If communication with Madsen Zodiac is interrupted, a message appears stating that there is no longer connection to the device. The system will automatically try to reconnect. •... -
Page 13: Communication Between Otosuite And Zodiac
2.4.1 Configuring the Immittance module You must run the Configuration Wizard before you can use the Otosuite Immittance module and Madsen Zodiac for the first time. You can also use the wizard later to change specific settings or, for example, to connect to another device. -
Page 14: Test Device Information
Immittance configuration. 2.4.2 Test device information In Otosuite Help About Device To see information relating to the test device, select > ... in the Otosuite Immittance module. In Zodiac Menu Device Settings... About Device > > Madsen Zodiac... -
Page 15: The Built-In Printer
2. To close the printer cover, press the printer cover into place until the lock clicks shut. Loading a new paper roll Caution • Be careful when opening the paper compartment to avoid injury from the cutter blades. Note Use only Natus replacement printer paper. • 1. Open the printer cover. MADSEN Zodiac... - Page 16 8. To close the printer cover, press the printer cover into place until the lock clicks shut. Storing extra paper rolls Store extra paper rolls in a cool dry place. Light exposure, high temperatures and high humidity levels will decrease their quality. MADSEN Zodiac...
-
Page 17: Views Of Zodiac
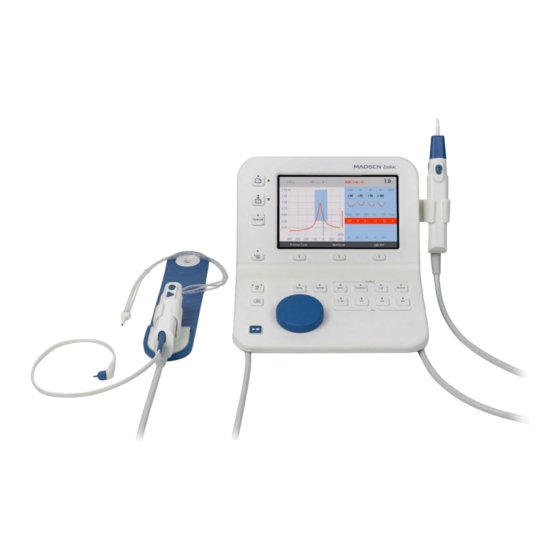
4 Views of Zodiac Views of Zodiac This section provides you with views of Madsen Zodiac. • Front view 17 • Bottom view 18 Zodiac Stand-alone A description of the front panel controls is in Madsen Zodiac test controls 25... -
Page 18: Bottom View
4 Views of Zodiac Bottom view Probe connections Label MADSEN Zodiac... -
Page 19: The Zodiac Probes
The Quick Check probe 19 • The diagnostic probes 21 At delivery, depending on the configuration of Madsen Zodiac, one or both probes are already connected to the device. The contralateral phone ► Madsen Zodiac supports the insert phone and supra-aural headphones listed in Technical specifications 131. - Page 20 Fitting the eartip on the probe 34 • Cleaning the probe and probe tip 115 Caution • Always fit an eartip on the probe before inserting it into the ear of the patient. Holding the probe • Underhand grip • Overhand grip MADSEN Zodiac...
-
Page 21: The Diagnostic Probes
Cleaning the probe and probe tip 115 The diagnostic probes Depending on the configuration of Madsen Zodiac, Madsen Zodiac can be used with one or two types of immittance probes. By using different eartips the probes can be used for both children and adults. - Page 22 The diagnostic probe connection The diagnostic probe is permanently connected to the control pad. Connection cable The connection cable connects the diagnostic probe to Zodiac. Connection socket for the contralateral phone When needed, connect the contralateral phone to this socket. MADSEN Zodiac...
-
Page 23: Using Two Probes With The Device
Push the plug firmly into the socket until it locks into the socket. Disconnecting the contralateral phone • To disconnect the contralateral phone, hold of the reinforced sleeve of the plug and pull firmly until the plug is disconnected. MADSEN Zodiac... - Page 24 Caution • If an ear canal collapses and prevents the stimulus from entering the ear, use the insert phone or follow local recommendations. MADSEN Zodiac...
-
Page 25: Madsen Zodiac Test Controls
6 MADSEN Zodiac test controls Madsen Zodiac test controls The Quick Check front panel Starting and ending a session Measurement selections Running tests On-screen selections Depending on the configuration of the stand-alone version of Zodiac, the front panel has a range of function buttons, a dial, and three soft-buttons. - Page 26 6 MADSEN Zodiac test controls Stimulus frequencies (Hz) Press these buttons to select the desired pure tone frequency for the reflex measurement. You can choose between the following frequencies: • 0.5 kHz • 1 kHz • 2 kHz • 4 kHz...
-
Page 27: The Diagnostic And Clinical Front Panel
6 MADSEN Zodiac test controls On-screen selections Arrow Up This function is enabled when you activate the Menu function • Press this button until you highlight the desired area on the screen. Arrow Down This function is enabled when you activate the Menu function. - Page 28 6 MADSEN Zodiac test controls Ipsi (ipsilateral) Press to select the presentation side for reflex testing (the probe ear). Contra (contralateral) Press to select the presentation side for reflex testing (the non-probe ear). Stimulus frequencies (Hz) Press these buttons to select the desired pure tone frequency for the reflex measurement.
- Page 29 6 MADSEN Zodiac test controls Sequence testing Seq. This function allows you to combine multiple measurements and run them (automatic sequence testing) in an automated sequence. Press this button to select automatic sequence testing. The buttons corresponding to the tests and test functions included in the sequence light up on the device, e.g., Tympanometry + Ipsi and Contra Reflex Thresholds at...
-
Page 30: The Zodiac Menu
6 MADSEN Zodiac test controls On-screen selections Soft button Press this button to select the current function of the soft-button as shown on the screen just above the soft-button. • Menu: Press the soft button below the column you wish to go to. -
Page 31: Special Tests
6 MADSEN Zodiac test controls • Use the dial or the arrow buttons to select another test protocol, if needed. • Press the soft button below the next column to select this column and scroll to any setting to view or change. -
Page 32: Preparing For Testing
• If needed, connect the contralateral phone. See The contralateral phone • Prepare Madsen Zodiac and the Immittance module: select the patient and test setup. See the Otosuite User Guide. • Prepare the patient. See Inspecting the patient’s ear •... -
Page 33: Creating A New Session
You can select a test setup different from the one currently selected. Menu 1. Press the button. 2. Use the arrow buttons to navigate to the desired test setup. Menu 3. Press the button to exit the menu. The selected test setup will be used for testing. MADSEN Zodiac... -
Page 34: Inspecting The Patient's Ear
Firmly push and twist the eartip onto the probe tip, until it rests firmly against the base of the probe tip. • Removing the eartip • To remove the eartip, grasp the stem of the eartip and pull the eartip straight off the probe tip. MADSEN Zodiac... -
Page 35: Fitting The Probe In The Patient's Ear
1. With a hand-held probe you can use a slightly over- sized eartip to achieve a seal when used with a wider range of ear canal sizes. The oversized eartip is not intended to enter the ear canal. 2. Fit the eartip on the probe. MADSEN Zodiac... - Page 36 Probe status and leakage The light indicators Light indicators light up in color in the probe to indicate different states. The control pad on the shoulder strap always shows the selected ear color if you are using the diagnostic probe. MADSEN Zodiac...
- Page 37 • screen. Stand-alone If there is a probe leak during testing, this icon appears on the Madsen Zodiac and Otosuite screens. PC-based If there is a probe leak during testing, this will be shown on the Otosuite screen. If you are using the Quick Check probe, the leakage indication will remain until you remove the probe from the ear and try again.
-
Page 38: Testing With Zodiac Quick Check - Stand-Alone
The user will see a warning message about high stimulus intensity level if the warning limit is reached. The safety intensity level cannot be exceeded in screening mode. Madsen Zodiac Quick Check performs automatic 226 Hz tympanometry which can be combined with Ipsi Reflex testing. - Page 39 Probe status and leakage The light indicators Light indicators light up in color in the probe to indicate different states. The control pad on the shoulder strap always shows the selected ear color if you are using the diagnostic probe. MADSEN Zodiac...
-
Page 40: The Quick Check Measurement Screen
Probe leakage Stand-alone If there is a probe leak during testing, this icon appears on the Madsen Zodiac and Otosuite screens. PC-based If there is a probe leak during testing, this icon appears on the Otosuite screen. If you are using the Quick Check probe, the leakage indication will remain until you remove the probe from the ear and try again. - Page 41 Deflection curves are shown when a reflex has been detected. No Response If a reflex is not detected, the highest stimulus is displayed together with a indication. Not Tested If the system cannot automatically analyze a reflex measurement, a indication is shown. MADSEN Zodiac...
- Page 42 Delete Deleting a curve Select the curve to delete and press the button. To replace a single measurement, delete a curve and adjust the measurement selections to redo the single measurement. MADSEN Zodiac...
-
Page 43: Testing With Zodiac Diagnostic Or Clinical - Stand-Alone
1. Look into the ear canal. Perform an otoscopy to assess the status of the outer ear before you insert the probe. 2. If the ear canal is blocked, a test may not be accurate. Clean the ear canal if needed. MADSEN Zodiac... - Page 44 – For adults: pull the pinna upwards and back. – For infants and children: pull the pinna down- ward and back. MADSEN Zodiac...
- Page 45 The left test ear has been selected • The device is in idle mode Green • The test is running Yellow • Leak Otosuite indications Color Status Green • During measurements, Otosuite shows a green background to the online values. MADSEN Zodiac...
-
Page 46: The Quick Check Measurement Screen
9 Testing with Zodiac Diagnostic or Clinical - Stand-Alone Probe leakage Stand-alone If there is a probe leak during testing, this icon appears on the Madsen Zodiac and Otosuite screens. PC-based If there is a probe leak during testing, this icon appears on the Otosuite screen. - Page 47 Delete Deleting a curve Select the curve you wish to delete and press the button. To replace a single measurement, delete a curve and adjust the measurement selections to redo the single measurement. MADSEN Zodiac...
-
Page 48: Sequence Testing
Selecting a test sequence If the sequence selection is not enabled in the device, and a sequence is started from Otosuite, then the Otosuite sequence will remain enabled in Madsen Zodiac until changed on the device. Activating sequence mode Seq. -
Page 49: Tympanometry Testing
The diagnostic probe: Press the button on Zodiac or the button on the control pad. • The Quick Check probe: Press the button on the probe. The probe lights up in the ear color to indicate that it is activated. MADSEN Zodiac... - Page 50 When you have finished testing one ear, switch ears, if needed. Viewing and managing test results 2. To view tympanometry results, see The Tympanometry screen 3. When you have finished testing, see Managing test results in Madsen Zodiac 107. MADSEN Zodiac...
-
Page 51: The Tympanometry Screen
Deflection curves are shown when a reflex has been detected. No Response If a reflex is not detected, the highest stimulus is displayed together with a indication. Not Tested If the system cannot automatically analyze a reflex measurement, a indication is shown. MADSEN Zodiac... - Page 52 Delete Deleting a curve Select the curve you wish to delete and press the button. To replace a single measurement, delete a curve and adjust the measurement selections to redo the single measurement. MADSEN Zodiac...
-
Page 53: Etf-I (Eustachian Tube Function - Intact) Testing
The actual probe tone applying to the curve shown is shown the results table. ETF-I (Eustachian Tube Function - Intact) testing Note • This test is available only if MADSEN Zodiac supports diagnostic testing. Procedure All three result rows in the Tympanometry results table will be used for this test. -
Page 54: Acoustic Reflex Testing
The user will see a warning message about high stimulus intensity level if the warning limit is reached. Reflex Threshold testing This test is supported by Madsen Zodiac Diagnostic and Madsen Zodiac Clinical. You can record a reflex threshold either as a separate measurement or as part of a diagnostic sequence. In Sequence testing, the test automatically suggests the threshold level. - Page 55 14. If needed, repeat these steps until you have collected the desired measurements. Caution • If the patient shows discomfort during the test, stop the test. The test will stop immediately. Already measured results are stored. MADSEN Zodiac...
-
Page 56: The Reflex Threshold Screen
When you have finished testing one ear, switch ears, if needed. Viewing and managing test results 2. To view tympanometry results, see Reflex Threshold testing 3. When you have finished testing, see Managing test results in Madsen Zodiac 107. 9.6.1 The Reflex Threshold screen On-line values... - Page 57 An offset of approximately 20 daPa is usually sufficient to stabilize the baseline. Note that excessive offsets will decrease the threshold sensitivity by several dB. ±P Use the pressure offset button to select a pressure offset to stabilize the eardrum. Keep the button depressed and use the dial to select the desired pressure. MADSEN Zodiac...
-
Page 58: Reflex Decay Testing
Reflex Decay testing This test is supported by Madsen Zodiac Diagnostic and Madsen Zodiac Clinical. You can record a reflex decay measurement either as a separate measurement or as part of a diagnostic sequence. In Sequence testing, the test automatically suggests the stimulus level, which is the reflex threshold level +10 dB. - Page 59 6. Ask the patient to sit very still and quiet during the test, without moving head or jaw. Start/Stop 7. Press the button to start the test for the preset stimulus. 8. If needed, repeat these steps until you have collected the desired measurements. MADSEN Zodiac...
-
Page 60: The Reflex Decay Screen
Reflex Decay graph Reflex Decay results table On-screen selections On-line values The on-line values show the current settings and status. • Probe tone in Hz • Stimulus side • Stimulus frequency • Stimulus level • Current pressure and admittance scales MADSEN Zodiac... -
Page 61: Manual Tympanometry
The probe lights up in the ear color to indicate that it is activated. Special Manual Tymp 4. Press the button and select Manual Tymp 5. The diagnostic probe is selected automatically when you select the test. MADSEN Zodiac... -
Page 62: The Manual Tympanometry Screen
5. When you have finished testing one ear, switch ears, if needed. Viewing and managing test results 6. To view tympanometry results, see The Manual Tympanometry screen ► 7. When you have finished testing, see Managing test results in MADSEN Zodiac 113. 9.8.1 The Manual Tympanometry screen On-line values Tympanometry graph... -
Page 63: Admittance (Y) Recorder
Reflex testing of the stapedius muscle – external electrical stimulation with cochlear implants – tactile stimulation • Patulous Eustachian tube testing Admittance variations in synchrony with the patient's breathing cycle resulting from insufficient closing of the Eustachian tube MADSEN Zodiac... - Page 64 4. If contralateral stimulation is used in the test, make sure that both the ipsilateral probe and the contralateral phone are in place before you start the measurement. Ear Selector 5. If needed, toggle the to select the ear on which you wish to start the test. MADSEN Zodiac...
-
Page 65: The Admittance (Y) Recorder Screen
9.9.1 The Admittance (Y) Recorder screen Admittance Recorder graph Admittance Recorder graph • Timeline in seconds • The recorded admittance graph shown in the left graph area • The live baseline graph shown in the right graph area MADSEN Zodiac... -
Page 66: Etf-P
8. Instruct the patient to perform the preferred equalizing method, for example having a sip of water. This ETF-P test result shows an example where the pressure changes throughout the measurement as the Eustachian tube briefly opens and closes. The pattern may differ depending on the patient. MADSEN Zodiac... -
Page 67: The Etf-P Screen
9.10.1 The ETF-P screen The ETF-P test screen in Madsen Zodiac provides a simple view for quickly assessing the Eustachian tube function. The ETF-P test result example shows how the pressure changes throughout the measurement as the Eustachian tube briefly opens and closes. - Page 68 Hide Marker Show Marker You can hide a half-life time marker. Alternatively, you can show the marker. Done Done When you have adjusted the marker, press the soft button. The results table is updated with the selected value. MADSEN Zodiac...
-
Page 69: The Otosuite Immittance Module
Viewing test data Editing results Selecting other test types Tympanometry and Reflex Screening - Diagnostic and Clinical version Starting and ending a session Measurement selections and carrying out tests Viewing test data Editing results Selecting other test types MADSEN Zodiac... - Page 70 Tymp • Click to add to the test. Reflex Screening frequencies (Hz) • Click to select the desired pure tone frequencies for the reflex screening measurement: – 0.5 kHz – 1 kHz – 2 kHz – 4 kHz Madsen Zodiac...
- Page 71 Click to select an automatic reflex threshold search. The stimuli will be presented in a sequence. Probe Tone • Click to select the desired probe tone in Hz: – – 768 (Clinical only) – 800 (Clinical only) – 1000 Admittance Recording Start Admittance Recording • Click to start recording admittance changes. MADSEN Zodiac...
- Page 72 2. Click the checkboxes next to the tests to include in the sequence. 3. If needed, modify the reflex settings to include in the automatic test sequences. You can enable an option to start sequences directly from the shoulder pad Start button. Madsen Zodiac...
- Page 73 Toggle to view the tympanogram in binaural or monaural mode. Retrieve data from device. Toggle to see the admittance components conductance and susceptance, or admittance data. Admittance is selected Susceptance/Conductance is selected Susceptance is selected Conductance is selected MADSEN Zodiac...
-
Page 74: Shortcut Keys
Sequence panel/Manual panel S (toggle) Probe tone P (cycle) User test Tympanometry and Reflex Screening Function Shortcut Start measurement F5/Spacebar Stop measurement F5/Esc Select Tympanometry T (toggle) Select Reflex Screening 500 Hz 1000 Hz 2000 Hz 4000 Hz Noise Madsen Zodiac... - Page 75 Level up Arrow up Level down Arrow down Frequency up Arrow right Frequency down Arrow left Ipsilateral Contralateral Adjust pressure - positive Shift + Arrow up Adjust pressure - negative Shift + Arrow down 500 Hz 1000 Hz MADSEN Zodiac...
-
Page 76: Leakage And Other Probe Problems
The pneumatic probe plug has not been inserted properly in Zodiac • the probe tip has not been tightened properly Probe problems can be caused by: • an occluded probe • a blocked wax filter Leakage and probe occlusion is shown on the screen during testing. Madsen Zodiac... - Page 77 Probe leakage Stand-alone If there is a probe leak during testing, this will be shown on the Madsen Zodiac and Otosuite screens. PC-based If there is a probe leak during testing, this will be shown on the Otosuite screen.
-
Page 78: Testing With Zodiac Quick Check - Pc-Based
With a hand-held probe you can use a slightly over- sized eartip to achieve a seal when used with a wider range of ear canal sizes. The oversized eartip is not intended to enter the ear canal. Fit the eartip on the probe. Ask the patient to sit very still and quiet during the test, without moving head or jaw MADSEN Zodiac... - Page 79 The right test ear has been selected • The device is in idle mode Blue • The left test ear has been selected • The device is in idle mode Green • The test is running Yellow • Leak MADSEN Zodiac...
-
Page 80: The Quick Check Measurement Screen
• screen. Stand-alone If there is a probe leak during testing, this will be shown on the Madsen Zodiac and Otosuite screens. PC-based If there is a probe leak during testing, this will be shown on the Otosuite screen. If you are using the Quick Check probe, the leakage indication will remain until you remove the probe from the ear and try again. - Page 81 Type • (Jerger types A, As, Ad, B, C, D and E denote the shape of the 226 Hz curve). You can set the type to be determined automatically, and you can subsequently change it manually, if necessary. MADSEN Zodiac...
-
Page 82: Testing With Zodiac Diagnostic Or Clinical - Pc-Based
2. Click the checkboxes next to the tests you wish to include in the sequence. 3. If needed, modify the reflex settings you wish to include in the automatic test sequences. You can enable an option to start sequences directly from the Start shoulder pad button. MADSEN Zodiac... -
Page 83: Running A Test Sequence
5. Load a test setting configured for Quick Check testing of patients in the relevant age group. Procedure Start 1. To prepare the probe for Quick Check testing, press the button on the probe or shoulder pad before you insert it into the ear canal of the patient. MADSEN Zodiac... -
Page 84: Tympanometry Testing
You can record a tympanogram either as a separate measurement or as part of a diagnostic or screening sequence. In a sequence, tympanometry is automatically followed by reflex testing. Follow the steps for performing tympanometry as a single test with the sequence function disabled. MADSEN Zodiac... - Page 85 The admittance for each pressure point is plotted out on the screen and forms the tympanogram curve. Stopping the test The test stops automatically, but can be stopped manually, if needed. Stop Start/Stop 1. Click the button on the Control Panel or the button on the probe. 2. The test is interrupted immediately. MADSEN Zodiac...
-
Page 86: The Tympanometry Screen
Viewing and managing test results 2. To view tympanometry results, see The Tympanometry screen 3. When you have finished testing, see Managing test results in Madsen Zodiac 107. 12.3.1 The Tympanometry screen When the measurement starts, you will see the measurement being performed real-time on the screen. -
Page 87: Etf-I (Eustachian Tube Function - Intact) Testing
Change Type • Swap Ear... • Delete Curve • Delete all curves for this ear • 12.4 ETF-I (Eustachian Tube Function - Intact) testing Note This test is available only if MADSEN Zodiac supports diagnostic testing. • MADSEN Zodiac... - Page 88 • equalization maneuvers by keeping the pressure between measurements. 12.5 Acoustic reflex testing Madsen Zodiac determines acoustic reflexes automatically using different stimulus levels. Note It is recommended that you perform a tympanometric test before making any acoustic reflex measurement •...
-
Page 89: Reflex Threshold Testing
This test is supported by Madsen Zodiac Diagnostic and Madsen Zodiac Clinical. You can record a reflex threshold either as a separate measurement or as part of a diagnostic sequence. In Sequence testing, the test automatically suggests the threshold level. - Page 90 When you have finished testing one ear, switch ears, if needed. Viewing and managing test results 3. To view tympanometry results, see The Reflex Threshold screen 4. When you have finished testing, see Managing test results in Madsen Zodiac 107. MADSEN Zodiac...
-
Page 91: Automated Reflex Threshold Testing
Stopping the test The test stops automatically, but can be stopped manually, if needed. Stop Start/Stop 1. Click the button on the Control Panel or the button on the probe. 2. The test is interrupted immediately. MADSEN Zodiac... -
Page 92: The Reflex Threshold Screen
Viewing and managing test results 3. To view tympanometry results, see The Reflex Threshold screen 4. When you have finished testing, see Managing test results in Madsen Zodiac 107. 12.6.3 The Reflex Threshold screen When the measurement starts, you will see the measurement being performed real-time on the screen. - Page 93 Stimulus side (Ipsi is the probe ear, and Contra is the opposite ear) • Stimulus frequency • Threshold level, if determined, or No Response, if determined If a specific threshold has not been determined, the measurement is indicated by a marker MADSEN Zodiac...
-
Page 94: Reflex Decay Testing
12.7 Reflex Decay testing This test is supported by Madsen Zodiac Diagnostic and Madsen Zodiac Clinical. You can record a reflex decay measurement either as a separate measurement or as part of a diagnostic sequence. In Sequence testing, the test automatically suggests the stimulus level, which is the reflex threshold level +10 dB. -
Page 95: The Reflex Decay Screen
Variations that are in synchrony with the patient's pulse or breathing may prevent the measurements from being successful. Use the Admittance Recording test to record and report such variations (Zodiac Clinical only). C. Tympanogram The primary tympanogram is shown in this view. MADSEN Zodiac... - Page 96 The stimulus on-set marker • The half-life marker Delete Curve Select the curve in the results • table and right-click the curve to Swap Data Between Left and Right Ear • edit the properties. Delete Marker • Add Marker • MADSEN Zodiac...
-
Page 97: Manual Tympanometry
2. The test stops immediately. Viewing and managing test results 3. To view tympanometry results, see The Manual Tympanometry screen 4. When you have finished testing, see Managing test results in Madsen Zodiac 107. MADSEN Zodiac... -
Page 98: The Manual Tympanometry Screen
The graph area shows the tympanometric curves and can rescale automatically to fit the curves. • Tympanometric curves • Pressure and admittance scales • Ear canal volume bar • Norm area The ear canal volume is shown to the right of the graph. MADSEN Zodiac... -
Page 99: Admittance (Y) Recorder
The condition is sometimes observed as a pulsatile objective tinnitus. It may indicate the presence of a Glomus tumor. Before testing 1. Do as described in Preparing for testing 2. Inform the patient about the high stimulus levels in the test. MADSEN Zodiac... -
Page 100: The Admittance (Y) Recorder Screen
8. The measurement stops automatically after 30 seconds, but you can stop it manually before. 9. You can record one measurement per ear. 12.9.1 The Admittance (Y) Recorder screen Admittance Recording Start Admittance Recording • Click to start recording admittance changes. MADSEN Zodiac... - Page 101 The live baseline graph shown in the right graph area D. Admittance Recorder results table The results table shows the results related to the currently selected curve: • Stimulus side • Duration in seconds E. Tympanogram • The primary tympanogram is shown in this view. MADSEN Zodiac...
-
Page 102: Etf-P
Start/Stop Start/Stop 4. Click the button on the control panel or press the button on the probe control pad on the shoulder strap. Positive Pressure Negative Pressure If needed, click the button to reverse the pressure control. MADSEN Zodiac... -
Page 103: The Etf-P Screen
Set negative pressure (daPa) • Click to set the negative target pressure. When the measurement starts, you will see the measurement being performed real-time on the screen. One curve per ear is saved Measurement selections ETF-P graph Results table Editing results MADSEN Zodiac... -
Page 104: Tympanogram History
This is extremely useful in tracing deterioration or recovery related to pathological events such as • Serous otitis media • Otosclerosis • Perforations • Otosalpingitis You can drag and drop tympanograms from different test dates to display them in the central view area. You can print the tympanogram history as a report. MADSEN Zodiac... -
Page 105: The Tymp History Screen
Select tympanograms from different sessions • Drag and drop tympanograms from different test dates for display in the central view area. The tympanograms illustrate changes over time to the middle ear function. The Tympanogram History screen showing tympanograms ready for selection. MADSEN Zodiac... - Page 106 12 Testing with Zodiac Diagnostic or Clinical - PC-based The Tympanogram History screen showing tympanograms selected for comparison. MADSEN Zodiac...
-
Page 107: Managing Test Results In Madsen Zodiac
13 Managing test results in MADSEN Zodiac Managing test results in Madsen Zodiac The following applies to managing test results in Madsen Zodiac. If you wish to perform these actions in Otosuite, see the Otosuite User Guide or Otosuite Reference Manual... -
Page 108: Printing From Zodiac
1. If the device is configured to print directly from the built-in printer, press the button to print the test results. You can use the dial to scroll through the preview before printing. 2. Remember to write the patient's name on the print-out. Madsen Zodiac... -
Page 109: Transferring Data To Otosuite
You can transfer data from Zodiac to a PC with Otosuite installed. Transferring data to Otosuite If you need to change the patient in Otosuite, while you are working with Otosuite you can fetch the patient's test results from Zodiac. Madsen Zodiac... -
Page 110: Printing Test Results From Otosuite
Use the Otosuite print function to print a test report. See the Otosuite User Guide. Tympanometry View • Click the checkboxes in the column to select or deselect the curves you wish to include in the test report. Madsen Zodiac... -
Page 111: Service And Maintenance
17 Service and maintenance Service and maintenance Warning Do not disassemble Madsen Zodiac. Any service or repair should only be performed by an authorized • service personnel at authorized repair centers. Caution • Service and repair of electro-medical equipment should be carried out only by the equipment manufacturer or by service personnel at authorized workshops. -
Page 112: Maintenance
On request, your supplier can obtain a Service Manual from the manufacturer. 17.3 Maintenance Madsen Zodiac requires no preventive maintenance. However, it is recommended that you observe the guidelines described in Cleaning Madsen Zodiac 114 Calibration 112. - Page 113 This is to make sure that the probe tip does not influence the probe test, and that the test cavity is not contaminated. 2. To access Probe Admittance Calibration from Madsen Zodiac, Special Calibration...
-
Page 114: Cleaning Madsen Zodiac
If needed, use a screwdriver (torque IP6) to carefully unscrew the screw fastening the dial. Procedure Warning Keep Madsen Zodiac away from liquids. Do not use metal objects or liquids while cleaning the printer • paper compartment. 1. Clean the external surfaces of the device: –... -
Page 115: Recommended Cleaning Agents
Fit a new probe tip on the probe if you have been testing on an infected ear canal. Cleaning the probe ring may also be necessary. Note Accurate testing is only guaranteed if you use the eartips approved specifically for Madsen Zodiac by • Otometrics. - Page 116 This will loosen the probe tip. Note Even the slightest amount of moisture • may dissolve any residual cerumen and thus contaminate the sensitive parts in the body of the probe. 2. Take out the probe tip. Madsen Zodiac...
-
Page 117: Fitting A New Probe Tip
If you have fitted a new probe tip, do a probe check. See Probe check 17.4.4 Fitting a new probe tip If the probe tip has been contaminated or blocked by cerumen or vernix, fit a new probe tip on the probe. Procedure Probe body Probe ring Probe tip Madsen Zodiac... -
Page 118: Cleaning The Test Cavities
Before cleaning, switch off Madsen Zodiac and disconnect it from any external power source. Caution • Be careful when opening the paper compartment to avoid injury from the cutter blades. Warning Keep Madsen Zodiac away from liquids. Do not use metal objects or liquids while cleaning the printer • paper compartment. Madsen Zodiac... -
Page 119: Disposable Accessories
Dispose of the flossing thread after cleaning the probe tip. Disposal There are no special requirements for the disposal of disposable articles such as eartips and probe tip cleaning floss, i.e., they can be discarded according to local regulations. Madsen Zodiac... -
Page 120: Standards And Warnings
This manual contains information and warnings, which must be followed to ensure the safe performance of the devices and software covered by this manual. Local government rules and regulations, if applicable, should also be always followed. 18.1 Definition of symbols Madsen Zodiac and Otosuite Immittance module Symbol Title Standard as per... - Page 121 2 requirements for basic safety instructions for use for and Essential performance. important cautionary information such as warnings and precautions that cannot, for a variety of reasons, be presented on the medical device itself. MADSEN Zodiac...
- Page 122 5.3.1. (ISO shall be handled with care. 7000-0621) ISO 7000 / IEC Graphical symbols for use on Non-ionizing Indicates generally 60417 equipment electromagnetic elevated, potentially radiation hazardous, levels of non- Symbol 5140 ionizing radiation. MADSEN Zodiac...
-
Page 123: Warning Notes
The following conditions or practices might present possible risk of death or serious injury to the user or patient: • Use Madsen Zodiac equipment only in a hospital or clinic under the guidance of a health care professional. • Any PC connected to Madsen Zodiac must comply with IEC-62368-1. -
Page 124: Caution Notes
Make sure that there are no contraindications for performing the Reflex Decay Test. • Do not use Madsen Zodiac for purposes other than the applications defined in the intended use. • Use new ear tips for each patient to prevent cross-infection. -
Page 125: Notes
• A test stops if a probe leak is detected or the probe is removed from the ear. The probe light shows yellow and the leak status icon appears on the Madsen Zodiac or Otosuite screen. • If the probe tip is blocked, check and clean the probe tip channels. -
Page 126: Other References
WEEE is reused or recycled safely. In line with that commitment Natus Medical Incorporated may pass along the obligation for take back and recycling to the end user unless other arrangements have been made. -
Page 127: Technical Specifications
19 Technical specifications Technical specifications Type identification Madsen Zodiac is type 1096 from Natus Medical Denmark ApS Compliance measuring system Probe tone: 226 Hz at 85 dB SPL ± 3 dB 678 Hz at 72 dB SPL ± 3 dB 800 Hz at 70.5 dB SPL ±... - Page 128 Ipsilateral Reflex Threshold Contralateral stimulation - Reflex Threshold and Screening Probe tone > 226 Hz and Screening 0 ms Initial/terminal latency: 0 ms 0 ms Rise/fall time: 250 ms 250 ms 100 ms Overshoot/Undershoot: Notes: 1. Tolerance +120/-0 ms MADSEN Zodiac...
- Page 129 400 - 4000 Hz. Tolerance ±5 dB re. 1 kHz level. Slope: Spectrum level drops between 4000 and 7000 Hz and remains below -23 dB re. 1 kHz level for frequencies above 7000 Hz. Level: Noise level is indicated in dB HL. Tolerance ±5 dB. MADSEN Zodiac...
- Page 130 Noise level is indicated in dB HL. Tolerance ±5 dB. ANSI & IEC reflex stimulus RETSPL values Frequencies Ipsilateral probe Insert Insert Supra-aural Supra-aural (Hz) HA-1 phone phone phone phone HA-1 HA-2 IEC 60318- IEC 60318-1 3/NBS 9A 11.5 13.5 1000 2000 4000 12.0 MADSEN Zodiac...
- Page 131 12.5 14.5 Notes: 1. From ANSI/ASA S3.6-2010, Table 5. 2. From ANSI/ASA S3.6-2010, Table 7. 3. Based on Natus internal data. Air pressure system Range: Normal +200 to -400 daPa/s. Extended +400 to -600 daPa/s Pressure sweep rate: 50, 100, 200, 400, 600 daPa/s ± 20% in 20% to 80% of the total pressure range Pressure accuracy: ±...
- Page 132 28 mm x 22 mm x 125 mm (1.1” x 0.9” x 4.9”), Cable length 2800 mm (110”) Diagnostic probe: 10 mm x 10 mm x 25 mm (0.4” x 0.4” x 1.0”), Cable length 2445 mm (96”) Weight Stand-alone version: 2.65 kg/5.85 lb PC-based version: 1.65 kg/3.64 lb MADSEN Zodiac...
- Page 133 2 cc coupler Calibration Equipment should be calibrated regularly according to EN 60645-5 and ANSI S3.39 Essential performance Madsen Zodiac has no essential performance and accordingly, the applicable requirements are as stated in the Standards section. Standards Safety: IEC 60601-1:2005+AMD1:2012...
-
Page 134: Accessories
22 Notes on EMC (Electromagnetic Compatibility Accessories The accessories listed depend on the configuration of the Madsen Zodiac supplied. Group/Family Part Number Product Software 8-49-75800 1052 Otosuite DVD 8-66-10000 1096 Quick-Check Probe Probe 8-66-10100 1096 Diagnostic Classic Probe 8-66-10200 1096 Diagnostic Comfort Probe 8-68-31961 1096 Eartip 3-6 mm, Green, Tree Tip, (100 pcs.) -
Page 135: Notes On Emc (Electromagnetic Compatibility)
IEC 60601-1-2:2014 and EN 60601-1-2:2015 Guidance and manufacturer's declaration - electromagnetic emissions for all equipment and systems Madsen Zodiac is intended for use in the electromagnetic environment specified below. The Madsen Zodiac user should ensure that it is used in such an environment. - Page 136 Guidance and manufacturer's declaration - electromagnetic immunity - for equipment and systems within Professional Healthcare use environment Madsen Zodiac is intended for use in the electromagnetic environment specified below. The Madsen Zodiac user should ensure that it is used in such an environment.
- Page 137 IEC 60601-1-2:2007 and EN 60601-1-2:2007 Guidance and manufacturer's declaration - electromagnetic emissions for all equipment and systems Madsen Zodiac is intended for use in the electromagnetic environment specified below. The Madsen Zodiac user should ensure that it is used in such an environment.
- Page 138 Guidance and manufacturer's declaration - electromagnetic immunity - for equipment and systems that are NOT life-supporting Madsen Zodiac is intended for use in the electromagnetic environment specified below. The Madsen Zodiac user should ensure that it is used in such an environment.
- Page 139 : At 80 MHz and 800 MHz the separation distance for the higher frequency range applies. Note 2 : These guidelines may not apply in all situations. Electromagnetic propagation is affected by absorption and reflection from structures, objects and people. MADSEN Zodiac...
-
Page 140: App. 1 Madsen Zodiac Immittance Methodology And Features
(compliant susceptance) in this frequency region, the middle ear compliance can only be considered isolated using low frequency probe tones. mmho In Madsen Zodiac, you can choose between any of the compliance or admittance units , or respectively, when you use a 226 Hz probe tone. When you use a higher frequency probe tone, all admittance components are... -
Page 141: App. 1.2 Tympanometry
App. 1 MADSEN Zodiac immittance methodology and features App. 1.2 Tympanometry In tympanometry you can measure the acoustic admittance of the middle ear system as a function of ear canal air pressure. The resulting tympanogram is predominantly determined by the ear cavity volumes, the mobility of the eardrum and the ossicular chain, and the middle ear air pressure. - Page 142 App. 1 MADSEN Zodiac immittance methodology and features measured at 200 daPa (approximates the isolated ear canal component). In accordance with this, static admittance is often referred to as the "peak to tail difference". The SA is shown only when the baseline compensation is enabled, i.e., when the admittance is shown relative to the baseline admittance.
-
Page 143: App. 1.2.3
In addition, Type D may be used to indicate a multiple peaked tympanogram. Adult 226 Hz tymp classification system Madsen Zodiac uses the Adult 226 Hz norm originating partly from Jerger. The determination of types A, Ad, As, B, and C is based on the location (pressure and static admittance) of the peak of the tympanogram as shown: •... -
Page 144: App. 1.3 Acoustic Reflex Testing
App. 1 MADSEN Zodiac immittance methodology and features How to perform the maneuver 1. Instruct the patient to block the nostrils by pinching the nose using the thumb and index finger. 2. Instruct the patient to swallow a few times. It may help to provide some water to drink. -
Page 145: App. 1.3.2 Acoustic Reflex Threshold
App. 1 MADSEN Zodiac immittance methodology and features Infant testing Acoustic reflex testing may also be used for infant screening purposes. The main objective is to confirm general middle ear function. For this purpose, a test protocol using a 1000 Hz probe tone, ipsilateral stimulation and broad band noise stim- ulus is recommended. -
Page 146: App. 1.5
App. 1 MADSEN Zodiac immittance methodology and features An initial positive or negative air pressure is applied to the ear through the probe. Due to the eardrum perforation, the pressure will be applied to both the ear canal and middle ear cavities. The patient is then instructed to swallow some water, which typically causes a functioning Eustachian tube to open. -
Page 147: App. 1.5.2 Conductance, G
App. 1 MADSEN Zodiac immittance methodology and features Mass Susceptance • is greater with high frequencies and gradually decreases with lower frequencies. Susceptance Compliance Mass The total is the algebraic sum of the positive and the negative contributions, jB + (-jB). -
Page 148: Component Compensation
App. 1 MADSEN Zodiac immittance methodology and features High frequency probe tones Since the B/G viewing is of interest only for high frequency probe tones, this method is clinically valuable in conjunction with multi-frequency tympanometry where the normative data is based on resonance frequency. However, even when... - Page 149 MADSEN Zodiac...