
Related Manuals for Canon CX-G2400


Summary of Contents for Canon CX-G2400
- Page 1 CX-G2400 COLOR CARD PRINTER Basic Operation Guide Please read this guide before operating this product. When nished reading, store it in a safe place for future reference.
- Page 2 About Instruction Manuals Thank you for purchasing the Canon CX-G2400 Color Card Printer. The following manuals come with this product. ⨋ Getting Started Guide • This manual describes the procedures for installing and making preparations for using this product. • Read this manual first.
-
Page 3: Table Of Contents
Table of Contents Before You Begin ........... 1 Troubleshooting ..........36 Conventions .............. 1 Status Lamp Lights up Orange ....36 Sample Screens ............1 Status Lamp Is Flashing Orange ....37 Trademarks ..............1 Power Does not Turn on ........38 Abbreviations ............2 Printing Does not Start/Complete ....38 Important Notices .......... -
Page 4: Before You Begin
Indicates an operation that must not be performed. Read these items carefully, and make sure not to perform the described operations. Sample Screens The sample CX-G2400 printer driver screens displayed in this manual were created with Windows 10. Trademarks • Canon and the Canon logo are trademarks of Canon Inc. -
Page 5: Abbreviations
Reproduction of such items may be subject to criminal prosecution. • Please note that intellectual property protected by copyright may not be reproduced without the express permission of the copyright holder except for personal or household use under limited circumstances. ■ Product Name CX-G2400... -
Page 6: Important Safety Instructions
Important Safety Instructions Prior to using this printer, please read this section ("Important Safety Instructions") thoroughly. Warnings and important matters are described here to ensure safe use of the product. Do not attempt to operate this printer in any way other than those mentioned in the manual. ■... - Page 7 Important Safety Instructions CAUTION • Do not install the printer in the following locations: A damp or dusty location A location exposed to oily smoke or steam; e.g., near a countertop or humidifier. A location exposed to rain or snow. A location exposed to salty wind.
- Page 8 Important Safety Instructions outlet that is not shared by other equipment or appliances. • To avoid causing a fire or serious electrical shock, make sure that the power plug is securely and completely inserted into the power outlet. • Do not damage, break, or modify the power cord and AC adapter. Do not place a heavy object on, heat, or pull the AC cord and the AC adapter.
- Page 9 Important Safety Instructions • Do not insert any metal objects into the printer. Also, do not let a metallic piece (clip, staple, etc.), or water and a flammable solvent (alcohol, benzene, thinner, etc.) into the printer. If it is brought into contact with the electric parts inside the printer, a fire or electric shock could result.
- Page 10 Important Safety Instructions • When the feeder lift tray is moving, do not touch it. Also, do not insert your hand or place objects below the tray. Doing so can cause injury or malfunction. IMPORTANT • Do not open the ink tank cover or transport unit lever, turn the printer off, or remove the power plug from the power outlet while the printer is operating.
- Page 11 Important Safety Instructions ■ Moving CAUTION • Before moving the printer, turn it off, remove the power plug from the power outlet, and disconnect the interface cable. Otherwise, the power cord and other cables could be damaged, resulting in a fire or electric shock.
- Page 12 Important Safety Instructions The power goes OFF and ON when the power cord is bent. There are cuts, cracks, or indentations on the power cord. The power cord or AC adapter becomes hot. • Check the power cord, power plug and AC adapter regularly to make sure that they are not handled in the following manner, as this may result in a fire or electrical shock: The connection part of the power plug is loose.
-
Page 13: Names And Functions Of Components
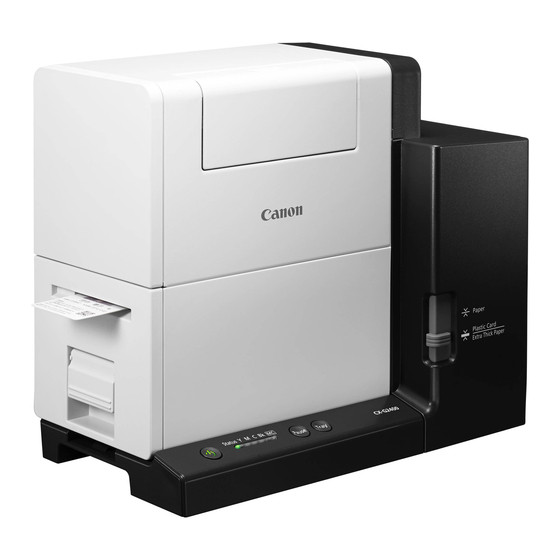
Names and Functions of Components External View Operation Panel (P.13) USB Connector Keys for selecting printer operations and lamps Connect a USB cable to this connector. indicating printer statuses are provided on this panel. LAN Connector Stacker Connect a LAN cable to this connector. Receives printed media output from the printer. -
Page 14: Internal View
Names and Functions of Components Rating Plate Power Socket A serial number for identifying the printer is shown on Connect the supplied AC adapter to this socket. this plate. (The serial number is required when you contact customer support or require any sort of printer repairs.) IMPORTANT •... -
Page 15: Transport Unit
Names and Functions of Components Transport Unit 54/55 Transport Unit Lever Paper Guide Open this lever to pull the transport unit out. This guide holds the paper down to keep it from floating. Normally, set the lever to the MM position for use. -
Page 16: Operation Panel
Names and Functions of Components Operation Panel Pause Tray Power Key/Lamp Ink Lamps (Bk/C/M/Y) Press this key to turn on/off the printer. This lamp lights Each lamp lights up or blinks when there is no ink up or blinks depending on the power supply status. available for printing or the ink tank is low. - Page 17 Names and Functions of Components Pause Key Tray Key Press this key to switch between online and offline Use this key to move the feeder lift tray upward/ modes. downward. When printing is in progress, pressing this key stops printing temporarily. Pressing this key again resumes printing.
-
Page 18: Turning The Printer On/Off
Turning the Printer On/Off Turn on/off the printer following the procedures described below. How to Turn the Printer On Press the Power key. The status lamp will blink (green), and then light NOTE • About the Sleep Timer The printer will automatically enter sleep mode when a predetermined amount of time elapses without printing. -
Page 19: Turning The Printer Off
Turning the Printer On/Off How to Turn the Printer Off Make sure all print jobs are complete. When the Status lamp is blinking (green), the printer is operating. Make sure the Status lamp lights up (green) before turning the printer off. Press and hold the Power key until the Status lamp turns off. -
Page 20: Loading Paper
Loading Paper IMPORTANT • Use the dedicated paper. Using other paper could cause blurred or faint printing or have a negative impact on the printer, resulting in a printer failure. NOTE • The following types of paper can be used with this printer: Matte Coated Paper Glossy paper Plastic card... - Page 21 Loading Paper Lower the feeder lift tray. If the feeder lift tray is already lowered, proceed to step 1. Press the Tray key. Wait for the feeder lift tray to stop. CAUTION • Do not touch the feeder lift tray when it is moving. Do not insert your hand or place objects below the tray.
- Page 22 Loading Paper Remove the paper from its packaging. For business card or card 1. Flip through the four sides ( of the paper to separate the sheets. As shown in the figure, flip through the four sides of the paper thoroughly to remove paper dust.
- Page 23 Loading Paper It is possible to check the amount of curl in paper that is curled downward with the curl 2 mm index (A). (0.08 inch) When you place the paper with the printing surface facing down as shown in the figure, check that the index is not exceeded (the curl is 2 mm (0.08 inch) or less).
- Page 24 Loading Paper Load paper. 1. Open the auxiliary tray. If there is paper in the feeder slot, remove it. 2. Loosen the side guide screw. Please note, if the screw its turned too much, it will come off. 3.
- Page 25 Loading Paper 4. Adjust the side guides to the paper edge, and secure them in place with the screw. 5. Close the auxiliary tray. For long sheets of paper (paper length of 157 mm (6.18 inch) or longer): You do not need to close the auxiliary tray. IMPORTANT •...
- Page 26 Loading Paper • If a paper feed error occurs, reduce the number of sheets loaded in the tray. • If the paper is not touching the back of the feeder lift tray, the paper may not be fed properly. • Fix the side guides in place so that they gently touch the edges of the paper. If they are set too tightly against the paper, the paper may not be fed properly.
- Page 27 Loading Paper Check the paper guide positions. 1. Remove the stacker if it is used. 2. Raise the transport unit lever, and pull the transport unit out. 3. Pull the transport unit out with both hands as shown in the figure.
- Page 28 Loading Paper CAUTION • When pulling the transport unit out of the printer, hold it firmly with both hands so it does not fall. • Do not put your hands inside the printer. Failure or physical injury could result. Ink adhered inside of the printer could stain clothes or hands.
- Page 29 Loading Paper 5. Slowly insert the transport unit as far as it will go. As you do this, be careful not to touch the paper guides doing so will change their positions. CAUTION • When returning the transport unit back inside the printer, be careful not to get your fingers caught between the transport unit and the inside of the printer.
- Page 30 Loading Paper For paper with the length of 91 mm (3.58 inch) or less 8. Set the extension tray according to the paper to be printed on. For paper with the length of 91 mm (3.58 inch) Extension tray or less (business card, etc.), use the stacker with the extension tray at the standing position.
-
Page 31: How To Print
How to Print Making Prints This section explains how to micro margin printing using Business Card 55.0 x 91.0 mm (2.17 x 3.58 inch) Matte coated paper. NOTE • The micro margin printing is a function to print with a minimum margin (Top/Bottom/Left/Right: 0.3 mm (0.01 inch)). - Page 32 How to Print NOTE • If the paper size cannot be obtained from the printer driver, follow the procedure below to set the document paper size. In micro margin printing, create the document larger than the actual paper size. Document paper width Set the paper width 0.7 mm (0.03 inch) wider than the actual width.
- Page 33 How to Print When the 157.0 mm - 172.0 mm (6.18 inch - 6.77 inch): Set the paper length 1.7 mm (0.07 inch) longer than the actual length. 0.85mm (0.04inch) Transport direction Paper length 157.0mm - 172.0mm (6.18inch - 6.77inch) 0.85mm (0.04inch) To the paper size, create a document.
- Page 34 How to Print Open the printer driver setup window. Select [Canon CX-G2400], and then click [Preferences] or [Properties]. Set the paper size and type. 1. Select the paper size. Select [[X]Business Card(MM) 55.0 x 91.0 mm]. 2. Select the paper type.
- Page 35 How to Print • Selecting the wrong paper size could stain the transport area and paper guides. For how to clean, refer to “Cleaning the Printer” (User’s Guide). NOTE • Selecting the wrong paper type could result in poor quality prints. Click [Print] in the [Print] dialog box.
- Page 36 How to Print NOTE • Checking the Current Printing Status. The status monitor allows you to check the printing status. [Number of Pages] The number of the page currently being printed is displayed. [Copies] The progress of printing of each page is displayed. For example, when the printer is set so as to print ten copies of a document consisting of three pages,”0001/0010”...
-
Page 37: Cancel Printing
How to Print Cancel Printing To cancel printing, click [Cancel Print Job] on the status monitor. NOTE • Stop Printing Temporarily To stop printing temporarily, press the Pause key on the operation panel. • Besides the status monitor, you can cancel printing from the Print Queue window (a window in which print data order is registered). -
Page 38: How To Check The Printer Status
How to Check the Printer Status The status monitor allows you to check the current status of the printer, print status, ink information, and maintenance cartridge information. NOTE • Select the message displayed in the [Status Information] field, and then click [Display details of selected status]. An additional screen will open, allowing you to know details of the message and how to handle the error. -
Page 39: Troubleshooting
Troubleshooting If problems persist after trying these procedures, contact your place of purchase. Status Lamp Lights up Orange When an error occurs in the printer that requires attention, the Status Lamp on the Operation Panel will light up orange (operator call error). The error details and actions required can be confirmed with the Status Monitor. -
Page 40: Status Lamp Is Flashing Orange
Troubleshooting IMPORTANT • For information on the details of the messages displayed on the Status Monitor and how to deal with errors, refer to “List of Error Messages/Warning Messages” (User’s Guide). • When error messages are displayed, the printer will automatically go offline. Depending on the type of error, even after handling the error, there are cases where it will not go online automatically. -
Page 41: Power Does Not Turn On
Troubleshooting Power Does not Turn on Points to Confirm Solution Is the AC adapter and power cord After confirming that the AC adapter and power cord are properly properly connected? connected, insert the power plug firmly into the power outlet. Is the power outlet supplying Try plugging in other electric appliances. - Page 42 Troubleshooting Points to Confirm Solution Is the computer's configuration Selecting "Never" in the Microsoft Windows Power Saver or Power for suspend or sleep state set to Option settings will prevent the computer from entering a sleep state. something other than “Never”? Refer to Microsoft Windows product documentation for instructions on adjusting your computer's power settings.
- Page 43 Troubleshooting Points to Confirm Solution (When you are connected within a Make sure that the computer and this printer are installed on the same network following the steps below: network environment) Are the printer and computer (Confirming the IP address) configured on the same network? 1.
-
Page 44: Paper Does Not Feed Properly
Troubleshooting 2. Right-click the printer icon and select [Printer Properties]. The properties window will appear. 3. Click on the [Ports] tab and click [Add port]. 4. Select [CNUS Network Port] and click [New Port...]. The [CNUS Network Port] dialog box will be displayed. 5. -
Page 45: Improving The Print Quality
Troubleshooting Points to Confirm Solution Are the paper guides set properly? Check that the paper guides are set to the MM position. (P.25) If the paper guides are adjusted to the paper width, check that the guides are set properly. If the paper guides are set narrower than the width of the set paper, paper jams could result. - Page 46 Troubleshooting Condition Solution The printing is blurred. Confirm that the paper set (size, shape, and type) matches the paper (size, shape, and type) configured by the application software or printer driver. Clean the print head. Refer to “Cleaning the Printhead” (User's Guide). If you are using the printer at low temperature (Room temperature is 14 degrees Celsius (57 degrees Fahrenheit) or lower) : Open the [Utility] tab in the printer driver and then select the [Low...
- Page 47 Troubleshooting Condition Solution During micro margin printing, the Adjust the print position and trimming position for micro margin print position and margins are off printing. alignment. Refer to “Setting Micro Margin Printing"” (User's Guide). If you have several printers, check that you have not changed the printer and transport unit combinations.
- Page 48 Troubleshooting Condition Solution Cyan ink is mixed on the first print Perform strong cleaning. Refer to “Cleaning the Printhead” (User's Guide). after installing printer. (Cyan ink is used for factory inspection. ) The colors are wrong or colors mixed. Any ink tank may be installed incorrectly. If any ink tank is installed incorrectly, ink colors may be mixed.
- Page 49 Troubleshooting Condition Solution The margin of the final print is too Configure the paper size set by the application software or printer small or large. driver as follows: When the margin is small or when images on the edge of the paper are missing: Decrease the [Paper Length] and adjust the image according to the paper size changed.
-
Page 50: Paper Is Jammed
Troubleshooting Paper Is Jammed When a paper jam occurs during printing, the printing is interrupted and the Status Monitor will display an error message such as “Paper jam #****” (where **** is a number). Follow the steps below to remove the paper jam. IMPORTANT •... - Page 51 Troubleshooting 3. Pull the transport unit out with both hands as shown in the figure. CAUTION • When pulling the transport unit out of the printer, hold it firmly with both hands so it does not fall. • Do not put your hands inside the printer. Failures or physical injury could result.
- Page 52 Troubleshooting 4. Remove the jammed paper from the transport unit Check that the paper is not jammed further in the transport unit. If paper is jammed, remove it. Check the feeder slot. If paper is jammed, remove it.
- Page 53 Troubleshooting IMPORTANT • When removing the jammed paper, be sure not to get the cotton swab or your finger caught in the sensor lever (A). Set the transport unit in the printer. 1. Slowly insert the transport unit as far as it will go.
- Page 54 Troubleshooting CAUTION • When returning the transport unit back inside the printer, be careful not to get your fingers caught between the transport unit and the inside of the printer. 3. When using the stacker, install it back to the correct position. Connection part ...
- Page 55 Troubleshooting transport belt, paper guides, or other areas may be stained with ink. If stain occurs, clean the transport unit, refer to “Cleaning the Printer” (User’s Guide). When you change the size of the set paper, reset the paper guides. If the paper guides are set narrower than the paper width, paper jams could result.
-
Page 56: Specifications
Specifications ■ Printer Product name CX-G2400 Printing method Inkjet Print colors Full color Output resolution 1200 dpi x 1200 dpi Printing speed Business Card/Plastic Card: 50 sheets/min Card (Length 157 mm (6.18 inch) or more): 25 sheets/min Transport speed Auto mode: 160, 120, 80 mm/sec (Speed changes automatically) - Page 57 Specifications ■ Paper Paper Dedicated paper (matte coated paper, glossy paper) Dedicated plastic card (for Inkjet) Paper size 51.0 mm - 58.0 mm (2.01 inch - 2.28 inch) (W) 81.0 mm - 91.0 mm (3.19 inch - 3.58 inch), 157.0 mm - 172.0 mm (6.18 inch - 6.77 inch) (L) Paper thickness Sheets: 0.21 mm - 0.76 mm (8.27 mil - 29.9 mil)
- Page 58 CANON U.S.A., INC. One Canon Park, Melville, NY 11747, U.S.A. www.usa.canon.com CANON SINGAPORE PTE.LTD. 1 Fusionopolis Place, #14-10 Galaxis, Singapore 138522 asia.canon 4Y8-8145-020 CANON FINETECH NISCA INC. 2017-2021 PRINTED IN JAPAN...