Table of Contents
Advertisement
Quick Links
Advertisement
Table of Contents

Related Manuals for Ferris IS6200


Summary of Contents for Ferris IS6200
-
Page 2: Table Of Contents
Table of Contents: Cutting Height Adjustment..........30 Deck Lift Lock Lever Lockout Plate Operation....30 General Information.............. 3 Suspension Adjustment..........31 Identifying Your Unit............3 Fuse Location and Identification........31 CE Identification Tag Markings........... 4 Deck Shut Down Module..........32 Operator Safety..............4 Using the Digital Display Panel........32 California Proposition 65.......... -
Page 3: General Information
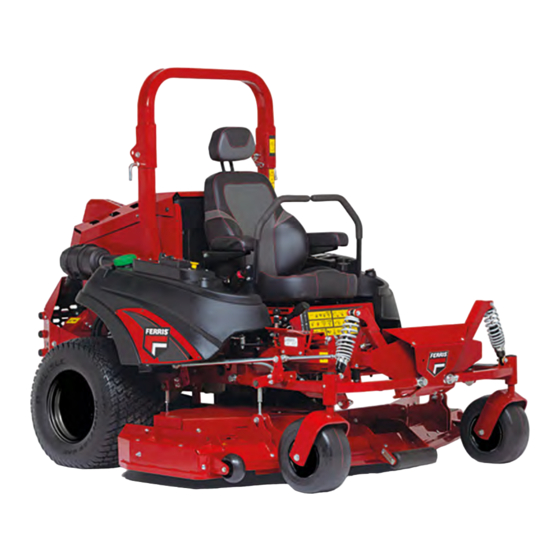
Your unit may vary from the images displayed. LEFT and RIGHT are as seen from the operator's position. Ferris is a registered trademark of Briggs & Stratton. Identifying Your Unit The following products are covered by this manual: 5901850 The product identification tag (A, Figure 1) can be found in PRODUCT REFERENCE DATE ... -
Page 4: Ce Identification Tag Markings
CE Identification Tag Markings The safety alert triangle ( ) in text signifies important cautions or warnings which must be followed. Operating Safety Congratulations on purchasing a superior-quality piece of lawn and garden equipment. Our products are designed and manufactured to meet or exceed all industry standards for safety. ... - Page 5 Children Thrown Objects Tragic accidents can occur with children. Do not allow them This unit has spinning mower blades. These blades can pick up and throw debris that could seriously injure a bystander. anywhere near the area of operation. Children are often attracted to the unit and mowing activity.
- Page 6 Keep the roll bar in the raised position and fasten the seat NOTICE belt. There is no roll over protection when the roll bar is down! Use ultra low sulfur fuel only. Do not jump off if the mower tips (it is safer to be secured by Consult the engine manufacturer's manual for specific fuel the seat belt with the roll bar raised.) recommendations.
-
Page 7: Slope Identification Guide
Slope Identification Guide Training • Read, understand, and follow all instructions in the manual and on the unit before starting. If the operator(s) or mechanic(s) can not read English it is the owner’s responsibility to explain this material to them. •... - Page 8 conditions can affect the machines stability. Use caution • OSHA regulations may require the use of hearing when operating near drop-offs. protection when exposed to sound levels greater than 85 dBA for an 8 hour time period. • Do not mow in reverse unless absolutely necessary. Always look down, behind and to the side before changing directions. ...
- Page 9 • Do not use grass catcher on steep slopes. • Never fill containers inside a vehicle or on a truck bed with a plastic bed liner. Always place containers on the • Do not mow slopes if you cannot back up them. ground away from your vehicle before filling. ...
- Page 10 Burn Prevention first and the positive last. Reconnect positive first and negative last. Do not touch any part of an operating engine system. The • Use care when checking blades. Wrap the blade(s) or engine, the exhaust, and the engine aftertreatment system wear gloves, and use caution when servicing them.
-
Page 11: Safety Decals
has not been compromised through normal machine use, misuse, age degradation, modifications, or a roll over. To maintain operator roll over protection and roll bar effectiveness: • If a ROLL BAR becomes damaged for any reason, such as a collision, roll over or impact, the ROLL BAR must be replaced. - Page 12 * Located on the rear guard by the gearbox drive belt. ** Located on the cross rail above radiator. *** Located on the unit by the roll bar pockets. A. Part Number: 5106565 - Decal, Main Safety B. Part Number: 7106109 - Decal, Discharge Safety C.
- Page 13 Safety Icons Danger: Fire Hazard: Keep unit free of grass, leaves and excess Warning: Read and understand oil. Do not add fuel while engine is the Operator’s Manual before using hot or running. Stop engine, remove this machine. Know the location key and allow to cool for at least ...
-
Page 14: Safety Alert Symbol And Signal Words
The hand (high pressure) warning label is a wrap around Important: Do not discard a battery in the trash: Contact local label that is install on the high-pressure fuel line. authorities for disposal and/or See authorized engine manufacturer service dealer for recycling of batteries. -
Page 15: Features And Controls
Zero-Turn Rider Controls to bypass safety switches, and never tamper with safety devices. Check their operation regularly. Operational SAFETY Checks Test 1 - Engine SHOULD NOT crank if: • PTO switch is engaged, OR • Parking brake is not engaged, OR •... - Page 16 DISENGAGE: Releases the parking brake. ENGAGE: Locks the parking brake. Ground Speed Control Levers: These levers control the ground speed and direction of the rider. The left lever controls the left rear drive wheel and the right lever controls the right rear drive wheel.
-
Page 17: Instrument Control Panel
Digital Display Panel The seat belt should always be worn when the Roll Bar is in the raised position. The seat belt should never be worn when the Roll Bar is in the down position. Fuel Tank Cap: To remove the cap, turn counter-clockwise. Power Outlet: Unit is equipped with a +12V DC, 20A power outlet. -
Page 18: Operation
Engine Fault Indicator Light: This light will WARNING illuminate when there is an engine fault code. • Never allow passengers to ride on the unit. • Before leaving the operator’s position for any reason, Neutral Circuit Indicator Light: This light will engage the parking brake, disengage the PTO, stop the illuminate when the ground speed control levers are not engine and remove the key. ... -
Page 19: Starting The Engine
Starting the Engine WARNING Fuel leaked or spilled onto hot surfaces or electrical WARNING components can cause a fire. To help prevent possible • If you do not understand how a specific control injury, turn the ignition switch OFF when changing fuel functions, or have not yet thoroughly read the Features filters or water separator element. - Page 20 forward, reverse, and turning movements will take some practice. Spending some time going through the maneuvers shown and becoming familiar with how the unit accelerates, travels, and steers — before you begin mowing —is absolutely essential to getting the most out of the Zero Turn rider. Locate a smooth, flat area of your lawn —...
-
Page 21: Mowing
Your Zero Turn Rider’s unique ability to turn in place allows While traveling forward allow one handle to gradually return you to turn around at the end of a cutting row rather than back toward neutral. Repeat several times. having to stop and Y-turn before starting a new row. NOTE: To prevent pivoting directly on the tire tread, it is best For example, to execute a left end-of row zero turn: to keep both wheels going at least slightly forward. -
Page 22: Mowing Recommendations
Mowing Recommendations Several factors can affect how well your machine cuts grass, Following proper mowing recommendations can improve the performance and life of your machine. Height of Grass Often cutting height is a matter of personal preference. Typically, you should mow the grass when it is between three and five inches high. -
Page 23: Pushing The Rider By Hand
Mulching Mulching consists of a mower deck which cuts and re-cuts clippings into tiny particles and which then blows them down INTO the lawn. These tiny particles decompose rapidly into by-products your lawn can use. UNDER PROPER CONDITIONS, your mulching mower will virtually eliminate noticeable clippings on the lawn surface. -
Page 24: Raise And Lower The Roll Bar
3. Disengage the parking brake. The unit can now be pushed by hand. 4. After moving the unit, re-engage the pumps (drive position) by turning the release valves clockwise and tighten to 80-120 in. lbs. of torque. Raise and Lower the Roll Bar WARNING Avoid serious injury or death from roll over: •... -
Page 25: Attaching A Trailer
Attaching a Trailer Checking/Adding Fuel The maximum weight of a towed trailer should be less than To add fuel: 300 lbs (138kg). Secure the trailer with an appropriately sized 1. Using a clean rag or cloth wipe any dirt or debris from clevis pin (A, Figure 25) and clip (B). -
Page 26: Check/Add Engine Oil Level
WARNING Fuel leaked or spilled onto hot surfaces or electrical components can cause a fire. To help prevent possible injury, turn the ignition switch off when changing fuel filters or water separator elements. Clean up fuel spills immediately. Check/Add Engine Oil Level Interval: Before each use. -
Page 27: Clean Radiator, Screen, And Oil Cooler
3. Install the radiator screen. Make sure the screen is fully seated in the carrier. 4. Clean all dirt, grass, and debris from the oil cooler fins (B). 5. Lower the seat plate. Check/Add Hydraulic Oil Level Note: Do not open the hydraulic oil reservoir unless oil is being added. -
Page 28: Checking Tire Pressures
Checking Tire Pressures Tire pressure should be checked periodically, and maintained at the levels shown in the Specifications chart. Note that these pressures may differ slightly from the "Max Inflation" stamped on the side-wall of the tires. The pressures shown provide proper traction and extend tire life. ... -
Page 29: Seat Adjustment
2. Grease the front caster. 3. Remove the 1/4-28 grease fitting and reinstall the 1/4-28 bolt. 4. Repeat the process for the other side of the machine. Seat Adjustment 2. Remove the center hardware (D). The seat can be adjusted forward and back. Move the lever (A, Figure 36), position the seat as desired, and release the 3. -
Page 30: Cutting Height Adjustment
WARNING Pinch Point Hazard When pressing the deck lift pedal (A), keep your foot (B) on the pedal to avoid a potential pinching hazard as the deck height link (C) moves forward. To Adjust the Handle Placement 2. Place the cutting height adjustment pin in the desired Loosen the jam nuts and adjust the placement bolt (B) in or cutting height. -
Page 31: Suspension Adjustment
The mower deck can now be raised to the TRANSPORT position without the deck lift lock lever engaging. 2. Move the deck lift lock lever away from the operating position, and rotate the deck lift lever lockout plate (B) to the LOCK (C) position (facing towards the rear of the machine) and allow the deck lift lever to return to its natural position. -
Page 32: Deck Shut Down Module
Callout Function Amperage Fuse/Relay Start 20 amp Fuse Glow Plugs 25 amp Fuse Glow Plugs 80 amp Relay If the oil pressure gauge has turned RED and/or is reading a low PSI: Fuse Block Two (Figure 43) • Shut the unit off immediately and see your dealer. Callout Function Amperage... - Page 33 setting will also change the AM/PM setting as you cycle Symbol Name through the hours. 5. Use the LEFT or RIGHT arrow button to select the MINUTES number and then use the INCREASE or DOWN DECREASE button to select the desired minutes. 6.
-
Page 34: Storage
6. Press the PREVIOUS SCREEN button four (4) times to 1. Drain crankcase oil while engine is hot and refill with a return to the main display screen. grade of oil that will be required when unit is used again. 2. Use an Antifreeze tester to check the cooling system's Viewing System Info level of protection. -
Page 35: Maintenance Schedule
7. Inflate tires to proper pressure. Check fluid levels. ENGINE MAINTENANCE 8. Start the engine and let it run slowly. DO NOT run at high Before Each Use speed immediately after starting. Be sure to run engine Check the engine oil level. only outdoors or in well ventilated area. -
Page 36: Warranty
This warranty gives you specific legal rights and you may also have other rights which vary from state to state Warranty service is available only through Ferris Authorized or country to country.** Service Dealers. This warranty only covers defects in materials or workmanship. - Page 37 not be provided if the serial number on the product has been removed or the product has been altered or modified in any way, or if the product has evidence of abuse such as impact damage, or water/chemical corrosion damage. Improper Maintenance or Repair - This product must be maintained according to the procedures and schedules provided in the Operator's Manual, and serviced or repaired...
- Page 38 Notes...
- Page 39 Notes...