
Related Manuals for VTech 8251


Summary of Contents for VTech 8251
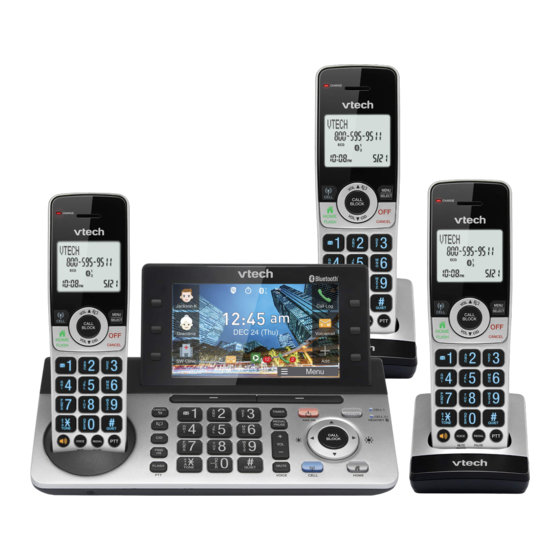
- Page 1 8251 8251-2 8251-3 8251-4 8251-5 Click on the in the manual to watch the video tutorials. Scan the QR code to go and User’s manual subscribe our tutorial channel...
-
Page 2: Handset - Method
VTech telephone. Please review this manual thoroughly to ensure proper installation and operation of this innovative and feature rich VTech product. For support, shopping, and everything new at VTech, visit our website at www.vtechphones.com. In Canada, please visit phones.vtechcanada.com. - Page 3 reassembling can cause electric shock when the Important safety instructions product is subsequently used. 13. Do not overload wall outlets and extension cords. When using your telephone equipment, basic safety 14. Unplug this product from the wall outlet and refer precautions should always be followed to reduce the servicing to an authorized service facility under risk of fire, electric shock and injury, including the...
- Page 4 19. For pluggable equipment, the socket outlet shall only in accordance with the instructions and be installed near the equipment and shall be limitations specified in this manual. easily accessible. Precautions for users of implanted cardiac CAUTION: Use only the batteries indicated in this manual.
- Page 5 ECO mode experienced, moving the cordless telephone farther away from the TV or VCR often reduces or eliminates the interference. This power conserving technology reduces power Rechargeable batteries: Exercise care in handling consumption for optimal battery performance. The • batteries in order not to create a short circuit with ECO mode activities automatically whenever the conducting material such as rings, bracelets and handset is synchronized with the telephone base.
- Page 6 14. Débranchez cet appareil de la prise de courant et plafond ou sous une table/ armoire. communiquez avec le département de service à 19. Pour le MATERIEL RACCORDE PAR PRISE DE la clientèle de VTech dans les cas suivants: COURANT, le socle de prise de courant doit • Lorsque cordon d’alimentation...
- Page 7 Avis détenteurs stimulateurs à très haute température pouvant provoquer une explosion ou la fuite de liquide ou de gaz cardiaques inflammables. • batterie soumise à une pression de l’air • Ils doivent tenir le téléphone sans fil à une distance extrêmement faible pouvant provoquer une d’au moins six pouces du stimulateur cardiaque.
- Page 8 • Consult the dealer or an experienced radio/TV VTech’s involvement in this program is part of its technician for help. commitment to protecting our environment and conserving natural resources. Changes or modifications to this equipment not RBRC®...
- Page 9 This Class B digital apparatus complies with Canadian practical, you will be notified as soon as possible. You requirement: will be given the opportunity to correct the problem CAN ICES-3 (B)/NMB-3(B). and the telephone service provider is required to inform you of your right to file a complaint with the FCC.
-
Page 10: Table Of Contents
Install | Set up Add a speed dial number via Phonebook What’s in the box Update the Smart key speed dial Connect the telephone base number/ entry Add an emergency number Connect the charger Add a menu option Install the battery Change a smart key function Charge the battery Edit a speed dial number... - Page 11 Contents Use phone menu Answer an intercom call On the handset End an intercom call Transfer a call via intercom On the base Sound Operate Use speakerphone Make, answer or end a cell call 37 Mute the microphone Make a cell call Temporary ringer silencing Predial a cell call Find handset...
- Page 12 Delete a phonebook entry with a Predial via home call and cell call handset Delete all phonebook entries Predial a home call with a handset Predial a cell call Delete a phonebook entry with Chain dialing base Access a number in the Delete all phonebook entries phonebook with a handset while with base...
- Page 13 Contents Base Delete all messages Review the caller ID log entry Handset Save a caller ID log entry to the Base phonebook Answering system remote access Save a caller ID log entry to the block list Call intercept while using Save a caller ID log entry to the star answering system name list...
- Page 14 Smart call blocker (SCB) Dial modes Temporary tone dialing Handset - Method 1 Handset - Method 2 Set dial mode Base Ringers Set SCB screening profile Set home/cell ring volume Handset Handset Base Base Set up Block list Set home/ cell ringtone Handset Handset Base...
- Page 15 Contents Other settings Clear voicemail Dim mode Brightness Wallpaper Countdown timer Set the countdown timer General product care Taking care of your telephone Avoid rough treatment Avoid water Electrical storms Cleaning your telephone Technical specifications Frequently asked questions...
-
Page 16: Install | Set Up
Install | Set up • 2 set for IS8251-2 • 3 sets for IS8251-3 • 4 sets for IS8251-4 THIS SIDE UP / CE CÔTÉ VERS LE HAUT What’s in the box • 5 sets for IS8251-5 Battery Pack / Bloc-piles : BT162342/BT262342 (2.4V 300mAh Ni-MH) WARNING / AVERTISSEMENT : DO NOT BURN OR PUNCTURE BATTERIES. -
Page 17: Connect The Telephone Base
If you do not have this wall-mounting Connect the charger plate, you can purchase one from many hardware consumer electronics retailers. You may need a professional to install the wall-mounting plate. Connect the telephone base Install the battery 1. Plug the battery connector securely into the socket inside the handset battery compartiment. -
Page 18: Charge The Battery
2. Align the cover flat against the battery • The screen • The battery is • To keep compartment, then slide it upwards shows charged. the battery HANDSET X. charged, until it clicks into place. place it in the handset charger when not in use. -
Page 19: Display
Display Telephone base Handset Jackson K Grandma Grandma HANDSET 1 SW Clinic Menu ANS ON MSG # • Configurable shortcut of menu 10:30 10/16 option(s), e.g. speed dial number, emergency call, message list, Smart key(s) phonebook, intercom, smart call • The handset battery is low and blocker, call log, bluetooth, timer, needs charging. -
Page 20: Check For A Dial Tone
Check for a dial tone Before use After you install your telephone or power returns following a power outage Press on the handset or and battery depletion, the handset will the base. If you hear a dial tone, the prompt you to set the date and time, and installation is successful. -
Page 21: Set Up Smart Call Blocker
After setting the date and time, the base NOTE will prompt if you want to set Set up • The screening feature of Smart call Smart call blocker*. blocker is applicable to home calls only. All incoming cell calls will get through and ring. -
Page 22: Install
Set number of rings Overview • Press 2, 3, 4, 5 or 6 for your preferred number of rings, or 8 for toll saver. Telephone base • Displays and confirms the number of rings being set. Set message alert tone When there is at least one new message, the base beeps every 10 seconds. - Page 23 • While in a menu, press to cancel an operation, • Keypad back up to the previous menu, or exit the menu • While reviewing a caller display; or press and entry, press hold this button to exit repeatedly to add or to idle mode.
- Page 24 • Press to enter • Press to turn on the answering system. COUNTDOWN TIMER. • Press repeatedly to view • Press to start or stop the last 10 numbers message playback. dialed. • While entering numbers, • CALL BLOCK press and hold to insert •...
-
Page 25: Handset
Handset • VOL • Press show phonebook entries when the telephone is not in use. • Press to scroll up while in a menu. • Press to increase the listening volume when on a call, or increase the message playback volume. - Page 26 • During a call, press to • VOICE hang up. • While connected • While in a menu, press one or two cell phones, to cancel an operation, press to activate the back up to the previous voice controlled menu, or exit the menu application of one of display;...
-
Page 27: Charger
Operating range • Press to make or answer a home call. This cordless telephone operates with • During a call, press to the maximum power allowed by the answer an incoming home call when you receive a Federal Communications Commission call waiting alert. -
Page 28: Telephone Base Features Menu
Telephone base features menu Handset features menu Here is the overview of the telephone Here is the overview of the handset base features menu. features menu. 1. Press 1. Press Menu. • You will then enter the menu list. • You will then enter the menu 2. -
Page 29: Smart Keys
6. Press to select a desired △ ▽ ▷ ◁ Smart keys color tone, then press Select On the telephone base, there are six COLOR SELECTION Smart keys along the left and right of the LCD screen. Smart keys allow you to access the speed dial number, emergency number and other menu options quickly. -
Page 30: Update The Smart Key Speed Dial Number/ Entry
Update the Smart key speed dial 3. Press Copy from Phonebook number/ entry SPEED DIAL NUMBER 1. Press softkey Menu and then △ ▽ scroll to the Smart key , and then press its smart key to enter. Copy from Phonebook 2. -
Page 31: Change A Smart Key Function
4. Press to confirm changing. SMART KEY 1 SETTING 5. Now, select your desired Smart key function. Msg list Phonebook Intercom Smart Cal. Caller ID log Follow the steps in Add a speed dial number, Add an emergency number, Smart key Setting Bluetooth Timer... -
Page 32: Edit An Emergency Number
6. Press to choose No Smart △ ▽ ▷ ◁ Edit an emergency number , and then press Save 1. Press Menu on the telephone base. SMART KEY 1 SETTING 2. Press to scroll to the Smart key △ ▽ , and then press its to enter. -
Page 33: Bluetooth
△ ▽ Place cell phone next to and then select Bluetooth. the base. Next MENU 6. Your telephone (VTech DECT 6.0) Bluetooth Smart key starts searching and pairing with your Access Ringers cell phone, press the appropraite key voicemail on your cell phone to continue the... -
Page 34: Headset
Headset Download your cell phone phonebook using the base 5. Follow the on-screen insturctions and press Next. ADD HEADSET NOTE • Before downloading the phonebook, STEP 1: If your BT headset is connected to make sure cell phone is paired, active, to cellphone, please disconnect it. -
Page 35: Disconnect/ Reconnect Your Bluetooth Device
Once your Phonebook entries are added, Connect / Phonebook BLUETOOTH DEVICE Disconnect download the LCD screen diplays:- Mike Smith smartphone Christine Smith smartphone Mike Smith Entries added: Add device Edit 4. Press the respective smart key X to select and remove the bluetooth device, or press Remove all to delete... -
Page 36: Activate Remove Voice Control
• The Bluetooth device is not within 2. Speak toward the base and wait for range of the telephone base. feedback. Activate remove voice control Use phone menu NOTE On the handset • Make sure cell phone is paired, active, and connected to the system via 1. -
Page 37: Operate
Answer a cell call Operate • Press on the handset. Make, answer or end a cell • Press on the base. call End a cell call Make sure you have pair your cell • Press , or put the handset in the phone(s) to the telephone system. -
Page 38: Make, Answer, Or End A Home Call
Make, answer, or end a home Answer or end a home call using a Bluetooth headset call Press the call key on your headset. Make a home call NOTES • Press on the handset, and • The handset displays Unable to call if then enter the telephone number. -
Page 39: View Dialing Options
View dialing options Option while on a call Although the caller ID log entries may When you are on a home or cell call and contain 10 digits (the area code plus speaking to the caller, and you do not the 7-digit number), in some areas, you want to continue the call, you can press may need to dial only the seven digits,... -
Page 40: Intercom
to exit the call. The call continues on Answer an intercom call the other handset until both handsets hang up. Press . Both handsets now show Intercom. NOTE • If you have paired a DECT 6.0 cordless End an intercom call headset or speakerphone to the telephone base, you can also join Press... -
Page 41: Transfer A Call Via Intercom
• If the called device does not answer Transfer a call via intercom the intercom call within 100 seconds, 1. When on an outside call, press or if the device is in use, on a call or out of range, the calling handset 2. -
Page 42: Temporary Ringer Silencing
displays Microphone on. • Press Stop on the telephone base; Mute is automatically cancelled when - or - you end the call. • Place the handset in the telephone base or charger. Temporary ringer silencing NOTES When the telephone is ringing, you can temporarily silence the ringer of the •... -
Page 43: Phonebook | Phonebook Entry
locate the desired number. Phonebook | • Press to confirm. Phonebook entry 6. Press and enter the name, and The phonebook can store up to 1,000 then press entries, which are shared by all handsets • The screen shows Enter name. and the telephone base. - Page 44 • The screen shows Phonebook is the left or right. empty. Add a contact?. Press Yes. • Press 0 to add a space. • Press Backspace to erase a character. • Press and hold Backspace to erase Phonebook is empty. all characters.
-
Page 45: Review The Phonebook Entries With A Handset
Review the phonebook PREVIEW entries with base There are 3 ways to access and review. Mike Smith 800-595-9512 Edit Save Option 1 • The screen preview your entry. 1. Press on the telephone base. • Press Save to confirm entry. 2. -
Page 46: Dial A Phonebook Entry With Base
phonebook entries with a handset Review the phonebook entries with Home 00:00:12 base Alphabetical search with a Phonebook Intercom Chris handset). 800-225-1445 2. When the displayed number is in the Mute correct format, press Option 2 the handset to dial with the home line. -
Page 47: Delete All Phonebook Entries With A Handset
Delete all phonebook entries Edit a phonebook entry with with a handset a handset 1. While reviewing a phonebook entry 1. Press on the handset when in idle (see Review the phonebook entries mode. with a handset), and press 2. Press to scroll to Phonebook, •... -
Page 48: Edit A Phonebook Entry With Base
5. Edit the characters. appears). -OR- Press to copy • Press 0 to add a space. a number from the redial list. Press • Press to move the cursor to , or press repeatedly to △ ▽ the left or right. locate the desired number. -
Page 49: Alphabetical Search With A Handset
• If you press 5 (JKL) once, J displays. PROFILE PICTURE Press . Jessie displays. • If you press 5 (JKL) twice, K and then Kevin displays. • If you press 5 (JKL) three times, L and then Linda displays. Select •... -
Page 50: Redial List
browse until the desired number Redial list displays. The handset beeps twice at the end of the list. Dial a redial list entry with a handset 3. Press on the handset to exit. 1. Press to enter the redial list. Review a redial list entry with 2. -
Page 51: Call Waiting
If you subscribe to call waiting service Call waiting from your telephone service provider, and someone calls while you are already Call waiting on the cell line on a call on the home line, the handset If you subscribe to call waiting service flashes , and you hear a beep. -
Page 52: Predial Via Home Call And Cell Call
Predial via home call and cell Chain dialing call Use this feature to initiate a dialing Predial a home call sequence from numbers stored in the Enter the telephone number, then press phonebook, caller ID log or redial list while you are on a call. (handset) or (base) to dial. -
Page 53: Access A Number In The Caller Id Log With A Handset While On A Call
Access a number in the caller Access the redial list with base ID log with a handset while while on a call on a call 1. Press 2. Press △ ▽ 1. Press Christine Smith 888-883-2445 2. Press to scroll to Caller ID log, until the desired number then press... -
Page 54: Caller Id
Caller ID 3. Press to exit the caller ID log. If you subscribe to caller ID service, information about each caller appears Save a caller ID log entry to the after the first or second ring. The caller phonebook ID log stores up to 50 entries. Each entry has up to 24 digits for the phone number 1. -
Page 55: Save A Caller Id Log Entry To The Block List
press • Press to erase a digit. 4. Press to scroll to To Block list, • Press and hold to erase all then press digits. 5. The handset displays Enter number. 6. Press to save the number in the Use the dialing keys to edit the display. -
Page 56: Save A Caller Id Log Entry To The Star
• The screen displays Deleting..Save a caller ID log entry to the star • There is a confirmation tone and name list the screen returns to the previous 1. Press to review the caller ID menu. log. Base 2. Press to browse through the caller ID log. - Page 57 CONTACT NAME #1/3 JUL 25 12:00am Delete Star Name Mike Smith Walter Smith 800-595-9512 Block Phonebook Backspace Next Dial List view 4. Press Next, and then use △ ▽ ▷ ◁ Save to Phonebook? select profile picture, and then press Select.
-
Page 58: Save A Caller Id Log Entry To The Block List
appear in the caller ID log. However, 5. Press to save the telephone the telephone can still save all digits number to the Block list. (up to 24 digits) of that telephone You can also edit the number if needed. number from the caller ID log in the 1. -
Page 59: Dial A Caller Id Log Entry
color, and then press Select. CALLER ID LOG Total: 3 1 Walter 6. Press Save to confirm. JAN 19 12:00pm 888-4544-5386 2 Amy JAN 25 Dial a caller ID log entry 10:00pm 800-4225-5386 3 Sally JAN 27 800-1112-5386 12:00pm 1. Search for the desired entry in the Edit caller ID log (see Review the caller ID... -
Page 60: Missed Call Indicator
last 7 digits of the incoming telephone Set CID time sync number do not match a number in You can adjust the global clock to your phonebook, the name appears synchronize with the time from the as it is delivered by the telephone incoming Caller ID with the base. -
Page 61: Answering System
Answering system About the built-in answering system and voicemail service Your telephone has separate indicators for two different types of voice messages: those recorded on its built-in digital answering system and those recorded in your telephone service provider’s voicemail (fees may apply). Your telephone’s built-in digital answering system messages and voicemail messages are separate. -
Page 62: Use Your Built-In Answering System
Use your built-in answering Message window Description system display New message indication • The answering system is being programmed system handset. If XX new messages display on the • The answering system answering a call or recording a handsets or display on the base, memo or announcement. -
Page 63: Base
3. Press to highlight Answer on/ 3. Press Ans sys setup off, then press select Ans sys 4. Press to highlight On or Off, setup, and then then press to save. press Base 4. Press # of rings Press to turn the answering system scroll to # of rings, and then on or off. -
Page 64: Message Playback
4. Press your desired number of rings. 4. Press to stop the playback. NUMBER OF RINGS Options during playback 2 Rings 5 Rings • Press to play the messages 3 Rings 6 Rings through the handset earpiece. • Press again to return to 4 Rings Toll Saver playing messages through the... -
Page 65: Delete All Messages
playback volume. remotely by dialing your home • Press Skip to skip to the next telephone number from any touch-tone message. telephone. • Press Repeat to repeat the 1. Dial your telephone number from any message currently playing. touch-tone telephone. •... -
Page 66: Call Intercept While Using Answering System
NOTES then press • The handset displays Recording... • If you do not enter a valid remote and Stop [5]. access code, the system answers the • The system announces, “Record call automatically. • Once the messages have played, the after the tone. -
Page 67: Turn On/ Off The Call Screening
Turn on/ off the call screening Screen a call with answering system Use this feature to choose whether incoming messages can be heard over Screen calls at the cordless handset the telephone base when they are being recorded. If you turn call screening on, If the answering system is on and a call you hear the incoming message. -
Page 68: Voicemail (Via Telephone Service Provider)
Options while a message is being and the telephone base still display the recorded new voicemail indicators, use this feature to turn off the indicators. This feature only turns off the displayed • Press on the telephone base to New voicemail and the ;... -
Page 69: Activate And Use Cell Phone's Voice App Via Handset/ Telephone Base
the voice app. Activate and use cell phone’s • Make sure you have turned on or voice handset/ logged in to the applications on telephone base your cell phone that you will be sending your voice commands, such as GPS, e-mail and social networking If you have paired a cell phone to the accounts. - Page 70 for feedback. Make reply to the voice voice control feature. Contact your app’s feedback, if necessary. cell phone’s manufacturer or network carrier, or check the voice app’s help • You can press on the handset topics if you encounter any problems. to turn off the speakerphone and •...
-
Page 71: Announcement
Announcement 3. Press and select Announcement. Your outgoing announcement plays 4. The screen displays Play [2] Del [3] Rec when calls are answered by the answering [7] and it announces, “To play, press 2. system. The telephone has a default To record, press 7.”... - Page 72 the callers of the following incoming or record your own name to replace call categories will hear a screening “this number” in the announcements. announcement. (see Record your name for screening announcements) • Home calls that are “out of area“ or with numbers set to “Private“.
-
Page 73: Base
your recorded name plays 3. Press Outgoing announcement. automatically. ANSWERING SYSTEM • Press 5 to stop the playback. Message Delete all old list Reset all your screening announcements Outgoing Record memo announcement 1. Press to enter the main menu Voice guide Answer ON/OFF when the handset is not in use. - Page 74 Options during playback • Home calls with caller ID names that are not on your star name list. • Press to adjust the listening default screening volume. announcements for screening unknown • Press Stop to stop at any time. calls and screening robocalls on home line.
- Page 75 4. Press Annc Type to choose • Press Stop to stop the playback. between Unknown caller Robocalls only. Reset all your screening announcements 1. Press Menu in idle mode. UNKNOWN CALLER ANNC 2. Press Smart call blocker 3. Press Screening annc.
-
Page 76: Smart Call Blocker (Scb)
settings. You hear a confirmation tone. Smart call blocker (SCB) If you have subscribed to caller ID service, • To allow all calls to ring through, you then you can use the Smart call blocker just need to select No screening feature to screen incoming calls. -
Page 77: Set Scb Screening Profile
Set SCB screening profile There are five profile options, which allows you to quickly set up Smart call blocker with your handset and base. Handset Set profile Steps 1. Press CALL BLOCK. Screen unknown Screen unknown 2. Press porq-> SCB screening -> home calls 3. -
Page 78: Base
Base Set profile Steps Screen unknown 1. Press Menu softkey, and choose Smart call blocker Screen all unknown home calls 2. Press screening. 3. Press and select Screen unknown Screen robot 1. Press Menu softkey, and choose Smart call blocker Screen robocalls 2. -
Page 79: Set Up Block List
Add an entry from caller ID log to the Set up Block list block list Handset -> p/q (to scroll to the 1. Press Add a new entry directly to the block list desired entry) -> 2. Press p/q-> To Block list -> 1. -
Page 80: Base
2. Press to select the entry. 2. Press to select the entry. 3. Edit the existing number -> 3. Press to delete -> to confirm. 4. Edit the existing name -> • Telephone number up to 30 digits. Base • Name up to 15 characters. Add a new entry directly to the block list •... - Page 81 2. Press next to that entry. Enter A-Z to search Unblock Total: 50 1 Chris 3. Edit the existing number -> Next. 800-225-1445 • Use the dialing keys to enter digits. 2 Mike • Press to move the cursor to ◁/▷...
-
Page 82: Smart Call Blocker Settings
through the block list. Smart call blocker 3. When the desired entry displays, settings press the smart key to unblock. • The screen shows Unblock Star name entry/ list entry? with the entry name and telephone number. There are many organizations like schools, medical offices, and pharmacies that use 4. - Page 83 word is capitalized. Delete all star name entries • Press p/q to move the cursor to 1. Press to enter the main menu the left or right. when the handset is not in use. Then, • Press 0 to add a space. press p/q to scroll to SCB settings.
-
Page 84: Base
Save a caller ID log entry to star name list Review star name list -> p/q (to scroll to the 1. Press 1. Press Menu -> Smart call blocker desired entry) -> -> Star name list 2. Press p/q-> To Star name -> Enter A-Z to search Total: 5 3. -
Page 85: Answering System Settings
if you want to set up the answering Answering system system via voice guide. Follow the settings instructions to start the setup. Change remote access code Set your built-in answering To access your answering system remotely system from any touch-tone phone, you need The answering system can record and to enter a two-digit number (00-99). -
Page 86: Turn On Or Off The Message Alert Tone
• Message alert tone setting is on. Turn on or off the message • There are new messages. alert tone When the message alert tone is set Area code settings to On, and there is at least one new message, the telephone base beeps Set home area code every 10 seconds. -
Page 87: Dial Modes Temporary Tone Dialing
digits. Dial modes 5. Press to confirm. Temporary tone dialing NOTE If you have pulse (rotary) service only, • If in the future, your telephone service you can switch from pulse to touch-tone provider requires you to dial ten dialing temporarily during a call. This is digits to make a local call (area code useful if you need to send touch-tone + telephone number), you need to... -
Page 88: Ringers
3. Press p/q to select Cell volume, then NOTE • If you have dial pulse (rotary) dialing press service only, refer to Temporary tone 4. Press p/q to sample each ringer dialing to temporarily switch from volume for cell lines. pulse to touch-tone dialing during a call. -
Page 89: Set Home/ Cell Ringtone
Set home/ cell ringtone 3. Press or the smart keys next to the Handset sound bar ( / ). To set the ringtone on home line HOME RINGER 1. Press in idle mode. 2. Press p/q to highlight Ringers, then Tone 3 press 3. -
Page 90: Base
Base Cell 1 RINGER To set the ringtone on home line/ cell lines Tone 3 -> △/▽ -> 1. Press Menu Ringers MENU Save 4. Press Save to confirm. Bluetooth Smart key NOTE Access Ringers voicemail • When you turn off the ringer volume, you will not hear ringer tone samples. -
Page 91: Base
3. Enter the month/ date/ year (MM/ DD/YY) using the dialing keys. • To skip setting the date and time, press on the base. 4. Press to move on to set the time. 5. Enter the hour / minute (HH:MM) using the dialing keys. -
Page 92: Sound Settings
Sound settings 3. Select between English, Français Español, and then press to confirm. Set QUIET mode When QUIET mode is turned on, the NOTE telephone silences all sounds during the • If you accidentally change the LCD set period of time (1-12 hours). However, language to French or Spanish, you the handset locator paging tone and any can reset it back to English without... -
Page 93: Adjust Listening Volume
ringer, ringer volume, or key tone Set key tone when QUIET mode is on, the sample The handset is set to beep with each key plays but the feature is still muted after press. You can adjust the key tone volume saving the setting. -
Page 94: Other Settings
Brightness KEY TONE You can set the base’s LCD screen Press [Vol +/-] or “+/-” key to adjust brightness. -> △/▽ -> 1. Press Menu Settings -> △/▽ -> Brightness BRIGHTNESS 3. Press to confirm. Press [Left/Right] or “+/-” key to adjust Other settings Clear voicemail To clear/ remove the voicemail indication,... -
Page 95: Countdown Timer
3. Press Start to start counting down. Countdown timer COUNTDOWN TIMER History You can use the timer as your kitchen timer for cooking, meeting timer, Enter the timer duration exercise timer, study timer, and etc. MINUTES SECONDS It assists you to be multitasking while : 00 working from home, so that you can better manage your time. -
Page 96: General Product Care
General product care Taking care of your telephone Your cordless telephone contains sophisticated electronic parts, so it must be treated with care. Avoid rough treatment Place the handset down gently. Save the original packing materials to protect your telephone if you ever need to ship it. Avoid water Your telephone can be damaged if it gets wet. -
Page 97: Technical Specifications
Technical Frequently asked specifications questions Below are the questions most frequently Frequency • Crystal controlled PLL control synthesizer asked about the cordless telephone. • Handset: 1921.536-1928.448 If you cannot find the answer to your Transmit question, visit our U.S. website at frequency •... - Page 98 The limited warranty period for the Product extends systems outside the unit. for ONE (1) YEAR from the date of purchase. If VTech replaces a Materially Defective Product under the How do you get warranty service?
- Page 99 In no event shall VTech assumes no risk for damage or loss of the VTech be liable for any indirect, special, incidental, Product in transit. If the Product failure is not covered...
- Page 100 Go to www.vtechphones.com (US) to register your product for enhanced warranty support and the latest VTech product news. phones.vtechcanada.com (Canada) for Go to the latest VTech product news. Specifications are subject to change without notice. © 2021 VTech Communications, Inc.