Table of Contents
Advertisement
Quick Links
Advertisement
Table of Contents

Related Manuals for AEG L6FQW842G


Summary of Contents for AEG L6FQW842G
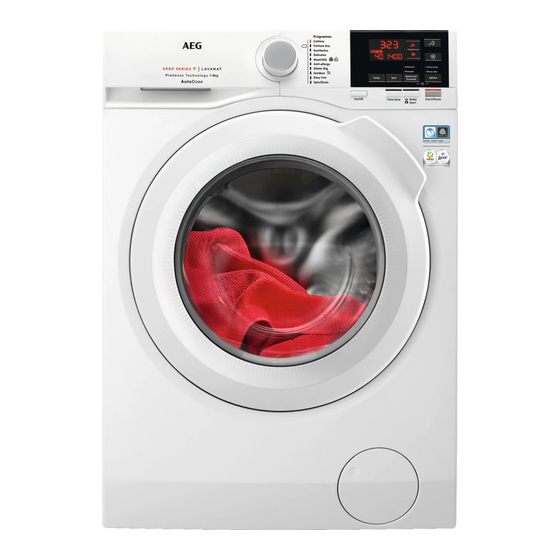
- Page 1 L6FQW842G User Manual Washing Machine USER MANUAL...
-
Page 2: Table Of Contents
CONTENTS 1. SAFETY INFORMATION..................... 3 2. SAFETY INSTRUCTIONS.....................5 3. INSTALLATION......................7 4. PRODUCT DESCRIPTION..................11 5. CONTROL PANEL..................... 12 6. BEFORE FIRST USE....................20 7. THE AUTODOSE TECHNOLOGY (AUTODOSING)..........20 8. PROGRAMMES ......................27 WI-FI - CONNECTIVITY SETUP................31 10. DAILY USE........................33 11. HINTS AND TIPS..................... 36 12. -
Page 3: Safety Information
ENGLISH FOR PERFECT RESULTS Thank you for choosing this AEG product. We have created it to give you impeccable performance for many years, with innovative technologies that help make life simpler - features you might not find on ordinary appliances. Please spend a few minutes reading to get the very best from it. - Page 4 Children between 3 and 8 years of age and persons • with very extensive and complex disabilities shall be kept away from the appliance unless continuously supervised. Children of less than 3 years of age should be kept •...
-
Page 5: Safety Instructions
If a tumble dryer is stacked on the top of the washing • machine, make sure to use the correct stacking kit approved by AEG (see more details in chapter "Accessories - Stacking kit"). 2. SAFETY INSTRUCTIONS 2.1 Installation •... - Page 6 2.4 Use • Always use a correctly installed shockproof socket. • Make sure that the parameters on the WARNING! rating plate are compatible with the Risk of injury, electric shock, electrical ratings of the mains power fire, burns or damage to the supply.
-
Page 7: Installation
ENGLISH 3. INSTALLATION 4. Open the door and remove the WARNING! polystyrene piece from the door seal Refer to Safety chapters. and all the items from the drum. 3.1 Unpacking WARNING! Remove all the packaging and the transit bolts before installing the appliance. - Page 8 We recommend that you 9. Remove the power supply cable and keep the packaging and the the drain hose from the hose holders. transit bolts for any movement of the appliance. It is possible to see 3.2 Positioning and levelling water flowing from the drain hose.
- Page 9 ENGLISH 4. Connect the water inlet hose to the A correct adjustment of the cold water tap with 3/4" thread. appliance level prevents the vibration, noise and the movement of the appliance when in operation. When the machine is installed on a plinth or if a washer dryer is stacked on the washing machine, use the accessories described in...
- Page 10 You can extend the drain hose to maximum 400 cm. Contact the authorized service centre for the other drain hose and the extension. It is possible to connect the drain hose in different ways: 1. Make a U shape with the drain hose and put it around the plastic hose guide.
-
Page 11: Product Description
ENGLISH 6. Position the hose directly to a built- in drain pipe in the room wall and tighten it with a clamp. 4. PRODUCT DESCRIPTION 4.1 Special features interact with your washing machine and to check the washing cycle status Your new washing machine meets all in remote control. -
Page 12: Control Panel
Control panel Inlet hose connection Door handle Mains cable Rating plate Transit bolts Drain pump filter Hose support Feet for levelling the appliance Drain hose 5. CONTROL PANEL 5.1 Control panel description Cottons Cottons Eco 11 10 The options are not selectable with all washing programmes. Check the compatibility between options and washing programmes in the "AutoDose and options compatibility with programmes"... - Page 13 ENGLISH For activating and deactivating the automatic detergent loading. Refer to "The AutoDose Technology (Autodosing)" chapter for AutoDose Fab- more details. ric Softener touch button Press this button repeatedly to activate one of the two following options: • Extra rinse option This option adds a few rinses according to the selected wash- ing programme.
- Page 14 Press this button repeatedly to activate one of the two options or both. The relevant indicator comes on. • Intensive By setting this option, the indicator appears close to deter- gent symbol, and the appliance will automatically dose an ex- tra amount of detergent when automatic detergent tank is en- abled.
- Page 15 ENGLISH Press this button repeatedly to activate one of the two options or both. The relevant indicator comes on in the display. • Remote Select this option to connect appliance with App. Touch this button, the display shows the indicator blink- ing for a few seconds.
- Page 16 When you set a programme, the appliance automatically selects the maximum spin speed. Touch this button repeatedly to: • Decrease the spin speed. The display shows only the spin speeds availa- ble for the set programme. • Activate the Rinse Hold option .
- Page 17 ENGLISH By means of Spin touch button, you can also set: • Drain only Activate the drain-only option (Skipping the wash, rinse and spin phases): The appliance performs the only draining phase of the selec- ted washing programme. The display shows the indicator (cold), the indicator (no spin) and the indicator •...
- Page 18 With this option you can prevent that the children play with the control panel. To activate/deactivate this option, touch the Intensive/Prewash and the Option buttons simultaneously until the indicator comes on/goes off on the display. You can activate this option: Child Lock •...
- Page 19 ENGLISH Remote connection indicator. Wi-Fi connection indicator. Door locked indicator. Delay start indicator. The digital indicator can show: • Programme duration (e. g. • Delay time (e. g. • Cycle end ( ). • Warning code (e.g. Washing phase indicator. It flashes during pre-wash and wash phase. Rinsing phase indicator.
-
Page 20: Before First Use
These indicators will appear next to detergent tank and softener tank indicators when increasing or decreasing the automatic deter- gent or softener dosage. 5.3 Multilingual badges Adhesive badges in different languages are supplied with the appliance. The desired badge can be glued next to the programme dial. - Page 21 ENGLISH If one of the AutoDose tank or both AutoDose detergent tank. are disabled (OFF ) in the set programme, proceed by manually filling AutoDose fabric softener tank. the product in the proper compartment. The appliance is pre-set by the factory to suit most users habits.
- Page 22 • Manual compartment for liquid setting. Read in the paragraph Manual additives (fabric softener, fabric 'AutoDose configuration mode' how to conditioner, starch). change the basic setting, but before: • Maximum level for detergent/ 1.
- Page 23 ENGLISH 7.5 Filling the detergent and blinking detergent tank additives on AutoDose system softener tank indicators on the right in the display. Please read "Detergents and other treatments" in "Hints and tips" chapter. We recommend that you do not exceed the maximum indicated level ( 1.
- Page 24 4. Gently pour only liquid softener in blinks slowly and continuously on the the AutoDose fabric softener tank display. . Fill up to the maximum indicated It will stop blinking when the compartment is refilled. level If tank is not refilled, once a programme has started, the indicator will stop blinking and stay steadily lit.
- Page 25 ENGLISH 7.9 Manual filling the detergent and additives You may need to use a different detergent or fabric softener than the ones used in the AutoDose tanks. First, make sure that the AutoDose tanks are disabled and then pour the detergent and/or other treatments in the manual •...
- Page 26 4. Gently close the detergent 3. Gently close the detergent dispenser, till click engagement. dispenser, till click engagement. If the machine has not been used for more than 4 weeks with filled tanks, detergent/ softener can become viscous or dry out. It is needed to...
-
Page 27: Programmes
ENGLISH 8. PROGRAMMES 8.1 Programme Chart Washing programmes Programme Programme description Washing programmes White and coloured cotton heavily and normally soiled cotton items. Cottons White and coloured cotton heavily and normally soiled cotton items. Cottons Eco Standard programmes for the Energy Label consumption values. - Page 28 Programme Programme description Do not use fabric softener and make sure that Outdoor there is no softener residue in the detergent dispenser. Outdoor clothing, technical, sport fabrics, waterproof and breathable jackets, shell jackets with a removable fleece or inner insulation. The recommended laundry load is 2,5 kg.
- Page 29 ENGLISH Programme Default tempera- Reference spin Maximum load ture speed Temperature Spin speed range range 40 °C 1200 rpm 4 kg 60 °C - Cold 1200 rpm - 400 rpm Synthetics 30 °C 800 rpm 2 kg 40 °C - Cold 1200 rpm - 400 rpm Delicates 40 °C...
- Page 30 ■ ■ ■ ■ ■ ■ ■ ■ AutoDose Fabric Softener Others ■ ■ ■ ■ ■ ■ ■ ■ ■ ■ Spin ■ ■ ■ ■ ■ ■ ■ ■ ■ ■ ■ ■ ■ ■ ■ ■...
-
Page 31: Wi-Fi - Connectivity Setup
"My 4. Configure the "My AEG" app on AEG" . your smart device and follow the 5. Follow the instructions on the App... - Page 32 5. If the connectivity is configured, 1. Touch the Remote button and the when the programme information indicator blinks on the display screen returns, the indicator is on for a few seconds. the display. 2. Touch the Start/Pause button to...
-
Page 33: Daily Use
ENGLISH 10. DAILY USE 10.3 Setting a programme WARNING! Refer to Safety chapters. If you wish to change the automatic detergent or 10.1 Activating the appliance fabric softener dosage, enter the AutoDose configuration 1. Connect the mains plug to the mains mode before proceeding socket. - Page 34 10.6 The ProSense load When the countdown is completed, the programme starts. detection The ProSense estimation The programme duration in starts at the end of the the display is referred to a countdown. medium/high load. Cancelling the delay start after...
- Page 35 ENGLISH Now, you can set a new washing About 20 minutes after the programme. programme start, the programme duration could If the ProSense phase is be adjusted again already carried out and the depending on the capacity water filling is already of water absorption of the started, the new programme fabrics.
-
Page 36: Hints And Tips
The indicator of the Start/Pause button 2. Touch the Start/Pause button: goes off. • If you have set , the appliance drains the water and spins. The door unlocks and the indicator • If you have set , the appliance goes off. - Page 37 ENGLISH • Follow the washing instructions on the Special stain removers are available. Use laundry care labels. the special stain remover that is • Do not wash white and coloured applicable to the type of stain and fabric. items together. 11.3 Detergents and other •...
-
Page 38: Care And Cleaning
Use the correct quantity of additive for necessary to use him. water softening. Follow the instructions that you find on the packaging of the To find out the water hardness in your product. - Page 39 ENGLISH 1. Open the detergent dispenser. Press Always follow the the catch as indicated in the picture instructions that you find on and pull the detergent dispenser out. the packaging of the product. Do not clean the drum with acidic descaling products, scouring products containing chlorine or iron or steel wool.
- Page 40 CAUTION! Do not use sharp or metal brushes and sponges. 6. Turn the dispenser up side down and open the bottom cover as indicated in the picture. 4. Press the catch on the back as indicated in the picture and lift up the top cover to remove it.
- Page 41 ENGLISH 9. Make sure that all detergent residue is removed from the upper and lower part of the recess. Use a small brush to clean the recess. WARNING! Do not clean with any sharp and metal brushes ora any tools, pumps or sensors allocated on the back of the detergent drawer.
- Page 42 • The appliance makes an unusual noise because of the blockage of the drain pump. • The display shows the alarm code WARNING! • Do not remove the filter while the appliance operates. • Do not clean the pump if the water in the appliance is hot.
- Page 43 ENGLISH 11. Put the filter back into the special guides by turning it clockwise. Make sure that you tighten the filter correctly to prevent leakages. 5. When the bowl is full of water, turn the filter back and empty the container.
- Page 44 12.8 Cleaning the inlet hose and the valve filter It is recommended to clean both the filters of the inlet hose and valve occasionally to remove any deposit, collected over the time: 1. Remove the inlet hose from the tap and clean the filter.
-
Page 45: Troubleshooting
ENGLISH 13. TROUBLESHOOTING WARNING! Refer to Safety chapters. 13.1 Introduction The appliance does not start or it stops during operation. First try to find a solution to the problem (refer to the table). If the problem persists, contact the Authorised Service Centre. - Page 46 13.2 Possible failures Problem Possible solution • Make sure that the mains plug is connected to the mains socket. • Make sure that the appliance door is closed. • Make sure that there is no damaged fuse in the fuse box.
- Page 47 ENGLISH Problem Possible solution • Make sure that a washing programme that ends with water in tub, has been selected. • Make sure that the washing programme is finished. • Set the drain or the spin programme if there is water in the You cannot open the ap- drum.
-
Page 48: Consumption Values
Problem Possible solution • Increase the detergent quantity or use a different deter- gent. • Use special products to remove the stubborn stains before you wash the laundry. • Make sure that you set the correct temperature. • Decrease the laundry load. -
Page 49: Technical Data
ENGLISH Programmes Load Energy Water Approxi- Remain- (kg) consump- consump- mate pro- ing mois- tion (kWh) tion (litre) gramme ture (%) duration (minutes) Cottons 60°C 1,89 Cottons 40°C 1,20 Synthetics 40°C 0,78 Delicates 40°C 0,47 Wool/Silk 30°C 0,26 Standard cotton programmes 0,77 Standard 60°C cotton 0,49... -
Page 50: Accessories
The tumble dryer can be stacked on the top of the washing machine only by www.aeg.com/shop or from using the correct stacking kit authorised dealer manufactured and approved by AEG. Only appropriate Verify the compatible accessories approved by stacking kit by checking the AEG ensure the safety depth of your appliances. -
Page 51: Quick Guide
ENGLISH 17. QUICK GUIDE 17.1 Daily use Load the laundry. Pour the detergent and other treatment Connect the mains plug to the mains in the proper compartment of the socket. detergent dispenser. Open the water tap. 1. Push the On/Off button to turn the 3. -
Page 52: Product Information Sheet In Reference To E.u. Regulation 1369/2017
18. PRODUCT INFORMATION SHEET IN REFERENCE TO E.U. REGULATION 1369/2017 Product Information Sheet Trade Mark Model L6FQW842G, PNC914915108 Rated capacity in kg Energy efficiency class A+++ Energy consumption in kWh per year, based on 220 standard washing cycles for cotton programmes at 60 °C and 40 °C at full and partial load, and the consumption of... - Page 53 ENGLISH Energy consumption of the standard 40°C cotton pro- 0,49 gramme at partial load kWh Power consumption of the off-mode in W 0,30 Power consumption in left-on mode in W 0,30 Water consumption in litres per year, based on 220 stand- ard washing cycles for cotton programmes at 60 °C and 10000 40 °C at full and partial load.
- Page 54 www.aeg.com...
- Page 55 ENGLISH...
- Page 56 LGPL-2.0, LGPL-2.1, zLib, MIT, ISC, Apache 2.0 and others. It is possible to display the complete copy of the licenses in the AEG App that can be downloaded from the corresponding App store from the License menu section. It is possible to download the source code of the open source software used in the product by searching for Wi-Fi Module Software version in NIUX subfolder at the following website: http://aeg.opensoftwarerepository.com.