Table of Contents
Advertisement
Quick Links
Advertisement
Table of Contents

Related Manuals for AEG L6FQW942G


Summary of Contents for AEG L6FQW942G
- Page 1 L6FQW942G User Manual Washing Machine USER MANUAL...
-
Page 2: Table Of Contents
9. THE AUTODOSE TECHNOLOGY (AUTODOSING).......... 21 10. PROGRAMMES....................28 WI-FI - CONNECTIVITY SETUP..............32 12. DAILY USE....................... 35 13. HINTS AND TIPS....................39 14. CARE AND CLEANING..................40 15. TROUBLESHOOTING..................48 16. CONSUMPTION VALUES................52 17. QUICK GUIDE....................54 18. ENVIRONMENTAL CONCERNS..............55 My AEG Care app... -
Page 3: Safety Information
ENGLISH FOR PERFECT RESULTS Thank you for choosing this AEG product. We have created it to give you impeccable performance for many years, with innovative technologies that help make life simpler – features you might not find on ordinary appliances. Please spend a few minutes reading to get the very best from it. - Page 4 Children between 3 and 8 years of age and persons • with very extensive and complex disabilities shall be kept away from the appliance unless continuously supervised. Children of less than 3 years of age should be kept •...
-
Page 5: Safety Instructions
ENGLISH The appliance must be connected to the water mains • using the new supplied hose sets, or other new hose sets supplied by the Authorised Service Centre. Old hose sets must not be reused. • If the mains power supply cable is damaged, it must •... - Page 6 2.4 Use to a grounding connection in the building. • Always use a correctly installed WARNING! shockproof socket. Risk of injury, electric shock, • Make sure that the parameters on the fire, burns or damage to the rating plate are compatible with the appliance.
-
Page 7: Technical Data
ENGLISH • Concerning the lamp(s) inside this • Disconnect the appliance from the product and spare part lamps sold mains electrical and water supplies. separately: These lamps are intended • Cut off the mains electrical cable to withstand extreme physical close to the appliance and dispose of conditions in household appliances, such as temperature, vibration,... -
Page 8: Installation
30 seconds. • The Intensive option pre-treats The washing programme is tailored to stubborn stains optimizing the the laundry load and the type of fabric effectiveness of washing without consuming more time, energy performance. and water than necessary. - Page 9 ENGLISH WARNING! It is possible to see water flowing from the drain hose. This is because the washing machine has been tested at the factory. 4. Remove the three bolts by using the key supplied with the appliance. Pull out the plastic spacers. Accessories delivered with the appliance may vary depending on the...
- Page 10 2. Position it toward left or right WARNING! depending on the position of the Do not put cardboard, wood water tap. or equivalent materials below the appliance feet to adjust the level. 45º 45º 20º 20º Make sure that the inlet hose is not in vertical position.
- Page 11 ENGLISH The red sector in the window «A» shows this fault. If this occurs, close the water tap and Make sure that the drain contact the authorized service centre to hose end is not immersed in replace the hose. the water. There may be a 5.5 Water drainage return of dirty water into the appliance.
-
Page 12: Accessories
If you install the appliance on a plinth authorised dealer that is not an accessory supplied by AEG, secure the appliance in the fixing Read carefully the instructions supplied plates. with the accessory. Read carefully the instructions supplied Only appropriate with the accessory. -
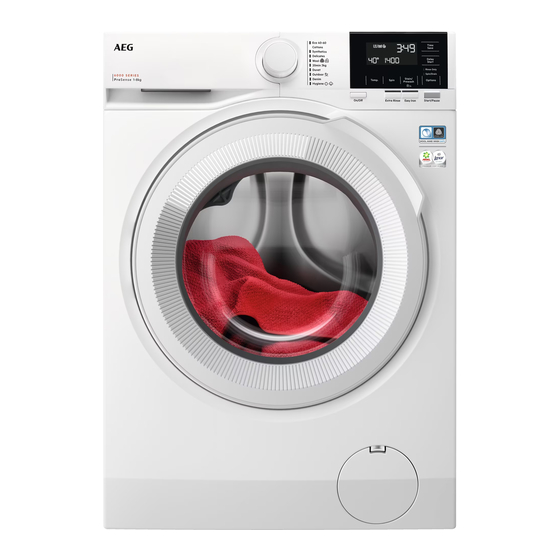
Page 13: Control Panel
ENGLISH WARNING! Do not put the tumble dryer under the washing machine. Verify the compatible stacking kit by checking the depth of your appliances. 7. CONTROL PANEL 7.1 Control panel description 11 10 The options are not selectable with all washing programmes. Check the compatibility between options and washing programmes in the "AutoDose and options compatibility with programmes"... - Page 14 For activating and deactivating the automatic detergent loading. Refer to "The AutoDose Technology (Autodosing)" chapter for AutoDose Liq‐ more details. uid Detergent touch button For activating and deactivating the automatic detergent loading. Refer to "The AutoDose Technology (Autodosing)" chapter for AutoDose Fab‐...
- Page 15 ENGLISH Press this button repeatedly to activate one of the two options or both. The relevant indicator comes on. • Intensive By setting this option, the indicator appears close to deter‐ gent symbol, and the appliance will automatically dose an ex‐ tra amount of detergent when automatic detergent tank is ena‐...
- Page 16 Press this button repeatedly to activate one of the two options or both. The relevant indicator comes on in the display. • Remote Select this option to connect appliance with App. Touch this button, the display shows the indicator blink‐...
- Page 17 ENGLISH When you set a programme, the appliance automatically selects the maximum spin speed. Touch this button repeatedly to: • Decrease the spin speed. The display shows only the spin speeds avail‐ able for the set programme. • Activate the Rinse Hold option . The water of the last rinse is not drained out to prevent the fab‐...
- Page 18 By means of Spin touch button, you can also set: • Drain only Activate the drain-only option (Skipping the wash, rinse and spin phases): The appliance performs the only draining phase of the selec‐ ted washing programme. The display shows the indicator...
- Page 19 ENGLISH With this option you can prevent that the children play with the control panel. To activate/deactivate this option, touch the Intensive/Prewash and the Options buttons simultaneously until the indicator comes on/goes off on the display. You can activate this option: Child Lock •...
- Page 20 Remote connection indicator. Wi-Fi connection indicator. Door locked indicator. Delay start indicator. The digital indicator can show: • Programme duration (e. g. • Delay time (e. g. • Cycle end ( ). • Warning code (e.g. Washing phase indicator. It flashes during pre-wash and wash phase.
-
Page 21: Before First Use
ENGLISH These indicators will appear next to detergent tank and softener tank indicators when increasing or decreasing the automatic deter‐ gent or softener dosage. 7.3 Multilingual badges Adhesive badges in different languages are supplied with the appliance. The desired badge can be glued next to the programme dial. - Page 22 AutoDose detergent tank. the product in the proper compartment. AutoDose fabric softener tank. AutoDose The appliance is pre-set by the factory to suit most users habits. Once started the programme, the Manual appliance will automatically release the...
- Page 23 ENGLISH 'AutoDose configuration mode' how to • Maximum level for detergent/ change the basic setting, but before: additives quantity. 1. Identify the water hardness level. 9.3 AutoDose basic setting Check the water hardness level in your area. The levels are generally The factory pre-set doses for a large indicated as: soft, medium and hard.
- Page 24 9.5 Filling the detergent and additives on AutoDose system Please read "Detergents and other treatments" in "Hints and tips" chapter. We recommend that you do not exceed the maximum indicated level ( 4. Touch related tank buttons to toggle 1.
- Page 25 ENGLISH 4. Gently pour only liquid softener in the 9.6 AutoDose low level AutoDose fabric softener tank . Fill indication up to the maximum indicated level Do not refill the AutoDose tanks unless appliances indicates that one or both tanks are empty. When the activated tank reaches a low level of detergent, related indicator blinks slowly and continuously on the display.
- Page 26 9.7 Switching from AutoDose to manual dosing It is possible to disable AutoDose function for one or both tanks by pressing related button symbol. Example: • To switch Fabric Softener tank off, 2. After about 10 seconds the display...
- Page 27 ENGLISH 2. Pour the liquid detergent in the 3. If desired, pour the fabric softener in compartment the compartment Manual 3. Gently close the detergent dispenser, 4. Gently close the detergent dispenser, till click engagement. till click engagement. If the machine has not been used for more than 4 weeks with filled tanks, detergent/ softener can become...
-
Page 28: Programmes
This will happen even if the user turned To restart the programme, ensure the AutoDose off. drawer is properly closed and press Start/Pause button. 10. PROGRAMMES 10.1 Programme Chart Washing programmes Programme Programme description Washing programmes Eco 40-60 White cotton and fast-coloured cotton. Normally soiled items. The energy consumption decreases and the time of the washing pro‐... - Page 29 ENGLISH Programme Programme description Outdoor Do not use fabric softener and make sure that there is no softener residue in the detergent dispenser. Outdoor clothing, technical, sport fabrics, waterproof and breathable jackets, shell jackets with a removable fleece or inner insulation.
- Page 30 Programme Default temperature Reference spin Maximum load Temperature range speed Spin speed range 30 °C 800 rpm 2 kg 40 °C - Cold 1200 rpm - 400 rpm Delicates 40 °C 1200 rpm 1,5 kg 40 °C - Cold...
- Page 31 ENGLISH AutoDose Others Programme Eco 40-60 ■ ■ ■ ■ ■ ■ ■ ■ ■ ■ ■ ■ ■ ■ ■ ■ ■ ■ ■ ■ ■ Cottons ■ ■ ■ ■ ■ ■ ■ ■ ■ ■ ■ Synthetics ■...
-
Page 32: Wi-Fi - Connectivity Setup
Programme Universal Liquid Uni‐ Liquid for Delicates Special versal coloureds woollens powder Anti-Allergy ▲ ▲ ▲ ▲ ▲ 20min 3kg ▲ ▲ Outdoor ▲ ▲ ▲ Easy Iron 1) At temperature higher than 60 °C the use of powder detergent is recommended. - Page 33 Your email and password. If you do 4. Configure the "My AEG" app on your not have an account, create a new smart device and follow the one following the instructions in "My instructions to connect the appliance AEG"...
- Page 34 2. Touch the Start/Pause button to Every time you switch the activate the Remote Start before the appliance on, the appliance indicator stops blinking. takes about 10 seconds to connect to the network The indicators appear on the automatically. When the...
-
Page 35: Daily Use
ENGLISH 12. DAILY USE WARNING! CAUTION! Refer to Safety chapters. Washing heavily oiled, greasy stains could cause damage rubber parts of the 12.1 Activating the appliance washing machine. 1. Connect the mains plug to the mains socket. 12.3 Setting a programme 2. - Page 36 12.4 Starting a programme In the display, the indicator of the operating phase starts flashing. with the delay start The programme starts, the door is locked. The display shows the indicator 1. Touch the Delay Start button repeatedly until the display shows the desired delay time.
- Page 37 ENGLISH Important! If the laundry amount will not The washing programme continues. be reduced, the washing programme 12.9 Cancelling a running starts anyway, despite the overload. In this case, it will be not possible to programme guarantee the best washing results. 1.
- Page 38 • The door stays locked. set via App. • You must drain the water to open the door: 12.11 End of the programme 1. If necessary, touch the Spin button to decrease the spin speed proposed When the programme has finished, the by the appliance.
-
Page 39: Hints And Tips
ENGLISH 13. HINTS AND TIPS WARNING! Refer to Safety chapters. 13.1 The laundry load • Divide the laundry into: white, coloured, synthetics, delicates and wool. • Follow the washing instructions on the • Empty pockets and unfold the items. laundry care labels. •... -
Page 40: Care And Cleaning
• The choice and quantity of detergent save detergent, water and time (the will depend on: type of fabric environment is protected too!). (delicates, woollens, cottons, etc), the • Loading the appliance to the colour of clothes, size of the load,... - Page 41 ENGLISH 14.4 Descaling Clean drum Every two months If the water hardness in your Clean detergent dis‐ Twice a year area is high or moderate, we recommend that you use a penser and Auto‐ water descaling product for Dose tanks washing machines.
- Page 42 Occasionally, at the end of a cycle the display may show the icon : this is a recommendation to perform the “drum cleaning”. Once the drum cleaning has been performed, the icon disappears. 14.8 Cleaning the detergent Clean it when needed, using ammonia...
- Page 43 ENGLISH 5. Wash the drawer and all inserts under running water. 3. Open the drain plugs of each tank and empty them into a sink. CAUTION! Do not use sharp or metal brushes and sponges. 6. Turn the dispenser up side down and open the bottom cover as indicated in the picture.
- Page 44 WARNING! If some residues remain on the back area of tanks, soak detergent drawer in a warm CAUTION! water. Do not use tools to Press the bottom cover as clean it. Before soaking, indicated in the picture. remove the handle by...
- Page 45 ENGLISH 14.9 Cleaning the drain pump b. Place the bottom cover and press till "click" sound. c. Place the top cover on the tanks WARNING! compartment and press till "click" Disconnect the mains plug sound. from the mains socket. d. Replace components on manual compartment.
- Page 46 Authorised Service Centre. 4. Turn the filter 180 degrees in anti- clockwise direction to open it, without removing. Let the water flow out. 10. Clean the filter under the water tap. 11. Put the filter back into the special guides by turning it clockwise.
- Page 47 ENGLISH When you drain the water with the 3. Clean the valve filter on the back of emergency drain procedure, you must the appliance with a toothbrush. activate the drain system again: a. Put 2 litres of water in the main wash compartment of the detergent dispenser.
-
Page 48: Troubleshooting
1. Put 2 litres of water in the main wash 3. Put the two ends of the inlet hose in compartment of the detergent a container and let the water flow out dispenser. of the hose. 2. Start the programme to drain the 4. - Page 49 ENGLISH • Make sure that the sink spigot is not clogged. • Make sure that the drain hose has no kinks or bends. The appliance does • Make sure that the drain filter is not clogged. Clean the filter, if not drain the water.
- Page 50 Problem Possible solution The appliance fills with • Make sure that the drain hose is in the correct position. The water and drains im‐ hose may be positioned too low. Refer to "Installation instruc‐ mediately. tion". • Set the spin programme. If the drain programme is not availa‐...
- Page 51 ENGLISH Problem Possible solution • Make sure that the wireless signal reaches the appliance. Try to move the home router as near the appliance as possible or The App cannot fre‐ consider purchasing a wireless range extender. quently connect to the •...
-
Page 52: Consumption Values
16. CONSUMPTION VALUES 16.1 Introduction See the web link www.theenergylabel.eu for detailed information about Energy Label. The QR code on the energy label supplied with the appliance provides a web link to the information related to the performance of the appliance in the EU EPREL database. - Page 53 ENGLISH Eco 40-60 pro‐ Litres h:mm °C gramme Quarter load 0.300 2:35 1351 1) Maximum spin speed. Power consumption in different modes Delay start Networked Off (W) Stand-by (W) standby (W) 0.50 0.50 4.00 2.00 Time to Off/Standby mode is 15 minutes maximum. 1) The energy consumption of the connected function is approximately 17.5 kWh per year.
-
Page 54: Quick Guide
17. QUICK GUIDE 17.1 Daily use Connect the mains plug to the mains 2. Set the desired options (1) by means socket. of the corresponding touch buttons. To start the programme, touch the Open the water tap. Start/Pause (2) button. -
Page 55: Environmental Concerns
ENGLISH Programmes Load Product description 4 kg Synthetic items or mixed fabric items. Synthetics Delicate fabrics such as acrylics, viscose, poly‐ 2 kg Delicates ester items. Wool/Silk Machine washable wool, hand washable wool 1,5 kg and delicates. White cotton items. This program removes more Anti-Allergy 9 kg than 99,99% of bacteria and viruses... - Page 56 My AEG Care app The software in this product contains components that are based on free and open source software. AEG gratefully acknowledges the contributions of the open software and robotics communities to the development project. To access the source code of these free and open source software components whose license conditions require publishing, and to see their full copyright information and applicable license terms, please visit: http://aeg.opensoftwarerepository.com (folder NIU5)