Table of Contents
Advertisement
Quick Links
Advertisement
Table of Contents

Related Manuals for Schwinn 590U


Summary of Contents for Schwinn 590U
- Page 1 590U Manuals in additional languages: ASSEMBLY MANUAL / OWNER’S MANUAL...
- Page 2 TABLE OF CONTENTS Bluetooth ® If purchased in US/Canada: www.SchwinnFitness.com/register If purchased outside US/Canada: ®...
-
Page 3: Important Safety Instructions
IMPORTANT SAFETY INSTRUCTIONS This icon means a potentially hazardous situation which, if not avoided, could result in death or serious injury. Obey the following warnings: Read and understand all warnings on this machine. Carefully read and understand the Assembly instructions. the Manual. - Page 4 •...
-
Page 5: Safety Warning Labels And Serial Number
SAFETY WARNING LABELS AND SERIAL NUMBER Product Serial number This product complies with the European Radio Equipment Directive 2014/53/EU. -
Page 6: Specifications
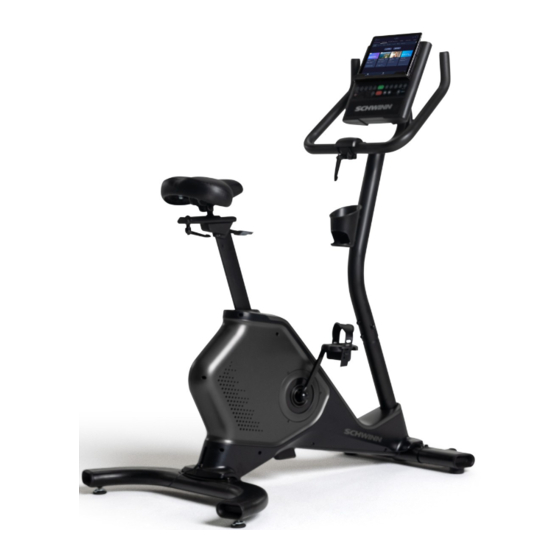
SPECIFICATIONS Maximum User Weight: Total Surface Area (footprint) of equipment: Machine Weight: Power Requirements (AC Adapter): Input Voltage: Output Voltage: 144.3 cm (56.8 in) 119.4 cm (47 in) 82 cm (32.3 in) Before Assembly NOTICE: Basic Assembly Tips 1.8 m 71 in 0.6 m 24 in... - Page 7 PARTS 15 (L) 16 (R) Item Description Item Description Console Console Note:...
-
Page 8: Hardware / Tools
HARDWARE / TOOLS Item Description Item Description Note: Tools Included... - Page 9 ASSEMBLY 1. Attach Leveler Feet to Rear Stabilizer and Attach Stabilizers to Main Assembly Note: 5 mm 5 mm...
- Page 10 2. Connect the Cables and Install Console Mast on Frame Assembly NOTICE:...
- Page 11 3. Install Handlebars on Console Mast NOTICE: Install the position. Note: To install the it down into position 4. Attach Console Mount Bracket to Console Mast NOTICE:...
- Page 12 5a. Remove Console Screws Note: NOTICE: 5b. Install the Console Assembly on the Console Mast NOTICE: Note:...
- Page 13 5c. Install the Pivot Cover and Media Tray NOTICE: Note: 6. Install Seat Post and Secure Top Shroud NOTICE: Pull up the Do not set the Seat Post position higher than the stop mark (STOP) on the tube. Be sure to keep...
- Page 14 7. Install the Seat to the Seat Post NOTICE: 13mm 8. Attach Pedal Straps and Install Pedals If the threads strip due to improper installation, then the Pedals can disengage from the bike and/or break while under usage, which can result in serious injury to the user. Note: The Left Pedal is reverse-threaded.
- Page 15 9. Install Water Bottle Holder Note: 10. Connect AC Adapter NOTICE:...
-
Page 16: Final Inspection
11. Final Inspection Do not use or put the machine into service until the machine has been fully assembled and inspected for correct performance in accordance with the Owner’s Manual. NOTICE: Console Mast Stabilizers Stabilizer Pedals... -
Page 17: Before You Start
BEFORE YOU START Leveling the Bike Do not adjust the levelers to such a height that they detach or unscrew from the machine. Injury to you or damage to the machine can occur. Moving the Bike The machine may be moved by one or more persons depending on their physical abilities and capacities. NOTICE:... - Page 18 FEATURES Console Pedals Bluetooth ® Bluetooth ® WARNING! Use the values calculated or measured by the machine’s computer for reference purposes only. The heart rate displayed is an approximation and should be used for reference only. Over exercising may result in serious injury or death. If you feel faint stop exercising immediately.
- Page 19 Console Features Keypad Functions It does ™...
-
Page 20: Console Display
Bluetooth ® Bluetooth ® Connected icon Console Display Bluetooth ® Bluetooth ® ® ® Time Interval Speed Calories Burn Rate Watts... - Page 21 Heart Rate (Pulse) Consult a physician before you start an exercise program. Stop exercising if you feel pain or tightness in your chest, become short of breath, or feel faint. Contact your doctor before you use the machine again. The heart rate displayed is an approximation and should be used for reference only. Distance Note: Cadence...
- Page 22 USB Charging Workout with Other Fitness Apps ® Using your JRNY™ membership with your machine success. ® Bluetooth ® Heart Rate Enabled ® ® If you have a pacemaker or other implanted electronic device, consult your doctor before using a Bluetooth ®...
- Page 23 Note: ® ® Connected icon. ® Heart Rate Calculations shown.
-
Page 24: Operation
OPERATION What to Wear How Often Should You Exercise Consult a physician before you start an exercise program. Stop exercising if you feel pain or tightness in your chest, become short of breath, or feel faint. Contact your doctor before you use the machine again. Use the values calculated or measured by the machine’s computer for reference purposes only. - Page 25 Note: Manual (Quick Start) Program Manual Note: Interval Programs Note: The "Sprint” period of an Interval Program is a suggested increase in resistance level and speed, and...
- Page 26 Non-Interval Programs Modify Display of Workout Values Note: Changing Resistance Levels Pausing or Stopping...
- Page 27 Muting the Console Note: Workout Summary Mode Note:...
-
Page 28: Console Setup Mode
CONSOLE SETUP MODE Console Setup Mode – System Menu Console. Note: Push the Note: Note: nect all Bluetooth ®... - Page 29 Note:...
-
Page 30: Maintenance
MAINTENANCE Equipment must be regularly examined for damage and repairs. The owner is responsible to make sure that regular maintenance is done. Worn, damaged or loose components must be repaired or replaced immedi- ately. Only manufacturer supplied components can be used to maintain and repair the equipment. If at any time the Warning labels become loose, unreadable or dislodged, replace the labels. -
Page 31: Maintenance Parts
Maintenance Parts Console Console Mast Pedals... -
Page 32: Troubleshooting
TROUBLESHOOTING Condition/Problem Things to Check Solution outlet contact Cus contact Cus code contact Cus Console ontact Cus Bluetooth ®... - Page 33 Condition/Problem Things to Check Solution pinched and snap into place. outlet outlet. to pedal connection pedaling connection ™...
- Page 36 ™ ™ ™ ™ ™ ™...