
Related Manuals for Axminster Professional AP254PS16


Summary of Contents for Axminster Professional AP254PS16
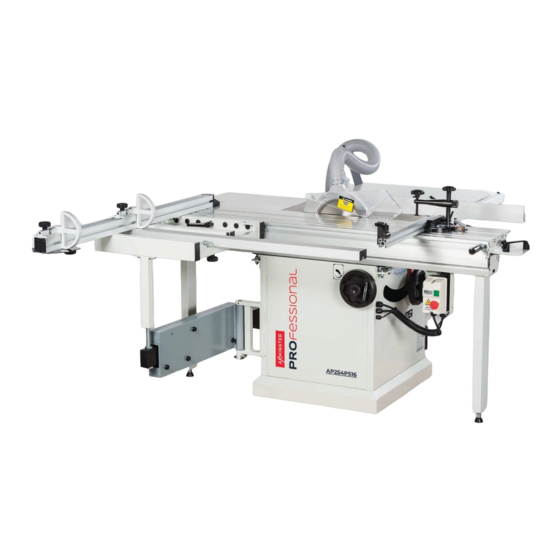
- Page 1 Code 107662 Original Instructions AP254PS16 Panel Saw AT: 08/02/2022 BOOK VERSION: 05...
- Page 2 Cert No: P25 EU Declaration of Conformity Axminster Tool Centre Ltd This machine complies with the following directives: Axminster Devon EX13 5PH UK axminstertools.com 2006/42/EC 06/42/EC - Annex I/05.2006 declares that the machinery described:- EN 1807-1:2013 Type Panel Saw Model...
-
Page 3: Table Of Contents
PANEL SAW INSTRUCTION MANUAL Table of Contents General Information ……………………………………………………………………………………. 2 Safety Rules…………………………………………………………………………………………………. 2 Wiring diagram……………………………………………………………………………………………. Specification Sheet………………………………………………………………………………………. Main Features……………………………………………………………………………………………… (1) Control Panel……………………………………………………………………………………. (2) Rip Fence………………………………………………………………………………………….. (3) Hold Down………………………………………………………………………………………… 6 (4) Riving Knife & Saw Blade…………………………………………………………………… Assembly And Set Up…………………………………………………………………………………… (1) Sliding Table …………………………………………………………………………………….. -
Page 4: General Information
PANEL SAW INSTRUCTION MANUAL General information OAV Equipment &Tools, Inc. is specialized to supply full range of panel saw from 1600, 2200, 2600, 3200 to 3800mm. The outlook design of this machine is so unique with complete cast iron bracket instead of sheet metal, enlarged outrigger and carriage, direct dust collection outlet. -
Page 5: Wiring Diagram
PANEL SAW INSTRUCTION MANUAL WIRING DIAGRAM... -
Page 6: Specification Sheet
PANEL SAW INSTRUCTION MANUAL SPECIFICATION Model 10” PANEL SAW Sliding table dimension 1600 X 316MM Max. Sliding Stroke with crosscut Fence 1600mm Max. Sliding Stroke w/o crosscut Fence 1900mm 912mm Table Height W: 377mm x D: 688mm (1020mm x 1193mm) Table Size W/ext. -
Page 7: Main Features
PANEL SAW INSTRUCTION MANUAL MAIN FEATURE Flip Stop: Large stopper for accurate measurements Crosscut Fence: 90° and 45° quick position design for a precise crosscutting operation Riving Knife: It is prevent kickback cause by the knife closing behind the blade Saw Blade Guard: Fully adjustable blade maintains maximum protection around the saw blade Hose Support Plate and Hose: To collect the dust chip efficiency Rip Fence: For smooth and precise cutting... -
Page 8: Control Panel
PANEL SAW INSTRUCTION MANUAL (1) Control Panel 1. Main Switch: Power on and power off the panel saw. 2. Emergency Stop Button disconnects power to motor. 3. Blade on Button: Starts the main saw blade and scoring saw blade. 4. Blade off Button: Stops the main saw blade and scoring saw blade. (2) Rip Fence 1. -
Page 9: Extension Table (Large &Small)
PANEL SAW INSTRUCTION MANUAL Button head bolt M6 x 16 Cap screw M8 x 20 Locate plate Lift the sliding table up to the cabinet, with another person’s help inset the T-bolt (Fig. 5.1) and space them apart the same distance and the mounting bolts to the cabinet (Fig. -
Page 10: Scale Adjustment
PANEL SAW INSTRUCTION MANUAL Fig. 7 Fig. 8 Fig. 9 (3) Scale adjustment Loosely thread 2 pcs M6 x 16 hex screw and 1 pc M6 x 25 hex screw with lock and flat washers through the scale and into table. -
Page 11: Cross Table
PANEL SAW INSTRUCTION MANUAL (5) Crosscut table Crosscut content Crosscut table x 1 Crosscut table brace x 1 T-nut M8-1.25 x 2 T-nut M12-1.75 x 1 Flat washer 12mm x 1 Adjustment handle M12-1.75 x 55 x1 Knob M8-1.25 x 50 x 2 Flat washer 8mm x 2 Fig. -
Page 12: Cross Fence
PANEL SAW INSTRUCTION MANUAL Sliding the centre stud, an M8-1.25 x 60 T-bolt and screw M8-1.25 x 25 Knob into the crosscut fence (Fig. 18) Slide the centre stud to the end with the plastic cap and tighten it in place. Insert the center stud and T-bolt in the places indicated (Fig. -
Page 13: Scoring Blade
PANEL SAW INSTRUCTION MANUAL Loosen the riving knife center bolt, slide the riving knife over the bolt (Fig. 24) and slightly tighten. Position the riving knife about 3mm or 1/ 8” away from the nearest carbide tooth on the main blade. For a quick gauge, use the 3mm hex wrench to find the correct spacing between the blade and the riving knife. -
Page 14: Fence Scale Alignment
PANEL SAW INSTRUCTION MANUAL Lower the scoring blade to the correct height (2mm or 5/ 64”), perform a test cut, and then make any final adjustment. Fig. 26 Fence Scale Alignment Before operation, the 0” mark on the rip fence scale must be aligned the right side of the blade to unsure that the rip fence measurements will be accurate. -
Page 15: Power Cord
PANEL SAW INSTRUCTION MANUAL Run a ground wire along the dust hose and attach the wire to the machine to protect against static electricity. Notice: Hose is optional accessories. Power cord (11) Power the terminal box (Fig. 31) Feed the power cord through the strain relief on the bottom of the control panel and Fig. -
Page 16: Operation
PANEL SAW INSTRUCTION MANUAL Operation You must follow these instructions EVERY time you use your saw. Stand to the left of the blade line-of-cut when performing a cutting operation. Turn off the saw and allow the blade to come to a complete stop before removing the cut-off piece. -
Page 17: Riving Knife Adjustment
PANEL SAW INSTRUCTION MANUAL (2) Riving Knife Adjustment Whenever the blade size is changed (maximum 10”), then ring knife must be adjusted to 2mm away from the blade you install. Disconnect the saw from power source Move the blade tilt to 0° (blade 90° to table) and raise the main blade as far as it will go. -
Page 18: Crosscutting
PANEL SAW INSTRUCTION MANUAL The saw also with the capability of rip cutting smaller boards which is using the machine as a traditional table saw. (Fig. 37) Smaller, lighter boards are easier to slide across the stationary cast iron table surface to the right of the saw blade. Rip Cutting With The Sliding Table: Install the crosscut fence in the center stud hole. -
Page 19: Miter Cutting
PANEL SAW INSTRUCTION MANUAL smaller panels. (Fig. 42) Lately, this machine has capability of crosscutting work-piece while using the rip fence as a cut-off gauge. (Fig. 43) Crosscutting full size panels 1. Install the crosscut fence to the forward 90° stop (Fig. 44) and lock it in place. -
Page 20: Lubrication
PANEL SAW INSTRUCTION MANUAL 6. Once all the necessary safety precautions have been taken, perform the cutting operation. (7) Lubrication Lubrication the areas indicated below every 6-12 months, depending on frequency of use. Blade angling trunnion Sliding table track ... -
Page 21: Blade Tilt
PANEL SAW INSTRUCTION MANUAL To change flat belt for the scoring motor (Optional) Disconnect the saw from the power source. Move the blade tilt to 0° (blade 90° to table) and raise the main blade and scoring blade set up. Open the motor cabinet door. -
Page 22: Sliding Table Parallel Adjustment
PANEL SAW INSTRUCTION MANUAL (10) Sliding Table Parallel Adjustment The table has been calibrated at the factory. If it changed during the transportation, please follow the instructions below and adjust it. 1. Disconnect the saw from the power resource. 2. Move the blade tilt to 0° (blade 90° to the table) and raise the main blade and scoring blade set up. -
Page 23: Troubleshooting
PANEL SAW INSTRUCTION MANUAL (12) Troubleshooting WARNING Disconnect power to the machine when performing any troubleshooting. Failure to do this may result in serious personal injury or death. Saw does not start Check the switch is being fully depressed. Check the electrical power cord is plugged into the power outlet. Check the electrical supply is on (rest). - Page 24 QC160G01B PARTS NAME SIZE ITEM PART NO Q`TY NOTE Machine body 204325R 204225 Cover Plate Emergency Stop Button 994808 Tapping Screw M5x16L ST059400 Scale LM204034 Lock Washer WS100000 Hex Nut M10xP1.5 NH101700 Switch Box 605408 Strain Relief PG-9 709409 Pan Head Screw (+)/W M6x10L SP060210 Hex Flange Nut...
- Page 25 QC160G01B PARTS NAME SIZE ITEM PART NO Q`TY NOTE Strain Relief PG-13.5 136013 Hex Head Bolt M10x35L SH100700 Dust Port 412007 SP060210 Pan Head Screw (+)/W M6x10L Setscrew M8x30L SS080600 Hex Nut NH081300 Power Box 201105A Nylon Nut M10xP1.5 NL101700 Button Head Screw M5x20 SP050400...
- Page 26 QC160G02 PARTS NAME SIZE ITEM PART NO Q`TY NOTE Channel Base 204060 Trunnion Bracket 204033 Cap Screw M5x8 SR050400 Lock Washer M6xψ13 WF061310 Cap Screw M8x12 SR089300 Button Head Screw M8x35L SJ060700...
- Page 27 QC160G02 PARTS NAME SIZE ITEM PART NO Q`TY NOTE Lock Washer WS080000 SWITCH (ASM.) Z15G1306+AA8000 AB204021A Cap Screw M5x10L SR050200 WF081818 Lock Washer M8xψ18xt1.8mm Cover Plate 204013 Hinge 612030 Pan Head Bolt M5x8L SF059200 Saw Blade 250x2.6x5/8x40P 204002 Magnetic Iron(assembly) AB203249 Dust port 204061...
- Page 28 QC160G03A PARTS NAME SIZE ITEM PART NO Q`TY NOTE Blade Cover AB205075 Splitter Seat (Asm.) AB204020 5x5x20 KD050520 Locate Block 204190...
- Page 29 QC160G03A PARTS NAME SIZE ITEM PART NO Q`TY NOTE Link Plate 204065 Bearing 6004LLB BB600404 Hex Nut NH101700 204029 Gip Plate Set Screw M10x45L SS100900 Set screw M5x10L SS050200 Arbor Pully 60HZ 204283 Washer M8xψ30xt3 WF083030 Lock Washer WS080000 Belt M-20(CSA) LM200000 Cap Screw...
- Page 30 QC160G03A PARTS NAME SIZE ITEM PART NO Q`TY NOTE Button Head Screw M5x12L SJ059300 Spring Pin 4x10 PS041000 Locate Block 204164 SJ059200 Button Head Screw M5x8L Cap Screw M8 x 20L SR080400 Washer M8xψ18 WF081818 Hex Nut NH081300 Cap Screw M12X25 SR120500 Cap Screw...
- Page 31 QC160G04 ITEM PART NO PARTS NAME SIZE Q`TY NOTE Sliding Table Set 316x1600mm 2316160S Cap Screw M12x35L 204242 WF122430 Washer M12xψ24xt3 Lock Washer WS120000 Hex Nut M12xP1.75 NH121900 S sliding table AB206528 PUSH-PULL HANDLE ASM. Button Head Screw M6x12L SJ069300 Tap Screw M4x8 ST047008...
- Page 32 QC160G05 PARTS NAME SIZE ITEM PART NO Q`TY NOTE Right Ext.Plate 204028 Table 204141 Table Insert 204321 SJ059300 Button Head Screw M5x12L Right Support Plate 201161 Fixed Seat (ASM.) AB201506 Hex Head Bolt M6x25L SH060500 Lock Washer WS060000 Hex Nut NH061000 Flat Washer M12xψ20...
- Page 33 QC160G06 PARTS NAME SIZE ITEM PART NO Q`TY NOTE Fence Plate 204282 Rear Fence (ASM.) 2~23 AB204016 Clamp Plate 204288 PS083000 Spring Pin ψ8x30L 204075 Strip 201479 Pan Head Screw M5x10L SP050200 Hex Nut M8xP1.25 NH081300 Handle 204152 Sleeve 204076 Spring Piece 204074 Cover Plate...
- Page 34 QC160G07 PARTS NAME SIZE ITEM PART NO Q`TY NOTE Adjust Handle 204220 Disc washer 204263 Handwheel ASM. AB204176 ψ12 5x5x20 KD050520 Tilt Adjuster ASM. AB204192 Flat Washer WF133025 ψ13xψ30xt2.5...
- Page 35 QC160G07 ITEM PART NO PARTS NAME SIZE Q`TY NOTE Flat Washer M10xψ40xt3.0 WF104030 Cap Screw M8x25L SR080500 Raising Mechanism ASM. AB201221 M8x1.25x4t NH081304 Point 204030 NH061000 Cap Screw M6x16L SR069400 SR080400 Cap Screw M8x20L Spring Washer WS080000 Flat Washer M8xψ18xt1.8 WF081818 Supporting Bracket ASM.
- Page 36 QC160G08A ITEM PART NO PARTS NAME SIZE Q`TY NOTE Arbor Flange 204175 Scoring Saw Blade CE(ψ20) 204057 Cap Screw M8x25L SR080500 Shaft CE(ψ20) 204078 Shaft 204003 Bearing 6202LLB (black) BB620204 Regulator 204063 201833 Scoring Pully 50HZ Setscrew M6x6L SS069100 Setscrew M6x6L SS069100 Adjust Shaft...
- Page 37 QC160G08A ITEM PART NO PARTS NAME SIZE Q`TY NOTE Cap Screw M6x25L SR060500 Hex Nut NH061000 Washer M6xψ30xt3 WF063030 Lock Washer WS060000 Hex Head Bolt M6x16L(L.H) SH069402 Setscrew M6x8L SS069200...
- Page 38 QC160G09 ITEM PART NO PARTS NAME SIZE Q`TY NOTE EXTENSION FRAME AB201951G T-NUT M12xP1.75 201855 WASHER M12xψ30xt3 WF123030 ADJUST HANDLE M12xP1.75x55L 200815 WASHER M8xψ30xt3mm WF083030 KNOW SCREW M8x50L 200954 T-NUT M8xP1.25 201103 WF061620 WASHER LOCK WASHER WS060000 HEX SOCKET BOLT M6x16L SR069400 SUPPORT STRUT...
- Page 39 QC160G10 PARTS NAME SIZE ITEM PART NO Q`TY NOTE Foam Rubber 204280 ψ28 Paster 204281 ψ28 Magnetic 200934-2 Magnetic Iron 204279 Hex Nut NH081300 Setscrew M8x35L SS080700 WF082320 Washer M8xψ23xt2 SLIDING TUBE ASM. AB204241 Cover 204239 Pan Head Screw M4x6L SP049100 Cover 204240...
- Page 40 QC160ML11 PARTS NAME SIZE ITEM PART NO Q`TY NOTE Square Fence 017210 Miter Gauge Body AC204295 Holding-Down Clamp AB204201 Location Stop Asm. AB017219 Rotary Shaft AB204106A Flat Washer M10xψ28xt2.5 WF102825 Spring plungers with ball M4x9 201632...
- Page 41 QC160G12 PARTS NAME SIZE ITEM PART NO Q`TY NOTE Ext. Fence Asm. AB204310 A,R1 Flip Stop AB200823 A,R2 Knob Screw M8x1.25px25L 201886 T-Nut M8x1.25p 201103 T-Bolt M8×1.25p×60L 200953 Washer M8x30 WF083030 Knob Screw M8×55 200952 Washer M10x20x1.5T WF102015 Rotate Shaft 200832...
- Page 44 The packaging is suitable for recycling. Please dispose of it in a responsible manner. EU Countries Only Do not dispose of electric tools together with household waste material. By law they must be collected and recycled separately. Axminster Tools, Axminster Devon EX13 5PH axminstertools.com...