Table of Contents
Advertisement
Quick Links
Advertisement
Table of Contents

Related Manuals for Oki Microline 421N


Summary of Contents for Oki Microline 421N
- Page 1 User’s Guide 45690301EE Rev1...
- Page 2 Oki Data also cannot guarantee that changes in Trademark Information software and equipment made by other manufacturers and OKI and MICROLINE are registered trademarks of Oki Electric Industry referred to in this guide will not affect the applicability of the Co., Ltd.
-
Page 3: Safety
Safety Your Oki printer has been carefully designed to give you years • Be certain that your power source matches the rating listed of safe, reliable performance. As with all electrical equipment, on the back of the printer. If you aren’t sure, check with your there are a few basic precautions you should take to avoid dealer or with your local power company. - Page 4 • Unplug the printer before you clean it. Use only a damp • If anything happens that indicates that your printer is not cloth. Do not use liquid or aerosol cleaners. working properly or has been damaged, unplug it immediately. Then, follow the procedures in “Service and •...
-
Page 5: Table Of Contents
Contents Safety................3 Top of Form (TOF) ............... 12 Top of Form (TOF) and Forms Tear-Off ........12 Chapter 1: Introduction ..........7 Determining if Forms Tear-Off is Off or On ......13 Printer Features ................7 Setting Top of Form (TOF): Forms Tear-Off OFF (Default Setting) ........ - Page 6 Entering and Exiting Menu Mode ..........26 Epson FX Commands ..............72 Resetting the Menu to the Factory Defaults ......26 Oki MICROLINE Standard Commands ........75 Printing the Menu Settings ............26 Appendix C: Specifications ........78 Changing the Menu Settings ............27 Menu Settings Table ..............
-
Page 7: Chapter 1: Introduction
Printer Features Oki Data on the Internet • Super reliable, durable operation: 20,000 hours Mean Time The Oki Data Web Sites provide the most current information Between Failures (MTBF) at 25% duty cycle and 35% page available on your printer. -
Page 8: Chapter 2: Helpful Hints
Oki Data provides support via the Internet: printer. • is the main web site, the gateway to Oki www.okidata.com When printing stops, Forms Tear-Off automatically moves the Data’s products and services. -
Page 9: Operation Tips
Operation Tips Turning the Platen Knob Top of Form (TOF) Important! Always turn the printer off before turning the platen knob! If Top of Form (TOF) sets the print start position. The factory you turn the platen knob when the printer is on, the Top of default is 1"... -
Page 10: Chapter 3: Using Your Printer
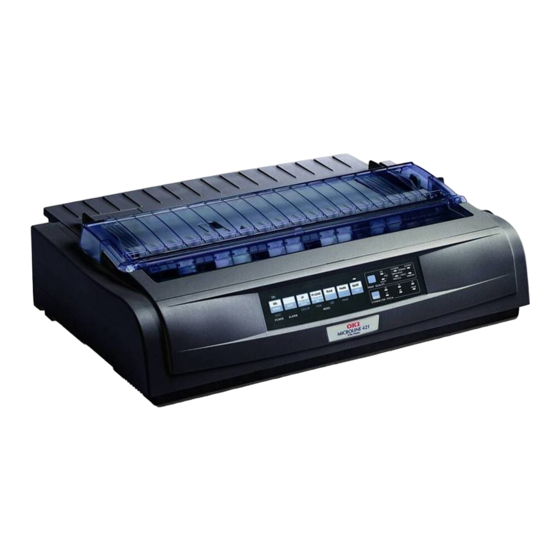
Chapter 3: Using Your Printer Parts Identification: Rear Feed Note: For rear feed, the paper lever must be forward. (Continuous Forms) Note: The serial number of your printer is on a label on the back, beside “S/N.” Sheet Guide Paper Lever On-Off Switch Platen Knob Control Panel... -
Page 11: Parts Identification: Top Feed (Single Sheets)
Parts Identification: Top Feed Note: For single-sheet printing, the paper lever must be in the middle position. (Single Sheets) Paper Guides Sheet Guide Paper Lever On-Off Switch Platen Knob Control Panel Acoustic Cover (open) Using Your Printer... -
Page 12: Top Of Form (Tof)
Top of Form (TOF) Top of Form (TOF) and Forms Tear-Off Note: Your software may print the first line of print above or Important! below where TOF is set. You may need to adjust the If you turn the platen knob when the printer is on, the Top of TOF to meet your software’s requirements. -
Page 13: Determining If Forms Tear-Off Is Off Or On
Determining if Forms Tear-Off is Off or On To use the TEAR key: 1 Make sure paper is loaded. There are two ways to determine the status of the Forms Tear-Off menu setting: 2 Press (3). TEAR • If the paper moves up, Forms Tear-off is off. •... -
Page 14: Setting Top Of Form (Tof): Forms Tear-Off Off (Default Setting)
Setting Top of Form (TOF): With paper loaded and the printer on and selected: Forms Tear-Off OFF (Default Setting) 1 Press (1) to take the printer off line. SEL | MENU The SEL light goes out. Important! 2 Press and hold (2), then SHIFT If you turn the platen knob when the printer is on, the Top of... -
Page 15: Forms Tear-Off Set To On
Setting Top of Form (TOF): 2 Press (2) and (7) to reset the current TOF. SHIFT QUIET/TOF Forms Tear-Off Set to ON 3 Press (4) to load the paper. FF/LOAD 4 Wait briefly until the paper moves up to the tear position, Important! then press and hold (5). -
Page 16: Temporarily Changing The Top Of Form Position
Temporarily Changing the Top of Form Resetting Top of Form to the Factory Default Position The factory default setting for the Top of Form (where the printing should begin) is 1" down from the top of the page. Important To reset the Top of Form to the factory default: Do not use the platen knob to change the Top of Form. -
Page 17: Forms Tear-Off Feature
Forms Tear-Off Feature Notes: The status of the Forms Tear-Off menu setting affects how you set the Top of Form: see “Top of Form (TOF) Note: This feature is normally turned off. To use Forms and Forms Tear-Off” earlier in this chapter. Tear-Off, you must enter the menu and change the Do not use Forms Tear-Off with labels or multipart setting to the desired time interval (see next page). -
Page 18: Changing The Forms Tear-Off Setting
Changing the Forms Tear-Off Setting Manual Forms Tear Off If you don’t wish to engage the Forms Tear-Off feature, you Note: The default setting for Forms Tear-Off is OFF. can advance • rear-feed continuous forms loaded on the built-in tractor •... -
Page 19: Changing Paper Paths
Changing Paper Paths 4 Move the paper lever (1) to the middle position marked “TOP.” Continuous Forms to Single Sheets 1 Tear off any printed pages, then press PARK 2 Raise the sheet guide (1) to the single-sheet feed position. 5 Adjust the paper guides (1) for the size paper you are using, then place a sheet of paper in the sheet guide. - Page 20 Single Sheets to Continuous Forms 4 Move the paper lever to the appropriate position. 1 Press to remove the single-sheet paper. FF/LOAD • Rear feed: 2 Lower the sheet guide into the continuous-forms position. • Bottom feed: 3 Swing the wire feed guide over onto the pull-up roller. 5 If necessary, load continuous-form paper.
-
Page 21: Printhead Gap
Printhead Gap To adjust the gap, open the access cover and move the blue lever (1) to the recommended setting from the table. The printhead gap is the distance between the printhead and the platen. CAUTION! Make sure the printer is turned off before you open the access cover. -
Page 22: Print Quality
Print Quality HSD: High Speed Draft • Lower quality, higher speed (507 cps) Important! • Gothic typeface only Front panel settings for print quality and character pitch are normally overridden by software commands. SSD: Super Speed Draft • Lowest quality, highest speed (570 cps) •... -
Page 23: Character Pitch
Character Pitch Epson and IBM Emulations Set the character pitch by pressing CHARACTER PITCH Important! until the light beneath the desired setting is lit: Front panel settings for character pitch are normally • 10 cpi overridden when the SI command is received from your •... -
Page 24: Printer Reset
• IBM Proprinter III — factory setting (reinitialize) the printer. To do this: • Epson ® 1 Press and release (1) to take the printer off-line. • Oki ® MICROLINE ® light goes out. Changing Emulations 2 Press and hold... -
Page 25: Chapter 4: Menu Mode
Chapter 4: Menu Mode Note: Please print the current Menu Mode settings before you GROUP Key reset or change them. This is the only way to have a Prints the next Group in the Menu. record of the settings. With the key, prints the previous Group. -
Page 26: Entering And Exiting Menu Mode
Entering and Exiting Menu Mode Printing the Menu Settings To enter or exit the Menu Mode, hold while pressing SHIFT Printing the Current Menu Settings 1 Make sure paper is loaded in the printer. 2 Press and hold , then press to enter the Menu SHIFT Resetting the Menu to the Factory Defaults... -
Page 27: Changing The Menu Settings
Changing the Menu Settings Note: Please print the current Menu Mode settings before you reset or change them. This is the only way to have a record of the settings. 1 Press and hold , then press to enter the Menu SHIFT Mode. -
Page 28: Menu Settings Table
Menu Settings Table For a complete explanation of each menu item, see “Explanations of Menu Items” later in this chapter. The table below shows the items which may appear in the menu. Settings which are engaged at the factory (defaults) are set in bold italic. - Page 29 Menu Settings Table (Continued) Group Item Settings (Defaults are set in bold italic) Rear Feed Line Spacing 6 LPI, 8 LPI Form Tear-Off Off, 500 ms, 1 sec, 2 sec Skip Over Perforation No, Yes Page Width (wide model) 13.6", 8" Page Length 11", 11-2/3", 12", 14", 17", 5", 3", 3.5", 4", 5.5", 6", 7", 8", 8.5"...
- Page 30 Menu Settings Table (Continued) Group Item Settings (Defaults are set in bold italic) Top Feed Line Spacing 6 LPI, 8 LPI Form Tear-Off* Off, 500 ms, 1 sec, 2 sec Bottom Margin Valid, Invalid Page Width (wide model) 8", 13.6" Page Length 11", 11-2/3", 12", 14", 17", 5", 3", 3.25", 3.5", 4", 5.5", 6", 7", 8", 8.5"...
- Page 31 Menu Settings Table (Continued) Group Item Settings (Defaults are set in bold italic) Setup (cont..) Print Registration 1 0, range to 0.25 mmm to the right or left, set in 0.05 mm increments • press SEL to shift registration to the left; •...
- Page 32 Menu Settings Table (Continued) s t l bold italic) SI Select Pitch (10 cpi)* 15 cpi, 17.1 cpi SI Select Pitch (12 cpi)* 12 cpi, 20 cpi Time Out Print Valid, Invalid No, Yes Auto Select Centering Position DEFAULT, MODE 1, MODE 2 Wide, Narrow CSF Type†...
- Page 33 Menu Settings Table (Continued) Group Item Settings (Defaults are set in bold italic) Serial IF* Parity None, Odd, Even Serial Data 7/8 Bits 8 Bits, 7 Bits Protocol Ready/Busy, X/On / X/Off Diagnostic Test No, Yes Busy Line SSD-, SSD+, DTR, RTS Baud Rate 19200 bps, 9600 bps, 4800 bps, 2400 bps, 1200 bps, 600 bps, 300 bps DSR Signal...
- Page 34 Menu Settings Table (Continued) Group Item Settings (Defaults are set in bold italic) CSF Bin 1* Line Spacing 6 LPI, 8 LPI Bottom Margin Valid, Invalid Page Width (Wide model) 8", 13.6" Page Length 11", 11-2/3", 12", 14", 17", 5", 3.5", 4", 5.5", 6", 7", 8", 8.5" CSF Bin 2* Line Spacing 6 LPI, 8 LPI...
-
Page 35: Explanations Of Menu Items
Explanations of Menu Items Auto Feed XT, Default = Invalid Epson emulation only. In the Epson emulation, the XT signal These explanations are in alphabetical sequence to make it on pin 14 of the parallel interface can control automatic line easier to look them up. - Page 36 Bottom Margin, Default = Valid Centering Position, Default = DEFAULT Change to Invalid if you want the printer to ignore the bottom Used to limit printhead travel when printing narrow columns. margin setting. • Select Mode 1 for the narrow carriage printer. CAUTION!! •...
- Page 37 CSF Type, Default = Wide Emulation Mode, Default = IBM PPR To avoid paper jams, change this setting to Narrow if you are Selects the printer command set (emulation) you want to using the optional Cut Sheet Feeder on the wide model ML421 engage.
- Page 38 I-Prime, Default = Buffer Print Operator Panel Function, Default = Full Operation Determines what the printer will do when it receives the Change to Limited Operation to deactivate the PRINT QUALITY I-Prime signal from the software. buttons, so that these features can CHARACTER PITCH only be controlled through your software.
- Page 39 Page Width, Default = Depends on Feed Path Parity, Default = None Wide carriage model only. Appears only when the optional Serial Interface is installed. Selects the type of parity your system uses: None, Odd or For rear and bottom paths, the default is 13.6". Change to 8" if Even.
- Page 40 Print Mode, Default = Utility Receive Buffer Size, Default = 64K Choose the quality and typeface of printing. Switch to NLQ Selects the amount of memory devoted to holding received Courier or NLQ Gothic for Near Letter Quality printing. If you data.
- Page 41 SI Select Pitch 12 cpi, Default = 20 cpi Wait Time, Default = 1 sec IBM emulation only. Sets the pitch to be engaged when the Sets the amount of time the printer will wait for more data printer control panel is set for 12 cpi and the SI command is before moving to the form tear-off position.
-
Page 42: Chapter 5: Maintenance
Chapter 5: Maintenance Replacing the Ribbon Cartridge 1 Make sure the printer is turned OFF. 2 Open the access cover and center the printhead. Important! Make sure you have the correct replacement ribbon for the your printer. The wrong ribbon will not print when installed in your printer. - Page 43 CAUTION! 5 Turn the take-up knob (1) in the direction of the arrow to take up any ribbon slack. The printhead may be HOT! 3 Swing the used ribbon cartridge up off the printhead, lift it out, and discard it. 6 Close the access cover and turn the printer back on.
-
Page 44: Loading Paper
Loading Paper Loading Rear Feed Paper from the Back of the Printer Note: These instructions assume you have ready access to the Rear Feed back of the printer. If you do not, skip down to “Loading Rear Feed Paper from the Front of the Printer.” Note: If you have any paper in the paper path, remove it before installing rear feed paper. - Page 45 3 Grasp the sheet guide. Lift it slightly, then slide it back. 4 Pivot the sheet guide forward and gently rest it against the roller assembly. Careful! If you push the sheet guide too hard against the roller assembly, it may dislodge it. If it does, be sure to reseat the roller assembly before continuing.
- Page 46 5 From the back of the printer, locate the tractors (1). 6 Open the lock levers (1) and move the right tractor (as viewed from the back of the printer) to the reference mark (2) matching the width of the paper you are loading. Then close the lock lever on the right tractor: ML421 ML420...
- Page 47 8 Place continuous forms paper on the first two pins of either 10 Adjust the left tractor until the holes in the paper are tractor. centered on the pins then lock the lever and close the left tractor cover. Important! Note: If the paper is too loose or too tight it can cause jams.
- Page 48 11 Lower the sheet guide and slide it toward the front of the 12 Place the wire guide (“1” in the illustration for the step printer until the marks align. above) in the sheet guide on the pull-up roller assembly. 13 Press FF/LOAD Note: The factory default setting for the Top of Form (where...
- Page 49 Loading Rear Feed Paper from the Front of the Printer 2 Open the access cover (1). Note: These instructions assume you do not have ready access to the back of the printer. If you do, go back to “Loading Rear Feed Paper from the Rear of the Printer” earlier in this chapter.
- Page 50 Note: The movement of the left tractor (as viewed from the 7 Open the tractor covers and place continuous forms paper on front of the printer) is restricted to ensure that the the first two pins of either tractor, then close the left tractor paper covers the paper out sensor.
- Page 51 8 Adjust the position of the right tractor to center the holes in 9 Reinstall the sheet guide. the paper on the pins. Then, close its tractor cover and push back the lock lever. Do not stretch the paper. Note: If the paper is too loose or too tight it can cause jams. Maintenance...
- Page 52 10 Place the wire guide (1) in the sheet guide on the pull-up 11 Press FF/LOAD roller assembly. Note: The factory default setting for the Top of Form (where the printing should begin) is 1" down from the top of the page.
-
Page 53: Top Feed (Single Sheets)
Top Feed (Single Sheets) 3 Open the acoustic cover (1) and raise the sheet guide to the single-sheet position. Pivot the wire feed guide (2) up into Note: If you have continuous form paper in the path, press the sheet guide. to remove it before loading single sheets. - Page 54 Important! 4 Adjust the paper feed guides (1) for the width of the paper, then place a sheet of paper in the separator. The paper will If the paper does not feed in, remove it. Check the paper lever feed into the printer. position.
-
Page 55: Clearing Paper Jams
Clearing Paper Jams 5 Lift the sheet guide (1) and reload paper. Make sure you lock the tractor covers. Rear-Feed Paper Jams 1 Turn off the printer. 2 Use the platen knob to back the paper all the way out of the printer. -
Page 56: Rear-Feed, Repeating Paper Jams
Rear-Feed, Repeating Paper Jams Bits of Paper Stuck in the Paper Path 1 Turn off the printer. If the paper keeps jamming, you may have: 2 Use the platen knob to back the paper all the way out of the •... - Page 57 4 Remove any torn pieces of paper. 8 Load regular paper, close and lock the tractor covers. 5 Fold some continuous-form paper over three times to make a page four sheets thick. Then, load it on the tractors and close and lock the covers.
-
Page 58: Single-Sheet Paper Jams
Single-Sheet Paper Jams 3 Open the access cover (1) and remove the pull-up roller assembly (2). 1 Turn off the printer. 2 Use the platen knob to back the paper out. 4 Remove any torn pieces from around the carriage. 5 Reinstall the pull-up roller assembly and close the access cover. -
Page 59: Cleaning The Housing
Cleaning the Housing 4 Use a clean, dry cloth to dust around the carriage shaft and platen. Remove any loose bits of paper. You should clean the printer housing every six months (or after 5 Reinstall the pull-up roller assembly and close the access about 300 hours of operation). -
Page 60: Chapter 6: Troubleshooting
• Does the paper being used meet the specifications for this product? • Is the paper properly installed? • Is the ribbon properly installed? • Is an Oki ribbon being used? • Is the printhead gap correctly set? • Are the correct printer drivers being used for the printer? -
Page 61: Problems / Solutions
Problems / Solutions The I-Prime signal will automatically override any front panel settings you have made. To eliminate this problem, enter the Menu Mode, go to the Parallel Interface group and change the Problem setting for I Prime to Invalid. My word processor files do not print the way I have the menu For more information on changing menu settings, see and front panel set. - Page 62 Problem Problem The printer does not print when the computer sends data. I'm getting strange symbols, incorrect fonts, etc., when I try to print a document. Solutions Solutions 1 Is the light on? If not, press the key. 1 Check to be sure that the printer driver you have selected in 2 Check that the interface cable is securely connected to both your software matches the printer emulation.
- Page 63 Problem Problem Ink smears on the paper when I print narrow columns. I've installed a new ribbon and the printing is smeared and streaked. Solution Solution This may be caused by excessive printhead travel from the centering position. Enter the Menu and set the Centering The ribbon shield (1) is either loose or missing.
- Page 64 Problem Problem There are dots missing in my printouts. The ALARM light is on and the Character Pitch 10 light is flashing. Solution Solution The head gap may not be set correctly. Try moving the headgap lever to a lower setting. If that doesn’t help, the printhead may This indicates that the paper lever is set at the wrong position be damaged;...
- Page 65 Problem Problem The printer needs paper. The ALARM is not on and I can’t load The Print Quality and Character Pitch keys on the front panel paper. don't work. Solution Solution 1 Press and release the key. The Operator Panel Function in the printer menu can be used to disable these buttons (Limited Function).
-
Page 66: Appendix A: Parts & Accessories
- Via telephone • Consult the dealer where your purchased your printer. Order toll-free by phone at 1-800-654-3282 ® ® • Locate an Authorized Oki Data Reseller by visiting one of (1-800-OKI-DATA) using VISA , MasterCard , or ® our web sites AmEx http://my.okidata.com... -
Page 67: Replacement Parts
Replacement Parts Item Part Number Both Models Ribbon Cartridge ( ) ------------------------------- 42377801 Platen Knob ( ) ------------------------------------- 51902220 Power Cord ( ) ------------------------------------- 56631801 Printhead ( ) ---------------------------------------- 41923901 Model ML420 Access Cover ( ) ----------------------------------- 42115401 Sheet Guide ( ) ------------------------------------- 51009509 Pull-Up Roller Assembly ( ) --------------------- 42044701 Model ML421 Access Cover ( ) ----------------------------------- 42115301... -
Page 68: Accessories
Accessories Option Part Number Model ML420 Pull Tractor, Top-Mount ( ) ---------------------- 70030501 Push Tractor, Bottom-Mount ( ) ---------------- 70030701 Roll Paper Stand ( ) ------------------------------- 70023301 Model ML421 Pull Tractor, Top-Mount ( ) ---------------------- 70030601 Push Tractor, Bottom-Mount ( ) ---------------- 70030801 Both Models Cut Sheet Feeder ( ) ------------------------------- 70030101 Serial Interface ( ) --------------------------------- 70012801... -
Page 69: Appendix B: Printer Control Codes
Appendix B: Printer Control Codes IBM Proprinter III Commands This section lists the most commonly used printer control codes. You will find a comprehensive listing of the control codes IBM Command ASCII Decimal (English only), on your Printer CD. Backspace To access it: Carriage Return 1 Place the CD in your CD-ROM drive and wait for it to... - Page 70 IBM Proprinter III Commands IBM Command ASCII Decimal (continued) Line Feed, Execute w/ Carriage Return IBM Command ASCII Decimal n/144" (n = 1 to 127) ESC % 5 n 27 37 53 n n/216" (n = 0 to 255) ESC J n 27 74 n Double Width On ESC W 1...
- Page 71 IBM Proprinter III Commands IBM Command ASCII Decimal (continued) Software I-Prime ESC } NUL 27 125 0 Stop Printing ESC j 27 106 IBM Command ASCII Decimal Subscript On ESC S 1 27 83 49 Overscore On ESC _ 1 27 95 49 Superscript On ESC S 0...
-
Page 72: Epson Fx Commands
Epson FX Commands Epson Command ASCII Decimal Double Height On ESC w 1 27 119 49 Epson Command ASCII Decimal Double Height Off ESC w 0 27 119 48 Backspace Double Width On ESC W 1 27 87 49 Carriage Return, Double Width Off ESC W 0 27 87 48... - Page 73 Epson FX Commands (continued) Epson Command ASCII Decimal Line Spacing, Set Epson Command ASCII Decimal n/144" (n = 0 to 127) ESC % 9 n 27 37 57 n Form Length n/216" (n = 0 to 255) ESC 3 n 27 51 n n Inches (n = 1 to 22) ESC C NUL n 27 67 0 n...
- Page 74 Epson FX Commands (continued) Epson Command ASCII Decimal Reset Printer Epson Command ASCII Decimal Clear Buffer & Initialize ESC @ 27 64 Print Quality/Font Clear Print Buffer Select HSD/SSD Skip Over Perforation, (depends on setting Cancel ESC O 27 79 for Draft Mode) ESC ( 0 27 40 48...
-
Page 75: Oki Microline Standard Commands
Oki MICROLINE Standard Oki Command ASCII Decimal Commands Slashed Zero ESC ! @ 27 33 64 Unslashed Zero ESC ! A 27 33 65 Oki Command ASCII Decimal Double Height On ESC US 1 27 31 49 Backspace Double Height Off... - Page 76 Oki MICROLINE Standard Oki Command ASCII Decimal Commands (continued) Paper Out Sensor Off ESC E 1 27 69 49 Paper Out Sensor On ESC E 0 27 69 48 Oki Command ASCII Decimal Print Quality Line Feed Commands Select HSD/SSD...
- Page 77 Oki MICROLINE Standard Commands (continued) Oki Command ASCII Decimal Shift-In Shift-Out Software I-Prime ESC } NUL 27 125 0 Subscript Printing On ESC L 27 76 Subscript Printing Off ESC M 27 77 Superscript Printing On ESC J 27 74...
-
Page 78: Appendix C: Specifications
Appendix C: Specifications Receive Buffer Size Note: Specifications are subject to change without notice. Maximum 128K Print Method Reliability Impact dot matrix Ribbon Life Printhead 4 million characters, on average, 10 cpi utility 9 pins, 0.30 mm (0.0118") diameter, with thermal Printhead Life protection 400 million characters average in 10 cpi utility mode at... - Page 79 Emulations (co-resident) Characters per Line (cpl) • IBM Proprinter III Setting ML420 ML421 • Epson FX • Oki MICROLINE Standard 10 cpi 80 cpl 136 cpl 12 cpi 96 cpl 163 cpl Print Speed 15 cpi 120 cpl 204 cpl Speed 17.1 cpi...
- Page 80 • Interleaved 2 of 5 Double 120 x 216 dpi • Code 128 Quadruple 240 x 216 dpi • Postnet Oki MICROLINE Single 72 x 72 dpi Double 144 x 144 dpi Paper Thickness: Tractor Feed Quadruple 288 x 144 dpi Rear Feed: 0.014"...
- Page 81 Paper Specifications: ML420 Labels Feed: Bottom* Only Single (Cut) Sheets Weight: Not applicable Feed: Top Only Width Range: 3" to 10" (76 to 254 mm) Weight: 14 to 24 lb. US Bond (52.6 to 90 g/m Envelopes, single feed Width Range: 7.2" to 8.5" (183 to 216 mm) Feed: Top Only Single-part, continuous forms Weight: Max.
- Page 82 Paper Specifications: ML421 Labels Feed: Bottom* Only Single (Cut) Sheet Weight: Not applicable Feed: Top Only Width Range: 3" to 16" (76.2 to 406.4 mm) Weight: 14 to 24 lb. US Bond (52.6 to 90 g/m Envelopes, single feed Width Range: 7.2" to 14.3" (182.8 to 363.2 mm) Feed: Top Only Single-part, continuous forms Weight: Max.
- Page 83 Environmental Requirements Physical Specifications Temperature Note: Height dimensions do not include the acoustic cover. Operating: 41 to 95°F (5 to 36°C) ML420 Storage: 14 to 122°F (-10 to 50°C) Size (WxDxH): 17.1" x 16.1" x 6" Humidity (434 x 409 x 153 mm) Operating: 20 to 80% RH Weight: 16.7 lbs.
-
Page 84: Appendix D: Installation
Appendix D: Installation Location Printer Ribbon Cartridge • Place your printer on a firm, solid surface. Power Cord • Allow enough space around the printer to easily access the platen knob and the various paper feed paths. • Make sure a suitable grounded power outlet is available nearby. - Page 85 1 Remove any packing tape, then grasp the tabs (1) at either 3 Remove the shipping restraint from the pull-up roller end of the access cover and pivot it toward the front of the assembly (1). printer as far as it will go. 2 Remove the printhead shipping restraint.
- Page 86 4 Use the tabs (1) to lift and remove the sheet guide, then 5 Reinstall the sheet guide: insert the clips on either side of the remove the shipping restraint. separator into the notches marked with a triangle, then press down to secure the separator in place.
-
Page 87: Install The Ribbon Cartridge
Install the Ribbon Cartridge CAUTION! The printhead may be HOT! 3 Unpack the new ribbon cartridge and install it on the Important! printhead. Make sure you have the correct replacement ribbon for your Important! printer. The wrong ribbon will not print when installed in your printer. -
Page 88: Power Connection
Power Connection Computer Connections 1 Make sure both the printer and the computer are OFF. Parallel (LPT): IEEE 1284 2 Plug the power cord into the back of the printer, then into a • Requires bidirectional cable, max. length 6 ft. (1.8 m), not grounded outlet. -
Page 89: Usb: Specification 1.1 Compliant
USB: Specification 1.1 Compliant Loading Paper • Requires USB 1.1 cable, maximum length 19.7 ft. (5 m), not For instructions on loading paper, see “Loading Paper” in supplied. Chapter 5. • Printer has USB “B” receptacle. 1 Make sure the printer and computer are both turned off. 2 Attach a suitable USB cable to the printer. -
Page 90: Testing The Printer
Testing the Printer The Font Sample Test prints a sample of the fonts standard to the printer. • Font Sample Test The top of the printout shows the Printer Model, Emulation, • Rolling ASCII Test Country Code, Interface, and Firmware Revision Level. •... -
Page 91: Rolling Ascii Test
Rolling ASCII Test The Rolling ASCII Print Test produces a continuous printout of all 96 ASCII characters in a rolling pattern in whatever typeface is selected (default = LQ Courier). The top of the printout shows the Printer Model, Emulation, Country Code, and Firmware Revision Level. -
Page 92: Hexadecimal Dump Mode
The Oki driver for your printer is provided on the CD included To engage the Hexadecimal Dump Mode: with the printer. You can either load the Oki driver or select one 1 Make sure paper is loaded. of the compatible drivers listed below in your software application. -
Page 93: Loading The Oki Driver
Loading the OKI Driver Using a Compatible Driver Parallel Interface Note: See your software documentation for information on how to select a printer driver. 1 Insert the CD into your CD-ROM drive. Note: If the CD does not AutoPlay, click Start → Run →... -
Page 94: Index
Bottom Feed ........81, 82 Epson FX ........72–74 Form Tear-Off ........29 IBM Proprinter III ....... 69–71 Line Spacing ........29 Oki Microline Standard ....75–77 Skip Over Perforation ......29 Control Codes ......... 69 Buffer Cut Sheet Feeder........68 Clearing .......... - Page 95 Factory defaults, menu mode ....26 Height, Double Height Printing ....41 Labels ..........81, 82 Font Sample Test ........90 Hex Dump Mode ........92 Language ..........28 Fonts Humidity ..........83 Length, Page Embedded Printer Commands ... 62 Rear Feed ...........
- Page 96 Paper Park ..........18 Paper Path, switching ......19 Oki MICROLINE Standard Rear Feed Parallel Interface ........32 Commands ........75–77 Continuous Forms ......10 I-PRIME Signal ......... 61 Operator Panel Function ......65 Form Tear-Off ......29, 30 Parts, replacement, purchasing ....66 Options ...........
- Page 97 Self Tests ..........90 Temperature Specifications ....83 Uni-directional printing, graphics ..30 Serial Interface ........68 Tests Utility Serial Interface Option ......62 ASCII Test ......... 91 Front Panel Light ....... 80 Server, Print Option ........ 68 Font Sample Test ....... 90 Print Speeds .........