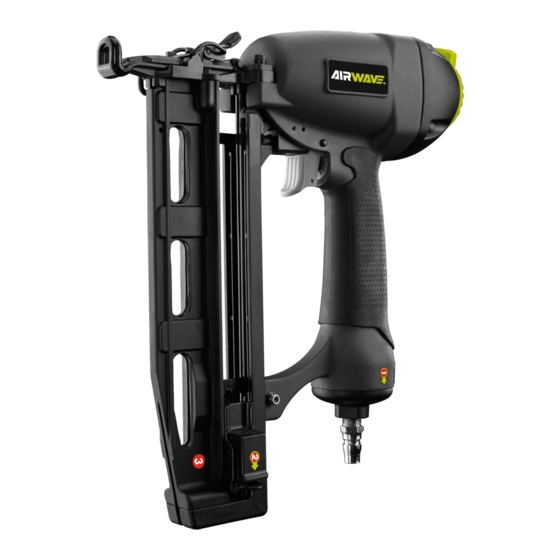
Summary of Contents for Ryobi RA-NB1664-S
- Page 1 RA-NB1664-S AIRWAVE AIR 16GA C BRAD NAILER OPERATOR'S MANUAL ORIGINAL INSTRUCTIONS Important! It is essential you read the instructions in this manual before starting and operating this machine.
- Page 2 DESCRIPTION 1. NITTO style coupler 2. No mar pad 3. Safety yoke 4. Exhaust cap 5. Air supply 6. Nails 7. Pusher 8. Magazine 9. Depth adjustment knob 10. Trigger 11. Jam release 12. Flat blade screwdriver Fig. 1 Fig. 2 Fig.
- Page 3 Fig. 8 Fig. 7 Fig. 9 Fig. 10 Quick Quick connector connector Lubricator Filter Tool compressor Cut-off valve Quick Quick coupler coupler Regulator Air hose (0-8.5 bar) Fig. 11...
-
Page 4: General Safety Rules
comfortable posture while maintaining a secure footing GENERAL SAFETY RULES and avoiding awkward or off-balanced postures. The operator should change posture during extended For multiple hazards, read and understand the safety instructions before installing, operating, repairing, tasks, which can help avoid discomfort and fatigue. maintaining, changing accessories on, or working If the operator experiences symptoms, such as near, the air tool. -
Page 5: Information On Mechanical Impact(Vibration)
INFORMATION ON MECHANICAL IMPACT(VIBRATION) Repairs shall be carried out only by the manufacturer's authorized agents or by other experts, having due The characteristic vibration values for the fastener driving regard to the information given in the operating tool have been determined in accordance with ISO 8662- instructions. -
Page 6: Specifications
trigger using finger pressure. In addition, fastener driving tool is fitted with a safety yoke which enables the driving operation to be carried SYMBOLS out only after the safety yoke of the tool is pressed against a work piece, These tools are marked with an inverted triangle behind the serial number and are Safety alert... -
Page 7: Noise And Vibration
WARNING Working pressure range Ensure the air supply is clean and does not exceed Exhaust high an air pressure and unclean air will shorten the Tool weight product's life due to excessive wear, and may be 1.91 kg dangerous causing damage and/or personal injury. NOISE AND VIBRATION Noise according to EN 12549:1999 and EN ISO 4871 ASSEMBLY... -
Page 8: Operation
gauge to be sure it is functioning within the proper range OPERATION NO-MAR PAD WARNING Do not use oxygen, combustible gases or bottled gases as a power source for this tool. The tool will explode and The no-mar pad attached to the safety yoke of the tool cause death or serious injury. - Page 9 feed a strip of fasteners into the magazine. Be sure the WARNING fasteners are pointed downward. Check for proper functioning by applying the safety yoke of the fastener driving tool to a piece of wood or wooden WARNING material and actuating the trigger once or twice. Keep the tool pointed away from yourself and others when loading fasteners.
-
Page 10: Setting The Air Pressure
air supply and passed to a specialist for inspection. The amount of air pressure required will depend on the size of the fastener and the workpiece material. In the event of longer breaks in work or at the end of the working shift, disconnect the tool from the compressed air Begin testing the depth of drive by driving a test fastener supply and it is recommended to empty the magazine. -
Page 11: Cold Weather Operation
WARNING WARNING Disconnect the tool from the air supply and empty the magazine before clearing a jammed fastener. Failure to based products, penetrating oils, etc., come in contact do so could result in serious personal injury. with plastic parts. Chemicals can damage, weaken or destroy plastic which may result in serious personal injury. - Page 12 seconds. The tool must not operate. IMPORTANT! Press the safety yoke firmly against the workpiece, and pull the trigger. The tool must operate. With the safety yoke still depressed, release the system, air operated tools should be lubricated at least trigger.
-
Page 13: Troubleshooting
TROUBLESHOOTING PROBLEM CAUSE POSSIBLE SOLUTION Loose screws. Tighten screws. Air leak near the top of the tool or in the trigger area. Worn or damaged O-rings or seals. Install overhaul kit. Loose screws. Tighten screws. Air leak near the bottom of the tool. -
Page 14: Parts List
PARTS LIST Description Description Description Description Bolt Gun body O-ring 7.2 X 1.9 Axle sleeve Rubber washer Valve pocket Washer Pin 3 x 26 Spring Nut M4 Bolt M5 x 25 Guide holder O-ring 2.5 X 1.5 Bolt M4 x 22 Spring washer 5 Spring Switch valve stem... - Page 15 NITTO is a registered trademark owned by Nitto Kohki Co., Ltd...
- Page 16 Techtronic Industries Australia Pty Ltd 31 Gilby Road, Mount Waverley, VIC, 3149, Australia Techtronic Industries N.Z. Limited Unit C, 70 Business Parade South, Highbrook, Auckland 2013, New Zealand...


