Table of Contents
Advertisement
Available languages
Available languages
Quick Links
Before returning this product call
1-800-4-D
INSTRUCTION MANUAL
GUIDE D'UTILISATION
MANUAL DE INSTRUCCIONES
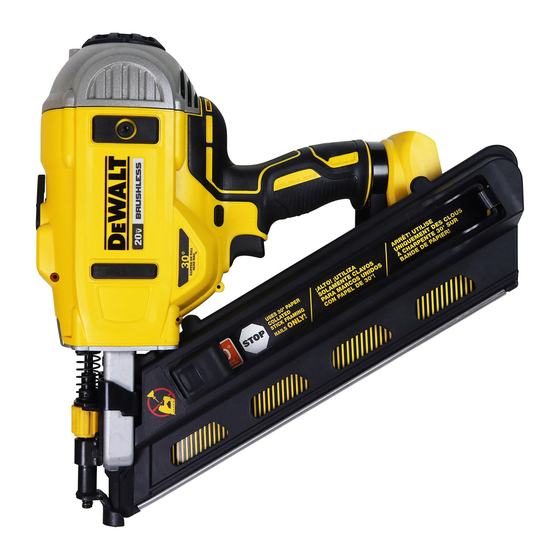
DCN692
20V Max* Cordless Framing Nailer
Cloueur pour charpente sans fil 20V max*
Clavadora inalámbrica de 20 V max*
FINAL PAGE SIZE: 11.69 X 8.26"
WALT
e
Questions? Visit www.D
IF YOU SHOULD EXPERIENCE A PROBLEM WITH YOUR D
PURCHASE,
CALL 1-800-4 D
IN MOST CASES, A D
WALT REPRESENTATIVE CAN RESOLVE
e
YOUR PROBLEM OVER THE PHONE.
IF YOU HAVE A SUGGESTION OR COMMENT, GIVE US A CALL.
YOUR FEEDBACK IS VITAL TO THE SUCCESS OF D
QUALITY IMPROVEMENT PROGRAM.
WALT.com
e
INSTRUCTIVO DE OPERACIÓN, CENTROS DE SERVICIO Y
PÓLIZA DE GARANTÍA. ADVERTENCIA: LÉASE ESTE
INSTRUCTIVO ANTES DE USAR EL PRODUCTO.
WALT
e
WALT
e
WALT'S
e
Advertisement
Table of Contents

Related Manuals for DeWalt DCN692B


Summary of Contents for DeWalt DCN692B
- Page 1 IF YOU SHOULD EXPERIENCE A PROBLEM WITH YOUR D WALT PURCHASE, Before returning this product call CALL 1-800-4 D WALT 1-800-4-D WALT IN MOST CASES, A D WALT REPRESENTATIVE CAN RESOLVE YOUR PROBLEM OVER THE PHONE. IF YOU HAVE A SUGGESTION OR COMMENT, GIVE US A CALL. YOUR FEEDBACK IS VITAL TO THE SUCCESS OF D WALT’S QUALITY IMPROVEMENT PROGRAM.
-
Page 2: Definitions: Safety Guidelines
FIG. 1 Definitions: Safety Guidelines The definitions below describe the level of severity for each signal word. Please read the manual and pay attention to these symbols. DANGER: Indicates an imminently hazardous situation which, if not avoided, will result in death or serious injury. -
Page 3: General Power Tool Safety Warnings
IF YOU HAVE ANY QUESTIONS OR COMMENTS ABOUT THIS OR ANY D WALT TOOL, CALL US f) Dress properly. Do not wear loose clothing or jewelry. Keep your hair, clothing and TOLL FREE AT: 1-800-4-D WALT (1-800-433-9258). gloves away from moving parts. Loose clothes, jewelry or long hair can be caught in moving parts. - Page 4 • Use caution while removing a jammed Do not tape or tie trigger in the ON position. causing the nail to ricochet, injuring you FIG. A FIG. H fastener. The mechanism may be under Do not remove spring from contact trip. or a co-worker.
-
Page 5: Important Safety Instructions For All Battery Packs
Important Safety Instructions for All Battery Packs TO AVOID DOUBLE FIRES: • Do not engage the tool against the work surface with a strong force. When ordering replacement battery packs, be sure to include the catalog number and voltage. • Allow the tool to recoil fully after each actuation. Consult the chart at the end of this manual for compatibility of chargers and battery packs. -
Page 6: Important Safety Instructions For All Battery Chargers
The RBRC Seal ® Minimum Gauge for Cord Sets The RBRC (Rechargeable Battery RecyclingCorp oration) Seal on the nickel cadmium, ® Volts Total Length of Cord in Feet (meters) nickel metal hydride or lithium-ionbatteries (or battery packs) indicates that the costs to Ampere Rating 120V 25 (7.6) -
Page 7: Wall Mounting
1. Longest life and best performance can be obtained if the battery pack is charged when the air manual, stop using the tool and have it serviced at an authorized dewalt service center. temperature is between 65 °F and 75 °F (18 ° – 24 °C). DO NOT charge the battery pack in an 1. -
Page 8: Mode Selection
WALT magazine in nearly empty. When approximately 7 to 9 nails remain in the magazine, the tool ceases (1-800-433-9258) or visit our website www.dewalt.com. to operate. Refer to Loading the Tool to reload a stick of collated nails. Mode Selection WARNING: Always wear proper eye [ANSI Z87.1 (CAN/CSA Z94.3)] and ANSI S12.6 (S3.19) - Page 9 Speed Selection (Fig. 1, 7) Loading the Tool (Fig. 9) FIG. 7 This nailer is equipped with a dual speed selection switch (M) located on the WARNING: Keep the tool pointed away from yourself and others. foot. WARNING: Never load nails with the contact trip or trigger activated. WARNING: Always remove battery pack before loading or unloading nails.
-
Page 10: Cold Weather Operation
6. If the driver blade is in the down position, rotate the stall release lever on the top of the nailer. LOW BATTERY NOTE: If the driver blade will not reset after rotating the stall release lever, manually resetting the blade with a long screw driver may be necessary. Replace battery with a charged pack. - Page 11 Cleaning 4. Twist and remove the Spring Bumper (ee) and remove the washer (ff) and return spring (gg). Refer to figure 18. WARNING: Blow dirt and dust out of all air vents with clean, dry air at least once a week. To minimize the risk of eye injury, always wear ANSI Z87.1 approved eye protection when performing FIG.
-
Page 12: Register Online
1 YEAR FREE SERVICE WARNING: Always test the unit by firing short nails in to soft wood, to ensure that the tool is WALT will maintain the tool and replace worn parts caused by normal use for free any time during working properly. -
Page 13: Troubleshooting Guide
TROUBLESHOOTING GUIDE MANY COMMON PROBLEMS CAN BE SOLVED EASILY BY UTILIZING THE CHART BELOW. FOR MORE SERIOUS OR PERSISTENT PROBLEMS, CONTACT A D WALT SERVICE CENTER OR CALL 1-(800)-4-D WALT. WARNING: TO REDUCE THE RISK OF SERIOUS PERSONAL INJURY, ALWAYS DISCONNECT BATTERY PACK FROM TOOL BEFORE ALL REPAIRS SYMPTOM... - Page 14 SYMPTOM CAUSE Tool operates but does not drive fasteners fully Depth adjust set too shallow Rotate depth adjust to a deeper setting. Tool not firmly applied to workpiece Apply adequate force to tool securing it tightly to workpiece See instruction manual.
-
Page 15: Définitions : Lignes Directrices En Matière De Sécurité
FIG. 1 Définitions : lignes directrices en matière de sécurité Les définitions ci-dessous décrivent le niveau de danger pour chaque mot-indicateur employé. Lire le mode d’emploi et porter une attention particulière à ces symboles. DANGER : indique une situation dangereuse imminente qui, si elle n’est pas évitée, entraînera la mort ou des blessures graves. -
Page 16: Avertissements De Sécurité Généraux Pour Les Outils Électriques
POUR TOUTE QUESTION OU REMARQUE AU SUJET DE CET OUTIL OU DE TOUT AUTRE OUTIL chaussures antidérapantes, un casque de sécurité ou des protecteurs auditifs lorsque la WALT, COMPOSEZ LE NUMÉRO SANS FRAIS : 1-800-4-D WALT (1-800-433-9258). situation le requiert réduira les risques de blessures corporelles. c) Empêcher les démarrages intempestifs. - Page 17 Consignes de sécurité Le court-circuit des bornes du bloc-piles • Ne pas retirer, altérer, ou rendre de FIG. A FIG. H quelque manière que ce soit l’outil, la risque de provoquer des brûlures ou un additionnelles propres aux incendie. gâchette ou le verrouillage de gâchette cloueurs d) En cas d’utilisation abusive, le inopérant.
- Page 18 • Toujours prendre soin d’éloigner les doigts du déclencheur par contact pour prévenir • Éviter tout contact avec la détente lors des réglages. une blessure en cas de relâchement involontaire du poussoir (fig. H) • Ne pas enfoncer des clous à l’aveuglette dans les murs, les planchers et autres zones de •...
- Page 19 Consignes importantes de sécurité propres à tous les blocs- • Le contenu des cellules d’une pile ouverte peut causer une irritation respiratoire. En cas d’inhalation, exposer l’individu à l’air libre. Si les symptômes persistent, consulter un médecin. piles AVERTISSEMENT : risques de brûlure. Le liquide de la pile peut s’enflammer s’il est exposé à Pour commander un bloc-piles de rechange, s’assurer d’inclure son numéro de catalogue et sa des étincelles ou à...
-
Page 20: Utilisation Du Chargeur
Utilisation du chargeur • Pour utiliser un chargeur à l’extérieur, le placer dans un endroit sec et utiliser une rallonge conçue pour l’extérieur. L’utilisation d’une rallonge conçue pour l’extérieur réduit les Reportez-vous aux indications du tableau ci-dessous pour consulter le statut de charge du bloc- risques de chocs électriques. -
Page 21: Description (Fig. 1)
Déplacer le chargeur et le bloc-piles dans un local où la température ambiante se trouve entre environ 18 ° et 24 °C (65 °F et 75 °F). -
Page 22: Sélection Du Mode
Pour plus d’informations quant au témoin de charge du bloc-piles, veuillez appeler le 1-800-4-D WALT MÉCANISME DE PRÉVENTION DES DÉCLENCHEMENTS À VIDE (1-800-433-9258) ou vous rendre sur notre site www.dewalt.com. Le cloueur est équipé d’un mécanisme de prévention des déclenchements à vide pour empêcher Sélection du mode le déclenchement de l’outil lorsque son magasin est presque vide. - Page 23 REMARQUE : le bloc-piles n’est pas totalement chargé d’usine. Suivre les instructions indiquées (se DÉCHARGEMENT DE L’OUTIL reporter à la section Procédure de charge). AVERTISSEMENT : le verrouillage de gâchette devrait systématiquement être verrouillé chaque fois qu’un réglage est effectué ou que l’outil est hors utilisation. 1.
-
Page 24: Maintenance
6. Si la lame de l’enfonceur est en position inférieure, tournez FIG. 13 PILE FAIBLE le levier de désenrayage sur le dessus du cloueur. Remplacer le bloc-piles par un bloc-piles REMARQUE : si la lame de l’enfonceur ne se réinitialise pas chargé. - Page 25 Tableau de maintenance quotidienne REMPLACEMENT DES RESSORTS DE RAPPEL CASSÉS : REMARQUE : les ressorts doivent être remplacés par paire, en utilisant le kit correct de remplacement ACTION Nettoyer le chargeur, le poussoir et le mécanisme de déclenchement par contact. de ressort D WALT.
-
Page 26: Garantie Limitée De Trois Ans
5. Installez le nouveau ressort de rappel et sa rondelle sur la glissière du ressort (dd). Tout en • POUR VOTRE SÉCURITÉ : enregistrer votre produit nous permettra de vous contacter dans compressant le ressort avec la rondelle contre l’extrémité opposée de la glissière, tournez la l’éventualité... -
Page 27: Guide De Dépannage
GUIDE DE DÉPANNAGE DE NOMBREUX PROBLÈMES COURANTS PEUVENT ÊTRE RÉSOLUS FACILEMENT À L’AIDE DU TABLEAU CI-DESSOUS. POUR DES PROBLÈMES PLUS SÉRIEUX OU PERSISTANTS, VEUILLEZ CONTACTER UN CENTRE DE RÉPARATION D WALT OU APPELER LE 1-(800)-4-D WALT. AVERTISSEMENT : POUR RÉDUIRE TOUT RISQUE DE DOMMAGES CORPORELS GRAVES, DÉCONNECTER SYSTÉMATIQUEMENT LE BLOC-PILES DE L’OUTIL AVANT TOUTE RÉPARATION. - Page 28 SYMPTÔME CAUSE SOLUTION L’outil ne fonctionne pas (le moteur Le mécanisme de prévention des déclenchements à vide est activé, Insérer des clous dans le magasin. tourne, mais ne déclenche pas) bloquant la course du déclencheur par contact La charge du bloc-pile est faible ou le bloc-piles est endommagé Vérifier le niveau de charge si le bloc-piles peut afficher son état de charge.
-
Page 29: Definiciones: Normas De Seguridad
FIG. 1 Definiciones: Normas de seguridad Las siguientes definiciones describen el nivel de gravedad de cada palabra de señal. Lea el manual y preste atención a estos símbolos. PELIGRO: Indica una situación de peligro inminente que, si no se evita, provocará la muerte o lesiones graves. - Page 30 SI TIENE ALGUNA DUDA O ALGÚN COMENTARIO SOBRE ÉSTA U OTRA HERRAMIENTA calzado de seguridad antideslizante, cascos o protección auditiva, reducirá las lesiones WALT, LLÁMENOS AL NÚMERO GRATUITO: 1-800-4-D WALT (1-800-433-9258). personales. c) Evite el encendido por accidente. Asegúrese de que el interruptor esté en la posición ADVERTENCIA: Para reducir el riesgo de lesiones, lea el manual de instrucciones.
-
Page 31: Mantenimiento
b) Utilice herramientas eléctricas saca un clavo atascado, la clavadora puede del cargador antes de marcharse de FIG. A FIG. H sólo con paquetes de baterías la zona o de pasarle la herramienta a activarse accidentalmente si está enchufada. específicamente diseñados. El uso otro operador. - Page 32 • No se estire. Conserve el equilibrio y párese adecuadamente en todo momento. La • Utilice el disparador de acción secuencial. pérdida del equilibrio podría provocar una lesión personal. (Fig. C) • Cuando la clavadora se active por tope, mantenga siempre la herramienta en control. •...
-
Page 33: Lea Todas Las Instrucciones
INSTRUCCIONES DE SEGURIDAD ESPECÍFICAS PARA BATERÍAS DE IONES DE LITIO ....Construcción de Clase II ....terminal de conexión a (Li-Ion) ....(doble aislamiento) ..... tierra • No incinere la unidad de batería, aunque esté completamente dañada o descargada. La …/min ..por minuto .... -
Page 34: Funcionamiento Del Cargador
Carga de una batería (Fig. 2) • No exponga el cargador a la lluvia o a la nieve. • Tire del enchufe y no del cable cuando desconecte el cargador. De esta forma se reduce 1. Enchufe el cargador en una toma de corriente apropiada antes de introducir la batería. el riesgo de daño al enchufe y cable. -
Page 35: Notas Importantes Sobre La Carga
Si la herramienta no funciona según se indica en el manual, deje de utilizarla y hágala reparar c. Mueva el cargador y la unidad de batería a un lugar donde la temperatura ambiental sea en un centro de servicios autorizado de dewalt. aproximadamente 18 – 24 °C (65 – 75 °F);... -
Page 36: Selección De Modos
Para mayor información sobre unidades de batería con indicadores de carga, por favor llame al permanezca presionado, se disparará un clavo cada vez que se presione el activador por 1-800-4-D WALT (1-800-433-9258) o visite nuestro sitio Web: www.dewalt.com. contacto. Esto permite que el usuario introduzca varios clavos en forma secuencial. Selección de modos ADVERTENCIA: No mantenga el gatillo apretado cuando la herramienta no esté... -
Page 37: Preparación De La Herramienta
Uso del botón de bloqueo del gatillo (Fig. 8) BLOQUEO DE DISPARO SIN CARGA La clavadora está equipada con un bloqueo de disparo sin carga que evita que la herramienta ADVERTENCIA: Para reducir el riesgo de lesiones corporales graves, no FIG. - Page 38 Liberación de parada (Fig. 12) NOTA: La herramienta está equipada con un imán en la zona de la tobera para un mejor rendimiento de la herramienta. Al descargar, verifique siempre que las pequeñas tiras de clavos no estén pegadas Si se utiliza la clavadora en madera más dura cuando se usa toda la FIG.
- Page 39 Funcionamiento en climas cálidos utilizados en estas piezas. Utilice un paño humedecido sólo con agua y jabón neutro. Nunca permita que penetre líquido dentro de la herramienta ni sumerja ninguna de las piezas en un líquido. La herramienta debería funcionar normalmente. Sin embargo, no exponga la herramienta a la luz solar directa, ya que el calor excesivo puede deteriorar los topes y otras piezas de goma con lo cual INSTRUCCIONES DE LIMPIEZA DEL CARGADOR aumenta la necesidad de mantenimiento.
-
Page 40: Registro En Línea
4. Gire y saque el tope del muelle (ee) y saque la arandela (ff) y el muelle de retorno (gg). Consulte ADVERTENCIA: Compruebe siempre la herramienta disparando clavos cortos en madera la Figura 18. blanda, para asegurarse de que esté funcionando adecuadamente. Si la herramienta no funciona 5. -
Page 41: Especificaciones
Garantía limitada por tres años MERIDA, YUC Calle 63 #459-A - Col. Centro (999) 928 5038 WALT reparará, sin cargo, cualquier falla que surja de defectos en el material o la fabricación del producto, por hasta tres años a contar de la fecha de compra. Esta garantía no cubre fallas de las MONTERREY, N.L. -
Page 42: Guía De Solución De Problemas
GUÍA DE SOLUCIÓN DE PROBLEMAS MUCHOS PROBLEMAS COMUNES PUEDEN RESOLVERSE FÁCILMENTE UTILIZANDO LA SIGUIENTE TABLA. PARA PROBLEMAS MÁS GRAVES O PERSISTENTES, CONTACTE CON UN CENTRO DE SERVICIO D WALT O LLAME AL 1-(800)-4-D WALT. ADVERTENCIA: PARA REDUCIR EL RIESGO DE LESIONES CORPORALES GRAVES, DESCONECTE SIEMPRE LA BATERÍA DE LA HERRAMIENTA ANTES DE TODAS LAS REPARACIONES. SÍNTOMA CAUSA SOLUCIÓN... - Page 43 SÍNTOMA CAUSA SOLUCIÓN La herramienta funciona pero no El ajuste de profundidad está fijado demasiado poco profundo Gire el ajuste de profundidad a una fijación más profunda clava lo clavos totalmente La herramienta no está aplicada firmemente a la pieza de trabajo Aplique la fuerza adecuada a la herramienta fijándola bien a la pieza de trabajo.
- Page 44 WALT BATTERY AND CHARGER SYSTEMS Chargers/Charge Time (Minutes) . Chargeurs/Durée de charge (Minutes) . Cargadores de baterías/Tiempo de carga (Minutos) 120 Volts 12 Volts Battery Output Cat # Voltage DCB609 20/60 DCB606 20/60 DCB404 DCB406 DCB407 DC9360 DCB361 DC9280 DW0242 DCB200 45/30** DCB201...