
Related Manuals for Bosch DIVAR IP 3000


Summary of Contents for Bosch DIVAR IP 3000
- Page 1 DIVAR IP 3000 DIP-3040-00N, DIP-3042-2HD, DIP-3042-4HD Installation Manual Available from A1 Security Cameras www.a1securitycameras.com email: sales@a1securitycameras.com...
- Page 2 Available from A1 Security Cameras www.a1securitycameras.com email: sales@a1securitycameras.com...
-
Page 3: Table Of Contents
System setup - first steps 12 Introduction 12 Setup instruction 12 Starting the application 12 Using Bosch VMS Configuration Wizard 13 Using Bosch VMS Configuration Client 24 Using Bosch VMS Operator Client 25 Recovering the unit 26 Additional Documentation and client software... -
Page 4: Safety Precautions
| Safety precautions DIVAR IP 3000 Safety precautions Observe the safety precautions in this chapter. General safety precautions Follow these rules to ensure general safety: – Keep the area around the system clean and free of clutter. – Place the chassis top cover and any system components that have been removed away from the system or on a table so that they won't accidentally be stepped on. -
Page 5: Electrical Safety Precautions
Installation should only be carried out by qualified customer service personnel in accordance with the applicable electrical regulations. Disposal Your Bosch product has been developed and manufactured using high- quality materials and components that can be reused. This symbol means that electronic and electrical devices that have reached the end of their working life must be disposed of separately from household waste. -
Page 6: Esd Precautions
| Safety precautions DIVAR IP 3000 – Mainboard replaceable soldered-in fuses: Self-resetting PTC (Positive Temperature Coefficient) fuses on the mainboard must be replaced by trained service technicians only. The new fuse must be the same or equivalent as the one replaced. Contact technical support for details and support. -
Page 7: System Overview
Easy to install and operate, DIVAR IP 3000 features wizard-based set-up and centralized configuration to reduce installation times. All components are pre-installed and pre- configured. Simply connect to the network and turn on the unit — DIVAR IP 3000 is ready to begin recording straight out of the box. -
Page 8: Power Supply
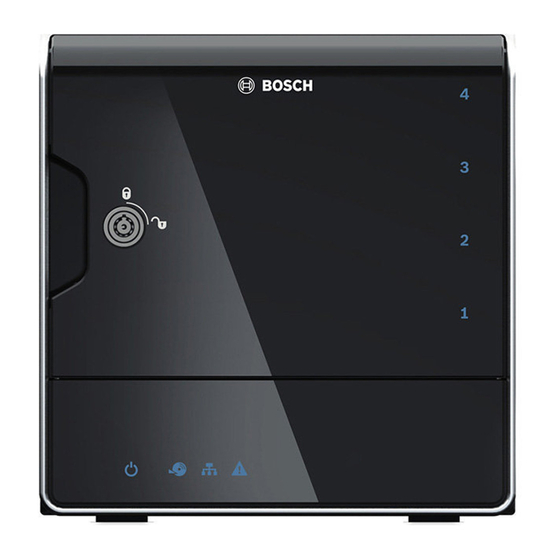
| System overview DIVAR IP 3000 2.2.3 Power supply The chassis features a highly energy-efficient power supplies. Device views There are several LEDs on the front and rear of the chassis. The LEDs show the over-all status of the system and the activity and health of specific components. -
Page 9: Led Description - Front Panel
DIVAR IP 3000 System overview | en Rear view: 1x VGA (monitor) Mains connection 100 - 240 VAC 1x Ethernet (RJ45) 1x USB 3.0 Note: Do not use this port for keyboard and mouse. 4x USB 2.0 1x DVI (monitor), for local viewing... -
Page 10: Lan Port Led Description - Rear Panel
System has booted in normal operation. Blue Blinking System is booting or shutting down Critical event occurred, such as degraded RAID volume. Bosch also provides the API and then application program is able to control this status. Individual hard Off (default) Hard drive not present. -
Page 11: Chassis Setup And Maintenance
Notice! We recommend using the respective Bosch hard disk drives. The hard disk drives as one of the critical component are carefully selected by Bosch based on available failure rates. HDD – not delivered from Bosch – are not supported. Information on supported HDDs can be found in the datasheet in the Bosch Online Product Catalog. -
Page 12: System Setup - First Steps
| System setup - first steps DIVAR IP 3000 System setup - first steps The following installation directive provides information on Installation and Configuration. DIVAR IP systems are based on Windows Storage Server 2008 R2 operating system. This chapter is valid for DIVAR IP models that come with pre-installed hard drives. Empty units start into the DOM recovery menu on first start. -
Page 13: Using Bosch Vms Configuration Wizard
IP, you can use the Configuration Wizard. In all other cases we recommend using the Bosch VMS Configuration Client. Notice! To perform administrative tasks, the BVRAdmin account can be entered when Bosch VMS default screen is displayed. To do so, press CTRL+ALT+DEL, then hold down SHIFT while clicking the Switch User option. - Page 14 – all advanced configurations beyond a basic setup (maps or alarms, for example) For these tasks refer to the Bosch VMS manual (see Additional Documentation and client software, page 27): To achieve a quick configuration using the Configuration Wizard: 1. On the Bosch VMS default screen, double-click the Bosch VMS Wizard icon.
- Page 15 If a DHCP server is employed in the network for the dynamic assignment of IP addresses, activate acceptance of IP addresses automatically assigned to the device. Certain applications (VRM, Bosch Video Management System, Bosch Video Client, Configuration Manager) use the IP address for the unique assignment of the device. If using...
- Page 16 | System setup - first steps DIVAR IP 3000 Time settings page You configure the time settings of the operating system. 2013.09 | V2 | DOC Installation Manual Bosch Sicherheitssysteme GmbH Available from A1 Security Cameras www.a1securitycameras.com email: sales@a1securitycameras.com...
- Page 17 DIVAR IP 3000 System setup - first steps | en Video settings page This page displays the devices and services that are included in the latest saved configuration. You can import a configuration. Bosch Sicherheitssysteme GmbH Installation Manual 2013.09 | V2 | DOC Available from A1 Security Cameras www.a1securitycameras.com email: sales@a1securitycameras.com...
- Page 18 | System setup - first steps DIVAR IP 3000 Device selection page This page displays all video devices that are not included in the latest saved configuration. Deselect the devices that should not be added to the configuration, then click Next.
- Page 19 DIVAR IP 3000 System setup - first steps | en Device passwords page This page is used to authenticate password protected devices. This can either be done for all cameras at once (if passwords are identical) or for each camera individually. Configuration Client must be used in order to set or change device passwords.
- Page 20 Before selecting a recording profile observe the following: – Recording profile details All video devices use the default recording profile details. To change these use the Bosch VMS Configuration Client. – Stream quality settings All video devices use the default settings for Stream 1 to record.
- Page 21 The Night schedule is active from 6 p.m. until 8 a.m., Monday through Friday. The Weekend schedule is active 24 hours a day for Saturday and Sunday. To change the schedule use the Bosch VMS Configuration Client. Bosch Sicherheitssysteme GmbH Installation Manual 2013.09 | V2 | DOC...
- Page 22 Notice! If the wizard stops and the message appears, that the internal iSCSI storage is not ready for recording because the LUNs are not formatted, you must format the LUNs using Bosch VMS Configuration Client. To format the LUNs, see Bosch VMS Configuration Manual, Chapter Formatting a LUN.
- Page 23 DIVAR IP 3000 System setup - first steps | en User accounts page You can add users and passwords. Use Configuration Client to add user groups and to change permissions. Bosch Sicherheitssysteme GmbH Installation Manual 2013.09 | V2 | DOC Available from A1 Security Cameras www.a1securitycameras.com email: sales@a1securitycameras.com...
-
Page 24: Using Bosch Vms Configuration Client
DIVAR IP, we recommend using the Bosch VMS Configuration Client. To assign device IP addresses: On the Bosch VMS default screen, double-click the Configuration Client icon change device network settings. The application starts. 2. Enter the following, then click OK. -
Page 25: Using Bosch Vms Operator Client
DIVAR IP 3000 System setup - first steps | en To perform further functionalities refer to the Bosch VMS manual. References to the manual are described in Additional Documentation and client software, page 27. Using Bosch VMS Operator Client Use Bosch VMS Operator Client to verify the live, recording and playback functionality of DIVAR IP. -
Page 26: Recovering The Unit
| Recovering the unit DIVAR IP 3000 Recovering the unit Following procedure describes how to restore the factory default image. To restore the unit to factory default image 1. Start the unit and press F7 during the BIOS power-on-self-test. -
Page 27: Additional Documentation And Client Software
Additional Documentation and client software | en Additional Documentation and client software Documentation for Bosch Security System products can be found as follows: www.boschsecurity.com > select your region and your country > select Product Catalog > start a search for your product > select the product in the search results to show the existing documents. - Page 28 Available from A1 Security Cameras www.a1securitycameras.com email: sales@a1securitycameras.com...
- Page 29 Available from A1 Security Cameras www.a1securitycameras.com email: sales@a1securitycameras.com...
- Page 30 Bosch Sicherheitssysteme GmbH Robert-Bosch-Ring 5 85630 Grasbrunn Germany www.boschsecurity.com © Bosch Sicherheitssysteme GmbH, 2013 Available from A1 Security Cameras www.a1securitycameras.com email: sales@a1securitycameras.com...