Table of Contents
Advertisement
Network Receiver
Réseau Ampli-Tuner
Owner's Manual
Mode d'emploi
Manual de instrucciones
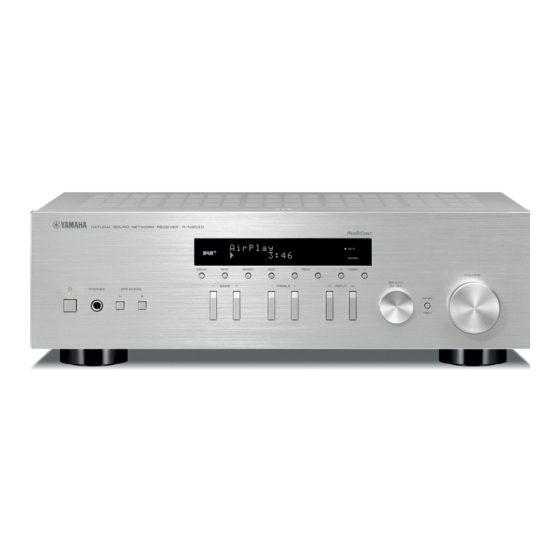
• The R-N303 and R-N303D network receivers allow you to play back sound in
high-quality stereo at your own home.
• This manual explains preparations and operations for everyday users of the unit.
• Les récepteurs réseau R-N303 et R-N303D vous permettent de lire des sources audio en
bénéficiant d'un son stéréo de qualité supérieure dans le confort de votre salon.
• Ce manuel décrit les préparatifs et les procédures pour l'usage quotidien de cette unité.
• Los receptores de red R-N303 y R-N303D permiten reproducir sonido estéreo de alta
calidad en casa.
• En este manual se explican los preparativos y el funcionamiento de la unidad en el día a
día.
URL
EN
FR
ES
Advertisement
Table of Contents

Related Manuals for Yamaha R-N303 D


Summary of Contents for Yamaha R-N303 D
- Page 1 Network Receiver Réseau Ampli-Tuner Owner’s Manual Mode d’emploi Manual de instrucciones • The R-N303 and R-N303D network receivers allow you to play back sound in high-quality stereo at your own home. • This manual explains preparations and operations for everyday users of the unit. •...
- Page 2 English IMPORTANT SAFETY INSTRUCTIONS 1 Read these instructions. 2 Keep these instructions. 3 Heed all warnings. C AU T IO N 4 Follow all instructions. 5 Do not use this apparatus near water. RISK OF ELECTRIC SHOCK DO NOT OPEN 6 Clean only with dry cloth.
- Page 3 Yamaha Corporation of America or its found in the users manual, may cause interference subsidiaries. harmful to the operation of other electronic devices. * This applies only to products distributed by YAMAHA CORPORATION OF AMERICA. (class B) FCC CAUTION COMPLIANCE INFORMATION STATEMENT...
- Page 4 • Never insert or remove an electric plug with wet hands. Do not • Yamaha cannot be held responsible for damage caused by handle this unit with wet hands. Failure to observe this may improper use or modifications to the unit.
- Page 5 Failure to observe this may cause a fire, electric purchased the unit or from qualified Yamaha service personnel. shocks, or burns. • Do not rest your weight on the unit or place heavy objects on it.
- Page 6 Notice and Information Notice Information Indicates points that you must observe in order to Indicates information of note regarding this product. prevent product failure, damage or malfunction and ■ data loss, as well as to protect the environment. About content in this manual •...
-
Page 7: Table Of Contents
Contents Contents Registering the current playback song/station INTRODUCTION (Preset function) ............36 What you can do with this unit ......... 2 Registering to a preset ..........36 Sources that can be played back on this unit ....2 Recalling a preset............36 Supplied accessories ........... -
Page 8: Introduction
INTRODUCTION What you can do with this unit This unit is a network receiver compatible with a network source such as a media server and mobile device. It supports playback from not only analog sources such as a CD player or AM/FM radio, but also from Bluetooth devices and network streaming services. -
Page 9: Supplied Accessories
What you can do with this unit Supplied accessories Check that the following accessories are supplied with the product. Remote control AM antenna (R-N303) FM antenna (R-N303) One of the above is supplied depending on the region of purchase. DAB/FM antenna Batteries (x2) (R-N303D) (AA, R6, UM-3) -
Page 10: Controls And Functions
Controls and functions Front panel BLUETOOTH DISPLAY MODE MEMORY BAND PRESET TUNING VOLUME SELECT BASS TREBLE INPUT PUSH ENTER PHONES SPEAKERS RETURN CONNECT 1 A (power) 8 PRESET j / i Turns on/off (standby) the unit. Recalls a preset radio station (p. 24, 22) or song/ streaming station (p. - Page 11 Controls and functions C PHONES jack Outputs audio to your headphones for private listening. D SPEAKERS A/B Turns on or off the speaker set connected to the SPEAKERS A and/or SPEAKERS B terminals on the rear panel each time the corresponding button is pressed.
-
Page 12: Front Display
Controls and functions Front display STEREO SP MUTE TUNED SP SLEEP Note You can change the brightness level of the front display by pressing DIMMER (p. 8). 1 Information display Displays the current status (such as input name). You can switch the information that is displayed when you press DISPLAY (p. -
Page 13: Rear Panel
Controls and functions Rear panel SERVICE ANTENNA NETWORK SPEAKERS VOLTAGE SELECTOR A OR B:8ΩMIN./SPEAKER 240 V DIGITAL OPTICAL PHONO LINE CLASS 2 WIRING CABLAGE CLASSE 2 COAXIAL (R-N303 except Europe model) * The R-N303 Europe model and R-N303D are as shown below. LINE 1 SERVICE jack 7 COAXIAL jack... -
Page 14: Remote Control
Controls and functions Remote control 5 SPEAKERS A/B Turns on and off the set of speakers connected to the SPEAKERS A and/or SPEAKERS B terminals on the rear panel of this unit when the corresponding key is DIMMER SLEEP pressed. 6 Input selection keys SPEAKERS Select the input source you want to listen to. - Page 15 Before inserting new batteries, wipe the battery compartment clean. Note Yamaha does not guarantee the operation of all Bluetooth devices. F PRESET j / i Recalls a preset radio station (p. 24, 22) or song/ streaming station (p. 36).
-
Page 16: Preparation
PREPARATION Connections Connecting audio devices Make sure to connect L (left) to L, R (right) to R, “+” to “+” and “–” to “–”. If the connections are faulty, no sound will be heard from the speakers, and if the polarity of the speaker connections is incorrect, the sound will be unnatural and lack bass. -
Page 17: Connecting The Speakers
Connections ■ Connecting via banana plug Note (North America, Australia, • Do not bundle audio cables and speaker cables together with the General models only) power cord. Doing so may generate noise. Tighten the knob and then insert the banana plug into the •... -
Page 18: Connecting The Fm/Am Antennas (R-N303)
Connections Connecting the FM/AM antennas Connecting the DAB/FM antenna (R-N303) (R-N303D) Connect the supplied FM/AM antenna to this unit. Connect the supplied DAB/FM antenna to this unit and fix Fix the end of the FM antenna to a wall, and place the AM the antenna ends to a wall. -
Page 19: Connecting The Network Cable
Connections Connecting the network cable Connecting power cord Connect the unit to your router with a commercially- Plug the power cord into an AC wall outlet after all other available STP network cable (CAT-5 or higher straight connections are complete. cable). -
Page 20: Connecting To A Network
Connecting to a network There are several methods to connect the unit to a network. Select a connection method according to your environment. Note • Some security software installed on your PC or the firewall settings of network devices (such as a router) may block the access of the unit to the network devices or the Internet. -
Page 21: Sharing The Ios Device Setting
Connecting to a network ■ Connecting without a wired router or wireless router (access point) Connecting wirelessly to a mobile device Connect wirelessly with Wireless (Wireless Direct) Direct (p. 17) Note When the unit is connected to the network with Wireless Direct, it cannot connect to any other wireless router (access point). To play back contents from the Internet or to update the firmware of this unit over the network, connect the unit to a network with a wired router or wireless router (access point). -
Page 22: Configuring With The Router's Wps Push Button
Connecting to a network Configuring with the router’s WPS Set the wireless network connection push button manually You can easily set up a wireless connection with one push Before performing the following procedure, check the of the WPS button. security method and security key on the wireless router (access point). -
Page 23: Connecting A Mobile Device To The Unit Directly (Wireless Direct)
Connecting to a network Connecting a mobile device to the Use the cursor keys to enter the SSID on the wireless router (access point), and press unit directly (Wireless Direct) RETURN to previous state. Use the cursor keys ( / ) to select a character and Using Wireless Direct, this unit can operate as a wireless the cursor keys ( / ) to move the edit position. -
Page 24: Verify The Network Connection Status
Connecting to a network Verify the network connection status Use the cursor keys ( ) to select desired security method and press RETURN. Perform the following procedure to verify the unit’s Settings connection to a network. None, WPA2-PSK (AES) Note If you select “None”, go to step 10 below. -
Page 25: Configuring Musiccast
MusicCast and on which devices are compatible. button on the front of this unit’s panel for five http://www.yamaha.com/musiccast/ seconds. Note To use MusicCast, download the MusicCast Setup Guide from BLUETOOTH the Yamaha Downloads website. DISPLAY MODE MEMORY BAND PRESET TUNING... -
Page 26: Basic Operation
BASIC OPERATION Playback Playing a source Switching information on the front display When you select a network source or Bluetooth as the input source, you can switch playback information on the DIMMER SLEEP front display. SPEAKERS A/B SPEAKERS OPTICAL COAXIAL BAND TUNING LINE 1... -
Page 27: Using The Sleep Timer
Playback Using the sleep timer Use this feature to automatically set this unit to standby mode after a certain amount of time. The sleep timer is useful when you are going to sleep while this unit is playing. DIMMER SLEEP (power) SLEEP SPEAKERS... -
Page 28: Listening To Fm/Am Radio
Listening to FM/AM radio ■ Improving FM reception (FM mode) Note If the signal from the station is weak and the sound quality The R-N303D does not include an AM tuner. is not good, set the FM band reception mode to monaural mode to improve reception. - Page 29 Listening to FM/AM radio ■ Registering a radio station manually BAND DIMMER SLEEP TUNING MEMORY PRESET PRESET j / i MEMORY SPEAKERS CLEAR MODE DISPLAY OPTICAL COAXIAL LINE 1 LINE 2 PHONO TUNER BLUETOOTH ENTER TUNER BAND TUNING BAND HOME RETURN MEMORY PRESET...
- Page 30 Listening to FM/AM radio ■ Recalling a preset station Press TUNER to select “TUNER” as the input You can recall preset stations that you registered using source. either an automatic station preset or manual station preset. Press OPTION. Use the cursor keys ( ) to select “Clear DIMMER SLEEP...
-
Page 31: Radio Data System Tuning (Only For U.k. And Europe Models)
Listening to FM/AM radio Radio Data System tuning (Only for Note U.K. and Europe models) “Program Service”, “Program Type”, “Radio Text”, and “Clock Time” are not displayed if the radio station does not provide the Radio Data System service. Radio Data System is a data transmission system used by FM stations in many countries. -
Page 32: Listening To Dab Radio (R-N303D)
Listening to DAB radio (R-N303D) DAB (Digital Audio Broadcasting) uses digital signals for clearer sound and more stable reception compared to analog signals. This unit can also receive DAB+ (an upgraded version of DAB) that allows for more stations using MPEG-4 audio codec (AAC+), which has a more efficient transmission method. -
Page 33: Using Preset Function
Listening to DAB radio (R-N303D) Press PRESET j / i to select the preset Using preset function number to which the station will be You can register up to 40 DAB radio stations as presets. registered. Once you have registered stations, you can easily tune in When you select a preset number to which no station to them by recalling the presets. -
Page 34: Displaying The Dab Information
Listening to DAB radio (R-N303D) ■ Clearing preset DAB radio stations Press TUNER to select “TUNER” as the input Clear DAB radio stations registered to the preset numbers. source. Press TUNER to select “TUNER” as the input Tune in to the desired DAB radio station. source. -
Page 35: Checking Reception Strength Of Each Dab Channel Label
Listening to DAB radio (R-N303D) ■ Checking reception strength of each DAB frequency information This unit supports Band III (174 to 240 MHz) only. DAB channel label Channel Channel Frequency Frequency You can check reception strength of each DAB channel label label label (0 [none] to 100 [best]). -
Page 36: Playing Back Music Via Bluetooth
Playing back music via Bluetooth You can play back music files stored on a Bluetooth On the Bluetooth device, select the unit’s device (such as mobile device) on the unit. model name from the available device list. Please also refer to the owner’s manual of your Bluetooth After pairing has been completed and the unit is device. -
Page 37: Disconnecting A Bluetooth Connection
Note obstacles, radio wave conditions and the type of equipment. • Yamaha does not guarantee all wireless connections You can use the playback keys on the remote control to control between this unit and devices compatible with Bluetooth playback. -
Page 38: Playing Back Music Stored On Media Servers (Pcs/Nas)
Playing back music stored on media servers (PCs/NAS) You can play back music files stored on your PC or Click “Turn on media streaming”. DLNA-compatible NAS on the unit. This unit Note Select “Allowed” from the drop-down list • To use this function, the unit and your PC/NAS must be next to the unit’s model name. -
Page 39: Playback Of Pc Music Contents
Playing back music stored on media servers (PCs/NAS) Playback of PC music contents Keys Function Select a music file or folder. Cursor keys Follow the procedure below to operate the PC music contents and start playback. Starts playback if pressed while content is selected. -
Page 40: Listening To Internet Radio
Listening to Internet radio You can listen to Internet radio stations from all over the world. Use the cursor keys to select an item and Note press ENTER. • To use this function, the unit must be connected to the Internet If an Internet radio station is selected, playback starts (p. -
Page 41: Playing Back Music With Airplay
Playing back music with AirPlay Playing back music with AirPlay The AirPlay function allows you to play back iPhone/ Note iPad/iPod touch/iTunes music on the unit via network. • If you press the DISPLAY repeatedly, you can switch the playback information on the front display (p. 20). •... -
Page 42: Registering The Current Playback Song/Station (Preset Function)
Registering the current playback song/station (Preset function) When you select a network source as the input source, you Press MEMORY again to register preset. can register the current playback song or streaming station Note as a preset. You can program up to 40 such presets. You can then easily recall any preset song/station by To cancel registration, press RETURN. -
Page 43: Advanced Operation
ADVANCED OPERATION Configuring playback settings for different playback sources (OPTION menu) You can configure separate playback settings for different playback sources. This menu allows you to easily configure settings during playback. OPTION menu items CLEAR MODE DISPLAY Note Cursor keys ENTER Available items vary depending on the selected input source. - Page 44 Configuring playback settings for different playback sources (OPTION menu) ■ Signal Info. Displays information about audio signal. Choices Audio format of the input signal FORMAT The number of samples per second of the input SAMPLING digital signal Note To switch the information on the front display, press the cursor keys ( / ) repeatedly.
-
Page 45: Configuring Various Functions (Setup Menu)
Configuring various functions (SETUP menu) Configuring various functions (SETUP menu) You can configure the unit’s various functions. Press SETUP. CLEAR MODE DISPLAY SETUP SP A Network Cursor keys Use the cursor keys ( ) to select and ENTER ENTER press ENTER. HOME RETURN RETURN... -
Page 46: Network
If the unit is operating in MusicCast Extend mode, “Extend” will be displayed. For details on Extend mode, see the MusicCast Specifies the IP address of the default gateway. GATEWAY Setup Guide on the Yamaha website. Specifies the IP address of the primary DNS DNS P server. -
Page 47: Bluetooth
Configuring various functions (SETUP menu) ■ Bluetooth Standby (Network Standby) Selects whether the unit can be turned on from other network devices (network standby). Configures the Bluetooth settings. Disables the network standby function. ■ On/Off Enables/disables the Bluetooth function (p. 30). Enables the network standby function. -
Page 48: Initialvolume
Configuring various functions (SETUP menu) InitialVolume Sets the initial volume when the receiver is turned on. Setting range Off, Mute, 1 to 99 (1step increments), Max Default AutoPowerStby (Auto Power Standby) Enables/disables the auto-standby function. If you do not operate the unit for the specified time, the unit will automatically go into standby mode. -
Page 49: Configuring The System Settings (Advanced Setup Menu)
Press SELECT/ENTER to select a setting. unit using remote controllers included with certain Press A (power) to set the unit to turn off and Yamaha players, set this to “AUTO”. turn it on again. Settings The new settings take effect. -
Page 50: Updating The Firmware (Update)
Configuring the system settings (ADVANCED SETUP menu) Updating the firmware (UPDATE) New firmware that provides additional features or product improvements will be released as needed. If the unit is connected to the Internet, you can download the firmware via the network. For details, refer to the information supplied with updates. -
Page 51: Updating The Unit's Firmware
Updating the unit’s firmware Updating the unit’s firmware New firmware that provides additional features or product improvements will be released as needed. If the unit is connected to the Internet, you can download the firmware via the network and update it. Notice •... -
Page 52: Additional Information
As a safety precaution, capability to turn on the power The power does not three times consecutively. If the unit is in is disabled. Contact your nearest Yamaha dealer or turn on. this state, the STANDBY/ON indicator on service center to request repair. - Page 53 Troubleshooting Problem Possible cause Remedy page The protection circuitry has been activated Set the speaker impedance to match your speakers. The sound suddenly because of a short circuit, etc. goes off. Check that the speaker wires are not touching each other and then turn the power of this unit back on.
- Page 54 Troubleshooting ■ AM reception (R-N303) Problem Possible cause Remedy page The unit is picking up noise from sources In some environments, it may be difficult to The AM radio such as a fluorescent light or a motor. completely eliminate noise. However, using a reception strength is commercially-available outdoor antenna may help to poor, and noise can...
- Page 55 Troubleshooting ■ Bluetooth Problem Possible cause Remedy page The “Bluetooth” setting in the settings Set the “Bluetooth” setting in the settings menu to The unit cannot menu is “Off”. “On”. connect to a Bluetooth device. The unit is connected to a different Unpair the Bluetooth device that is currently Bluetooth device.
- Page 56 Troubleshooting ■ Network Problem Possible cause Remedy page The network information (IP address) has Enable the DHCP server function on the router. In the The network function not been properly acquired. settings menu of this unit, set “DHCP” to “On". cannot be used.
- Page 57 Troubleshooting Problem Possible cause Remedy page The network connection may not be good. Try connecting again after a while. The firmware on this — unit failed to update via the network. MAC address filtering may have been This unit cannot connect to the Internet while MAC The unit cannot enabled on the wireless LAN router address filtering is enabled on the access point.
-
Page 58: Supported Devices And File Formats
Supported devices and file formats The following devices and file formats can be used by thisunit. Supported devices ■ ® Bluetooth devices • This unit supports the A2DP audio profile. • This unit supports the AVRCP control profile. • Not all Bluetooth devices are guaranteed to work with this unit. ■... -
Page 59: Specifications
Specifications Specifications • Maximum input signal Network CD, etc. (1 kHz, 0.5% THD)..........2.2 V • Input jack: NETWORK x 1 (100Base-TX/10Base-T) • Output level/output impedance • PC client function CD, etc. (input 1 kHz, 500 mV) • Compatible with DLNA ver. 1.5 LINE OUT ............ - Page 60 Including legs and protrusions • Weight ..............7.2 kg (15.9 lbs) * The contents of this manual apply to the latest specifications as of the publishing date. To obtain the latest manual, access the Yamaha website then download the manual file.
-
Page 61: Trademarks
AirPlay, iPad, iPhone, iPod, and iPod touch are information on GPL/LGPL open source software, how to trademarks of Apple Inc., registered in the U.S. and other obtain it, and the GPL/LGPL license, refer to the Yamaha countries. Corporation website iPad Air and iPad mini are trademarks of Apple Inc. -
Page 62: Index
Index InitialVolume, SETUP menu........42 Initiate Scan, OPTION menu........37 ADVANCED SETUP menu.......... 43 Internet radio..............34 AirPlay................35 IP Address, Network, SETUP menu......40 AM antenna connection..........12 iPod content playback, AirPlay ........35 AM tuning ..............22 iTunes content playback, AirPlay......... 35 ANTENNA terminals............ - Page 63 Index SETUP menu ..............39 Shuffle playback, AirPlay..........35 Shuffle playback, PC music content ......33 Signal Info., OPTION menu ........37, 38 Sleep timer ..............21 Speaker connection ............11 SPEAKERS terminals ............ 7 Standby (Bluetooth Standby), Bluetooth, SETUP menu ............41 Standby (Network Standby), Network, SETUP menu ............