Table of Contents
Advertisement
Quick Links
Advertisement
Table of Contents

Related Manuals for Yamaha R-N402


Summary of Contents for Yamaha R-N402
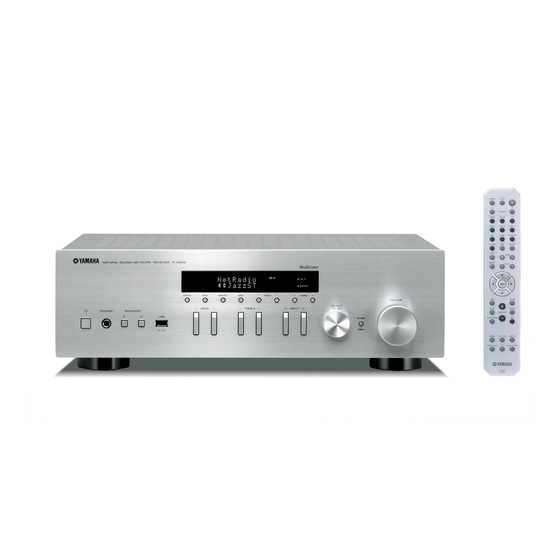
- Page 1 Network Receiver R-N402/R-N402D OWNER’S MANUAL...
- Page 2 Yamaha will not be held responsible for any damage resulting from use ■ Special Instructions for U.K. Model of this unit with a voltage other than specified.
-
Page 3: Table Of Contents
..............41 Connecting the speakers ..........11 Connecting a USB storage device ....... 41 Connecting the FM/AM antennas (R-N402) ....12 Playback of USB storage device contents ....41 Connecting the DAB/FM antenna (R-N402D).... 12 Registering the current playback song/station Connecting the network cable ........ -
Page 4: Introduction
INTRODUCTION What you can do with this unit This unit is a network receiver compatible with a network source such as a media server and mobile device. It supports playback from not only analog sources such as a CD player but also Bluetooth devices and network streaming services. -
Page 5: Mastering Useful Apps (Musiccast Controller)
• Select an Internet radio station • Play music stored on mobile devices • Play music on streaming service • Distribute and receive audio between the unit and other Yamaha MusicCast supported devices See MusicCast Setup Guide for details. Supplied accessories Check that the following accessories are supplied with the product. -
Page 6: Controls And Functions
Controls and functions Front panel BLUETOOTH DISPLAY MODE MEMORY BAND PRESET TUNING VOLUME SELECT BASS TREBLE INPUT PUSH ENTER PHONES SPEAKERS RETURN CONNECT 1 A (power) 8 PRESET j / i Turns on/off (standby) the unit. Recalls a preset radio station (p. 24, 28, 31) or song/ streaming station (p. - Page 7 Controls and functions C PHONES jack Outputs audio to your headphones for private listening. D SPEAKERS A/B Turns on or off the speaker set connected to the SPEAKERS A and/or SPEAKERS B terminals on the rear panel each time the corresponding button is pressed.
-
Page 8: Front Display
Controls and functions Front display [AM radio is available only for R-N402.] STEREO SP MUTE TUNED SP SLEEP You can change the brightness level of the front display by pressing DIMMER (p. 8). 1 Information display Displays the current status (such as input name). -
Page 9: Rear Panel
Controls and functions Rear panel [AM radio is available only for R-N402.] WIRELESS NETWORK ANTENNA MAINS SPEAKERS VOLTAGE SELECTOR 240 V DIGITAL OPTICAL LINE COAXIAL (R-N402) 1 NETWORK jack 5 OPTICAL jack For connecting to a network with a network cable For connecting to audio components equipped with (p. -
Page 10: Remote Control
Bluetooth devices and USB devices. 1 Infrared signal transmitter Sends infrared signals. Note 2 A (power) Yamaha does not guarantee the operation of all Bluetooth and Turns on/off (standby) the unit. USB devices. 3 SLEEP Sets the sleep timer (p. 21). -
Page 11: Installing Batteries
Controls and functions E DISPLAY Selects the information displayed on the front display (p. 20). F Radio keys Operate the radio. BAND Sets the radio tuner band when TUNER is selected as the input source (p. 22, 26, 30). TUNING jj / ii Selects the tuning frequency (p. -
Page 12: Preparation
WIRELESS NETWORK ANTENNA SPEAKERS DIGITAL OPTICAL LINE COAXIAL (R-N402) Audio output CD player Speakers A Speakers B Only PCM signals can be input to the digital (OPTICAL/COAXIAL) jacks of this unit. Note Do not bundle audio cables and speaker cables together with the power cable. Doing so may generate noise. -
Page 13: Connecting The Speakers
Connections ■ Bi-wire connection Connecting the speakers Bi-wire connection separates the woofer from the combined midrange and tweeter section. A bi-wire ■ Connecting speaker cables compatible speaker has four binding post terminals. These aRemove approximately 10 mm (3/8") of insulation two sets of terminals allow the speaker to be split into two from the ends of the speaker cable and twist the bare independent sections. -
Page 14: Connecting The Fm/Am Antennas (R-N402)
Connections Connecting the FM/AM antennas Connecting the DAB/FM antenna (R-N402) (R-N402D) Connect the supplied FM/AM antenna to this unit. Connect the supplied DAB/FM antenna to this unit and fix Fix the end of the FM antenna to a wall, and place the AM the antenna ends to a wall. -
Page 15: Connecting The Network Cable
Connections Connecting the network cable Connecting power cable Connect the unit to your router with a commercially- Plug the power cable into an AC wall outlet after all other available STP network cable (CAT-5 or higher straight connections are complete. cable). -
Page 16: Connecting To A Network
If you turn on the power to the unit right after you purchase or initialize it, the unit will automatically use the network settings of the R-N402 XXXXXX iOS device (iPhone/iPad/iPod touch) and try to connect to a wireless LAN (unless the unit is already connected to a wired LAN). -
Page 17: Sharing The Ios Device Setting
Connecting to a network Sharing the iOS device setting On the iOS device, select the unit as the AirPlay speaker in the Wi-Fi screen. You can easily setup a wireless connection by applying the connection settings on iOS devices (iPhone/iPad/iPod Example (iOS 9) touch). -
Page 18: Using The Wps Push Button Configuration
Connecting to a network Using the WPS push button About WPS WPS (Wi-Fi Protected Setup) is a standard established by the configuration Wi-Fi Alliance, which allows easy establishment of a wireless home network. You can easily set up a wireless connection with one push of the WPS button. -
Page 19: Set The Wireless Network Connection Manually
Connecting to a network Set the wireless network Use the cursor keys ( / ) to select connection manually “Security” and press ENTER. Before performing the following procedure, check the SECURITY security method and security key on the wireless router ¡WPA2-PSK(AES) (access point). -
Page 20: Connecting A Mobile Device To The Unit Directly (Wireless Direct)
Connecting to a network Connecting a mobile device to the Use the cursor keys ( / ) to select desired unit directly (Wireless Direct) security method and press RETURN. Settings Using Wireless Direct, this unit can operate as a wireless None, WPA2-PSK (AES) network access point that mobile devices can directly connect to. -
Page 21: Verify The Network Connection Status
Connecting to a network Verify the network connection status Perform the following procedure to verify the unit’s connection to a network. MEMORY PRESET Cursor keys / ENTER ENTER ENTER HOME RETURN RETURN SETUP OPTION SETUP VOLUME NOW PLAYING MUTE Press SETUP. -
Page 22: Basic Operation
BASIC OPERATION Playback Playing a source Switching information on the front display When you select a network source or USB as the input DIMMER SLEEP source, you can switch playback information on the front display. SPEAKERS A/B SPEAKERS COAXIAL OPTICAL Input selection LINE 1 LINE 2... -
Page 23: Using The Sleep Timer
Playback Using the sleep timer Use this feature to automatically set this unit to standby mode after a certain amount of time. The sleep timer is useful when you are going to sleep while this unit is playing. DIMMER SLEEP (power) SLEEP SPEAKERS... -
Page 24: Listening To Fm/Am Radio (R-N402)
Listening to FM/AM radio (R-N402) ■ Improving FM reception (FM mode) FM/AM tuning If the signal from the station is weak and the sound quality is not good, set the FM band reception mode to monaural mode to improve reception. - Page 25 Listening to FM/AM radio (R-N402) ■ Registering a radio station manually DIMMER SLEEP DIMMER SLEEP SPEAKERS COAXIAL OPTICAL SPEAKERS LINE 1 LINE 2 LINE 3 COAXIAL OPTICAL BLUETOOTH LINE 1 LINE 2 LINE 3 TUNER BAND DISPLAY BLUETOOTH TUNER BAND...
- Page 26 Listening to FM/AM radio (R-N402) ■ Recalling a preset station You can recall preset stations that you registered using Press TUNER to select “TUNER” as the input either an automatic station preset or manual station preset. source. Press OPTION. DIMMER SLEEP Use the cursor keys (...
-
Page 27: Radio Data System Tuning (Only For U.k. And Europe Models)
Listening to FM/AM radio (R-N402) Note Radio Data System tuning (Only “Program Service”, “Program Type”, “Radio Text”, and “Clock for U.K. and Europe models) Time” are not displayed if the radio station does not provide the Radio Data System service. -
Page 28: Listening To Fm Radio (R-N402D)
Listening to FM radio (R-N402D) ■ Improving FM reception (FM mode) FM tuning If the signal from the station is weak and the sound quality is not good, set the FM band reception mode to monaural mode to improve reception. DIMMER SLEEP DIMMER... - Page 29 Listening to FM radio (R-N402D) ■ Registering a radio station manually DIMMER SLEEP DIMMER SLEEP SPEAKERS COAXIAL OPTICAL SPEAKERS LINE 1 LINE 2 LINE 3 COAXIAL OPTICAL BLUETOOTH LINE 1 LINE 2 LINE 3 TUNER BAND DISPLAY BLUETOOTH TUNER BAND MODE TUNER BAND...
- Page 30 Listening to FM radio (R-N402D) ■ Recalling a preset station You can recall preset stations that were registered using Press TUNER to select “TUNER” as the input automatic station preset or manual station preset. source. Press OPTION. DIMMER SLEEP Use the cursor keys ( / ) to select “Clear SPEAKERS Preset”...
-
Page 31: Radio Data System Tuning (Only For U.k. And Europe Models)
Listening to FM radio (R-N402D) Program service name Program Service Radio Data System tuning (Only Current program type Program Type for U.K. and Europe models) Information on the current program Radio Text Radio Data System is a data transmission system used by Current time Clock Time FM stations in many countries. -
Page 32: Listening To Dab Radio (R-N402D)
Listening to DAB radio (R-N402D) DAB (Digital Audio Broadcasting) uses digital signals for clearer sound and more stable reception compared to analog signals. This unit can also receive DAB+ (an upgraded version of DAB) that allows for more stations using MPEG-4 audio codec (AAC+), which has a more efficient transmission method. -
Page 33: Using Preset Function
Listening to DAB radio (R-N402D) Using preset function Press PRESET j / i to select the preset number to which the station will be You can register up to 40 DAB radio stations as presets. registered. Once you have registered stations, you can easily tune in When you select a preset number to which no station to them by recalling the presets. -
Page 34: Displaying The Dab Information
Listening to DAB radio (R-N402D) ■ Clearing preset DAB radio stations Clear DAB radio stations registered to the preset numbers. Press TUNER to select “TUNER” as the input source. Press TUNER to select “TUNER” as the input source. Tune in to the desired DAB radio station. Press BAND to select the DAB band. -
Page 35: Checking Reception Strength Of Each Dab Channel Label
Listening to DAB radio (R-N402D) ■ DAB frequency information Checking reception strength of This unit supports Band III (174 to 240 MHz) only. each DAB channel label Channel Channel Frequency Frequency label label You can check reception strength of each DAB channel 174.928 MHz 208.064 MHz label (0 [none] to 100 [best]). -
Page 36: Playing Back Music Via Bluetooth
Playing back music via Bluetooth You can play back music files stored on a Bluetooth device (such as mobile device) on the unit. On the Bluetooth device, select the unit’s Please also refer to the owner’s manual of your Bluetooth model name from the available device list. -
Page 37: Disconnecting A Bluetooth Connection
• Yamaha does not guarantee all wireless connections You can use the playback keys on the remote control to control between this unit and devices compatible with Bluetooth playback. -
Page 38: Playing Back Music Stored On Media Servers (Pcs/Nas)
Playing back music stored on media servers (PCs/NAS) You can play back music files stored on your PC or DLNA-compatible NAS on the unit. Click “Turn on media streaming”. This unit Notes • To use this function, the unit and your PC/NAS must be connected to the same router (p. -
Page 39: Playback Of Pc Music Contents
Playing back music stored on media servers (PCs/NAS) Use the following remote control keys to control Playback of PC music contents playback. Follow the procedure below to operate the PC music Keys Function contents and start playback. Select a music file or folder. Cursor keys Note Starts playback if pressed while... -
Page 40: Listening To Internet Radio
Listening to Internet radio You can listen to Internet radio stations from all over the world. Notes Use the cursor keys to select an item and • To use this function, the unit must be connected to the Internet press ENTER. (p. -
Page 41: Registering Favorite Internet Radio Stations (Bookmarks)
Listening to Internet radio Registering favorite Internet radio stations (bookmarks) Registering your favorite Internet radio stations as “Bookmarks” enables you to access those stations from the “Bookmarks” folder on the front display. Select any Internet radio station on the unit. This operation is necessary to register the radio station for the first time. -
Page 42: Playing Back Music With Airplay
Playing back music with AirPlay The AirPlay function allows you to play back iPhone/ iPad/iPod touch/iTunes music on the unit via network. On the iPod/iTunes, click (tap) the AirPlay icon and select the unit (network name of the unit) as the audio output device. iTunes iTunes (example) iPod (example) -
Page 43: Playing Back Music Stored On A Usb Storage Device
Playing back music stored on a USB storage device You can play back music files stored on a USB storage device on the unit. Refer to the instruction manuals for the USB storage device for more information. Notes • Do not connect devices other than USB mass storage class devices (such as USB chargers or USB hubs), PCs, card readers, an external HDD, etc. - Page 44 Playing back music stored on a USB storage device ■ Repeat/shuffle settings You can configure the repeat/shuffle settings for playback Use the cursor keys to select an item and of USB storage device contents. press ENTER. If a song is selected, playback starts and the playback information is displayed.
-
Page 45: Registering The Current Playback Song/Station (Preset Function)
Registering the current playback song/station (Preset function) When you select a network or USB source as the input source, you can register the current playback song or streaming station as a preset. You can program up to 40 such presets. You can then easily recall any preset song/station by selecting its preset number. -
Page 46: Advanced Operation
Cursor keys ENTER ENTER Vol.Interlock iTunes/iPod via AirPlay. ENTER *1 Only for R-N402D HOME RETURN *2 Only for R-N402 UK and Europe models RETURN SETUP OPTION OPTION VOLUME ■ Volume Trim NOW PLAYING MUTE Corrects volume differences between input sources. If you are bothered by volume differences when switching between input sources, use this function to correct it. -
Page 47: Configuring Various Functions (Setup Menu)
Configuring various functions (SETUP menu) You can configure the unit’s various functions. MEMORY Use the cursor keys ( / ) to select a menu. PRESET SETUP SP A Cursor keys ENTER ENTER Max Volu e ENTER HOME RETURN RETURN Press ENTER. SETUP OPTION SETUP... -
Page 48: Network
Configuring various functions (SETUP menu) ■ IP Address Network Configures the network parameters (such as IP address). Configures the network settings. DHCP Select whether to use a DHCP server. ■ Connection Selects the network connection method. Does not use a DHCP server. Configure the network parameters manually. -
Page 49: Bluetooth
For information on selecting a menu option, refer to the steps described on page 45. Disables the Bluetooth standby function. R-N402 (example) Enables the Bluetooth standby function. (The unit consumes more power than when “Off” is On (default) NET NAME SP A selected.) -
Page 50: Balance
Configuring various functions (SETUP menu) Balance Adjusting the sound output balance of the left and right speakers to compensate for sound imbalance caused by speaker locations or listening room condition. Setting range L+10 to R+10 Max Volume Sets the maximum volume to prevent excessive loudness. Setting range 1 to 99 (1step increments), Max Default... -
Page 51: Configuring The System Settings (Advanced Setup Menu)
VOLUME SELECT BASS TREBLE INPUT PUSH ENTER PHONES SPEAKERS The remote control for certain Yamaha CD players enables you to RETURN CONNECT turn the power to this unit on or off. Setting tuner frequency step (TU) (power) DISPLAY SELECT/ENTER Selects the step size for locating tuner frequencies. -
Page 52: Updating The Firmware (Update)
Configuring the system settings (ADVANCED SETUP menu) Updating the firmware (UPDATE) New firmware that provides additional features or product improvements will be released as needed. If the unit is connected to the Internet, you can download the firmware via the network. For details, refer to the information supplied with updates. -
Page 53: Updating The Unit's Firmware Via The Network
Updating the unit’s firmware via the network New firmware that provides additional features or product improvements will be released as needed. If the unit is connected to the Internet, you can download the firmware via the network and update it. Notes •... -
Page 54: Additional Information
The protection circuitry has been activated As a safety precaution, capability to turn on the power The power does not three times consecutively. If the unit is in is disabled. Contact your nearest Yamaha dealer or turn on. — this state, the STANDBY/ON indicator on service center to request repair. - Page 55 Troubleshooting Problem Cause Remedy page Incorrect cable connections. Connect the cables properly. If the problem persists, Only the speaker on the cables may be defective. one side can be heard. Incorrect setting for the speaker balance. Set the speaker balance (“Balance” in the “SETUP” menu) to the appropriate setting.
- Page 56 Troubleshooting ■ AM reception (R-N402) Problem Cause Remedy page The signal is weak or the antenna Tighten the AM antenna connections and orient it for The desired station — connections are loose. the best reception. cannot be tuned in automatically.
- Page 57 Troubleshooting ■ Bluetooth Problem Cause Remedy page The Bluetooth function of the unit is Enable the Bluetooth function in the “SETUP” menu. A Bluetooth disabled. connection cannot be established. Another Bluetooth device is already Terminate the current Bluetooth connection and then connected to the unit.
-
Page 58: Usb And Network
Troubleshooting ■ USB and network Problem Cause Remedy page The USB device is not connected to the Turn off the unit, reconnect your USB device, and The unit does not — USB jack securely. turn the unit on again. detect the USB device. -
Page 59: Error Indications On The Front Display
Error indications on the front display Message Cause Remedy Access to the PC is denied. Configure the sharing settings and select the unit as a device to Access denied which music contents are shared (p. 36). The unit cannot access the USB device. Turn off the unit and reconnect your USB device. -
Page 60: Specifications
* The contents of this manual apply to the latest specifications as of • Signal to noise ratio (IHF-A) the publishing date. To obtain the latest manual, access the Yamaha CD, etc. (input shorted, 500 mV)......100 dB or more website then download the manual file. -
Page 61: Trademarks
For iPod touch (5th and 6th generation) information on GPL/LGPL open source software, how to (as of June 2016) obtain it, and the GPL/LGPL license, refer to the Yamaha Corporation website (http://download.yamaha.com/sourcecodes/musiccast/). DLNA™ and DLNA CERTIFIED™ are trademarks or registered trademarks of Digital Living Network Alliance. - Page 62 Information for Users on Collection and Disposal of Old Equipment and Used Batteries These symbols on the products, packaging, and/or accompanying documents mean that used electrical and electronic products and batteries should not be mixed with general household waste. For proper treatment, recovery and recycling of old products and used batteries, please take them to applicable collection points, in accordance with your national legislation and the Directives 2002/96/EC...
- Page 63 We, Yamaha Music Europe GmbH hereby declare that this unit is in compliance with the essential requirements and other relevant provisions of Directive 1999/5/EC. Nous, le fabricant Yamaha Music Europe GmbH, déclarons que cet appareil est conforme aux exigences essentielles et autres dispositions pertinentes de la Directive 1999/5/EC.
- Page 64 Yamaha Global Site http://www.yamaha.com/ Yamaha Downloads http://download.yamaha.com/ Manual Development Department © 2016 Yamaha Corporation Published 06/2016 IP-A0 Printed in Malaysia ZV01410...