Table of Contents
Advertisement
Quick Links
Advertisement
Table of Contents

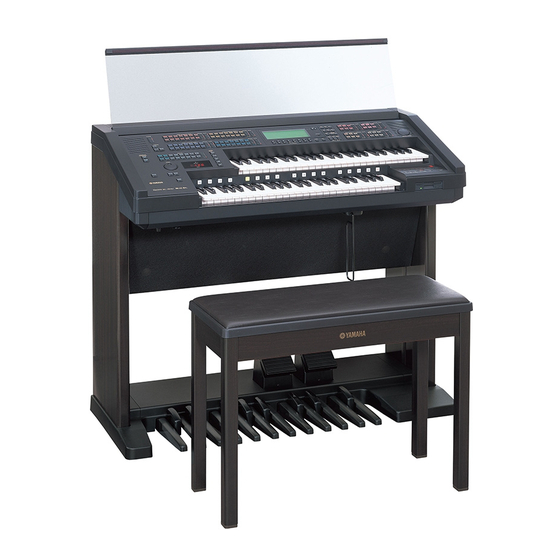
Related Manuals for Yamaha Electone EL-900


Summary of Contents for Yamaha Electone EL-900
-
Page 2: Special Message Section
SPECIFICATIONS SUBJECT TO CHANGE: The information contained in this manual is believed to be correct at the time of printing. However, Yamaha reserves the right to change or modify any of the specifications without notice or obligation to update existing units. - Page 3 • Always save data to a floppy disk frequently, in order to help prevent the loss of important data due to a malfunction or user operating error. Yamaha cannot be held responsible for damage caused by improper use or modifications to the instrument, or data that is lost or destroyed.
-
Page 4: Included Items
The GM mark is affixed to all software and hardware products that support the General MIDI standard. XG is a new MIDI format created by Yamaha which significantly improves and expands upon the General MIDI standard by providing a greater variety of high-quality voices plus considerably enhanced effect operationムwhile being fully compatible with GM. -
Page 5: Table Of Contents
Table of Contents Panel Layout ... 6 Main Features ... 9 1 Quick Introductory Guide ... 1 0 1 Getting Started ... 10 2 Basic Registrations ... 11 3 Registration Menu Disk ... 12 4 Basic Operation ... 19 5 Using the LCD Display ... 20 6 Voice List ... -
Page 6: Panel Layout
Panel Layout Front Panel Monitor Speaker REVERB (page 52) SUSTAIN (page 55) KEYBOARD PERCUSSION Rhythm Section (page 59) KEYBOARD PERCUSSION LOWER KEYBOARD VOICE 1, 2 (page 26) UPPER KEYBOARD VOICE 1 REVERB STRINGS BRASS CLARI- SAXO- CHORUS PHONE ORGAN PIANO GUITAR VIBRA- COSMIC... -
Page 7: Music Disk Recorder
LCD Display DISPLAY SELECT (page 20) (page 8) VOICE EFFECT DISPLAY PAGE FOOT REGIST. SHIFT RHYTHM PROGRAM CONTRAST VOICE EDIT PATTERNSEQUENCE U. FLUTE L. FLUTE VOICE VOICE COARSE HOLD DATA CONTROL DISPLAY SELECT LEAD VOICE 1, 2 (page 26) LEAD VOICE 1 LEAD VOICE 2 BRILLIANCE VOLUME... - Page 8 LCD/Display Select LCD Display (page 20) DATA CONTROL DATA CONTROL Buttons (page 21) Others Monitor Speakers Jacks (page 180) Speaker Unit Page Buttons (page 28) VOICE DISPLAY Button (page 28) EFFECT SET Button (page 48) VOICE EFFECT A. B. C. DISPLAY M.
-
Page 9: Main Features
Main Features Your Yamaha Electone is packed with many sophisticated functions. Yet is amazingly easy to use. The main features are briefly described here so that you can quickly understand the capabilities of your Electone. Included among the main features are:... -
Page 10: Quick Introductory Guide
Only use the voltage specified as correct for the Electone. The required voltage is printed on the name plate of the Electone. Yamaha products are manufactured specifically for the supply voltage in the area where they are to be sold. If you... -
Page 11: Basic Registrations
Set the MASTER VOLUME control. The MASTER VOLUME control is an overall control which affects the volume of the entire instrument. MASTER VOLUME Press the Expression pedal down with your foot. Once you have set the MASTER VOLUME control to a suitable level, you can use the Expression pedal to change the volume with your foot as you play. -
Page 12: Registration Menu Disk
NOTE: See page 87 for more information on the Music Disk Recorder. NOTE: See page 14 for the complete list of the Registration Menus. NOTE: While you are in the Voice Edit mode or Rhythm Pattern/Sequence Program mode, the Registration Menus cannot be displayed on the LCD. - Page 13 Select one of the registrations shown on the LCD by pressing the appropriate Data Control button. Up to 16 registration selections are shown on the LCD, and the 16 Data Control buttons correspond to those selections. The Data Control buttons are used to select voices, rhythms and various functions.
-
Page 14: Registration Menu List
Registration Menu List Page 1: Strings Orchestra1 Orchestra2 Orchestra3 Orchestra4 Orch.Pops1 Orch.Pops2 Orch.Pops3 Musical Strs.Ens.1 Strs.Ens.2 Strs.Ens.3 Strs.Ens.4 Solo Vln. Strs.Quart Pizz.Strs. Pizz.Ens. The numbers in the parentheses indicate that the “feet” settings for the assigned voice are different from the default. 1 Strings 1 2 Strings 2 5 Horn 3... - Page 15 Page 2: Brass 1 Brass 1 (16') Marching Band 1 5 Brass 1 1 Glockenspiel Marching Band 2 5 Brass 1 1 Tutti 3 BigBand1 5 Trombone 2 1 Tutti 3 BigBand2 5 Guitar 2 1 Trombone 2 BigBand3 5 Sax Ensemble 1 1 Muted Trombone BigBand4 5 Piano 1...
- Page 16 Page 3: Lead Wood.Ens. Menuet Swan PolkaEns.1 PolkaEns.2 Pops1 Pops2 Pops3 Jazz.Cla. Folklore Folk.Harm. BluesHarp Tango Chanson Jazz.Org.1 Jazz.Org.2 1 Clarinet 1 5 Bassoon 2 5 Harp 5 Tremolo Strings 5 Horn 3 2 Glockenspiel 5 English Horn 5 Elec. Piano 1 5 Pizzicato Strings 5 Elec.
- Page 17 Page 4: Decay 1 Piano 1 Piano1 5 Piano 1 1 Piano 2 Piano2 5 Piano 2 1 Elec. Piano 1 E.Piano1 5 Elec. Piano 1 1 Elec. Piano 2 E.Piano2 5 Elec. Piano 2 1 Honky Tonk Piano HonkyTonk 5 Honky Tonk Piano Country 5 Guitar 1...
- Page 18 Page 5: Synth Fusion1 Fusion2 Dance1 Dance2 Dance3 Dance4 Dance5 Funk Pops1 Pops2 JazzySax. Jazz.Waltz Orch.Syn.1 Orch.Syn.2 Cosmic1 Cosmic2 5 Elec. Guitar 2 1 Elec. Guitar 1 5 Elec. Piano 1 6 Strings 2 1 Synth. Brass 2 5 Elec. Guitar 1 1 Brass 3 2 Brass 3 (16') 5 Elec.
-
Page 19: Basic Operation
4 Basic Operation Select the keyboard to play Select the voice (Voice Menu) Voice Edit Finely adjust the voice (User Voice) (Voice Condition) * The Controls and Effects may be applied differently depending on the selected type of Controls Add effects and Effects. -
Page 20: Using The Lcd Display
5 Using the LCD Display This section introduces you the convenient control functions of the LCD display. The LCD display lets you see at a glance the current settings and provides easy-to-understand graphic representation of all parameters. Selecting a voice/rhythm Press the panel voice/rhythm button which you want to use (For example, press the STRINGS button in the Upper Keyboard Voice 1 section). - Page 21 Using Data Control Buttons The Data Control buttons are used to select 1 a voice/rhythm or function shown on the display. Press the STRINGS button in the Upper Keyboard Voice 1 section once again. This LCD changes to show some of the other ways in which the Data Control buttons are used to control Electone functions.
- Page 22 The Summary of the LCD Operation 1) Pressing Panel Buttons Selecting voices or setting up the Voice Condition Selecting rhythms or setting up the Rhythm Condition Setting the Reverb effect Setting the Sustain Setting the User Keyboard Percussion 3. To Actually Change the Settings 1.
- Page 23 LCD Display DATA CONTROL Data Control Buttons Hold This button allows you to keep the LCD display at the current function. Normally, if the buttons of other functions are pressed, the LCD will switch to those functions. To keep this from happening, press the Hold button;...
-
Page 24: Voice List
6 Voice List A variety of voices can be divided into the following categories. ORCHESTRAL Strings 1 Brass 1 Clarinet 1 Saxophone 1 Chorus 1 Organ 1 Piano 1 Guitar 1 Vibraphone Cosmic 1 Cosmic 2 Cosmic 3 Cosmic 4 Cosmic 5 Cosmic 6 Cosmic 7... - Page 25 ORCHESTRAL Tutti 1 Tutti 2 Tutti 3 Tutti 4 Harmonica 1 Harmonica 2 Thin Reed Horn 1 Horn 2 Horn 3 Horn 4 Muted Horn LEAD Violin 1 Violin 2 Violin 4 Violin 5 Buzz String Pizzicato Violin Cello Kokyu Flute 1 Flute 2 Recorder...
-
Page 26: Voice Sections
Voice Sections The EL-900 features 207 different high quality voices: 173 AWM/FM voices and 34 VA voices. Each of the AWM/FM voices can be used on the Upper keyboard, Lower keyboard and Pedalboard. There are five voice sections for the Upper keyboard (including the Upper Flute Voice section), three voice sections for the Lower keyboard (including the Lower Flute Voice section), and two voice sections for the Pedalboard. - Page 27 Press one of the Data Control buttons that corresponds to voice you wish to select. The selected voice will be shown at the upper row of the LCD. In this case, Pop Organ 1 appears. If you wish to, you can select voices from the other Upper Keyboard Voice sections (Upper Voices 2, Lead Voice 1 and Lead Voice 2), following steps #1 and #2 above.
- Page 28 NOTE: The Lead and Pedal Voices sound one note at a time; when you simultaneously press two or more keys, only the highest note will sound. VOICE EFFECT A. B. C. DISPLAY M. O. C. FOOT REGIST. EXP. SHIFT PITCH/MIDI RHYTHM PROGRAM VOICE...
- Page 29 About Solo Mode Unique to the Lead Voice 2 (VA) section is a Solo Mode function. Solo Mode lets you instantly switch to a solo Lead voice in the middle of your performance, muting all other Upper Keyboard voices. To Use the Solo Mode: Select the voice in the Lead Voice 2 section that you wish to play in the Solo Mode.
-
Page 30: Selecting Voices From The Dotted Buttons
Selecting Voices from the Dotted Buttons ムDotted Buttons and User Voicesム The EL-900 has a wide variety of voices from which you can choose-far greater than what is immediately apparent from the front panel controls. Youユve already learned in the section above how to select the different voices that are available in the Voice Menu display of each panel voice. - Page 31 Select one of the pages with the Page buttons, and choose a Voice Menu (PIANO, for example). Each page represents a general voice category and the title of the category appears in the dark bar in the middle of the display when the page has been selected.
-
Page 32: Voice Menus
3 Voice Menus The following chart lists the voices available and their button/page assignment. STRINGS Upper/Lower Strings Strings Pizz. Trem. Strings Strings VIOLIN Lead Violin Violin Cello Kokyu CONTRABASS Pedal Contra Contra Bass 1 Bass 2 BRASS Upper/Lower Brass Brass Synth. - Page 33 Page CLARINET Upper/Lower CLARINET Clari- Clari- Bass Synth. Synth. net 1 net 2 Cla. Cla.1 Cla.2 SAXOPHONE Upper/Lower SAXOPHONE Saxo- Saxo- Sopra. Sax. Sax. Synth. phone1 phone2 Sax. Ens.1 Ens.2 Synth. Synth. Synth. Synth. Synth. Lead1 Lead2 Lead3 Lead4 Lead5 TUTTI Upper/Lower TUTTI Tutti...
-
Page 34: Electric Bass
VIBRAPHONE Upper/Lower Vibra- Gloc- phone ken. Chime Synth. Chime ELECTRIC BASS Pedal Elec. Elec. Bass1 Bass 2 COSMIC Upper/Lower Cosmic Cosmic Cosmic Cosmic USER VOICE USER USER USER USER LEAD VOICE 2 (VA) VA ACOUSTIC Flute Oboe Trum- Trom- bone VA VIRTUAL Pipe Buzz... - Page 35 The VA voices offer many advantages in terms of musical performance. Not just in terms of sound, but also in terms of the メbehaviorモ that makes acoustic instruments so ノ well, musical! Yamaha Virtual Acoustic Synthesis is simply the most musical tone generation system ever created.
-
Page 36: Details On Each Voice
Details on Each Voice P a g e / S e c t i o n 1. Upper/Lower Strings 1 STRINGS Strings 2 Strings 3 Strings 4 Strings 5 Strings 6 Strings 7 Pizz. Strings Trem. Strings Synth. Strings 1 Synth. - Page 37 P a g e / S e c t i o n Voice Name 9. Lead Oboe 1 OBOE Oboe 2 English Horn Bassoon 1 Bassoon 2 10. Upper/Lower Clarinet 1 CLARINET Clarinet 2 Bass Cla. Synth. Cla. 1 Synth. Cla. 2 11.
- Page 38 P a g e / S e c t i o n 18. Upper/Lower Guitar 1 GUITAR Guitar 2 Guitar 3 12Str. Guitar Banjo Mandolin Sitar Shamisen Elec. Guitar 1 Elec. Guitar 2 Muted Guitar Dist. Guitar Harp Steel Guitar Koto Taisho Koto 19.
- Page 39 Lead Voice 2 (VA) Preset page Voice Name Feet Effect VA Acoustic V-Flute V-Oboe V-Clarinet V-Sopra. Sax. Alto Sax. Tenor Sax. Breath Sax. V-Trumpet V-Trombone V-Shakuhachi V-Kokyu V-Sitar VA Virtual Pan Pipe Air Reed Thin Reed Grass Reed Soft Reed Buzz String Bow Strings Waspy Horn...
-
Page 40: Flute Voices (Organ Sounds)
Flute Voices (Organ Sounds) The Flute Voice feature allows you to create your own organ voices, giving you access to an unlimited combination of organ sounds. With this function, you can recreate all of the classic organ sounds by adjusting the flute footage levels and the percussive sounds, just like on conventional organs. - Page 41 Press the Page buttons to select the various pages for the other Flute Voice functions. ATTACK Page 1 Attack Footages Determines the level of each volume in the percussive portion of the voice. Footage settings are 4', 2-2/3' and 2'. 2 Attack Length Determines the duration of the attack sound.
-
Page 42: Save To User Flute Voice
NOTE: All settings in the Footage, Attack and Volume pages can be saved to the Save page, except for the following: Attack Mode, Tremolo On/Off, Reverb and Volume. 2 Save to User Flute Voice Saves the currently created Flute Voice to the selected User Flute Voice memory space. -
Page 43: Using Preset And User Voices
3 Using Preset and User Voices To call up the Preset Voices and User Voices: Press the Page buttons to select the MENU page. MENU Page Select Preset or User Flute Voices. Eight factory-preset voices (four Jazz Organ and four Pop Organ voices) are set to the upper row, and the eight User voices in the bottom row are for selecting voices you created and stored with the SAVE page. -
Page 44: Voice Controls And Effects
Voice Controls and Effects The Electone is equipped with two general kinds of functions that can be used to change the sound of the voices: Voice Controls and Effects. Voice controls are used to change various aspects of the voices, such as the touch sensitivity fortified with Horizontal touch, volume, octave (footage), vibrato, pan setting and brilliance. -
Page 45: Selecting From Voice Condition
1 Selecting from Voice Condition Pages To call up the Voice Condition page: Choose a voice on the panel, then press that voiceユs panel button again (or again press the Data Control button corresponding to the selected voice). LEAD VOICE 1 VIOLIN FLUTE OBOE... -
Page 46: Pitch
NOTE: Horizontal Touch is not available on the Pedalboard. NOTE: Horizontal Touch may affect not only the pitch but the timbre on some voices in the Lead Voice 2 section. NOTE: No reverb can be obtained even though you raise the level here, unless you raise the total reverb level using the panel Reverb buttons (page 52). -
Page 47: Brilliance
SYMPH. (SYMPHONIC): Selects Symphonic/ Celeste. See page 49 for the details of the Symphonic/ Celeste setting. DELAY: Selects Delay. See page 49 for the details of the Delay setting. FLANG. (FLANGER): Selects Flanger. See page 50 for the details of the Flanger setting. DIST. -
Page 48: Touch Vibrato
NOTE: You can select the voice section to which the effect should be applied, by pressing the Page buttons. VOICE EFFECT A. B. C. DISPLAY M. O. C. FOOT REGIST. EXP. SHIFT PITCH/MIDI RHYTHM PROGRAM VOICE EDIT PATTERN SEQUENCE U. FLUTE L. -
Page 49: Tremolo/Chorus
1 TREM./CHOR. (TREMOLO/CHORUS) See Tremolo section on page 56. Independently applied to each voice section. 2 SYMP. (SYMPHONIC/CELESTE) Determines the type of the Symphonic effect, SYMPHONIC (SYMP.) or CELESTE (CELE.). Symphonic is a subtle echo effect that makes one voice sound like an ensemble. -
Page 50: Flanger
TIME Determines the time between delayed repeats. Range: 5ms - 956ms F.B. (Feedback) Determines the number of delayed repeats. Range: 0.2% - 46.9% BAL. (Balance) Determines the volume of the delay effect, relative to the original sound. Higher settings produce a louder delay. Range: 0% - 100% MODE Selects the delay type from Mono, ST (Stereo) 1, 2, 3. -
Page 51: Distortion
SPEED Determines the speed of the modulation. Range: 0Hz - 12.1Hz F.B. (Feedback) Controls the brightness and the metallic sound of the effect. Range: 0.6% -94.0% DEPTH Determines the intensity of the effect. Range: 37.8% - 87.8% 5 DISTORTION Distortion adds a distorted image to the sounds usually found in electric guitars. -
Page 52: Selecting From The Panel
NOTE: When this parameter or the panel REVERB control is set to the minimum, the settings in the pages that follow have no effect. 3 Selecting from the Panel Reverb, Sustain and Tremolo/Chorus pages are called up by pressing the respective panel buttons. - Page 53 Selecting LENG. (LENGTH) will display the following message. Select [Uniform] to set the current Length value for all registrations in the 16 Registration Memories. Select [Cancel] to abort the operation. Selecting DEPTH will display the following message. Select [Uniform] to set the current Depth value for all registrations in the 16 Registration Memories.
- Page 54 1 UPPER 1, 2, FLUTE Sections Determines the amount of reverb applied to each voice section. Range: 0-24 2 LOWER 1, 2, FLUTE Sections Determines the amount of reverb applied to each voice section. Range: 0-24 3 LEAD 1, 2 Sections Determines the amount of reverb applied to each Lead Voice section.
-
Page 55: Sustain
2) Sustain The Sustain effect, selectable for the Upper, Lower and Pedal voices, causes voices to gradually fade out when the keys are released. The sustain on/off and sustain length settings are independent for each keyboard, providing maximum expressive control. To add sustain to the voices and call up the Sustain Length page: Press one of the SUSTAIN buttons in the SUSTAIN section. -
Page 56: Tremolo/Chorus
3) Tremolo/Chorus Tremolo recreates the rich, swirling sound of the popular rotating speaker effect. Just as with a conventional rotating speaker, you can switch between slow and fast speeds. And like a motor-driven speaker, the characteristic tremolo effect gradually changes speed after it is switched. You can also adjust the maximum speed of the effect to suit your playing style. - Page 57 1) Turning on the Tremolo effect (set to standby): Before you can switch Tremolo on and off in real time, you must first turn the effect on in the various voice sections. This doesnユt actually start the effect, but merely puts Tremolo in a メstandbyモ condition. Tremolo can be applied selectively to the voice sections;...
- Page 58 VOICE EFFECT A. B. C. DISPLAY M. O. C. FOOT REGIST. EXP. SHIFT PITCH/MIDI RHYTHM PROGRAM VOICE EDIT PATTERN SEQUENCE U. FLUTE L. FLUTE TREMOLO VOICE VOICE (FAST) DISPLAY SELECT 2) Setting the Tremolo effect Tremolo setting made here are global; in other words , they are applied the same to all voices for which Tremolo has been turned on (set to standby).
-
Page 59: Rhythm And Accompaniment 5
Rhythm and Accompaniment The Rhythm features of the Electone use actual drum and percussion sampled sounds to automatically play various rhythms. Automatic Accompaniment functions are used with the rhythms, providing appropriate and completely automatic accompaniment to match the style of the selected rhythm. Moreover, the Electone has a Keyboard Percussion feature that allows you to play drum and percussion sounds from the Lower keyboard and Pedalboard. - Page 60 NOTE: The Left Footswitch can also be used to turn the rhythm on and off in the middle of song. To assign the Footswitch for rhythm control, see page 151.) NOTE: ABOUT SYNCHRO START: Synchro Start functions quite differently when the Auto Bass Chord feature is turned on and the Accompaniment Memory is turned off.
- Page 61 Set the tempo. TEMPO 1 TEMPO Dial For adjusting the speed of the rhythm. Turn the dial clockwise to increase the tempo, and counter-clock wise to decrease it. 2 TEMPO Display (BAR/BEAT Indicator) Shows the current tempo. (Displayed values are given in beats per minute, just as on a conventional metronome.) The tempo range is 40 to 240 beats per minute.
-
Page 62: Rhythm Condition Page
NOTE: See page 68 for the information on A.B.C. NOTE: The Auto Variation function is not applied to some of the rhythms. 2 Rhythm Condition Pages The Rhythm Condition includes the following two pages: the Rhythm Condition page used to adjust the rhythms and the Instrument page used to make up each drum/ percussion instrument, each of which comprises the rhythms and is playable using the Keyboard Percussion function. - Page 63 2) To select the Instrument page: Choose a rhythm, and press that patternユs panel button again (or again press the Data Control button corresponding to the selected rhythm) to display the Rhythm Condition page. Then press the Page buttons to select INST. (Instrument) page.
-
Page 64: Dotted Buttons And User Rhythms
NOTE: As with the Voice sections dotted buttons, you can set two or three rhythms from the same page to be selected from different buttons (one from the original Rhythm button, and the others from the dotted buttons). To use the Copy function, press one of the rightmost Data Control buttons. The following display will then appear: Press any of the Data Control buttons below [Copy] in the display to erase all user settings and restore the preset data. - Page 65 Select one of the pages with the Page buttons. Each page represents the same general rhythm types as those selected from the panel buttons. The currently assigned rhythm name appears at the top of the display when the page has been selected. The rhythm name shown at the top of the LCD is that of the currently assigned rhythm and is irrelevant to the Rhythm Menu below.
-
Page 66: Rhythm Menus
4 Rhythm Menus This chart lists all 66 of the rhythms available on the Electone. The rhythm names in the chart correspond to the ones shown at the top right on the display. MARCH MARCH March March March Polka Polka Coun- Coun- Broad-... - Page 67 Page LATIN2 LATIN2 Samba Samba Samba Bossa- Bossa- Bossa- nova1 nova2 nova3 8 BEAT 8 BEAT 8 Beat 8 Beat 8 Beat 8 Beat 8 Beat Dance Dance Dance Dance Pop 1 Pop 2 Pop 3 Pop 4 16 BEAT 16 BEAT 16 Beat 16 Beat...
-
Page 68: Automatic Accompaniment-Auto Bass Chord (A.b.c.)
5 Automatic Accompaniment - Auto Bass Chord (A.B.C.) The Auto Bass Chord (A.B.C.) function works with the Rhythm section of the Electone to automatically produce chord and bass accompaniment as you play. It adds an entirely new dimension to your performance by effectively putting a full backing band at your disposal. - Page 69 2) To select the A.B.C. function (from the A.B.C./M.O.C. page): The Auto Bass Chord page can be called up by pressing the A.B.C./M.O.C. button in the DISPLAY SELECT section. The A.B.C. section on this page are the same as the one found in the Rhythm Condition page.
-
Page 70: Accompaniment Controls
NOTE: To turn the Accompaniment function off, p r e s s t h e D a t a C o n t r o l b u t t o n corresponding to the currently selected type. (When off, all types should appear in normal display.) NOTE: Even if the Accompaniment Type is... -
Page 71: Preset/User Keyboard Percussion
7 Keyboard Percussion The Keyboard Percussion function features a total of 120 different drum and percussion sounds, playable from the keyboards and Pedalboard. Keyboard Percussion has two different modes, Preset and User. Preset Keyboard Percussion lets you play 43 different sounds from the Lower keyboard and Pedalboard, while the User Keyboard Percussion lets you freely assign the 120 available sounds to any key or pedal you wish. - Page 72 NOTE: You can rearrange the key assignments of the drum and percussion sounds using the following User Keyboard Percussion function. Preset Keyboard Percussion Preset Percussion Assignments for the Lower Keyboard (43) Preset Percussion Assignments for the Pedalboard (18)
- Page 73 2) To use the User Keyboard Percussion A total of 120 different drum and percussion sounds can be assigned to any key or pedal, and your original setups can be saved to eight memory locations: User 1 through User 8. (For this example, use User 1.) Turn on the Keyboard Percussion function by pressing the LOWER/ 1 button in the KEYBOARD PERCUSSION section.
-
Page 74: Snare Drum
Select the ASSIGN page by pressing the Page buttons. The display will be replaced with the Assign Page: 1 INST. (Instrument) Use the Data Control buttons below INST. in the display to page through the 12 available Instrument categories. (Refer to the User Keyboard Percussion Categories list below.) 2 Instrument Names The individual instruments are shown in the display and can be... - Page 75 Page 4 4.SNARE BRUSH SD Br SD Br SD Br Shot1 Shot1 Roll Page 5 5.TOM TomBr TomBr TomBr TomBr Synth. Shot1 Shot2 Shot3 Shot4 Tom1 Page 6 6.BASS DRUM Synth. Light Heavy Attack March Analog Analog Page 7 7.CONGA/BONGO Conga Conga Conga...
- Page 76 NOTE: Though eight User Keyboard Percussion setups can be created, they cannot be memorized to Registration Memory. Only on/off data and the Keyboard Percussion Menu are memorized to Registration Memory. NOTE: Two User Keyboard Percussions currently selected by LOWER/1 and PEDAL/2 are playable if both buttons are on.
- Page 77 3) Other User Keyboard Percussion Functions Additional operations in the User Mode include copying of Lower/Pedal Preset Keyboard Percussion to one of the Users, and copying from one User location to another. The copy operations here are convenient for creating a basic foundation over which you can make your own custom Keyboard Percussion setups, without having to start from scratch.
- Page 78 To copy from one User location to the other: 1. Select the MENU page by using the Page buttons. COPY/USER Copies one of the eight Users to another. 2. With USER 3 selected as the MENU (for this example, use User 3 as the destination and User 1 as the source), press one of the Data Control buttons below メUSERモ...
-
Page 79: Melody On Chord (M.o.c.)
8 Melody On Chord (M.O.C.) The Melody On Chord (M.O.C.) feature automatically adds a harmony part to the melodies you play on the Upper keyboard. The harmony is derived from the chords you play on the Lower keyboard ム or from the chords that are played for you, if you use Automatic Accompaniment. -
Page 80: Registration Memory
Registration Memory Registration Memory allows you to store virtually all the settings you make on the panel and LCD, providing a convenient way to instantly change all voice settings and rhythms while youユre playing, with the simple touch of a single button on the Registration Memory panel. The buttons are conveniently located between the Upper and Lower keyboards for easy access while playing. -
Page 81: Saving The Registration Data To Disk
3 Saving the Registration Data to Disk Insert a formatted disk into the disk slot under the Music Disk Recorder (M.D.R.). Make certain that the disk is either blank or has data you can erase. If the disk is new and unformatted, you will have to format it. Refer to the instructions how to format a disk (page 89). -
Page 82: Registration Shift
VOICE EFFECT A. B. C. DISPLAY M. O. C. FOOT REGIST. EXP. SHIFT PITCH/MIDI RHYTHM PROGRAM VOICE EDIT PATTERN SEQUENCE U. FLUTE L. FLUTE TREMOLO VOICE VOICE (FAST) DISPLAY SELECT 4 Registration Shift The Registration Shift function allows you to change registrations, all the settings you make on the panel and LCD, without taking your hands from the keyboards. - Page 83 4 USER Selects the User mode. In the User mode, each press of the Right Footswitch selects registrations according to the order you specify. To set the User mode function: 1. Press any of the Data Control buttons below USER in the Registration Shift page.
- Page 84 NOTE: The cursor cannot be moved unless registration numbers have been entered. NOTE: Though about 15 Registration Shift steps are shown in the display at one time, up to 80 steps can be memorized; use the cursor controls to access the undisplayed steps.
- Page 85 CLEAR For erasing all current user Registration Shift Settings. After selecting CLEAR, the following display appears: Select [Clear] to clear all data. The message メCompleted!!モ momentarily appears on the LCD and returns to the previous display. Select [Cancel] to abort the operation. Registration numbers cannot be entered beyond the Registration Shift functionユs capacity of 80.
- Page 86 Turning the Electone off erases all panel settings you have made. When the Electone is turned on, Basic Registration 1 is automatically selected. If you have made panel settings you wish to keep, save them to Registration Memory before turning the Electone off. You can, however, restore the panel settings that were made before the Electone was last turned off.
-
Page 87: Precautions
Floppy disk slot LED (Lamp in-use) NOTE: When the EL-900 is turned on, the LED below the floppy disk slot will be lit indicating that the M.D.R. is ready to use. To eject a floppy disk: Before ejecting the disk, be sure to confirm that the M.D.R. - Page 88 Improved Potentiality of the M.D.R. Different from the existing models, the M.D.R. of the EL-900 begins reading all data starting with the song numbered 1 as soon as you insert a disk into the floppy disk slot. Thus, inserting a disk causes to produce a sound (reading sound) indicating that the M.D.R.
-
Page 89: Formatting A Disk
2 Formatting a Disk Before recording a performance to your blank disk, the disk must first be formatted. To format a disk: Put the disk, label facing up, into the disk drive (floppy disk slot). メFortモ will appear on the LED display indicating that the inserted disk requires to be formatted. -
Page 90: Recording ム Punch In Recording
3 Recording 1) To record a song: Set the desired registrations on the Electone. Make all the Electone settings necessary for the song you will record. This means entering the all registrations you will need for the entire performance in the Registration Memory. - Page 91 After numbers appear on the LED display of the M.D.R., begin playing. Once the setup operation in step #5 is complete, a number will appear on the LED display indicating that you can begin recording your performance. The number also indicates the amount of memory left on the disk.
- Page 92 Changing the Song Name 1. Press the top right Data Control button in the Song Name display. Edit Song Name display appears, prompting you to edit the song name. 2. Select the letter, number or symbol you want to use by pressing the Data Control buttons corresponding to 2.
- Page 93 2) To record each part separately: You can also record the parts of your performance independently; for example, first recording the chords and bass to the song (using the Lower and Pedalboard), and after that recording the melody (using the Upper Keyboard). This function also lets you record keyboard percussion and performance control data, such as registration changes and expression pedal operation, separately from the other parts of the song.
- Page 94 Separate recording for Lead Voice 1 and/or Keyboard Percussion parts: Hold down the SHIFT button and simultaneously press the appropriate button in the top row in the procedure #2. above. The two buttons (indicated in the illustration at the right) function as Lead Voice 1 and Keyboard Percussion selectors in the record mode.
- Page 95 Press the CUSTOM PLAY button to start recording of the new part or parts. (Upper part.) Playback of the previously recorded parts starts immediately. The CUSTOM PLAY button is used here to record only the parts that have been selected for recording, and play back only those parts that have been selected for playback.
-
Page 96: Recording Registrations (And Bulk Data)
4 Recording Registrations (and Bulk Data) You can also record registrations by themselves, without recording a performance. Bulk data, including Registration Memory and Registration Shift settings, Rhythm Pattern (User rhythms) and Rhythm Sequence data, and User voices, are also saved in the operation. There are two ways to record the registrations and bulk data: [1] To record only the registrations and bulk data: On the Electone, set the registrations and all other data... -
Page 97: Recalling Recorded Registrations (And Bulk Data)
5 Recalling Recorded Registrations (and Bulk Data) The registrations (and bulk data) recorded to song numbers in the above operation can be loaded back to the Electone by simply selecting the appropriate song number and pressing the PLAY button. When the operation has been completed, the M.D.R. -
Page 98: Playback ム About Xg Songs
STOP button. If you have recorded the Lead Voice 1/Keyboard Percussion part separately: On the EL-900 the Lead/Keyboard Percussion part(s) you have recorded separately will automatically be on when you start playback. - Page 99 Press the PLAY button. First the registration and other data are read, then playback of the performance starts (excepting the parts that were turned off in step #2). Now perform your new part or parts over the playback parts. When the end of the recorded performance is reached, playback is automatically stopped and the STOP status is resumed.
- Page 100 The EL-900 allows you to play back the commercially available XG song data using the M.D.R. Also, the XG Easy Convertor function of the EL-900 lets you convert the data created by the EL-900 to the XG compatible data. Playing back the XG Song Data This function is only for playback.
- Page 101 XG Easy Convertor This function allows you to convert the EL-900 song data to the XG format data. You can then play back the data using XG devices and/or personal computer. Depending on the type of XG devices, sound may be different from the original data you have created.
-
Page 102: Other Functions
8 Other Functions 1) Custom Play If you want to play back the song without resetting the registrations and other data, press the CUSTOM PLAY button. This displays the song time and starts playback immediately. 2) Read and Auto Increment Another method for calling up only registration data, besides that mentioned in the Note above, is to press the UPPER button in the RECORD section while the M.D.R. - Page 103 5) Changing the Tempo You can change the tempo of the song as the song is playing on the M.D.R. by holding down the SHIFT button and pressing the TEMPO + or TEMPO - button. (The Tempo dial on the Electone panel cannot be used to change the tempo on the Music Disk Recorder.) Each press of the button slows down or speeds up the tempo by a...
- Page 104 6) Song Copy This function lets you copy the data recorded at one song number to another song number. You can copy and exchange the data even between two different disks. To use the Song Copy function within a disk: Select the song number to be copied (source) with the SONG SELECT buttons.
- Page 105 To use the Song Copy function between two different disks: Insert the source disk that contains the song you want to copy to. While holding down the SHIFT button, press the SONG COPY FROM button. The song number to be copied from appears at the left of the LED display.
- Page 106 When the Song Delete function is completed, the STOP status is automatically resumed. 8) Disk Copy You can duplicate a floppy disk by copying the contents. Yamaha recommends that you keep two copies of important data on separate floppy disks by using this function.
- Page 107 Insert the source disk into the disk slot. The M.D.R. starts reading the data in the source disk. メout 1モ appears on the LED display. Press the eject button to take out the source disk. メIn 2モ appears on the LED display to urge you to insert the destination disk.
- Page 108 9) Checking the Remaining Memory While playback is stopped, you can check the amount of memory available for additional recording in your disk. To do this, simultaneously hold down the SHIFT button and the PAUSE button (indicated in the illustration at right as REM. MEM.: Remaining Memory).
- Page 109 Messages on the M.D.R. LED Display Display Description of the Messages No disk is installed. Install a disk. 1) The installed disk is write-protected, so the Record, Song Copy, and Song Delete jobs cannot be performed. Set the diskユs Write-protect tab (page 88) to OFF. 2) If you are using a copy-protected playback-only disk, this message may appear when you attempt the Record, Song Copy, or Song Delete operations.
-
Page 110: Voice Edit
Voice Edit The EL-900 Electone has a Voice Edit feature that allows you to create your own voices (except for the VA voices). The Voice Edit uses sophisticated sound shaping tools that make it possible to craft just about any kind of soundムfrom authentic recreations of acoustic instruments to wild electronic voices and special effects. - Page 111 EDIT Page Name of the voice to be edited Algorithm At the left side of the display is the Algorithm used for this voice. An algorithm is a kind of メmapモ that shows how the sound components of the voice are related to each other. Each voice has nine separate sound components and they are called メOperators,モ...
- Page 112 NOTE: The parameter value can be changed quickly when you press the Data Control button with the COARSE button held. 2) To edit the FM Operators: Adjust the Envelope Parameters of Operator 1 (after turning off the other Operators). The Envelope Parameters control the level of the sound and how that level changes over time.
- Page 113 Adjust the RR (Release Rate) parameter. Play a note on the keyboard and then release it. Notice how the changes affect the tail end of the sound, just after you release the key. By changing this parameter, you can make the sound sustain beyond the release point (lower settings).
- Page 114 NOTE: LOW and HIGH are the equalizers exclusive to the AWM sounds. Volume HIGH – 3) To edit the AWM Operator: Next, weユll make some changes in the sound of the AWM Operator. The AWM Operator is a specially recorded waveform with an actual instrumental sound, unlike the pure electronic sounds of the other Operators.
-
Page 115: Saving Your New Voice
You have got the full-bodied ringing electronic piano sounds. 2 Saving Your New Voice Once you have created a sound you are satisfied with, youユll want to save that sound for future use. To save your newly created voice: Use the Page buttons to select the SAVE page. The following display appears. - Page 116 This operation automatically erases any voice that had been previously saved to the selected User voice number. You should check the User voices (page 31) before saving a voice to make sure that you will not be erasing any important voices. (If necessary) Press the Data Control buttons below [Edit Name] to give a name to the voice you have edited.
-
Page 117: Quitting Voice Edit
3 Quitting Voice Edit You can quit the Voice Edit function from any of its display pages. To quit: Press the VOICE EDIT button in the DISPLAY SELECT section once again. Select [Exit] to quit the Voice Edit function, or [Cancel] to abort the operation and return to the previous display. -
Page 118: Selecting Voices From A Voice Disk (Optional)
NOTE: The EL-900 can read the data from the EL-90/ 87 Voice Disk. NOTE: Any one of the voice sections can be used here. Make sure that the volumes of all other voices are set to off (the minimum value). -
Page 119: Voice Editing Basics
6 Voice Editing Basics The EL-900 Electone uses a versatile tone generation system developed by Yamaha that is capable of producing an exceptionally wide range of voices. To be more specific, the system uses individual sound sources that メmodulateモ each otherユs frequencies and thus create complex sounds not possible by the ordinary mixing of those sound sources. - Page 120 NOTE: Some voices may not have remarkable effect using these AWM parameters. 3) AWM Operators Each algorithm has a special AWM (Advanced Wave Memory) Operator. AWM Operators are not sine waves like the other Operators, but are digital recordings of actual instrument sounds, such as piano, violin, guitar, and so on.
- Page 121 4) FM Operators The Operators 1 through 8 are the sine wave Operators of the algorithm. When one of these Operators has been selected, the following parameters are displayed: 1 OL (Output Level) Determines the level of the selected Operatorユs sound. Range: 0 - 127 2 AR (Attack Rate) Determines how quickly the Operator will reach its maximum level...
- Page 122 Envelope Parameters By using the modulators and setting them to various output levels, you can create all kinds of sounds. These sounds will be static, however, unless you have the output levels change in time. That is precisely what an envelope does. It varies the output of an Operator in time so that you can vary the tone or the level.
- Page 123 5) General Guidelines for Editing Operators Before you edit a voice, always check its algorithm to see which Operators function as carriers and which as modulators. Then select each Operator in turn and edit its parameters. The Output Level and envelope parameters function differently depending on whether they belong to a carrier or a modulator.
- Page 124 6) Some Voice Editing Examples The following examples illustrate some specific uses of the Voice Edit controls. Make the changes as described in the examples, then go on to explore some other voices on your own, making changes as you like. Ex.
-
Page 125: Rhythm Pattern Program And Rhythm Sequence Program
Rhythm Pattern Program and Rhythm Sequence Program The Electone also includes powerful Rhythm Program functions: the Rhythm Pattern Program and the Rhythm Sequence Program. The Rhythm Pattern Program allows you to record your own original rhythms using the 120 different high-quality percussion sounds of the Electone. The Rhythm Sequence Program lets you connect your original rhythms together with the Preset rhythms to create complete rhythm tracks, which you can automatically play back during your performance. -
Page 126: Rhythm Pattern Program
NOTE: Pressing the PATTERN button here also automatically stops the rhythms and rhythm sequences. NOTE: Use of the playback and recording functions on the Music Disk Recorder automatically cancels the Rhythm Programming/Rhythm Sequencing operations. 1 Rhythm Pattern Program The Rhythm Pattern Program lets you use any of 120 different instruments (percussion sounds) assigned to each key on the Upper and Lower keyboards in creating your own rhythms. - Page 127 2.-1 To copy a preset rhythm: While holding down the PATTERN button, select a preset rhythm to be copied to the Rhythm Pattern Program. Copying a preset rhythm lets you make changes to an existing rhythm, saving you time if you want to program a rhythm that is similar to an existing preset pattern.
-
Page 128: Percussion Sounds Used For Rhythm Pattern Program
2) Percussion Sounds Used for Rhythm Pattern Program The total of 120 different instruments are available for the Rhythm Pattern Programming and are divided into two instrument sets: Normal and Extend, and assigned to each key on the Upper and Lower keyboards, as shown in the following chart.. - Page 129 Extend(ed) Set Consists of 29 different drum and percussion instruments. Assigned to the Upper Keyboard (13) Assigned to the Lower Keyboard (16) NOTE: Some of the instruments such as Tom 1, 2 and 3 on the Upper and Lower keyboards are the same. The instruments marked with the underlines are exclusive to the Extend(ed) Set.
-
Page 130: Step Write And Real Time Write
3) Step Write and Real Time Write There are two different methods you can use to program rhythms: Step Write and Real Time Write. Step Write allows you to enter percussion sounds as individual note values. As a method, it is very similar to writing down the notes on a sheet of music paper;... -
Page 131: Entering Percussion Sounds To A Rhythm Pattern
BEAT/QUANTIZE PageムStep Write 1 BEAT Determines the time signature used for the rhythm. Available time signatures are 2/4, 3/4 and 4/4. The 4/4 time is the default setting when a blank pattern has been selected. 2 QUANTIZE Determines the resolution of the Step Write function. Step Write operations involve advancing in メstepsモ... -
Page 132: Editing With Step Write
7) Editing with Step Write To enter sounds with Step Write: Raise the rhythm volume, and turn off all the Upper and Lower keyboard voices by setting each sectionユs volume to MIN. Select the EDIT page with the Page buttons. Select the percussion sound you wish to enter. - Page 133 To replace the instrument: 1. Select the track using the Rhythm Track control above. 2. Simultaneously hold down the Data Control button corresponding to CHANGE and press the key on the Upper or Lower keyboard that corresponds to the instrument you want to use. 3 CLEAR The Clear function is used to erase an instrument from the rhythm.
- Page 134 NOTE: If you have copied an existing pattern, its name will be shown below PATTERN on the display. NOTE: You can return to the BEAT/QUANTIZE page in the middle of editing and change the time signature and/or the Quantize value. NOTE: You can record up to sixteen different instrument sounds in a single rhythm,...
- Page 135 About Quantize The Quantize function is a process of rounding off timing and/or duration values. With Real Time Write It allows you to automatically correct the timing of the notes you play, according to the specified Quantize resolution. The range can be corrected is within 50 percent of the selected note (Quantize) value.
-
Page 136: Editing With Real Time Write
NOTE: As in Step Write, you can record up to sixteen different instrument sounds in a single rhythm, with each instrument occupying one of the sixteen available tracks. Instruments can only be entered if there are empty tracks remaining. If all sixteen tracks have been used, no subsequently recordings can be performed or heard. -
Page 137: Selecting Accompaniment Patterns ム Lower Rhythmic
9) Selecting Accompaniment Patterns The Rhythm Pattern Program allows you to use one of the Electoneユs Accompaniment patterns with your original rhythm. You can select and save the Accompaniment pattern that best matches the rhythm that you have created. Also, the Rhythm Pattern Program lets you use the Lower Rhythmic function to add your own backings, two measure long lower rhythmic patterns, to the rhythm you created. - Page 138 NOTE: You cannot create your own bass pattern. To create your own backings with the Lower Rhythmic function: You can add backings (lower rhythmic pattern) to the rhythm. The lower rhythmic pattern, using one track, can be entered by the same method as the one for the rhythm.
- Page 139 Pressing the Data Control button corresponding to CHANGE VOICE opens the following message on the display. Select the voice you want to use by pressing the Data Control buttons corresponding to . The available voices are as follows: Acc.Piano Acc.EP (Electric Piano) Acc.FolkGt (Acoustic Guitar) Acc.JazzGt (Jazz Guitar) Acc.Banjo...
-
Page 140: Saving Rhythm Patterns
10) Saving Rhythm Patterns To save a newly created rhythm to a User pattern number: Select the SAVE page with the Page buttons. The current rhythm, if playing, will automatically be stopped when this page is selected. Using the appropriate Data Control buttons, select both the User number and variation type to which you wish to save the newly created rhythm. -
Page 141: Quitting Rhythm Pattern Program
(If necessary) Press the Data Control buttons below [Edit Name] to give a name to the rhythm you have created. The method to edit the name is the same as the one for the song name in the M.D.R. section, See page 92 for more information. Up to 10 characters can be used in this case. -
Page 142: Recalling User Rhythm Patterns
NOTE: When you select the user rhythm with the Lower Rhythmic function (page 138) turned on, メRHYTHMICモ will be shown above the メACCOMPANI.モ on the LCD display. NOTE: A press of the FILL IN button plays back only the first measure if you have created a two-measure fill in pattern. -
Page 143: Selecting Patterns From A Pattern Disk (Optional)
13) Selecting Rhythms From a Pattern Disk (Optional) You can also load the rhythms from optional Pattern Disks to the User rhythms in the Rhythm Menu. To do this: Press the PATTERN button in the DISPLAY SELECT section. Select the DISK page with the Page buttons. The message メInsert Pattern Disk!!モ... -
Page 144: Rhythm Sequence Program
NOTE: When you select one of the sequences in this step, any editing done to that sequence is instantly and automatically saved. This means that if you select a sequence that is already programmed, any editing you do will permanently change the sequence and the original sequence cannot be recovered. -
Page 145: Programming A Sequence
2) Programming a Sequence Select the type of rhythm you wish to enter, Preset or User. Press these Data Control buttons to select PRESET and USER, alternately. Select the desired rhythm by pressing the appropriate button in the Rhythm section, then select SET in the display to enter the pattern. (Refer to the Rhythm Pattern Number Table below for a list of the rhythms and their number assignments.) ・... - Page 146 Rhythm Pattern Number Table 0 1 March 1 0 2 March 2 0 3 March 3 0 4 Polka 1 0 5 Polka 2 0 6 Country 1 0 7 Country 2 0 8 Broadway 0 9 Baroque 1 0 Waltz 1 1 1 Waltz 2 1 2 Waltz 3 1 3 Waltz 4...
- Page 147 Entering Intro. And Ending Patterns: Pressing the INTRO. ENDING button when at the first position in the pattern row automatically enters an Intro pattern there. Pressing the INTRO. ENDING button at any other position in the row enters an Ending pattern. Use the cursor controls to move the cursor along the pattern row in the display and select the position at which patterns will be entered.
-
Page 148: Quitting Rhythm Sequence Program
Audition: You can play the rhythm sequence at any time during the editing process by moving the cursor to the point at which you wish to begin playback and pressing the Rhythm START button. About Using Registration Memory with the Rhythm Sequence Program: The rhythms (Rhythm Menu) used to program the sequence can be changed during editing by selecting different registrations. -
Page 149: Playing All Sequences In Order
5) Playing All Sequences in Order You can also have up to all four rhythm sequences automatically play in order, one after the other. To do this: Press the desired Sequence buttons, making sure that their LEDs are all lit. RHYTHM SEQ. - Page 150 NOTE: When you are playing the rhythm sequence that is made up of several sequences (SEQ. buttons), pressing the Left Footswitch turns off the currently played-back rhythm sequence and pressing it again starts the next sequence. NOTE: When loading your original Rhythm Program data back to the Electone, be sure to stop the rhythm if it is playing.
-
Page 151: 0 Footswitches, Knee Lever And Expression Pedals
Footswitches, Knee Lever and Expression Pedals These leg- and foot-operated controls allow you to turn on and execute various performance functions without taking your hands from the keyboards. 1 Footswitch The Electone has two Footswitches on the main expression pedal that can be used to control various functions. - Page 152 NOTE: When the Glide function is applied, the Vibrato is not effective. 1) Rhythm Control Selection of Left Footswitch control over rhythm functions. When this is chosen, the following display appears: FOOTSWITCH-LEFT PageムRhythm One of the three Rhythm Control functions can be selected. Pressing the Footswitch executes the corresponding function.
-
Page 153: Knee Lever
3) Tremolo Control Selection of Footswitch control over Tremolo. Pressing the Footswitch turns the Tremolo effect on and off (Chorus), performing the same function as the TREMOLO (FAST) button in the DISPLAY SELECT section. If you want to use this function, the tremolo settings require to be set properly. See page 56 for more information. - Page 154 VOICE EFFECT A. B. C. DISPLAY M. O. C. FOOT REGIST. EXP. SHIFT PITCH/MIDI RHYTHM PROGRAM VOICE EDIT PATTERN SEQUENCE U. FLUTE L. FLUTE TREMOLO VOICE VOICE (FAST) DISPLAY SELECT NOTE: If the KNEE is set to ON, the Melody On Chord cannot be applied without using the Knee Lever.
-
Page 155: Expression Pedals
3 Expression Pedals There are two types of Expression Pedals: the Expression Pedal which controls the volume during performance with your toe, and the 2nd Expression Pedal which can control the Pitch Bend and Tempo. Second Expression PedalムPitch Bend And Tempo To select the 2nd Expression page: Press the EXP. - Page 156 NOTE: Donユt use the Pitch Bend and Tempo at the same time since you may inadvertently apply both two controls at once. Tempo Control 1 MODE Determines the range of the Tempo control. Range: 1 - 12 The setting 2 (NARROW) results in a small amount of tempo variation (70%-140%);...
-
Page 157: Transpose And Pitch Controls
Transpose and Pitch Controls There are two pitch-related controls on the Electone: Transpose and Pitch. Transpose allows you to change the key of the instrument and Pitch lets you finely adjust the tuning. These features make it easy to change the key of a song to accommodate a vocalistユs range or to precisely match the tuning of another instrument. -
Page 158: Midi
MIDI MIDI (Musical Instrument Digital Interface) is a kind of communication system for electronic musical instruments. It is built into most every modern digital musical instrument and allows different instruments to メtalkモ to each other and control each otherユs functions. For example, the Upper keyboard of your Electone could be used to play sounds on a connected synthesizer. - Page 159 MIDI CONTROL Page Internal/External Control 1 LEAD Determines Internal or External control of the Lead Voices. When set to Internal, Lead Voices are played from the Electone and the sounds from a connected MIDI instrument can be played via MIDI channel 1 (or channel 2, when the To Lower function is on).
-
Page 160: Accessory Jacks And Controls
Accessory Jacks and Controls On the underside of the Electone keyboard is a separate panel equipped with various input/output terminals and miscellaneous controls, the functions of which are described below. NOTE: See page 161 for the details of the connection using the TO HOST terminal. MIC. -
Page 161: Appendix
For Windows users: To actually exchange the data via the Serial Cable you need to install the appropriate MIDI driver (Yamaha CBX Driver) to your personal computer in advance. Please visit Yamaha XG web site, <http:// www.yamaha.co.jp/english/xg/index.html>, and download it. NOTE:... - Page 162 EL-900 will work as an XG tone generator and play back the MIDI data transmitted from the personal computer (a sequencing software). See page 166 for the details to use the EL-900 as an XG tone generator. Controls the EL-900 using an external...
-
Page 163: Channel Messages
The Channel Messages are the data related to the performance on the keyboard for the specific channel. Each time you play the keyboard on the EL-900, the channel messages, which keys are played and how hard the keys are pressed, will be transmitted via a specific channel. -
Page 164: System Messages
These allow you to execute bulk dump operation, sending and receiving all the data of the EL-900 including registrations to and from an external device. This is especially useful for you to build up the library of the registration data in a device like a hard disk. - Page 165 ・ Selecting the Registration Memory Buttons Sending the Program Change messages from the PC to your EL-900 makes it possible to change the registration on the EL-900. Send the Program Change message, メCF, 00モ (Hexadecimal) to the EL-900.
- Page 166 メElectone.モ Sending an appropriate system exclusive message from the sequencing software (PC) to the EL-900 changes the mode to XG Mode, in which you can use the Electone as an XG tone generator. Send the XG System On message, メF0, 43, 1N, 4C, 00, 00, 7E, 00, F7モ...
-
Page 167: Midi Data Format
MIDI Data Format 1. Channel Messages 1.1 EL Mode Code (Hexadecimal) F u n c t i o n 8n,nn,00-7F Note Off 9n,nn,00 Note Off 9n,nn,01-7F Note On Bn,00,00-7F Bank select Bn,20,00-7F Bn,01,00-7F Modulation Bn,04,00-7F 2nd Expression Bn,05,00-7F Portamento Time Bn,06,00-7F Data Entry Bn,26,00-7F... - Page 168 Code (Hexadecimal) Cn,nn Dn,00-7F En,00-7F,00-7F * Can be changed in the MIDI settings. ** Can be output when assigned to the channel 4. 1.2 XG Mode Code (Hexadecimal) 8n,nn,00-7F 9n,nn,00 9n,nn,01-7F Bn,00,00-7F Bn,20,00-7F Bn,01,00-7F Bn,04,00-7F Bn,05,00-7F Bn,06,00-7F Bn,26,00-7F Bn,07,00-7F Bn,0A,00-7F Bn,0B,00-7F Bn,10,00-7F Bn,40,00-7F...
-
Page 169: Realtime Messages
Code (Hexadecimal) F u n c t i o n Bn,78,00 All Sounds Off Bn,79,00 Reset All Controllers Bn,7B,00 All Note Off Bn,7C,00 Omni Off Bn,7D,00 Omni On Bn,7E,00 Mono Bn,7F,00 Poly Cn,00-7F Program Change Dn,00-7F After Touch En,00-7F,00-7F Pitch Bend * Can be changed in the MIDI settings. - Page 170 F0,43,70,70,40,nn(*3),7F,F7 F0,43,70,70,40,50,TL,TH,F7 F0,43,70,78,41,cd,dd,F7(*4) F0,43,70,78,42,...(Data)...F7 F0,43,70,78,44...(Data)...(*5),F7 F0,43,70,70,70,nn(*6),F7 F0,43,70,70,73,F7 F0,43,70,70,78,SC,NC,F7 X : don't care N : Device Number(“0” on EL-900) *1 Data Codes to Send D a t a All RAM Registrations Rhythm Sequences 14,15 User Patterns User Voices Keyboard Percussion Assignments...
-
Page 171: Solo Mode
*4 Switch Codes Selectors C o d e Switch Transmit Tx Range UK Voice 1 LK Voice 1 UK Voice 2 LK Voice 2 LEAD Voice 1 Pedal Voice 1 Pedal Voice 2 LEAD Voice 2 Rhythm Registration Memory Volume C o d e Switch Transmit Tx Range... - Page 172 Sustain C o d e Switch Upper Keyboard Lower Keyboard Pedalboard Solo Bar C o d e Switch Solo Bar Keyboard Percussion C o d e Switch Lower Keyboard Pedal Board Disable C o d e Switch Disable Tremolo C o d e Switch Tremolo Rhythm Sequence...
- Page 173 *5 EL MIDI Parameters Voice Section Parameters Panel Voice Parameters Address Size Data Parameter 00-07 00-0D 00-7F Voice Assign Number H 00-7F Voice Assign Number L 00-07 00-0D Voice Selector Number 00-07 00-7F Volume 00-07 00-7F Reverb Send Level 00-07 00-7F Brilliance 00-07...
- Page 174 Flute Voice Parameters Address Size Data 00-01 00-7F 00-01 00-7F 00-01 00-7F 00-01 00-7F 00-01 00-7F 00-01 00-7F 00-01 00-7F 00-01 00-7F 00-01 00-7F 00-01 00-7F 00-01 00-7F 00-01 00-7F 00-01 00-7F 00-01 00-7F 00-01 00-7F 00-01 00-7F 00-01 00-7F 00-01 00-07 40-47...
- Page 175 Keyboard Parameters Sustain Parameters Parameter Address Size Data 00-02 00-01 Sustain On/Off 00-02 00-0C Length Keyboard Percussion Parameters Parameter Address Size Data 01-02 00-01 Keyboard Percussion 01-02 00-08 Modes Effect Parameters (Keyboard) Parameter Address Size Data 00-02 40-42 Reverb 00-02 48-4A Tremolo 00-02...
- Page 176 Accompaniment Parameters Address Size Data 00-03 00-01 00-7F 00-7F A.B.C. Parameters Address Size Data 00-03 00-01 00-01 M.O.C. Parameters Address Size Data 00-03 00-01 Parameter Content Transmit Tx Range Pattern Selector Number 00:Type1 fl 01:Type2 02:Type3 03:Type4 Volume Mute 00:OFF fl...
- Page 177 Overall System Parameters Parameter Address Size Data 00-01 Disable 00-01 Flute Coupler Attack Mode 3A-46 Transpose 00-0B 2nd Expression Range 00-03 Footswitch Mode 3C-4F Pitch 00-04 Glide Speed 34-4C Manual Balance 00-01 L.I.T. 00-01 Expression INT/EXT Effect Parameters (Overall) Parameter Address Size Data...
-
Page 178: Midi Implementation Chart
MIDI Inplementation Chart YAMAHA [Electone-EL mode] / Model: EL-900 Function Basic Channel Default Changed Mode Default Messages Altered Note Number True Voice Velocity Note ON Note OFF After Touch Pitch Bend Control Change 1, 5, 7, 10 84, 91, 93, 94... - Page 179 YAMAHA [Electone-XG mode] / Model: EL-900 Function Basic Channel Default 1, 2, 3, 16 Changed 1-16 Mode Default Mode3 Messages Altered ************************ Note Number 36-96 True Voice ************************ Velocity Note ON fl 9nH, v=1-127 Note OFF fl 9nH, v=0 After Touch...
- Page 180 Memo...
-
Page 181: Troubleshooting
Troubleshooting Please note that the appearance of any of following phenomena does not indicate a mechanical failure of the Electone. Problem GENERAL OPERATION Some of the LEDs in the DISPLAY SELECT section do not light. A cracking noise is sometimes heard. Interference from radio, TV, or other sources occurs. - Page 182 Problem VOICES/RHYTHMS Only one sound is heard when two notes of the Lead or Pedal voices are simultaneously played. The Pedal voices do not sound, even though the volume is properly set. The pitch may be felt high on the Pedalboard and low in the higher registers of the Lower and Upper keyboards.
- Page 183 Problem VOICE EDITING During voice editing, the specified voice isnユt heard, even when the keyboard is played. Changing the Envelope Generator of the Carrier (FM Operator) causes a timing gap in timbre changes. RHYTHM PROGRAM During use of the Rhythm Pattern Program, no sound is produced even when you play a certain percussion sound.
-
Page 184: Specifications
EL-900 Specifications KEYBOARD Keyboards Touch Tone Pitch VOICE Tone Generation Upper Keyboard Voice 1, 2 Lower Keyboard Voice 1, 2 Lead Voice 1 Lead Voice 2 (VA) Pedalboard Voice 1, 2 Voice Display Upper Flute Voice Lower Flute Voice VOICE EDIT... - Page 185 Specifications and description in this Owner's Manual are information purposes only. Yamaha Corp. reserves the right to change or modify products or specifications at any time without prior notice. As specifications, equipment or options may not be the same in every locale, please check with Yamaha dealer.
-
Page 186: Index
Index A.B.C..68 A.B.C./M.O.C ... 68, 79 ACC. (ACCOMPANIMENT) ... 70 ACCENT(LOWER RHYTHMIC) ... 139 ACCENT(RHYTHM PROGRAM) ... 134 ACC. (RHYTHM PROGRAM) ... 137 AFTER ... 45 ALG (ALGORITHM) ... 111, 119 AR (AWM) ... 120 AR (FM) ... 121 ASSIGN (INSTRUMENT) ... - Page 187 NEXT SONG (SHIFT END) ... 83 NORMAL Set ... 63, 128, 131 OL (AWM) ... 120 OL (FM) ... 121, 122 OPERATOR ... 111, 113, 119 OUTPUT (MIDI) ... 158 PAGE ... 21 PAN ... 46 PAN (INSTRUMENT) ... 63 PATTERN ...
Need help?
Do you have a question about the Electone EL-900 and is the answer not in the manual?
Questions and answers
Hoá to connect a micro to el 900