
Related Manuals for Ricoh FW740


Summary of Contents for Ricoh FW740
- Page 1 FW780 Operating Instructions For safe and correct use of this machine, please be sure to read the Safety Informa- tion before you use it.
- Page 2 For good copy quality, Ricoh recommends that you use genuine Ricoh toner. Ricoh shall not be responsible for any damage or expense that might result from the use of parts other than genuine Ricoh parts in your Ricoh office product.
- Page 3 Safety Information When using your equipment, the following safety precautions should always be followed. Safety During Operation In this manual, the following important symbols are used: R WARNING: Indicates a potentially hazardous situation which, if instructions are not followed, could result in death or serious injury. R CAUTION: Indicates a potentially hazardous situation which, if instructions are not followed, may result in minor or moderate injury or damage to property.
- Page 4 R WARNING: • Connect the power cord directly into a wall outlet and never use an extension cord. • Only connect the machine to the power source described on the inside front cover of this manual. • Avoid multi-wiring. • Do not damage, break or make any modifications to the power cord. Do not place heavy ob- jects on it, pull it hard or bend it more than necessary.
- Page 5 R CAUTION: • When you pull out the plug from the socket, grip the plug to avoid damaging the cord and causing fire or electric shock. • Unplug the power cord from the wall outlet before you move the equipment. While moving the equipment, you should take care that the power cord will not be damaged under the equipment.
- Page 6 ENERGY STAR Program As an ENERGY STAR Partner, we have determined that this machine model meets the ENERGY STAR Guidelines for energy efficiency. The ENERGY STAR Guidelines intend to establish an international energy-saving system for developing and introducing energy-efficient office equipment to deal with environmental is- sues, such as global warming.
- Page 7 How to Read this Manual Symbols In this manual, the following symbols are used: R WARNING: This symbol indicates a potentially hazardous situation that might result in death or serious injury when you misuse the machine without following the in- structions under this symbol.
-
Page 8: Table Of Contents
TABLE OF CONTENTS Guide to Components ................1 Copier Exterior ....................1 Operation Panel ..................... 3 1. Basics Turning on the Power................. 5 Turn on the Main Power................. 5 Turn off the Main Power................. 5 Recommended Originals ................6 Non-recommended Originals ................. 7 Note for Leading and Side Edges of the Originals ......... - Page 9 4. Maintaining Your Copier Changing The Used Toner Bottle............49 Adding Toner .................... 52 Changing the Roll Paper Size..............56 Removing the Roll Paper Holder..............56 Setting the Roll Paper Holder............... 56 Loading A Roll Of Paper ................58 5. Troubleshooting If Something Goes Wrong ...............
- Page 10 viii...
-
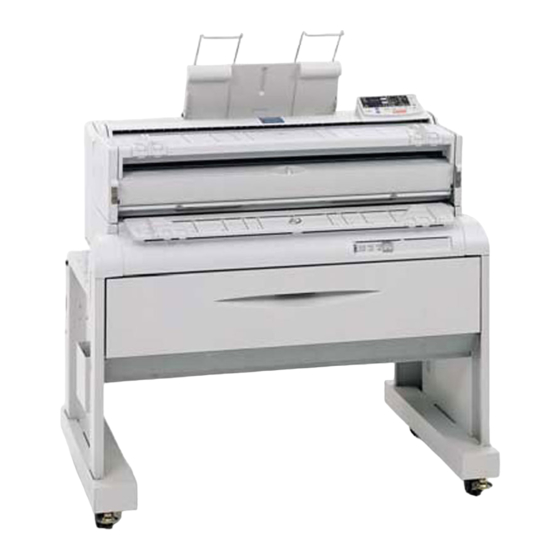
Page 11: Guide To Components
Guide to Components Copier Exterior Locks Operation Panel ⇒ p.3 “Operation Panel”. Squeeze both locks (1a&1b) to open the unit. Open the unit to empty the used Rear Table toner bottle and to remove jammed pa- Place stiff originals face down here. per. - Page 12 Main switch Anti-humidity Heater Switch Use this switch to turn the copier on and When humidity is high, the paper in the off. The copier will need about 3 minutes paper roll tray may absorb moisture, to warm up, if it's been turned off for a which can effect the image quality of long time.
-
Page 13: Operation Panel
Operation Panel Function indicators Energy Saver indicator These indicators show which setting you Shows that the machine is in a state of are currently editing. Press the Function wait (Energy Saver). Press key 9. Select key to cycle through them. Troubleshooting indicators •... - Page 14 {Program} key Density indicator and {i}, {j}keys Allows you to recall or set a program. Shows the density level the copies will The program indicator(LED) lights after have. you store the setting. Press the left key to make copies lighter. {Function Select} key Press the right key to make copies darker.
-
Page 15: Basics
1. Basics Turning on the Power To turn the machine on, press the main switch. Turn on the Main Power Make sure that the power cord is firmly plugged into the wall out- let. Turn on the main switch. Turn off the Main Power Turn off the main switch. -
Page 16: Recommended Originals
Basics Recommended Originals • You can set originals with weight in the range 21g/m of(6 lb) to 157 g/m (41 lb). • You can set original with sizes between 914×3,000mm (W×L), 36"×118" and 210×297mm (W×L), 8.5"×11". (The maximum width that can be fed is 960mm, 38.4") •... -
Page 17: Non-Recommended Originals
Recommended Originals Non-recommended Originals The following types of originals are not recommended. • Wet originals • Originals with cardboard stuck on the leading edge • Originals with clips or staples • Originals with wet ink or white-out • Carbon paper •... -
Page 18: Recommended Paper
Basics Recommended Paper R CAUTION: Do not reuse stapled paper. Do not use aluminum foil,carbon-containing paper or other con- ductive paper. If you do, there is a danger of fire. Standard paper sizes that can be used in this copier are shown below. Metric version Inch version Bypass... -
Page 19: Anti-Humidity Heater
Recommended Paper • When you use paper in high humidity under hot conditions, take out only the necessary amount of paper from the bag. Do not take all the paper out of the bag. • Do not use paper printed onto with an inkjet printer, as it may become en- tangled or jammed, which may damage the machine. -
Page 20: Toner
Basics Toner Handling Toner R WARNING: • Do not incinerate used toner, toner bottles or toner cartridg- • Toner dust might ignite when exposed to an open flame. • Dispose of toner bottles and the used toner cartridges ac- cording to local regulations. R CAUTION: •... -
Page 21: Copying
2. Copying Basic Copying (Copying to sheets) Use bypass table or roll feeder to copy onto paper. Note ❒ For acceptable types of original and paper, ⇒ p.6 “Recommended Origi- nals”⇒ p.8 “Recommended Paper”. ❒ If you use bypass teble, place one sheet of paper and never insert more than one sheet of paper. - Page 22 Copying R CAUTION: • If during copying your original gets stuck in the copier, press the {Emergency Stop} key. • If you stop operation by pressing this key, remove the original. Turn on the main switch. When the Wait indicator goes off and the Ready and the Set Original indi- cator go on, the copier enters the ready condition.
- Page 23 Basic Copying (Copying to sheets) Select any copy settings you require, such as the media type or copy density. Press the {Paper Select/Cut} key to select either the Roll Feeder or Bypass Tray. Note ❒ If you select two roll feeder, select one of the roll. ❒...
- Page 24 Copying Set the original guide to match the width of the original. Center your original face down on the original table. Slide the original straight into the copier until the copier pulls it in. Note ❒ If you want to feed manually, use the manual feed mode. Press the {Start} key for more than 3 seconds to enter the mode.
- Page 25 Basic Copying (Copying to sheets) The original is fed through to the rear table. When the original is being sent back, the machine scans the original and starts copying. The copy is delivered at the back of the copier. Note ❒...
- Page 26 Copying After copying has finished, hold the original with one hand, press the Clear/Stop key, and remove the original. Note ❒ Do not hold down or pull out the original during copying. Do not put heavy object on the original table. ❒...
-
Page 27: Manual Feed Mode
Basic Copying (Copying to sheets) Manual Feed Mode When you need to make larger sized paper, you can feed paper manually by us- ing this function. If you want to feed manually, use the manual feed mode. This function helps you to make larger sized copy and protect from the paper skew. When the Wait indicator goes off and the Ready and the Set Original indi- cator go on, the copier enters the ready condition. - Page 28 Copying Select any copy settings you require, such as the media type or copy density. Press the {Paper Select/Cut} key to select either one of the Roll Feeder or By- pass Tray. Note ❒ If you select two roll feeder, select one of the roll. ❒...
- Page 29 Basic Copying (Copying to sheets) Note ❒ Do not force to remove the original once you set it and if you want to change the position of your original or set another original. In this case, press the {Clear/Stop} key to eject the original. If you are ready to make copy, press the {Start} key.
-
Page 30: Using The Rear Table
Copying Copies are delivered at the rear of the machine. Using the Rear Table Set thick originals or originals less than 297(11”)mm in width and more than 1,200( 48”)mm in length on the rear table. Note ❒ You cannot use the following functions when using the rear table. •... - Page 31 Basic Copying (Copying to sheets) Press the {Clear/Stop} key and remove the original. If the paper is hardly to remove, ⇒ p.66 “If Sheet Paper is Jammed at the Pa- per Exit”...
-
Page 32: Copying Onto Roll Paper
Copying Copying onto Roll Paper The paper will be fed to the copier from the Roll Feeder. You can copy onto roll paper using the following functions: • Synchro cutting • Preset cutting • Variable cutting Note ❒ If unused roll paper is left in the copier, cut 1000mm (39.3") from the edge of the paper before you start copying. -
Page 33: Synchro Cutting
Copying onto Roll Paper Synchro Cutting This function cuts roll paper automatically according to the original length. Note ❒ This feature can cut length of paper in the range of 280mm to 3,000mm, 11”to 118”. Press the {Paper Select/Cut} key. The Paper Select indicator lights up. - Page 34 Copying Select any copy settings you require. Set the original guides to match the width of the original. Make sure that the wait indicator goes off and the ready and the set original indicator go on. Center your original face down on the original table. Slide the original straight into the copier until the copier pulls it in.
- Page 35 Copying onto Roll Paper After copying has finished, hold the original with one hand, press the {Clear/Stop} key, and then remove the original. Note ❒ To cancel copying, press the {Clear/Stop} key. The copier finishes the oper- ation in progress, and delivers the copy and the original. Press the {Clear/ Stop}key to remove the original.
-
Page 36: Preset Cutting
Copying Preset Cutting This function cuts roll paper to a selected length. The paper is cut to this length regardless of the size. Note ❒ The default preset cut lengths are as follows. Metric Version: 1189mm, 841mm, 594mm, 420mm, 297mm Inch Version: 48.0", 42.0", 36.0", 24.0", 18.0", 11.0"... -
Page 37: Variable Cutting
Copying onto Roll Paper Variable Cutting This function cuts roll paper in a length you specify. Note ❒ Length can be cut from 280mm to 3,000mm, 11" to 118". Press the {Paper Select/Cut} key. The Preset/Variable indicator lights up and the paper length display shows the default Preset Cut length. - Page 38 Copying Press the {Paper Select/Cut} key to turn on the Paper Select indicator. Continue from step E⇒ ⇒ ⇒ ⇒ p.24...
-
Page 39: Copy Settings
3. Copy Settings Copying onto Other Media To copy onto translucent paper, film, use the {Copy Media} key to match the pa- per type refer to the following table. Type of paper Media setting Plain paper Both indicators off Film Film indicator on Translucent paper Translucent paper indicator on... -
Page 40: Adjusting The Fusing Temperature Manually
Copy Settings Adjusting the Fusing Temperature Manually Press the {Copy Media} key to turn on the Translucent or Film indicator that you want. Hold down the {Copy Media} key for 3 seconds until beep. The indicator show the current fusing temperature. The unlit indicator shows the current temperature settings. -
Page 41: Adjusting Copy Image Density
Adjusting Copy Image Density Adjusting Copy Image Density To make copies darker or lighter, change the density setting. There are 14 densi- ty levels (=7 notches × 2) . • Standard density level (Default) • 3 darker levels • 10 lighter levels Set the density with the {i} and {j} keys under the density indicator. -
Page 42: Setting The Number Of Copies (Repeated Copying)
Copy Settings Setting the Number of Copies (Repeated Copying) You can preset the number of copies (1 to 10) you want to make. Repeated cop- ying means making two or more copies of an original. Note ❒ With this feature, the image might be copied at a slant. Whether this happens depends on the original size, type, and condition (e.g., curled, wavy). -
Page 43: Setting A Leading/Trailing Edge Margin
Setting a Leading/Trailing Edge Margin Setting a Leading/Trailing Edge Margin You can set a margin on the leading or trailing edge of the copy when you use Roll Feeder in the Synchro Cut mode. When using the bypass table, and Preset/ Variable Cut mode you can only set the trailing edge margin. - Page 44 Copy Settings Using the original table, insert the leading edge of the original first. Note ❒ If you use the rear table, insert the original trailing edge first.
-
Page 45: Partial Copying
Partial Copying Partial Copying The Partial Copy function copies only a part of an original. You need to enter start and end points in the feed direction of the original . Synchro Cut Mode original Bypass Table Preset/Variable Cut Mode Note ❒... - Page 46 Copy Settings Hold down the {Function Select} key for 3 seconds or more. A "P" will blink in the copy counter display. Slide the paper straight into the copier until it stops, or press the {Paper Se- lect/Cut} key to turn on the Paper Select indicator. Set the original.
- Page 47 Partial Copying Press the {Function Select} key when the leading edge of the area to be cop- ied reaches the edge of the original table cover. The "P" will stay on, not blinking. The copier starts copying. Press the {Function Select} key when the trailing edge of the area to be cop- ied reaches the edge of the original table cover.
-
Page 48: Programming Settings You Often Use
Copy Settings Programming Settings You Often Use There are two ways of programming settings you often use. A) Store the settings in the {Program} key. When you press this key, the settings will be recalled instantly. B) Change the default settings to those you use most frequently. Whenever you turn on the machine or press the {Clear Modes/Energy Saver} key, these settings will be ready to use. - Page 49 Programming Settings You Often Use Recalling Settings Stored in the Program key Press the {Program} key before copying. Enter the number of copies required with the {+} and {—} key. Make a copy.
-
Page 50: B) Changing The Default Setting
Copy Settings B) Changing the Default Setting Turn off the main switch. While holding down the {Emergency Stop} key, turn the copier back on. The jam and service indicators will blink. Input the settings you want. Turn off the main switch. Note ❒... -
Page 51: User Tools
User Tools User Tools Access the User Tools to make the following adjustments: A1) Magnification Adjustment: allows you to adjust the vertical degree. A2) Cut Length: allows you to adjust the cut length. −25mm ~ +25mm (−1.0" ~ −1.0") (by 1mm or 0.1") Hold down the {Program} key for 3 seconds or more. - Page 52 Copy Settings Use the {+} and {− − − − } key to change the value Press the {Program} key to return to step B. Press the {Clear Modes/Energy Saver} key to exit this mode.
-
Page 53: Settings You Can Change With User Tools
Settings You Can Change with User Tools Settings You Can Change with User Tools This section is for the key operators in charge of this machine. You can change or set the machine's default settings. Note ❒ For how to enter the User Tools program, press the {Clear Modes/Energy Saver} key, and then press the {Clear/Stop} key for more than 3 seconds. - Page 54 Copy Settings • Beeper On/Off(+05): The beeper can be turned off completely; turned off for setting the margin, multiple copies, and paper length; or left on to emit a tone whenever a key is pressed. Note ❒ 0: On, 1: All Off, 2: Partially Off ❒...
- Page 55 Settings You Can Change with User Tools • Auto Energy Saver Mode(+10): The fusing unit needs to be hot for copying. When the copier is idle, the fusing unit can be kept hot to save time or it can be allowed to cool to save energy. This feature can be set to start automatical- ly, but you can also turn it on yourself by pressing and holding the {Clear Modes/Energy Saver} key for three seconds.
- Page 56 Copy Settings • Auto Off Time(+15): You can set the time the machine waits after the last op- eration before switching itself off automatically. The time can be set by minute from 1 to 240 minutes. Note ❒ Default: 30min ❒...
- Page 57 Settings You Can Change with User Tools • Paper Length Up/Down Speed Setting(+21) :The copier can scroll through the preset lengths forward or backward, and at different speeds. There are many sets of sizes from which to choose. Note ❒ 0: 0.10 seconds, 1: 0.5 seconds, 2: 0.25 seconds, 3: 0.05 seconds, 4: 0.02 sec- onds, 5: 0.01 seconds ❒...
- Page 58 Copy Settings...
-
Page 59: Maintaining Your Copier
4. Maintaining Your Copier Changing The Used Toner Bottle When "E" is displayed, it is time to change the toner bottle. R WARNING: • Do not incinerate used toner, toner bottle or toner cartridge. • Toner dust might ignite when exposed to an open flame. •... - Page 60 Maintaining Your Copier Unplug the code from the mainframe. Open the door on the right side of the copier ,and then carefully remove the plastic bottle. Note ❒ Put the used toner to the plastic bag and dispose of it according to local reg- ulations.
- Page 61 Changing The Used Toner Bottle Close the upper unit.
-
Page 62: Adding Toner
Maintaining Your Copier Adding Toner When D is displayed, it is time to add toner. When the indicator starts blinking, you can still copy about 53 feet of paper (16 m, 27 8 "×11" size copies). When the indicator stays on, you can't copy until a new cartridge is installed. - Page 63 Adding Toner Open the toner cartridge cover. Turn the old cartridge towards you. Then, while pressing the cartridge to the right (A), lift the left end and re- move the cartridge (B). Put the old toner cartridge in a plastic bag and dispose of it according to lo- cal regulations.
- Page 64 Maintaining Your Copier Install the new cartridge. Make sure that the white circle labeled 1 on the cartridge faces up. Make sure the cartridge is set well but don't push it in yet. Take the right edge of the seal and slowly remove it. Push the toner cartridge all the way to the left.
- Page 65 Adding Toner Close the toner cartridge cover and the original table. The copier will need a few moments to warm up before it is ready to copy.
-
Page 66: Changing The Roll Paper Size
Maintaining Your Copier Changing the Roll Paper Size Change the size guides on the left and Setting the Roll Paper Holder right of the roll paper holder when you load different sized paper rolls. Insert the hook on the paper hold- Important er into (A), and then insert the ❒... - Page 67 Changing the Roll Paper Size Metric version Roll Feeder...
-
Page 68: Loading A Roll Of Paper
Maintaining Your Copier Loading A Roll Of Paper When C is displayed, it is time to install a new roll of paper. R CAUTION: • Rolls of paper can be heavy, so you should be careful when load- ing one. •... - Page 69 Loading A Roll Of Paper Set the paper holder to the roll core (A), and then lower the lever (B). Note ❒ Insert the paper roll as far as it will go. Hold both sides of the paper roll and install it securely in the paper holder. Note ❒...
- Page 70 Maintaining Your Copier ❒ You may hardly to adjust the roll paper position when you set 914mm (“36). In this case, take out the paper holder, and then release the lock lever. After you adjust it, put it back to the roll feeder. ❒...
- Page 71 Loading A Roll Of Paper ❒ For how to change the Roll 2, refer to the following illustration: Hold the paper (B), and then slide the cutter (A). Note ❒ Slide the cutter one way only, otherwise paper waste may pile up inside the machine.
- Page 72 Maintaining Your Copier...
-
Page 73: Troubleshooting
5. Troubleshooting If Something Goes Wrong If you have problems with your copier, consult the following pages. If a service indicator lights up, read the following section. If the original or copy is stuck in the copier; ⇒ p.64; if the copier won't start, or if copies don't look right, ⇒ p.72. If Indicator Lights Up If one of the indicators shown appears on the operation panel, turn to the appro- priate page and follow the instructions described there. -
Page 74: If Jams Occur
Troubleshooting If Jams Occur If the Original is Jammed at the exit Note ❒ If the paper or original gets stuck in the copier, remove both original and pa- per. Lift the original table. Very gently pull the original out of the feed-out slot. Be careful not to tear Close the original table. -
Page 75: If Sheet Paper Is Jammed In The Feed-In Slot
If Jams Occur If Sheet Paper is Jammed in the Feed-in Slot R CAUTION: • The fusing unit can be very hot. Do not touch any parts under the fusing cover. If necessary, wait until the fusing unit has cooled down. -
Page 76: If Sheet Paper Is Jammed At The Paper Exit
Troubleshooting If Sheet Paper is Jammed at the Paper Exit R CAUTION: • The fusing unit can be very hot. Do not touch any parts under the fusing cover. If necessary, wait until the fusing unit has cooled down. Squeeze the locks on each side of the copier and lift the moddle unit be- tween the original table and the bypass table. -
Page 77: If Roll Paper Jams
If Jams Occur Close the unit and all covers. Press firmly on both sides until it clicks into place. If Roll Paper Jams If roll paper jams inside the roll feeder, you still might need to check everywhere to remove the entire length of paper. R CAUTION: •... - Page 78 Troubleshooting Note ❒ Slide the cutter one way only, otherwise paper waste may pile up inside the machine. Rotate the paper roll in the direction of the arrow until you can see the edge of the paper. Turn the knob anticlockwise about 1/4 to adjust the paper position. Slowly rotate the paper roll until the edge of the paper is fed into the rub- ber part of the roller (A).
-
Page 79: If You Cannot See The Roll Paper Jam
If Jams Occur Note ❒ Do not hold the paper knob from side. It may cause you touching a sticky oil. For how to turn the knob without any harm, see the illustration below: ❒ Make sure that the paper is not loose. Insert it straight into the roller. ❒... - Page 80 Troubleshooting Cut the edge of the paper with the cutter or scissors. Hold the paper (B), and then slide the cutter (A). Note ❒ Slide the cutter one way only, otherwise paper waste may pile up inside the machine. Turn the knob anticlockwise about 1/4 to adjust the paper position. Slowly rotate the paper roll until the edge of the paper is fed into the rub- ber part of the roller (A).
- Page 81 If Jams Occur Note ❒ Do not hold the paper knob from side. It may cause you touching a sticky oil. For how to turn the knob without any harm, see the illustration below: ❒ Make sure that the paper is not loose. Insert it straight into the roller. ❒...
-
Page 82: Others
Troubleshooting Others If a puzzling or recurring problem occurs, check the following before calling a service representative. It's also a good idea to check the ⇒ p.75 “Do's & Don'ts” to make sure the paper and originals match what the copier can handle. Absolutely Nothing Happens •... -
Page 83: Creases
Others Creases • Try setting your copy paper sideways. • If long creases appear on copies, try setting your copy paper sideways, or try changing the copy media setting. • If creases appear on copies made to transparent film, try setting your film sheets sideways. -
Page 84: Daily Maintenance
Troubleshooting Daily Maintenance Clean the Exposure Glass & the Platen Plate You should clean the copy and original tables with a damp cloth, and then wipe them with a dry cloth. Clean the exposure glass and the original drive roller with a damp cloth, and then wipe them with a dry cloth. -
Page 85: Do's & Don'ts
Do's & Don'ts Do's & Don'ts R CAUTION: • When you move the machine, unplug the power cord from the wall outlet to avoid fire or electric shock. • When the machine will not be used for a long time, unplug the power cord. -
Page 86: Where To Put Your Copier
Troubleshooting Where to Put Your Copier Your copier should be installed by a qualified technician. If you need to trans- port your copier to a distant location, call your service center before the move. You can of course move your copier around your office without calling the serv- ice center. -
Page 87: Power Connection
Where to Put Your Copier • Areas prone to strong vibrations • Locations directly exposed to cool air from an air conditioner or heat from a nearby heater (Sudden temperature changes may lead to condensation with- in the copier.) • Locations near a diazo copy machine Power connection R WARNING: •... -
Page 88: Access To Machine
Troubleshooting Access To Machine Place the copier near a power source and provide clearance as shown. 1. Rear: more than 60cm, 23.7” 2. Right: more than 60cm, 23.7” 3. Left: more than 60cm, 23.7” 4. Front: more than 100cm, 40.0”... -
Page 89: Specifications
6. Specifications Copier Configuration Console with roll feeder Process Dry electrostatic transfer system Scanning Original moving over a fixed fiber optics array Originals Sheet Original Reference Position Center Maximum: 914 (W) × 3,000mm (L) (36" × 118") Original Size Minimum: A4 K (210 (W) × 297mm (L)) (8.5" ×... -
Page 90: Roll Feeder
Specifications Roll Feeder Number of loaded paper rolls 1 roll (Type780A) 2 roll (Type780B) Acceptable Roll Size Width: 210, 257, 297, 364, 420, Width: 210, 257, 297, 364, 420, 515, 594, 660, 728, 800, 841, 515, 594, 660, 728, 800, 841, 880, 914mm 880, 914mm Roll length: less than 150mm... -
Page 91: Options
Options Options • Copy Tray Type 780... -
Page 92: Index
INDEX Absolutely Nothing Happens , 72 If Copies Look Wrong , 72 Access To Machine , 78 If Indicator Lights Up , 63 Adding Toner , 52 If Jams Occur , 64 Adjusting Copy Image Density , 31 If Jams Occur Frequently , 72 Adjusting the Fusing Temperature If Roll Paper Jams , 67 Manually , 30... - Page 93 Safety Information , i Setting a Leading Edge Margin/Trailing Edge Margin , 33 Settings You Can Change with User Tools , 43 Setting the Number of Copies (Repeated Copying) , 32 Setting the Roll Paper Holder , 56 Something Happens, but Set Paper or Paper Select Never Appear , 72 Specifications , 79 Synchro Cutting , 23...
- Page 94 MEMO B048-8600B...
- Page 95 Declaration of Conformity “The Product complies with the requirements of the EMC Directive 89/336/EEC and the Low Voltage Directive 73/23/EEC and 93/68/EEC.” Where symbols are used on or near switches, they mean an under in accordance with IEC 60417: a means POWER ON. c means STAND BY.
- Page 96 1 Plane Tree Crescent, Feltham, Yan An West Road, Middlesex, TW13 7HG Shanghai, P.C.:200050 Phone: +44-(0)20-8261-4000 Phone: +86-21-5238-0222 Germany Singapore RICOH DEUTSCHLAND GmbH RICOH ASIA PACIFIC PTE.LTD. Mergenthalerallee 38-40, 260 Orchard Road, 65760 Eschborn #15-01/02 The Heeren, Phone: +49-(0)6196-9060 Singapore 238855 Phone: +65-6830-5888 France RICOH FRANCE S.A.