Table of Contents
Advertisement
Quick Links
Before installing and using this product, be sure to read "Read this first!" (pages 4, 24 to 25).
ENGLISH
This manual contains information excerpted from the Operating Instructions.
Excerpted Version
For more information, please visit the Panasonic website (http://pro-av.panasonic.net/manual/en/index.html), and
refer to the Operating Instructions.
Antes de instalar y usar este producto, asegúrese de leer "Lea esto primero!" (páginas 4, 26 a 27).
ESPAÑOL
Si desea obtener más información, visite el sitio web de Panasonic (http://pro-av.panasonic.net/manual/en/index.
html) y consulte las instrucciones de funcionamiento y las instrucciones de instalación.
Before operating this product, please read the instructions carefully and save this manual for future use.
PJ
SS0118TY0 -FJ
Printed in Japan
Operating Instructions
Installation Instructions provided
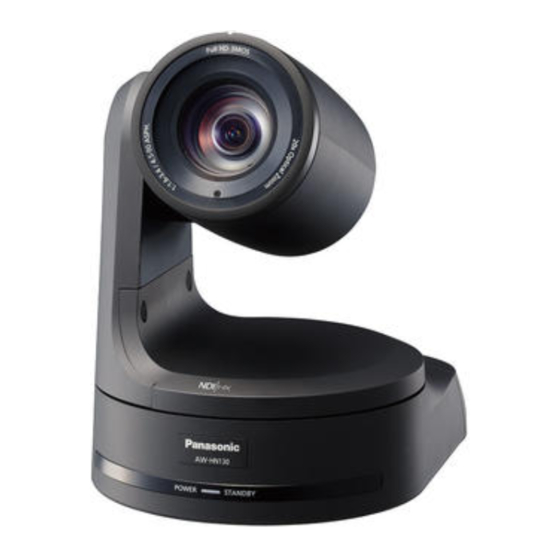
AW‑HN130WP
Model No.
AW‑HN130KP
Model No.
Excerpted Version
HD Integrated Camera
ENGLISH
DVQX1528ZA
Advertisement
Table of Contents

Related Manuals for Panasonic AW-HN130WP


Summary of Contents for Panasonic AW-HN130WP
- Page 1 Antes de instalar y usar este producto, asegúrese de leer “Lea esto primero!” (páginas 4, 26 a 27). ESPAÑOL Si desea obtener más información, visite el sitio web de Panasonic (http://pro-av.panasonic.net/manual/en/index. html) y consulte las instrucciones de funcionamiento y las instrucciones de instalación.
- Page 2 Model number given in and the HDMI Logo are trademarks or registered trademarks of Model number of unit manual HDMI Licensing Administrator, Inc. in the United States and other AW-HN130WP countries. AW-HN130 AW-HN130KP • NDI is a registered trademark of NewTek, Inc.
-
Page 3: Table Of Contents
Contents Installation Instructions Read this first! ..................4 Connections ..................18 Connecting an NDI|HX compatible switcher ........18 Lea esto primero! .................. 4 Connections with a controller Installation precautions ................ 5 (AW-RP120/AW-RP50/AK-HRP200) ..........19 System example 1 (Serial control) ............. 20 Before installation ................. -
Page 4: Installation Instructions
Panasonic modelo WV-Q105A. La utilización con otros aparatos puede causar inestabilidad y posibles lesiones. -
Page 5: Installation Precautions
Installation Instructions Installation precautions Panasonic does not accept any responsibility for accident or damage during installation if procedure in this manual is not followed. To installation personnel Read the “Installation Instructions” thoroughly and then perform the operation correctly and safely. - Page 6 Installation Instructions Installation precautions (continued) Before installation, always disconnect the power Power switch „ „ „ „ This unit does not have a power switch. The power turns on when plug its power plug is connected to a power outlet. When the power When installing, always use the supplied components.
-
Page 7: Before Installation
AUTO SW4 (communication format selection switch) Selects the communication format. When this is set to ON, standard serial communication is enabled. When this is set to OFF, Panasonic's proprietary serial communication is enabled. SW5 (maintenance switch) Fixed at OFF. Do not change this switch setting. -
Page 8: How To Install And Connect The Unit
Installation Instructions How to install and connect the unit Be absolutely sure to read through the “Read this first!” (→ page 4) and “Installation precautions” (→ pages 5 to 6) The procedure given here is for the kind of installation where the unit is suspended from an overhead surface, but the same steps are followed for a stand-alone installation. - Page 9 Installation Instructions How to install and connect the unit (continued) Mount the mount bracket onto the installation surface. • Use the bracket mounting screws (M4, bind-head: 10 mm long) supplied with the unit. • For proper clamping torque, securely attach the screws using the specified tools. Screw Clamping torque diameter...
- Page 10 Installation Instructions How to install and connect the unit (continued) Mount the unit. • Align the position of the hole for checking the positioning with the status display lamp. • Align the holes on the camera main unit used to insert the bottom panel with the protrusions on the mount bracket used for inserting the camera, push the bracket and camera firmly together, and rotate the main unit by about 20 degrees in the direction of the arrow.
- Page 11 Installation Instructions How to install and connect the unit (continued) Connect the rear panel connectors. Anchor the AC adaptor cable in place using the cable clamp. When three coaxial cables are to be connected, connect coaxial cable [2] first. LAN cable LAN cable RS-232C cable RS-232C cable...
-
Page 12: When Using The Wv-Q105A (Optional Accessory)
Installation Instructions How to install and connect the unit (continued) When using the WV-Q105A (optional accessory) It is recommended that you provide an inspection opening or other such space for access purposes in the area near where the equipment is installed in order to facilitate installation and the wiring connections work. -
Page 13: Changing The Direction Of The Nameplate
Installation Instructions Changing the direction of the nameplate When the unit is mounted on the ceiling, its nameplate will be upside down. The direction of the unit’s nameplate can be changed. Push in the part indicated by the arrow, and pull out the nameplate. Change the direction of the nameplate. -
Page 14: Removing The Camera
Installation Instructions Removing the camera Turn off the circuit breaker and power. Remove the cable cover. • Remove the screw (M3) for the cable cover used to secure the cover. • Push the tab parts of the cover to disengage the cover. Disconnect the cables. -
Page 15: Stand-Alone Installation (When The Mount Bracket Is Going To Be Used)
Installation Instructions Stand-alone installation (when the mount bracket is going to be used) The same steps are followed as for the kind of installation where the unit is suspended from an overhead surface (→ pages 8 to 11). Check the mounting space. <NOTE>... - Page 16 Installation Instructions Stand-alone installation (when the mount bracket is going to be used) (continued) Check the mounting. Connect the rear panel connectors. When three coaxial cables are to be connected, connect coaxial cable [2] first. Screw for cable cover (M3 screw) (with flat washer, spring washer) S I G - 2 3...
-
Page 17: Stand-Alone Installation (When The Mount Bracket Is Not Going To Be Used)
Installation Instructions Stand-alone installation (when the mount bracket is not going to be used) When installing the unit on a desktop Place the unit flat on the surface. <NOTE> • Install the unit in a stable location which will not be susceptible to shaking. If the unit is installed in a location which is susceptible to shaking, this will cause the unit’s images to shake in turn. -
Page 18: Connections
Installation Instructions Connections Connecting an NDI|HX compatible switcher HD Integrated Camera AW-HN130 HD Integrated Camera AW-HN130 Accessory AC adaptor LAN cable Switching hub NDI|HX compatible switcher External DC Remote Camera Controller power supply AW-RP120 The AC adaptor provided with the unit is not shown Monitor Monitor in the above figure. -
Page 19: Connections With A Controller
Installation Instructions Connections (continued) Connections with a controller (AW-RP120/AW-RP50/AK-HRP200) LAN cable (crossover cable) Pan-tilt head/ HD Integrated Camera camera control signals AW-HN130 Remote Camera Controller HDMI/SDI AW-RP50 Monitor Accessory AC adaptor Accessory AC adaptor Remote Camera Controller AW-RP120 External DC power supply... -
Page 20: System Example 1 (Serial Control)
Installation Instructions Connections (continued) System example 1 (Serial control) HD Integrated Camera HD Integrated Camera AW-HN130 AW-HN130 Accessory AC adaptor RS-422 connector Genlock signal generator Pan-tilt head and camera control signal (LAN straight cable) SDI video signal Monitor 1 Monitor 2 Monitor Monitor System TALLY... -
Page 21: System Example 2 (Ip Control)
Installation Instructions Connections (continued) System example 2 (IP control) HD Integrated Camera HD Integrated Camera AW-HN130 AW-HN130 Accessory AC adaptor connector Genlock signal generator SDI video signal LAN cable (straight cable) Monitor 2 Switching hub Monitor 1 LAN cable (straight cable) Monitor Monitor Accessory... -
Page 22: System Example 3 (Ip Image Transmission, Poe+)
Installation Instructions Connections (continued) System example 3 (IP image transmission, PoE+) HD Integrated Camera AW-HN130 HD Integrated Camera AW-HN130 connector Network Recorder WJ-NV300/4 LAN cable PoE+ compatible switching hub Personal computer System example 4 (connection with commercially available controller, RS-232C daisy-chain connection) HD Integrated Camera AW-HN130 Up to 7 RS-232C... -
Page 23: Appearance
Installation Instructions Appearance Unit: mm (inch) 125 (4-29/32) AW-HN130 90 (3-17/32) 180 (7-3/32) 234(9-3/16) -
Page 24: Operating Instructions
Operation at a voltage other than 120 V AC may require the use of a different AC plug. Please contact either a local or foreign Panasonic authorized service center for assistance in selecting an alternate AC plug. indicates safety information. -
Page 25: Note On Grounding
Operating Instructions ENGLISH Read this first! (continued) FCC NOTICE (USA) This device complies with part 15 of the FCC Rules. Operation is subject to the following two conditions: (1) This device may not cause harmful interference, and (2) this device must accept any interference received, including interference that may cause undesired operation. -
Page 26: Lea Esto Primero
CA diferente. Póngase en contacto con un centro de servicio autorizado por Panasonic, bien sea local o del extranjero, para que le ayude en la selección de una clavija de CA alternativa. -
Page 27: Nota Sobre La Conexión A Tierra
Operating Instructions ESPAÑOL Lea esto primero! (continuación) INSTRUCCIONES DE SEGURIDAD IMPORTANTES 1) Lea estas instrucciones. 2) Guarde estas instrucciones. 3) Preste atención a todas las advertencias. 4) Siga todas las instrucciones. 5) No utilice este aparato cerca del agua. 6) Limpie solamente con un paño seco. 7) No bloquee ninguna abertura de ventilación. -
Page 28: Before Use
• Connection with a Panasonic camera controller is also possible via Panasonic's proprietary serial communication format. OS X 10.8 Safari 6.1.2 • The unit is available in white (AW-HN130WP) or black (AW-HN130KP) OS X 10.7 to suit your intended application and environment. Safari 6.1.2 For iPhone, iPad, iPod touch: iOS 7.1... -
Page 29: Disclaimer Of Warranty
Disclaimer of warranty • Protect your network against unauthorized access by restricting users IN NO EVENT SHALL Panasonic Corporation BE LIABLE TO ANY to those who log in with an authorized user name and password. PARTY OR ANY PERSON, EXCEPT FOR REPLACEMENT OR •... -
Page 30: Features
The unit can also be used together with the cameras and pan-tilt manual. head unit systems currently available from Panasonic Corporation For details on PoE+ power supply devices for which operation so that an existing system can be used to advantage to put has been verified, consult your local dealer. -
Page 31: Controller Supported
• It may be necessary to upgrade the version of the controller in order to support the unit. For details on upgrading, visit the support page on the following website. http://pro-av.panasonic.net/ <NOTE> • The following operations can not be performed via the following controllers. -
Page 32: Accessories
Operating Instructions Accessories Check that the following accessories are present and accounted for. • After removing the product from its container, dispose of the power cable cap (if supplied) and packing materials in an appropriate manner. Mount bracket for installation surface Main unit mounting screw (with flat AC adaptor (1) (Hanging / Desktop) (1) -
Page 33: Operating Precautions
Operating Instructions Operating precautions Shoot under the proper lighting conditions. Concerning the HDMI interface standard „ „ „ „ To produce pictures with eye-pleasing colors, shoot under the This unit has been certified as HDMI-compatible, but on rare proper lighting conditions. occasions images may not be displayed depending on the HDMI The pictures may not appear with their proper colors when shooting device which has been connected to the unit. - Page 34 This product includes MIT Licensed software. This product includes BSD Licensed software. For details on obtaining the source codes, visit the following website. http://pro-av.panasonic.net/ However, do not contact Panasonic for questions regarding obtained source codes.
-
Page 35: Wireless Remote Control (Optional Accessory)
Operating Instructions Wireless remote control (optional accessory) This unit can be operated by remote control using a wireless <Layout of wireless remote control signal light-sensing areas> remote control (model number: AW-RM50G) purchased separately. Check out the following points before using the wireless remote <NOTE>... -
Page 36: Parts And Their Functions
Operating Instructions Parts and their functions Camera unit Mount bracket for installation surface (supplied accessory) Mount this bracket onto the installation surface, and then attach the camera main unit to the bracket. Drop-prevention wire This wire is screwed down to the bottom panel of the camera main unit. - Page 37 — (standard serial 1080/50i 576/50i 1080/50i communication) 1080/25PsF 576/50i 1080/50i 576/50i 720/50p Communication Panasonic Standard serial 720/50p 576/50p(i) 576/50i ― format proprietary serial communication communication <NOTE> Always leave at OFF (used for factory adjustments) • Locking to a subcarrier is not possible with BBS.
- Page 38 Selects the communication format. When this is set to ON, standard serial communication is enabled. 1080/25p When this is set to OFF, Panasonic's proprietary serial 1080/23.98p communication is enabled. 720/59.94p ...
-
Page 39: Wireless Remote Control (Not Supplied)
Operating Instructions Parts and their functions (continued) Wireless remote control (not supplied) MODE button <MODE> This is used to select the video signals which are output from the unit. Each time it is pressed, the signals are switched between the color bar signals and camera video signals. - Page 40 Operating Instructions Parts and their functions (continued) <NOTE> • To prevent malfunctioning, there are a number of menu items ([Scene], [Format], [Down CONV. Mode] and [Frequency]) whose setting is not reflected immediately even if it is changed while it is still flashing.
-
Page 41: Setting The Remote Control Ids
Operating Instructions Setting the remote control IDs The wireless remote control (optional accessory) is capable of operating up to four units. IDs are used to set which units are selected when the <CAM1>, <CAM2>, <CAM3> and <CAM4> buttons on the wireless remote control have been pressed. -
Page 42: Network Settings
Easy IP Setup Software. You can obtain Easy IP Setup Software (EasyIPSetup.exe) by downloading it from the following website. http://pro-av.panasonic.net/ To establish the settings for a multiple number of units, the settings must be selected for each camera involved. If the settings cannot be established using the Easy IP Setup Software, select the settings separately for the unit and personal computer on the Network setup screen [Network] of the setting menu. -
Page 43: Installing The Plug-In Viewer Software
Operating Instructions Network settings (continued) Installing the plug-in viewer software User authentication To view IP images from the unit on a web browser, the "Network The unit can be configured to allow access from the internet. To Camera View 4S" plug-in viewer software (ActiveX ) must be installed. -
Page 44: Troubleshooting
– – – → For details on upgrading, visit the support page on the following website. http://pro-av.panasonic.net/ • When using an HTTPS connection, network connection with the AW-RP50, AW- PDF page 90 RP120, and AK-HRP200 will be disabled. - Page 45 Operating Instructions Troubleshooting (continued) Symptom Cause and solution Reference pages • Has a LAN cable of category 5 or above been connected to the LAN connector pages 20 to 22 for IP control <NDI|HX>? • Is the [LINK] LED of the LAN connector for IP control lit? →...
- Page 46 Operating Instructions Troubleshooting (continued) Symptom Cause and solution Reference pages For Windows: • Press the [F5] key on the keyboard of the personal computer to request that the settings be acquired. – – – For Mac: • Press the [Command] + [R] key on the personal computer's keyboard to request that the settings be acquired.
- Page 47 Operating Instructions Troubleshooting (continued) Symptom Cause and solution Reference pages • Is access being performed in HTTPS mode? Screen displays may take a while to appear in HTTPS mode due to signal – – – processing. Screens displays take a while to •...
- Page 48 Operating Instructions Troubleshooting (continued) Video „ „ Symptom Cause and solution Reference pages • Has the unit been connected properly to the other connected devices? pages 18 to 22 • If the system is configured in such a way that the picture is also switched when PDF page 23 the unit to be operated is selected, has the correct unit been selected? No pictures are displayed or the...
- Page 49 Operating Instructions Troubleshooting (continued) Symptom Cause and solution Reference pages • Activate the ATW (Auto tracking white adjustment) function. PDF page 30 Something is wrong with the • In some situations, the proper colors may not be reproduced using the ATW coloring of the pictures function.
- Page 50 Operating Instructions Troubleshooting (continued) IP images „ „ Symptom Cause and solution Reference pages For Windows: • Is the plug-in viewer software installed? page 43 → Install the plug-in viewer software. For Windows: • If [Check for newer versions of stored pages] is not set to [Every time I visit the webpage] in the temporary Internet file settings, IP images may not appear in the Images are not displayed live screen [Live].
- Page 51 Operating Instructions Troubleshooting (continued) Symptom Cause and solution Reference pages • The images may be distorted if the transmission path is congested and proper transmission is not possible. – – – → Consult your network administrator. The images are distorted •...
- Page 52 "This website wants to run the • Select [Allow]. – – – following add-on: 'WebVideo Module' from 'Panasonic System Networks Co.,Ltd.'." For Internet Explorer 8.0: • Click the information bar, and select [Always Allow Pop-ups from This Site]. The following message appears in When the [Allow pop-ups from this site?] dialog box appears, click the [Yes] the information bar.
-
Page 53: Specifications
( excluding protrusions, cable cover, direct ceiling (f=4.5 mm to 90 mm; 35 mm equivalent: 32.13 mm mount bracket) to 642.5 mm) Finish: AW-HN130WP: Pearl white Focus: Switching between auto and manual AW-HN130KP: Metallic black Focus distance: Entire zooming range: 800 mm (2.62 ft) Controller supported: Wide end: 400 mm (1.31 ft) - Page 54 Operating Instructions Specifications (continued) AC adaptor Chroma amount variability: „ „ OFF, -99 % to 40 % Input : 100 V - 240 V AC ( ), 50 Hz/60 Hz, 1.2 A Scene file: Scene1, Scene2, Scene3, Scene4 Output : 12 V DC ( ), 3.0 A, 36 W Output format: 1080/59.94p, 1080/29.97p...
-
Page 55: Index
Index Accessories ..................VIDEO OUT connector ................ Anti-theft wire mounting hole ............... AUDIO IN connector ................Wireless remote control ............Wireless remote control signal light-sensing area ....... Cable clamp ..................Camera head ..................DC IN connector .................. Drop-prevention wire ................Easy IP Setup Software ............... - Page 56 Web Site: http://www.panasonic.com © Panasonic Corporation 2018...