Table of Contents
Advertisement
Quick Links
PLEASE CONTACT MOEN FIRST
For Installation Help, Missing or
Replacement Parts
(USA)
1-800-BUY-MOEN (1-800-289-6636)
WWW.MOEN.COM
(Canada)
1-800-465-6130
www.moen.ca
POR FAVOR, CONTÁCTESE PRIMERO CON
MOEN
Para obtener ayuda de instalación, piezas
faltantes o de recambio
(Costa Este)
011 52 (800) 718-4345
WWW.MOEN.COM.MX
VEUILLEZ D'ABORD CONTACTER MOEN
En cas de problèmes avec l'installation, ou pour
obtenir
toute pièce manquante ou de rechange
HELPFUL TOOLS
For safety and ease of faucet replacement, Moen recommends
the use of these helpful tools.
HERRAMIENTAS ÚTILES
Para que el cambio de la llave sea fácil y seguro, Moen le
recomienda usar estas útiles herramientas.
OUTILS UTILES
Par mesure de sécurité et pour faciliter l'installation, Moen
suggère l'utilisation des outils suivants.
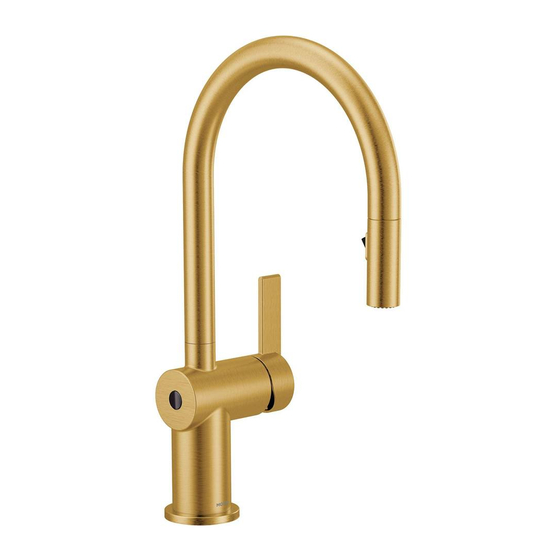
MOTIONSENSE™ HANDS-FREE
KITCHEN FAUCET
MEZCLADORA PARA COCINA
MOTIONSENSE™ MANOS LIBRES
ROBINET DE CUISINE MAINS LIBRES
MOTIONSENSE
MC
*Faucet model image may differ slightly
*La imagen del modelo de su mezcladora puede variar ligeramente
*L'image du modèle de robinet peut différer légèrement
Image is for reference only
(Style varies by model)
La imagen es sólo como referencia
(El estilo varía por el modelo)
Cette image n'est offerte qu'à titre indicatif seulement
(Le style varie selon le modèle)
Record Purchased Model Number:
Registro del número de modelo comprado:
Consigner ici le numéro du modèle acheté :
_______________________
(Save instruction sheet for future reference)
(Guarde la hoja de instrucciones para futura referencia)
(Garder ces directives pour référence ultérieure)
Register Online:
Regístrese en línea:
S'enregistrer en ligne :
www.moen.com/product-registration
INS11739 - 10/21
Advertisement
Table of Contents

Related Manuals for Moen MOTIONSENSE 7622EWBG


Summary of Contents for Moen MOTIONSENSE 7622EWBG
- Page 1 (El estilo varía por el modelo) HERRAMIENTAS ÚTILES Cette image n'est offerte qu'à titre indicatif seulement Para que el cambio de la llave sea fácil y seguro, Moen le (Le style varie selon le modèle) recomienda usar estas útiles herramientas.
- Page 2 (x6) * Use only non-rechargable alkaline batteries. * Paralograr el mejor desepeno, use baterias alcalinas no rechargeables. * Nutiliser que des piles alcalines non rechargeables. ** Optional A/C Adapter with Power Splitter 169031 (sold separately). The outlet for the AC power adapter requires continuous power.
-
Page 3: Parts List
INS11739 - 10/21 Parts List CAUTION — PRIOR TO OLD FAUCET REMOVAL: Ensure available clearance for control box installation. See page 6 for mounting A. Faucet body Q. Mounting screw options. B. Spray wand R.* Batteries* CAUTION — TIPS FOR REMOVAL OF OLD FAUCET: C. - Page 4 Recommended Configuration Configuracion recomendada Montage recommande Optional Control Box wall mounting - Order Kit 177566 Optional Control Box on left configuration Montaje de pared para caja de control optativa - pipa el kit 177566 Caja de control optativa en configuration izquierda Boitier de contrôle pour montage mural optionnel - gauche Boitier de contrôle optionnel pour montage a...
- Page 5 Soporte al Cliente Moen al 12" (305 mm) por encima del piso. 1-800-BUY-MOEN o vaya a www.moen.com y pida el Kit de Servicio para Montaje en Seleccione la ubicación deseada para la caja de control (M). Verifique que las Pared optativo (177566).
- Page 6 Three Hole Application Single Hole Application Aplicacion de tres agujeros Aplicaciо`n de un solo agujero Installation sur trois ouvertures Installation sur ouverture unique 1. Install faucet body (A)–including data cable (E), and single hole deck gasket (C)–in hole For 3 Hole Applications: on sink.
- Page 7 INS11739 - 10/21 1. Hand tighten Mounting Nut (J) with Installation Tool (P). 2. Use screwdriver though hole in Installation Tool (P) to tighten firmly. 1. Hand tighten Mounting Nut (J) with Installation Tool (P). 2. Use screwdriver though hole in Installation Tool (P)to tighten firmly. 1.
- Page 8 1. Remove and discard protective cap from Spray Wand (B). 2. Attach Spray Wand (B) to Pulldown Hose (D). 1. Insert small end of Pulldown Hose (D) into spout and feed through Faucet Body (A). 3. Finger tighten. 1. Insert small end of Pulldown Hose (D) into spout and feed through Faucet Body (A). 1.
- Page 9 INS11739 - 10/21 1. Remove and discard protective cap from pulldown hose (D). 1. Insert data cable (E) to data port on bottom of control box (M). 2. Insert pulldown hose (D) into quick connect on the bottom of control box (M). Push in 2.
- Page 10 Attach control box (M) onto hose guide nut (K) until it snaps into place. This is the recom- Control box (M) may also be attached from the left hand side as shown for optional mended orientation for most installations. mounting. Presione la caja de control (M) a la tuerca guía de la manguera (K) hasta que calce en su lugar.
- Page 11 INS11739 - 10/21 Battery Holder location ubicacion del soporte para pilas Emplacement du porte-pilas Install Zone Zona de instalación zone ďinstallation Locate hose weight locator mark (F) on pulldown hose (D). 1. Install hose weight (L) just above start of loop Before determining a location to mount the battery holder (S), verify that the battery holder curvature in hose on the same side of hose as locator mark (F).
- Page 12 Mounting Option 2/ Opciо`n de montage 2/ Option de montage 2 Attach battery holder (X) to wall with hook & loop fastener (T). First, attach one side of hook and loop fastener to wall. Then attach other piece to back of battery holder. Option: Attach battery holder to wall with screw (V) provided.
- Page 13 INS11739 - 10/21 1. Insert battery holder (S) cable into control box (M) power port. Ensure cable is pushed all 1. Turn the water supply line valves on and check for leaks. the way into the control box. 1. Abra las válvulas de suministro de agua y verifique si hay pérdidas. 1.
- Page 14 Handle Check Wave Sensor Check Verificatión del monomando Verificatión del sensor de ondas Verification de la poignée Verification du detecteur de mouvement Check to ensure wave sensor is working properly. Move hand over wave sensor to Check to ensure handle is working properly. Turn on water with handle to test that test that water will turn on.
- Page 15 INS11739 - 10/21 Sensor Options / Opciones de los sensores / Option de capteur Disable/Enable Wave Sensor Alternate method to Enable Wave Sensor Metodo alternativo para activear el sensor de ondas Desactive/Active el sensor de ondas Autre methode ppour activer le détecteur de mouvement Désactiver/Activer le détecteur de mouvement Option Opciо`n...
- Page 16 Low Flow / Flujo Bajo / Faible Débit 1. Insert each filter hose into a cup of water. 1. Turn water off. If low flow, turn off water at stops before 2. Agitate filter hoses back and forth for 15 seconds to 2.
- Page 17 INS11739 - 10/21 Low Flow / Flujo Bajo / Faible Débit Note: Filter screen (U) can be removed for further cleaning. Reassemble Filter Screen (U) into housing using needle 1. Insert each Filter Screen (U) into a cup of water. Screen must be reinstalled to maintain product warranty.
- Page 18 Irregular Flow / Flujo Irregular / Debit reduit 1. Rinse debris from screen. 1. Unscrew Pulldown Hose (D) from Spray Wand (B) and remove screen and O-ring. 1. Enjuaque los residuos del filtro. 1. Unscrew Pulldown Hose (D) from Spray Wand (B) and remove 1.
-
Page 19: Troubleshooting
INS11739 - 10/21 Troubleshooting If faucet does not appear to be functioning prop- erly, repeat the faucet startup process Data Startup process definition: Disconnect the battery holder cable (Y) and leave disconnected for 10 seconds. Reinsert battery holder cable (Y) and ensure cable is pushed all the Wave Sensor Hot Side way into the control box (S) (Refer to step 13). -
Page 20: Resolución De Problemas
Resolución de Problemas Si la mezcladora no parece estar funcionando correctamente, repita el proceso de puesta en Datos marcha de la mezcladora. Definición de proceso de puesta en marcha: Desconecte el cable del soporte para pilas (Y) y déjelo Lado Sensor desconectado durante 10 segundos. -
Page 21: Résolution De Problèmes
INS11739 - 10/21 Résolution de problèmes Si le robinet ne semble pas fonctionner correcte- ment, recommencer le processus de démarrage Données du robinet. Définition du processus de démarrage : Débrancher Détecteur de Côté eau le câble du porte-piles (Y) et le laisser débranché mouvement chaude pendant dix (10) secondes. - Page 22 What is Covered by This Limited Warranty, and the Applicable Warranty Periods Moen “(Seller”) warrants that the MotionSense™ System (“the Product”) will be free from defects in materials and manufacturing workmanship. Moen warrants that the faucet will be leak-free and drip-free under normal use, and that the Product’s control box (which houses the hydraulic system) and finish will be free from defects in material and manufacturing workmanship for: (1) the lifetime of the Original Consumer Purchaser;...
-
Page 23: Limitación De Responsabilidad
Cette garantie limitée ne couvre que les défauts de conformité de fabrication et de matériaux indiqués ci-dessus, et ne couvre pas les problèmes de conformité ni les dommages pouvant découler de toute autre cause, y compris, mais sans s’y limiter, les défauts ou les dommages causés par l’utilisation de pièces autres que les pièces d’origine Moen, l’erreur d’installation, l’usage abusif ou incorrect du Produit ou tout dommage causé par l’utilisation de produits nettoyants contenant des agents abrasifs, de l’alcool ou tout autre solvant organique. - Page 24 Moen Incorporated Moen de Mexico, S.A. de C.V. Moen Inc. 25300 Al Moen Drive Carretera Saltillo-Monterrey KM 14.7 2816 Bristol Circle North Olmsted, Ohio 44070-8022 Ramos Arizpe, Coahuila Oakville, Ontario L6H 5S7 U.S.A. Mexico 25900 Canada INS11739 - 10/21 ©2021 Moen Incorporated...