Advertisement
Quick Links
1
5
2
6
1
3
2
4
6
7
8
9
10
11
12
13
OPTIONAL/OPTATIVO/OPTIONNELLE
4
DEC 02
3
16
17
15
14
21
19
20
22
23
24
Moen Incorporated 25300 Al Moen Drive, North Olmsted, OH 44070-8022 U.S.A.
Moen Inc. 2816 Bristol Circle, Oakville, Ontario L6H5S7
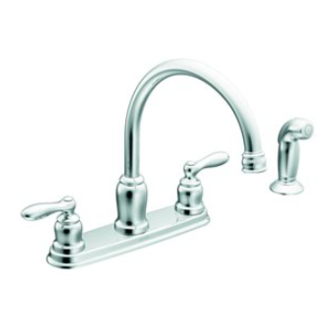
TWO-HANDLE
KITCHEN FAUCET
7980, 7990, 87980, and 87990 SERIES
ROBINET DE CUISINEÀ POIGNÉE
DOUBLE
SERIES 7980, 7990, 87980, et 87990
MEZCLADORA PARA COCINA DE
DOS MANIJAS
SERIES 7980, 7990, 87980, y 87990
ENGLISH
1
Plug Button
2
Handle Screw
18
3
O-ring
Lever Handle Insert
4
(not included on all models)
Cross Handle Insert
5
(not included on all models)
6
Handle Hub
7
Cartridge Nut
8
Cartridge
9
Escutcheon
10
Faucet Shank
11
Deck Gasket
12
Mounting Nut/Washer
Tailpiece Nut
13
(not included with
all models)
Diverter
14
(side spray models only)
15
Spout Nut
16
Spout Assembly
17
Aerator
Swivel Spray Aerator
18
(not included on all models)
Hose Nut
19
(side spray models only)
Spray Hose
20
(side spray models only)
Spray Head
21
(side spray models only)
Spray Escutcheon
22
(side spray models only)
Spray Shank
23
(side spray models only)
Locknut
24
(side spray models only)
Complies with ASME A112.18.1M and CSA B125
Conformément à ASME A112.18.1M et CSA B125
En cumplimiento de ASME A112.18.1M y CSA B125
in Canada:
FRANÇAIS
ESPAÑOL
Bouton de finition
Vis de poignée
Tornillo de Manija
Joint torique
Manija de Palance
Manette (certains modèles seul.)
(no incliudas con todos los modelos)
Poignée cruciforme
Inserto de Manija en Cruz
(certains modèles seul.)
(no incliudas con todos los modelos)
Moyeu de poignée
Centro de Manija
Écrou de cartouche
Tuerca del Cartucho
Cartouche
Rosace
Tige de rosace
Tubo Roscado de Mezcladora
Joint d'étanchéité de comptoir
Empaque de Cubierta
Écrou/rondelle de montage
Arandela/Tuerca de Montaje
Écrou d'about
Tuerca de Colilla
(non comprises avec
(no incluidas con
tous les modéles)
todos los modelos)
Inverseur
(avec rince-lég. lat. seul.)
(modelos con rociador lateral)
Écrou de bec
Tuerca de Salida
Assemblage de bec
Ensamble de Salida
Aérateur
Aérateur Swivel Spray
Aireador de Rociador de Aire
(certains modèles seul.)
Écrou de boyau
Tuerca de Manguera
(avec rince-lég. lat. seul.)
(modelos con rociador lateral)
Boyau de rince-légumes
Manguera del Rociador
(avec rince-lég. lat. seul.)
(modelos con rociador lateral)
Pomme de rince-légumes
Cabeza del Rociador
(avec rince-lég. lat. seul.)
(modelos con rociador lateral)
Rosace de rince-légumes
Chapetón del Rociador
(avec rince-lég. lat. seul.)
(modelos con rociador lateral)
Tige de rince-légumes
Tubo Roscado del Chapetón
(avec rince-lég. lat. seul.)
(modelos con rociador lateral)
Écrou de blocage
Tuerca Aseguradora
(avec rince-lég. lat. seul.)
(modelos con rociador lateral)
© Moen Incorporated 2002
INS082D
Tapón
Anillo
Cartucho
Chapetón
Desviador
Aireador
Printed in U.S.A
Advertisement

Related Manuals for Moen 7980


Summary of Contents for Moen 7980
- Page 1 Complies with ASME A112.18.1M and CSA B125 Conformément à ASME A112.18.1M et CSA B125 En cumplimiento de ASME A112.18.1M y CSA B125 Moen Incorporated 25300 Al Moen Drive, North Olmsted, OH 44070-8022 U.S.A. in Canada: © Moen Incorporated 2002 Printed in U.S.A Moen Inc.
- Page 2 TOURNEVIS À TÊTE ÉTOILÉE TOURNEVIS À TÊTE PLATE LINTERNA DESTORNILLADOR DE ESTRELLA DESTORNILLADOR DE PALA For Safety and ease of installation, Moen recommends the use of the helpful tools above. PUTTY MASTIC Par mesure de sécurité et pour faciliter l'installation, Moen MASILLA suggère l'utilisation des outils mentionnés ci-dessus.
- Page 3 2. From under the sink, thread locknut (24) on shank (23) of 4. Feed spray hose (20) down through spray escutcheon (22). spray escutcheon and tighten by hand. 3. Make final tightening of locknut with a basin wrench. 2. Sous l’évier, fileter l’écrou de blocage (24) sur la tige du rince- 4.
- Page 4 OPTIONAL/OPTATIVO/OPTIONNELLE ENGLISH 5. Place deck gasket (11) over faucet shanks (10). For easy con- 6. Place faucet in position on the sink (hot side to left) with the nection of hose and spray models, bring spray hose (20) up deck gasket aligned. Faucet will not tip over if the spout (16) is through center hole on deck.
- Page 5 7. From under the sink, thread plastic mounting nut/washers (12) 8. To connect supply lines (not included), thread onto faucet sup- onto faucet shanks (10), large side up. Check faucet position plies finger tight. Then tighten with a wrench by rotating one on sink top, then HAND-TIGHTEN.
- Page 6 APPELER SANS FRAIS HELPLINE LINEAS TELEFONICAS NOTRE SERVICE À LA 1 (800) BUY-MOEN DE SERVICIO CLIENTÈLE [289-6636] Para Aclarar sus dudas relacionadas con la In the U.S. call our toll free Helpline number, for Utiliser notre LIGNE D’ASSISTANCE...
- Page 7 DISASSEMBLY DEMONTAGE DESARMADO CAUTION: Always turn water OFF before removing or disassembling the valve. Open valve handles to relieve water pressure to insure that com- plete water shut-off has been achieved. ATTENTION: Toujours couper l’alimentation en eau avant d’enlever ou de démonter le robinet. Ouvrir la poignée du robinet pour libérer la pression d’eau et pour s’assurer que l’alimentation en eau a CARTRIDGE...
- Page 8 Moen will advise you of the procedure to follow in making warranty claims. Simply write to Moen Incorporated using the address below. Explain the...