Table of Contents
Advertisement
Quick Links
Advertisement
Table of Contents

Related Manuals for Garmin ECHOMAP Ultra 122sv


Summary of Contents for Garmin ECHOMAP Ultra 122sv
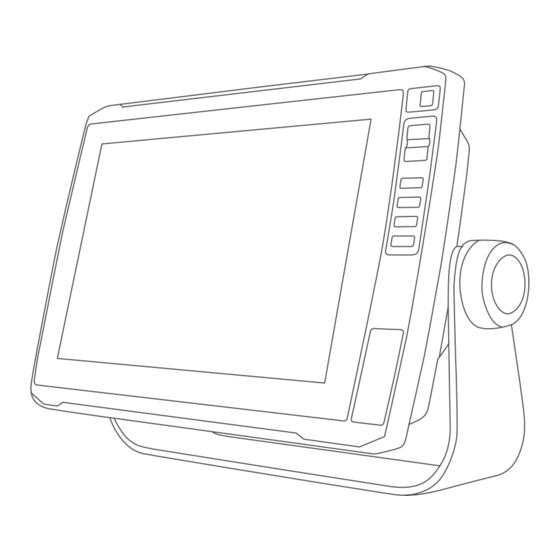
- Page 1 ECHOMAP ULTRA SERIES ™ Owner’s Manual...
- Page 2 © 2019 Garmin Ltd. or its subsidiaries All rights reserved. Under the copyright laws, this manual may not be copied, in whole or in part, without the written consent of Garmin. Garmin reserves the right to change or improve its products and to make changes in the content of this manual without obligation to notify any person or organization of such changes or improvements.
-
Page 3: Table Of Contents
Deleting All Saved Waypoints, Routes, and Tracks ....16 Contours Feature ..............10 Sonar Fishfinder............16 Adding a Label to a Garmin Quickdraw Contours Map .... 10 Stopping the Transmission of Sonar Signals ......17 Garmin Quickdraw Community ..........10 Changing the Sonar View ............ - Page 4 Playing Sonar Recordings ........... 21 Setting the Fuel Capacity of the Vessel ....... 30 Traditional, Garmin ClearVü, and SideVü Sonar Setup ... 21 Synchronizing the Fuel Data with the Actual Vessel Fuel ... 30 Setting the Zoom Level on the Sonar Screen ...... 21 Viewing the Wind Gauges ............
- Page 5 Restoring the Original Chartplotter Factory Settings ....39 Sharing and Managing User Data....... 39 Connecting to a Garmin Device to Share User Data ....39 Selecting a File Type for Third-Party Waypoints and Routes ... 39 Copying User Data from a Memory Card ......... 39 Copying User Data to a Memory Card ........
-
Page 7: Introduction
• Press , and select Power > Sleep Device to set the chartplotter to standby mode, when available. Downloading the Manuals from the Web You can get the latest owner's manual and translations of manuals from the Garmin website. The owner's manual ® includes instructions for using device features and accessing regulatory information. -
Page 8: Selecting The Gps Source
Select an option: CAUTION • To rearrange an item, select Rearrange, select the item to This feature allows users to submit information. Garmin makes move, and select the new location. no representations about the accuracy, completeness or • To add an item to the Home screen, select Add, and timeliness of information submitted by users. -
Page 9: Enabling Smart Notifications
Wi-Fi Network > Wi-Fi > On. areas of the chart you need. Enter a name and password for this network. If you are downloading an entire chart, you can use the Garmin From the application store on your mobile device, install and Express ™... -
Page 10: Navigation Chart And Fishing Chart
Creating a Waypoint on the Chart and when trying to identify entry and exit routes in unfamiliar harbors or anchorages. From a chart or a 3D chart view, select a location or object. Fish Eye 3D: Provides an underwater view that visually Select Create Waypoint or represents the sea floor according to the chart information. -
Page 11: Heading Line And Angle Markers
Heading Line and Angle Markers Fish Eye 3D: Provides an underwater, three-dimensional view that visually represents the sea floor according to the The heading line is an extension drawn on the map from the information on the chart. bow of the boat in the direction of travel. Angle markers indicate relative position from the heading or course over ground, which Fishing Charts: Shows the chart with enhanced bottom are helpful for casting or finding reference points. -
Page 12: Showing Satellite Imagery On The Navigation Chart
AIS Targeting Symbols Select an option: • To show animated tide station indicators and animated Symbol Description current direction indicators on the chart, select Animated. AIS vessel. The vessel is reporting AIS information. The • To enables the tides and current slider, which sets the direction in which the triangle is pointing indicates the time for which tides and currents are reported on the map, direction in which the AIS vessel is moving. -
Page 13: Activating A Target For An Ais Vessel
Activating a Target for an AIS Vessel Enabling AIS Transmission Test Alerts To avoid a large number of test alerts and symbols in crowded From a chart or a 3D chart view, select an AIS vessel. areas such as marinas, you can select to receive or ignore AIS Select AIS Vessel >... -
Page 14: Chart Menu
Sailing Angle: Allows you to select how the device calculates laylines. The Actual option calculates the laylines using the Quickdraw Contours: Shows and hides Garmin Quickdraw measured wind angle from the wind sensor. The Manual Contours data (Garmin Quickdraw Contours Settings,... -
Page 15: Fish Eye 3D Settings
Garmin devices only support official maps produced by Garmin or an approved third party producer. Water Layer Settings You can purchase maps from Garmin. If you purchase maps From a chart, select Menu > Layers > Water. from a seller other than Garmin, investigate the seller before NOTE: The menu may contain some settings that are not purchasing. -
Page 16: Mapping A Body Of Water Using The Garmin Quickdraw Contours Feature
ECHOMAP Ultra device, your contour maps are transferred to Contours Map the community automatically. You can add labels to a Garmin Quickdraw Contours map to Connecting to the Garmin Quickdraw Community with mark hazards or points of interest. Garmin Connect From the Navigation chart, select a location. -
Page 17: Garmin Quickdraw Contours Settings
I want to go (bearing)? To, page 12). Survey Coloring: Sets the color of the Garmin Quickdraw How do I make the device Build a single-leg route and navigate it Contours display. When this setting is turned on, the colors... -
Page 18: Selecting A Destination Using The Navigation Chart
The 50 nearest destinations that contain your search criteria • To create the waypoint by entering position coordinates, appear. select Enter Coordinates, and enter the coordinates. Select the destination. • To create the waypoint using a chart, select Use Chart, select the location, and select Select Position. -
Page 19: Deleting A Waypoint Or An Mob
The Auto Guidance feature is based on electronic chart Creating and Saving a Route information. That data does not ensure obstacle and bottom This procedure saves the route and all the waypoints in it. The clearance. Carefully compare the course to all visual sightings, starting point can be your present location or another location. -
Page 20: Deleting A Saved Route
Select Offset to navigate parallel to the route, offset from it NOTE: When using Auto Guidance, a gray segment within by a specific distance. any part of the magenta line indicates that Auto Guidance cannot calculate part of the Auto Guidance line. This is due to Indicate how to navigate the route: the settings for minimum safe water depth and minimum safe •... -
Page 21: Tracks
3 feet, the charts only use depths of 3 feet for Auto Guidance Near or Nearest. As a result, the chartplotter may not path calculations. reposition the Auto Guidance line, unless the destination selected requires navigation through a narrow waterway. Vertical Clearance: Sets the minimum height of a bridge or obstacle, based on chart data, that your boat can safely Repeat steps 3 through 9 at least once more, using a... -
Page 22: Deleting All Saved Tracks
Creating a Boundary For more information about which transducer is best for your Select Nav Info > Boundaries > New. needs, go to garmin.com/transducers. Select a boundary shape. Different sonar views can help you view the fish in the area. The Follow the on-screen instructions. -
Page 23: Stopping The Transmission Of Sonar Signals
Distance from the side of the boat Water between the vessel and the bottom Garmin ClearVü Sonar View NOTE: To receive Garmin ClearVü scanning sonar, you need a SideVü Scanning Technology compatible chartplotter or fishfinder and a compatible Instead of a more common conical beam, the SideVü transducer transducer. - Page 24 Boat Range Fish Panoptix Sonar Views Trails To receive Panoptix sonar, you need a compatible transducer. Bottom The Panoptix sonar views allow you to see all around the boat in real time. You can also watch your bait underwater and bait schools in front of or below your boat.
- Page 25 Before you can select the transducer type, you must know what kind of transducer you have. Depth information This chartplotter is compatible with a range of accessory Suspended targets or fish transducers, including the Garmin ClearVü ™ transducers, which are available at garmin.com/transducers. Bottom of the body of water...
- Page 26 Garmin ClearVü sonar views are sonar view. For example, if you have two sources for Garmin synchronized to make the split views more cohesive.
- Page 27 SideVü sonar view. Select an option: Color Scheme: Sets the color scheme of the sonar view. This • While in the Garmin ClearVü or SideVü sonar view, select setting might be available in the Appearance menu. Contrast. The high contrast color schemes provide darker color •...
- Page 28 Allowing the device to adjust the range automatically keeps the • sets the alarm to sound only when large fish are bottom within the lower or outer third of the sonar screen, and detected. can be useful for tracking a bottom that has minimal or moderate Advanced Sonar Settings terrain changes.
- Page 29 Panoptix Sonar Setup CHIRP generally performs better than single frequency applications. Because some fish targets may show up better Adjusting the RealVü Viewing Angle and Zoom Level using a fixed frequency, you should consider your goals and water conditions when using CHIRP frequencies. You can change the viewing angle of the RealVü...
- Page 30 Setting the LiveVü and FrontVü Transducer Transmit Angle Bottom Style: Sets the style for the bottom. When you are in deep water, you can select the Points option and manually This feature is available only with RealVü capable Panoptix set the range to a shallower value. transducers, such as the PS30, PS31, and PS60.
- Page 31 From any screen, select Engage. steering functions and patterns. Your intended heading shows in the center of the Autopilot When the chartplotter is connected to a compatible Garmin screen. autopilot system, you can engage and control the autopilot from the chartplotter.
- Page 32 For more information about using the remote, see the Reactor By default, the start line guidance window and the race timer autopilot remote control instructions at garmin.com window appear in the Sail Racing combination screen. Pairing a Reactor Autopilot Remote Control With a...
- Page 33 Using the Race Timer If you want to know the true water depth and the transducer is installed below the water line, measure the distance from the From the starting line guidance gauge, select to set bottom of the transducer up to the water line. the timer.
- Page 34 25). You can connect the chartplotter wirelessly to a compatible Select Menu. Garmin Force trolling motor on your boat to control the trolling Select an option. motor from the chartplotter The autopilot steers your boat through a tack or gybe.
- Page 35 Setting the Bow Offset Speed indicator. Based on the installation angle, the trolling motor may not align Increases the speed. with the center line of your boat. For the best results, you should Enables the cruise control at the current speed over ground set the bow offset.
- Page 36 • To specify the total fuel in the vessel tanks, select Set Total Fuel Onboard, and enter the total amount of fuel in the tanks. Viewing the Wind Gauges Before you can view wind information, you must have a wind sensor connected to the chartplotter.
- Page 37 Digital Selective Calling For more information about purchasing and configuring a digital switching system, contact your Garmin dealer. Chartplotter and NMEA 0183 VHF Radio Adding and Editing a Digital Switching Page Functionality You can add and customize digital switching pages to the When your chartplotter is connected to a NMEA 0183 VHF chartplotter.
- Page 38 Repeats all songs Individual Routine Calls Repeats one song When you connect the chartplotter to a Garmin VHF radio, you Scans for stations can use the chartplotter interface to set up an individual routine call.
- Page 39 NOTE: The source menu appears only for devices that Setting the Tuner Region support multiple media sources. From the media screen, select Menu > Installation > Tuner Region. Select a source. Select an option. Playing Music Changing the Radio Station Browsing for Music From the media screen, select an applicable source, such as From the media screen, select Browse or Menu >...
- Page 40 If necessary, select Scan to scan for local DAB stations. The activation process usually takes 10 to 15 minutes, but can take up to an hour. For the SiriusXM Connect Tuner to Select to change the station. receive the activation message, it must be turned on and When you reach the end of the current ensemble, the stereo receiving the SiriusXM signal.
- Page 41 (if applicable), the software turned off using , and power is removed and reapplied version for an optional Garmin radar (if applicable), and the unit within less than two minutes, you may need to press ID number. You may need this information to update the system restart the chartplotter.
- Page 42 If the message appears again, stop the boat, and ensure the speed-sensor wheel is not stuck. If the wheel turns freely, check the cable connections. If you continue to get the message, contact Garmin product support. Setting the Fuel Capacity of the Vessel Select Settings >...
- Page 43 Communications Settings Naming Devices and Sensors on the Network NOTE: Some settings and options require additional charts or You can name devices and sensors connected to the Garmin hardware. Marine Network and the NMEA 2000 network. Select Settings > Communications.
- Page 44 From the wireless device, turn on the Wi‑Fi technology and Select Settings > Alarms > Fuel > Set Total Fuel Onboard search for wireless networks. > On. Select the name of your chartplotter wireless network (Setting Enter the remaining amount of fuel that triggers the alarm, ‑...
- Page 45 Type. AIS: Enables and disables AIS signal reception. Select GPX. DSC: Enables and disables digital selective calling (DSC). To transfer data with Garmin devices again, select the ADM file AIS Alarm: Sets the collision alarm (Setting the Safe-Zone type. Collision Alarm, page 7...
- Page 46 NOTICE If you select All, all the data you have saved will be removed, NOTE: You can contact Garmin customer support to order a except Garmin Quickdraw contours data. preloaded software update card if you do not have a computer with Windows software.
- Page 47 Next > Finish. to acquire the satellites correctly. A Garmin folder containing the software update is created on the • Ensure the device is using the latest software. If not, update memory card. The software update can take several minutes to...
- Page 48 Specifications Specification Measurement All Models Sonar frequencies Traditional: 50, 77, 83, or 200 kHz Specification Measurement CHIRP Garmin ClearVü: 260, 455, or 800 kHz Material Polycarbonate plastic CHIRP SideVü: 260, 455, 800, or Water rating IEC 60529 IPX7 1,100 kHz...
- Page 49 Receive Description 129039 AIS class B position report Sentence Description 129040 AIS class B extended position report Depth 129794 AIS class A static and voyage related data Depth below transducer 129798 AIS SAR aircraft position report Water temperature 128000 Nautical leeway angle Water speed and heading 129802 AIS safety-related broadcast message...
- Page 50 NMEA 2000 37, 43 chart notifications 3 Garmin ClearVü 17 layers 8, 9 Garmin Marine Network 37 settings 8 Garmin product support. See product support charts 3, 5, 8–10 off course alarm 38 gauges appearance 8, 9 other vessels engine 29, 30 details 4 AIS 9 fuel 29, 30, 37 fishing 4 trails 9...
- Page 51 23 showing 8 FrontVü 19 sonar 20 gain 20 tracked vessel 32 Garmin ClearVü 17 viewing list of 12 interference 22 Wi‑Fi 2 measuring distances 20 Wi‑Fi technology 37 noise 20, 22 wind, rose 8 overlay numbers 21 wind gauges 30 Index...
- Page 52 August 2019 190-02536-00_0B...