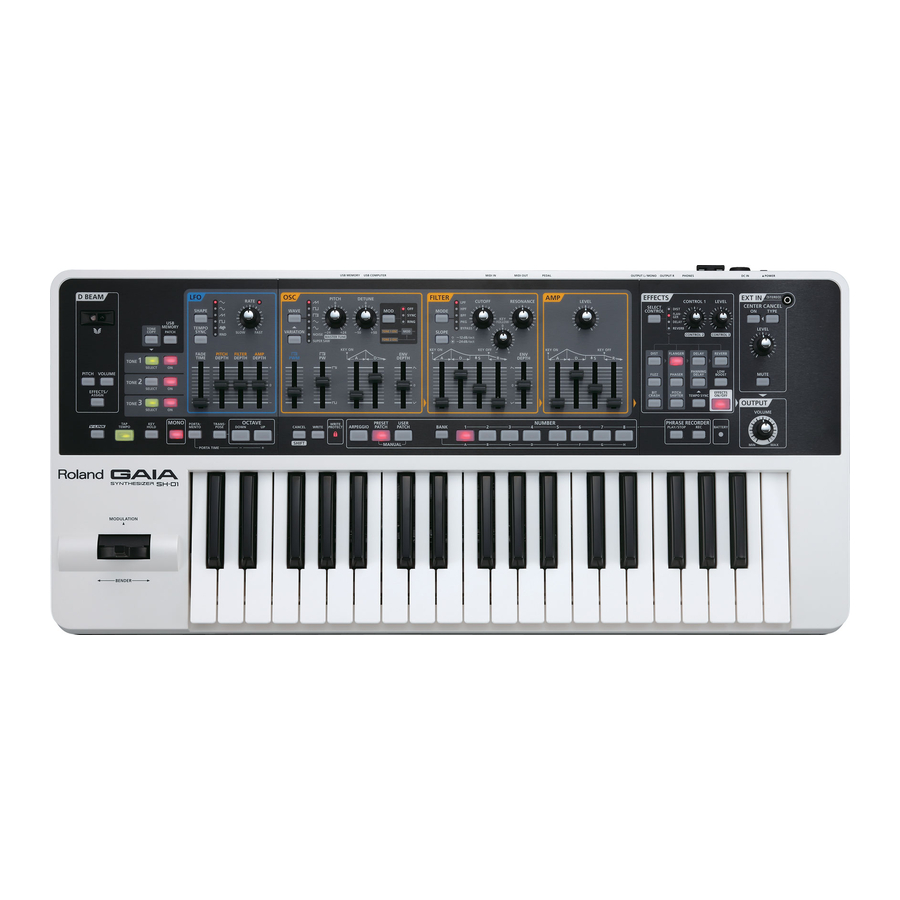
Roland GAIA SH-01 Owner's Manual
Roland synthesizer owner's manual
Hide thumbs
Also See for GAIA SH-01:
- Owner's manual (68 pages) ,
- Midi implementation manual (21 pages) ,
- User manual (16 pages)
Table of Contents
Advertisement
Advertisement
Table of Contents

Related Manuals for Roland GAIA SH-01


Summary of Contents for Roland GAIA SH-01
-
Page 2: Main Features
Main Features Able to produce a broad range of sounds with simple operation, the GAIA SH-01 is a compact and light-weight, yet full-fledged virtual analog synthesizer that’s a great choice for live performance or in the studio. Rich sound equivalent to three synthesizers A synthesizer consists of sections such as the OSC (p. - Page 3 GAIA SH-01 or to record the sound from the EXT IN jack. MIDI data played back by your DAW software can be sounded by GAIA SH-01’s sound generator, or audio played back by your DAW software can be output via the GAIA SH-01.
- Page 4 Roland. • When using the unit with a rack or stand recom- mended by Roland, the rack or stand must be carefully placed so it is level and sure to remain stable. If not using a rack or stand, you still need to make sure that...
- Page 5 • The unit and the AC adaptor should be located so their location or position does not interfere with their proper ventilation. 101c • This (GAIA SH-01) for use only with Roland stand KS-18Z. Use with other stands is capable of resulting in instability causing possible injury. 101f •...
-
Page 6: Important Notes
During repairs, due care is taken to avoid the loss of data. However, in certain cases (such as when circuitry related to memory itself is out of order), we regret that it may not be possible to restore the data, and Roland assumes no liability concerning such loss of data. -
Page 7: Additional Precautions
• Unfortunately, it may be impossible to restore the contents of data that was stored on a computer once it has been lost. Roland Corporation assumes no liability concerning such loss of data. -
Page 8: Table Of Contents
Turning the Power Off ......15 How the GAIA SH-01 is Organized ..16 Basic Structure . - Page 9 Restoring Data from USB Memory to the GAIA SH-01 ........56 Saving Your Recorded Phrases to USB Memory .
-
Page 10: Names Of Things And What They Do
Here you can specify the loudness of the sound that has passed through the fi lter section. EFFECTS (p. 38) The GAIA SH-01 has fi ve built-in eff ects: distortion, fl anger, delay, reverb, and low boost. You can make settings independently for each eff ect. - Page 11 When using batteries, this indicates the remaining battery power. Normally, this will be unlit. When the batteries run low, the indicator will light. If you continue operating the GAIA SH-01, the indicator will blink; stop use and charge the batteries.
-
Page 12: Rear Panel
Connect these when you want to transmit or receive MIDI messages to or from another MIDI device. USB COMPUTER Connector (p. 42) This connector lets you use a USB cable to connect the GAIA SH-01 to your computer. USB MEMORY Connector (p. 55) Connect USB memory (sold separately) here. -
Page 13: Getting Ready
The GAIA SH-01 can operate on eight commercially available AA nickel-metal hydride batteries. Press in the tabs of the battery compartment cover on the bottom panel of the GAIA SH-01, and remove the cover. NOTE • Take care that foreign objects (fl ammable items, coins, pins, etc.) or liquids (water, juice, etc.) do not enter the unit... -
Page 14: Removing The Batteries
POWER SAVE MODE You can set the GAIA SH-01 so it will automatically enter power-save mode when a certain length of time has passed without any operation being performed. -
Page 15: Turning The Power On/Off
Check the following before you turn off the power. • Have you minimized the volume of the connected equipment? • Have you saved any sound you’ve created? (p. 39) Switch off power to the connected equipment. Press the GAIA SH-01’s [POWER] switch to turn off the power. -
Page 16: How The Gaia Sh-01 Is Organized
(waveform, pitch, brightness, loudness, etc.) using the knobs and buttons of the panel. Eff ects The GAIA SH-01 contains a variety of eff ects, and each can be adjusted independently. Basic structure of the GAIA SH-01 Phrase recorder... -
Page 17: About Memory
Rewritable memory System memory System memory contains system parameter settings that specify how the GAIA SH-01 is to operate. User memory Arpeggio Patches and phrases can be stored in user memory. USB memory (p. 55) Patches and phrases can be stored in USB memory in the same way as in user memory. -
Page 18: Performing
PATCH] button will switch you to the USER B-5 patch. About Patches The GAIA SH-01 lets you store the sounds that you create. A sound you create is called a “patch”; you can use the buttons to recall a patch and then play it. -
Page 19: Adding Dynamics To The Sound
USB memory group NUMBER 1–8 Adding Dynamics to the Sound The GAIA SH-01’s keyboard allows you to vary the volume or brightness of the sound by changing your playing dynamics (key velocity). When the instrument was shipped from the factory, this was set to “FIX, ”... -
Page 20: Shifting The Keyboard's Pitch Range
Shifting the Keyboard’s Pitch Range ( OCTAVE UP/DOWN) You can shift the keyboard’s pitch range in steps of one octave, for a maximum of three octaves upward or downward. To raise the range, press the OCTAVE [UP/+] button, and to lower the range press the OCTAVE [DOWN/-] button. -
Page 21: Changing The Pitch Or Volume By Moving Your Hand
The D BEAM controller’s sensitivity will decrease if it’s used in strong sunlight or strong illumination. The GAIA SH-01 lets you adjust the sensitivity of the D BEAM controller. Hold down the [EFFECTS/ASSIGN] button and press one of the NUMBER [1]–[8] buttons. -
Page 22: Changing The Volume To Add Expression
Changing the Volume to Add Expression ( VOLUME) Press the [VOLUME] button so it’s lit. While playing the keyboard, position your hand over the D beam controller, then move it up and down. The volume will change, allowing you to add expression to your performance. -
Page 23: Selecting How The Arpeggio Will Sound
Selecting How the Arpeggio will Sound The GAIA SH-01 lets you choose from 64 variations of arpeggio. Hold down the [CANCEL/SHIFT] button and press the [ARPEGGIO] button. Now you can use the [BANK] button and NUMBER [1]–[8] buttons to select the arpeggio variation. -
Page 24: Recording Operations (Phrase Recorder)
You can record up to eight phrases, and each phrase can be up to eight measures long. The GAIA SH-01’s phrase recorder does not record the sound that’s actually being produced; rather, it records performance data (MIDI messages) such as “which key was pressed when and how strongly. -
Page 25: Erasing Recorded Operations
Saving the Recorded Phrase The phrase you record will be lost when you switch off the GAIA SH-01’s power, or when you select a diff erent phrase. When you’ve fi nished recording a phrase, it’s a good idea to save it. -
Page 26: Choosing The Phrase To Play Back
Choosing the phrase to play back Here’s how to select a phrase that’s saved in internal memory or USB memory. Hold down the [REC] button. While you hold down the [REC] button, the NUMBER [1]–[8] buttons will select phrases. To select a phrase that’s saved in USB memory, hold down the [REC] button and press the USB MEMORY [PATCH] button so it’s lit. -
Page 27: Adding Expression To Your Performance
The GAIA SH-01 can control images on a V-LINK compat- ible video device that’s connected via MIDI. Press the [V-LINK] button to turn V-LINK on. -
Page 28: Creating Sounds
Creating Sounds Sound-Creating Workfl ow The following illustration shows the basic workfl ow for creating sounds on the GAIA SH-01. TONE 3 TONE 2 TONE 1 FILTER WAVE MODE MODE Creates the waveform Specifi es the bright- Specifi es the bright-... -
Page 29: Cyclic Change (Lfo)
The OSC, FILTER, and AMP can be modulated at a rate specifi ed by the LFO (p. 36) to create vibrato (by modulating the pitch) or tremolo (by modulating the volume). The GAIA SH-01 has three LFOs; you can use one LFO for each tone. Eff ects ( EFFECTS) You can apply eff ects to add a fi nishing touch to the sound. -
Page 30: Copying A Tone (Tone Copy)
The OSC (oscillator) section produces the waveform that is the basis of the sound. Selecting a waveform will also determine the pitch. The GAIA SH-01 has an oscillator for each tone 1–3. These three oscillator can be used independently, or in combination to create thick or complex sounds. - Page 31 This waveform contains all frequencies. NOISE It is suitable for percussion instrument Noise sounds or sound eff ects. This produces a tone similar to seven sawtooth waves heard simultaneously. SUPER SAW Pitch-shifted sounds are added to the Super Saw center sound. It is suitable for strings sounds, and for creating thick sounds.
-
Page 32: Adjusting The Brightness And Thickness (Filter)
[ PW] slider If the [WAVE] button (p. 30) has selected square wave), you can use this slider to specify the width of the upper portion of the square wave (the pulse width) as a percentage of the entire cycle. •... - Page 33 HPF (High-Pass Filter) This type of fi lter cuts the frequency range that is below the cutoff frequency, emphasizing the high-frequency range. This can be used to create percussion instrument sounds with a distinctive high-frequency range. Volume region Frequency BPF (Band Pass Filter) This type of fi lter passes only the range of frequencies in the region of the cutoff frequency, cutting the other frequencies.
- Page 34 [RESONANCE] knob will not aff ect the sound. NOTE In response to demands by pro sound designers for tonechanging capabilities, the GAIA SH-01 permits a wide variety of resonance settings. Because of this, raising the resonance level too much results in extremely high output levels in specifi c frequency ranges.
-
Page 35: Specifying The Sound's Attack And Decay (Amp)
[ A] (Attack time) slider This specifi es the time from the moment you press the key until the cutoff frequency reaches its highest (or lowest) point. Moving the slider upward will lengthen this time, and moving it downward will shorten the time. [ D] (Decay time) slider This specifi es the time from when the cutoff frequency reaches its highest (or lowest) point, until it decays to the... -
Page 36: Modulating The Sound (Lfo)
[ D] (Decay time) slider This specifi es the time from when the maximum volume is reached, until it decays to the sustain level. Moving the slider upward will lengthen this time, and moving it downward will shorten the time. [ S] (Sustain level) slider This specifi es the volume level that will be maintained from when the attack and decay times have elapsed until... - Page 37 [ TEMPO SYNC] button This button lets you specify the LFO speed as a note value relative to the arpeggio or phrase recorder tempo. If you press the [TEMPO SYNC] button so it’s lit, and then turn the [RATE] knob, the LFO speed (cycle) will change in steps of note lengths “RATE”...
-
Page 38: Adding Power, Spaciousness, And Reverb (Effects)
“Eff ects” allow you to modify or enhance the sound in various ways, such as by adding reverberation or delaying the sound. The GAIA SH-01 provides fi ve diff erent eff ects—DIST, FLANGER, DELAY, REVERB, and LOW BOOST—which give you a broad range of possibilities for modifying or enhancing the sound. -
Page 39: Saving A Sound You've Created (Write)
The sound you create will change if you move a knob or select a diff erent patch, and will be lost when you switch off the GAIA SH-01’s power. When you’ve created a sound you like, you should save it as a user patch. -
Page 40: Performing With Sound From A
Connections Connect your portable audio player or other device to the GAIA SH-01’s top panel EXT IN jack. 926a * When connection cables with resistors are used, the volume level of equipment connected to the inputs EXT IN jack may be low. -
Page 41: (Center Cancel)
Eliminating Sound from the Center ( CENTER CANCEL) By using this function, sounds that are localized at the center (such as vocals) can be eliminated from the sound of the device connected to the EXT IN jack. When you press the CENTER CANCEL [ON] button so it’s lit, sounds localized at the center will be removed. -
Page 42: Using The Gaia Sh-01 With A Computer Or
Connecting the SH-01 to Your Computer Install the USB driver on your computer. The USB driver is on the included CD-ROM “GAIA SH-01 DRIVER CD-ROM. ” The driver installation procedure will depend on your system, so be sure to carefully read the “Readme” fi le on the CD-ROM. -
Page 43: Using The Sh-01 As A Controller Or Sound Module
Using the SH-01 as a Controller or Sound Module ( MIDI) MIDI (Musical Instrument Digital Interface) is a universal standard for exchanging performance data and other information between electronic musical instruments and computers. If you use MIDI cables to connect devices equipped with MIDI connectors, you’ll be able to do things such as using a single MIDI keyboard to play multiple instruments, play an ensemble of MIDI instruments, or make settings change... - Page 44 Using the SH-01’s Keyboard and Knobs to Play an External MIDI Sound Module (MIDI OUT) You can use the SH-01 as a controller. Use a MIDI cable (sold separately) to connect the SH-01’s rear panel MIDI OUT connector to your MIDI sound module’s MIDI IN connector.
-
Page 45: Advanced Operation
Advanced Operation In addition to editing its settings via the panel knobs and sliders, the GAIA SH-01 also allows you to edit the following parameters. Patch Parameters COMMON Parameter Range LFO KEY TRIGGER OFF, ON FILTER ENVELOPE 0–+63 VELOCITY SENS LEVEL VELOCITY SENS 0–+63... - Page 46 Parameter Range SAW, SQR, PULSE, WAVE TRI, SIN, NOISE, SUPER SAW VARIATION PITCH -24–+24 DETUNE -50–+50 SYNC/RING OFF, SYNC, RING 0–127 0–127 0–127 0–127 ENV DEPTH -63–+63 FILTER Parameter Range BYPASS, LPF, HPF, MODE BPF, PKG SLOPE -12dB, -24dB CUTOFF 0–127 RESONANCE 0–127...
- Page 47 Specifies the release time of the amp envelope. Explanation Selects the LFO waveform. Specifies whether the LFO rate will be synchronized with the GAIA SH-01’s tempo. Specifies the time from when the tone begins to sound until the LFO reaches its maximum amplitude.
-
Page 48: D Beam Assign Parameters
Parameter Range Specifies the LFO rate. When TEMPO SYNC is OFF: 0–127 RATE When TEMPO SYNC is ON: 16, 12, 8 ( ), 4 ( ), 2 ( ), 1 ( ), 3/4 ( ), 2/3 ( ), 1/2 ( ), 3/8 ( ), 1/3 ( ), 1/4 ( ), 3/16 ( ), 1/6 ( ), 1/8 ( ), 3/32, 1/12, 1/16, 1/24, 1/32 PITCH DEPTH -63–+63... -
Page 49: Effect Parameters
Parameter Range CUTOFF RESONANCE KEY FOLLOW ENV-A FILTER ENV-D ENV-S ENV-R ENV-DEPTH LEVEL ENV-A ENV-D ENV-S ENV-R CONTROL 1 EFFECTS LEVEL PORTAMENTO-TIME BENDER MODULATION OTHERS POLARITY Effect Parameters Parameter Range Drive Type [DIST] Presence Level Drive Type [FUZZ] Presence Level Sample Rate Bit Down [BIT CRASH]... - Page 50 Parameter Range Pitch Detune [PITCH SHIFTER] Pitch Level Time Feedback [DELAY] High Damp Level Time Feedback [PANNING DELAY] High Damp Level Time Type [REVERB] High Damp Level Shared in Common Patch Level Explanation Explanation Adjusts the amount of pitch shift in -12–+12 semitone steps.
-
Page 51: System Parameters
Higher values will make the D BEAM respond more easily. Turns the Local switch on/off. Specifies the volume of the entire GAIA SH-01. Specifies the reference pitch of the entire GAIA SH-01. The setting indicates the frequency of the A4 key. -
Page 52: Midi Parameters
Parameter Range This selects the function that will be controlled by a pedal connected to the PEDAL jack. HOLD: The pedal will operate as a damper pedal. MODULATION: CC01: The pedal will have the same operation as when using the pitch bend/modulation lever to apply MODULATION. - Page 53 This specifies whether note messages received via MIDI or USB MIDI will be handled in the same way as REMOTE KEYBOARD OFF, ON notes played on the GAIA SH-01’s own keyboard. If this is on, note messages from an external device can trigger arpeggios. MIDI TX...
-
Page 54: Other Parameters
Other Parameters Parameter Range RECORDER SYNC OFF, ON OUTPUT Specifies how the metronome will sound. OFF: Metronome will not sound. RECORDER REC-ONLY: Metronome will sound only during recording. METRONOME MODE REC&PLAY: Metronome will sound during recording and playback. ALWAYS: Metronome will sound constantly. RECORDER 0–7 METRONOME LEVEL... -
Page 55: Usb Memory
USB Memory The GAIA SH-01 is equipped with a USB memory connector that allows you to use USB memory as storage media. Using USB Memory Make sure that the USB memory is oriented correctly, and insert it into the GAIA SH-01’s USB connector. -
Page 56: Saving User Patches To Usb Memory
Saving User Patches to USB Memory Here’s how to save all (64) patches from the GAIA SH-01’s user memory to USB memory. Hold down the [CANCEL/SHIFT] button and press the USB MEMORY [PATCH] button. The [CANCEL/SHIFT] button and the USB MEMORY [PATCH] button will blink. -
Page 57: Saving All User Data To Usb Memory
Saving All User Data to USB Memory When you execute this operation, all (64) patches from the GAIA SH-01’s user memory, all (8) phrases, as well as the system data, will be saved to USB memory. This operation is called “backing up. ”... -
Page 58: Restoring The Factory Settings
Restoring the Factory Settings Here’s how to restore all of the GAIA SH-01’s settings to their factory-set condition. This operation is called “ factory reset. ” NOTE All data that you’ve created and saved in the GAIA SH-01’s internal memory will be lost when you execute the factory reset operation. -
Page 59: Troubleshooting
Overall Symptom Cause Make sure that the GAIA SH-01’s AC adaptor is correctly connected to the outlet and to the Power does not turn on instrument itself, and that the power cord is correctly connected to the AC adaptor. Problems with the sound... - Page 60 Check the on/off status of each effect in the top panel. The GAIA SH-01 can use USB memory that is formatted as FAT. If the USB memory is formatted in a format other than FAT, please format it using FAT.
-
Page 61: Midi Implementation Chart
MIDI Implementation Chart SYNTHESIZER Model GAIA SH-01 Function... Basic Default 1–16 Channel Changed 1–16 Default Mode 3 Messages Mode Altered ************** Note 0–114 Number : ************** True Voice Note On Velocity Note O After Key’s Touch Channel’s Pitch Bend Control 16−30... -
Page 62: Main Specifications
Main Specifications GAIA SH-01: Synthesizer keyboard Keyboard 37 keys (velocity sensitive) Maximum Polyphony 64 voices Virtual analog synthesizer sound generator (Number of part: 1) Sound Generaor (1 Oscillator + 1 Filter + 1 Amp + 3 Envelopes + 2 LFOs) x 3... -
Page 63: Index
Index A (ATTACK TIME) AMP ENV ... 35, 47 ENV DEPTH (ENVELOPE DEPTH) FILTER ENV ..35, 46 PITCH ENV ..32, 46 AC ADAPTOR . -
Page 64: Block Diagram
Block Diagram... - Page 65 Information When you need repair service, call your nearest Roland Service Center or authorized Roland distributor in your country as shown below. PHILIPPINES AFRICA G.A. Yupangco & Co. Inc. 339 Gil J. Puyat Avenue Makati, Metro Manila 1200, EGYPT PHILIPPINES...
-
Page 66: Declaration Of Conformity
This product contains chemicals known to cause cancer, birth defects and other reproductive harm, including lead. DECLARATION OF CONFORMITY Compliance Information Statement Model Name : SH-01 Type of Equipment : Synthesizer Keyboard Responsible Party : Roland Corporation U.S. Address : 5100 S. Eastarn Avenue, Los Angeles, CA 90040-2938 Telephone : (323) 890-3700 NOTICE AVIS WARNING For the U.K. - Page 67 For EU Countries For China...