Roland SP-404SX Owner's Manual
Roland linear wave sampler owner's manual
Hide thumbs
Also See for SP-404SX:
- Owner's manual (372 pages) ,
- System update (3 pages) ,
- Service notes (26 pages)
Table of Contents
Advertisement
Quick Links
Advertisement
Table of Contents

Related Manuals for Roland SP-404SX


Summary of Contents for Roland SP-404SX
-
Page 2: Features
(Mac/PC) (p . 22) . Copyright © 2009 ROLAND CORPORATION All rights reserved . No part of this publication may be reproduced in any form without the written permission of ROLAND CORPORATION . Before using this unit, carefully read the sections entitled: “USING THE UNIT SAFELY” (p . 51) and “IMPORTANT NOTES” (p . 52) . These sections provide important information concerning the proper operation of the unit . -
Page 3: Table Of Contents
Before.You.Start . . . . . . . . . . . . . . . . . . . . . . . . . . . . Connecting the SP-404SX to Your Speakers . . . . . . . . . . . 8 Turning the Power On . -
Page 4: Panel.descriptions
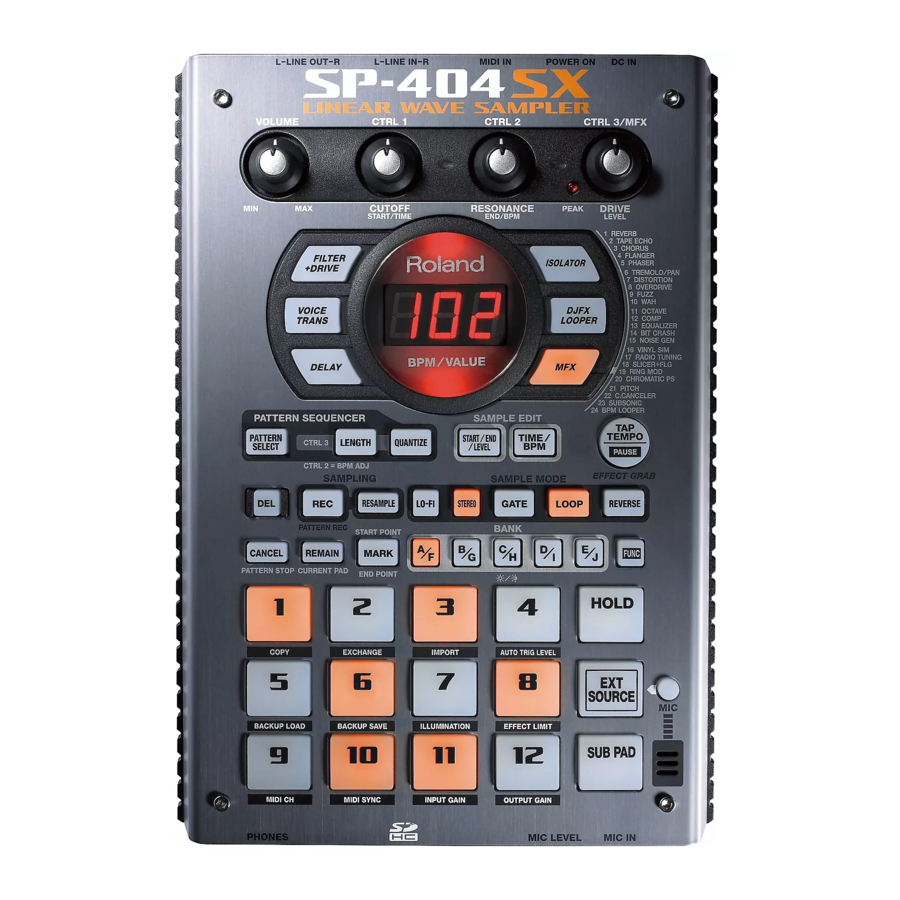
Panel Descriptions Name [VOLUME].knob [CTRL.1]–[CTRL.3].knobs PEAK.indicator Eff . ect.buttons Display Display.illumination [PATTERN.SELECT].button [LENGTH].button [QUANTIZE].button [DEL].button [REC].button [RESAMPLE].button [CANCEL].button [REMAIN].button [MARK].button Description This adjusts the volume . These knobs control eff ect parameters . You can also use each knob to make the following settings . The starting location of a sample CTRL.1 The playback time of a sample... - Page 5 This button switches the mic input on/off . [MIC].button This is the SP-404SX’s built-in mic . If you connect your own mic (sold separately) to the MIC Internal.mic jack of the top panel, this internal mic will not function .
-
Page 6: About.batteries
If you’ve selected the “ ” (sleep) setting in “Display illumination and sleep settings” (p . 40), all of the SP-404SX’s buttons will go out when it has not been operated for ap- proximately fi ve minutes, and it will enter Sleep mode . This... -
Page 7: Basic Operation
Basic Operation... -
Page 8: Before.you.start
Before You Start Connecting the SP-404SX to Your Speakers Make sure that the SP-404SX and your amplifi ed speakers (which we’ll simply call “speakers”) are powered off , and then make connections as shown below . LINE IN jacks Amplifi ed speakers... -
Page 9: Turning The Power On
3. Turn.on.the.power.of.your.speakers . 4. Adjust.the.volume . While striking the pads of the SP-404SX to produce sound, slowly turn the [VOLUME] knob toward the right, and adjust the volume on the SP-404SX and on your speakers . Turning the Power Off 1. Minimize.the.volume.of.the.SP-404SX.and.your.speakers . -
Page 10: Inserting An Sd Card
Before you can use a commercially available SD card with the SP-404SX, you must format it as described in “Formatting an SD card” (p . 35) . However, do not format the SD card that was included with the SP-404SX . All of the preload data on the card will disappear if you format the included SD card . -
Page 11: Playing.sounds
. You can play a sample by pressing the corresponding pad [1]–[12] . What’s a sample bank? A sample bank is a set of twelve samples assigned to the pads . The SP-404SX has ten sample banks, A–J . How many samples can play simultaneously? The SP-404SX can play 12 monaural samples or 6 stereo samples simultaneously . - Page 12 If the sound won’t stop! If the sound won’t stop, Press the [ CANCEL] button four times in rapid succession . All of the SP-404SX’s sounds will stop . That pad will blink while its sample is playing . You can press two or more pads to play them simultaneously .
-
Page 13: Applying Effects
Applying Eff ects The SP-404SX contains 29 types of eff ects . As an example, here’s how to apply the “FILTER + DRIVE” to a sample . 1. Press.a.pad.to.play.its.sample . 2. Press.the.[FILTER.+.DRIVE].button . If the eff ect buttons are off , pressing the [TAP... -
Page 14: Playing Patterns
What is a pattern bank? A “pattern bank” is a set of twelve patterns assigned to the pads . The SP-404SX has ten pattern banks, A–J . On the factory-installed SD card, patterns are assigned to pads [1]–[12] of pattern banks [A]–[E] . You’ll probably want to start by listening to these . -
Page 15: Adjusting The Tempo
3. Press.a.pad,.and.the.pattern.will.play . 4. Press.another.pad.to.reserve.the.next.pattern . 5. Press.the.currently.playing.pad,.and.the.pattern.will.stop.playing . MEMO For details on how to create a pattern, refer to “Recording a Pattern” (p . 32) . Adjusting the Tempo Here’s how to change the playback tempo of the pattern . 1. Press.the.[. -
Page 16: Recording.samples-.Basic.operation
Connecting a Portable Music Player or Stereo If you’re connecting your portable music player, stereo, or CD player, use audio cables to connect your device’s output jacks (LINE OUT jacks, AUX OUT jacks, etc .) to the SP-404SX’s LINE IN jacks . Your portable music player’s output jack... - Page 17 To use a mic, connect it to the MIC IN jack, then press the [MIC] button so it’s lit . Importing WAVE fi les from your computer By using the included “SP-404SX Wave Converter” software, WAV or AIFF fi les from your computer can be written to an SD card and assigned to the pads of the SP-404SX .
-
Page 18: Step 2: Sampling
STEP 2: Sampling Here we’ll explain how to use Sampling to record to pad [1] of bank J . 1. Make.sure.that.the.[PATTERN.SELECT].button.is.extinguished . 2. Press.the.[. R EC].button.so.the.button.is.lit . If you decide to cancel sampling, Press the [CANCEL] button . 3. Press.the.BANK.[E/J].button.so.it’s.blinking . Press.the.BANK.[E/J].button.so.it’s.blinking . - Page 19 . 6. . A djust.the. . recording.level 6-1. Produce.sound.on.the.device.that’s.connected.to.the.SP-404SX.(if.you’re.using.a.mic,.vocalize.into.the. mic) . 6-2. Adjust.the.volume.of.the.device.(e .g .,.portable.music.player).connected.to.the.SP-404SX.so.that.the. PEAK.indicator.lights.occasionally . The PEAK indicator should light occasionally 6-3. If.the.. d isplay.illumination.lights.red,.the.internal.digital.input.level.is.excessive;.turn.the.[CTRL.3].knob.
- Page 20 7. Produce.sound.on.the.device.that’s.connected.to.the.SP-404SX,.and.Press.the.[REC].button.when.you.want.to. start.sampling . NOTE Never turn off the power while sampling is in progress . If you turn off the power, not only the sample being recorded but also other samples may also be destroyed . 8. When.you.want.to.stop.sampling,.press.the.[REC].button .
-
Page 21: Deleting A Sample
Deleting a Sample If you are not satisfi ed with the sound you sampled, use the following procedure to delete it, and then sample the sound again . 1. Press.the.[. D EL].button . 2. The.display.will.indicate.“ ,”.and.the.pads.that.can.be.deleted.will.blink . 3. Press.the.pad.that.you.want.to.delete . 4. Press.the.[DEL].button.to.delete.the.sample . -
Page 22: Importing.wave.files.from.your.computer
4. Use.Wave.Converter.to.load.WAVE.fi . les . Using the procedure described as follows, assign WAVE fi les (or AIFF fi les) to the pads of the SP-404SX . When you’re fi nished, click [Exit] button to exit the software . Select the SD card drive . -
Page 23: Advanced Operation
Advanced Operation... -
Page 24: Playing.an.external.input.sound
LINE IN jacks or a mic connected to the MIC IN jack) can be handled much like samples are on the SP-404SX; it can be played and effects can be applied to it . -
Page 25: Recording.samples-.Advanced.operation
Approx . 360 min . 4.GB 32.GB (720 min .) MEMO Since the 1 GB SD card included with the SP-404SX contains preload data, the available sampling time will be less than the time above . Remaining sampling time 1. When.you.press.the.[REMAIN].button,.the.display. -
Page 26: Sampling With A Specified Tempo
Sampling with a Specified Tempo If you specify the BPM (tempo) while you’re still in sampling standby mode, the end point (the timing at which the sound stops playing) will be automatically set after sampling to a beat of the BPM value you specified . 1. Prepare.for.sampling.as.described.in.steps.1–6.of. -
Page 27: Editing.a.sample
. Adjusting the Playback Region of a Sample For each sample, the SP-404SX lets you specify the region within the sample’s waveform data that will actually play . The point within the waveform data at which playback will begin is called the Start Point, and the point at which playback will end is the End Point . - Page 28 Adjusting Both the Start Point and End Point 1. Make.sure.that.the.[PATTERN.SELECT].button. is.extinguished ..If.it.is.lit,.press.the.[PATTERN. SELECT].button.to.turn.it.off . 2. Press.the.pad.whose.playback.region.you.want.to. adjust,.making.it.sound . MEMO If the [MARK] button is lit, the start point or end point has already been adjusted . In this case, cancel the start point/end point setting (p .
-
Page 29: Deleting An Unwanted Portion (Truncate)
Making Fine Adjustments to the Start Point and End Point 1. Make.sure.that.the.[PATTERN.SELECT].button. is.extinguished ..If.it.is.lit,.press.the.[PATTERN. SELECT].button.to.turn.it.off . 2. Play.the.pad.whose.playback.region.you.want.to. adjust,.making.it.the.current.pad . 3. Press.the.[START/END/LEVEL].button.so.the. button.is.lit . 4. Use.the.[CTRL.1].knob.to.adjust.the.start.point,. and.the.[CTRL.2].knob.to.adjust.the.end.point . 5. When.you’ve.finished.making.adjustments,.press. the.[START/END/LEVEL].button.to.turn.off.its.light . Start sampling [CTRL 1] Start Point This region will sound MEMO • You can press the pad to produce sound even while making adjustments . -
Page 30: Changing A Sample's Bpm
Changing a Sample’s BPM A sample’s BPM (tempo) is automatically determined by the length between the sample’s start point and end point . However, depending on this length, the calculated BPM value may be half or double the actual BPM . In this case, you can correct the BPM as follows . -
Page 31: Exchanging Samples Between Two Pads
Exchanging Samples between Two Pads You can exchange samples between two pads . This lets you bring together the desired samples into a single bank . MEMO If you decide to cancel this operation during the procedure, press the [CANCEL] button . 1. Hold.down.the.[FUNC].button.and.press.the.pad. -
Page 32: Pattern.sequencer
Pattern Sequencer The SP-404SX contains a Pattern Sequencer function that can record sample-playback operations . Another way to use this capability is to combine several phrase samples to create a simple song, or to combine rhythm samples to create rhythm patterns . -
Page 33: Erasing Mistakes From Performance
The [REC] button will change from blinking to lit, and recording will begin . There will be a one-measure count before recording actually begins, so wait for one measure while listening to the metronome . During this time, the display will indicate a count of -4, -3, -2, -1 . -
Page 34: Deleting A Pattern
Deleting a Pattern 1. Press.the.[PATTERN.SELECT].button.so.the.button. is.lit . P t n The display will indicate “ ” and the pads that have been recorded will blink . 2. Press.the.[DEL].button.so.the.button.is.lit . d E L The display will indicate “ . ” E NP If the display indicates “... -
Page 35: About.sd.card
. les.that.were.on. the.card . Exporting WAVE Files Data sampled by the SP-404SX is saved on the SD card as WAVE fi les (WAV/AIFF) (“Specifying the Type of Data to Create when Sampling” (p . 25)) . You can use a commercially... -
Page 36: Importing Wave Files
• The WAVE fi les (WAV/AIFF) in the imported “/ROLAND/ IMPORT” folder will be deleted automatically . Caution when importing • Use an SD card that was formatted by the SP-404SX . If you’re using the SD card that was included with the SP-404SX, don’t format the card . -
Page 37: Saving Backup Data
Saving Backup Data (Backup Save) This operation will save backup data (all data including sample banks and pattern banks) to the SD card . You can save up to 12 backups . MEMO If you’ve saved numerous samples and patterns on a card, and it doesn’t have much space remaining, you’ll only be able to save a small number of backup sets . -
Page 38: About The Protect Function
, ” and the samples and patterns of banks A–J will be protected . NOTE If you use an SD card with the same SP-404SX, the card banks will also be protected, but the card will not be protected when used with your computer . -
Page 39: Other.functions
. If you are playing only a few pads at a time, or if you have connected the SP-404SX to a DJ mixer or other device, and are using it as an eff ects processor, raising this internal processing level will allow you to output a higher level . -
Page 40: Restoring The Factory Settings (Factory Reset)
MEMO If you’re using the SD card included with the SP-404SX or an SD card that is being used with the SP-404SX, and are executing this procedure from step 2, the backup data on the card will not be erased by this procedure . -
Page 41: Appendix
Appendix... -
Page 42: Effect.list
Effect List Effect Limit Mode If you turn on Effect Limit mode, the depth of the effect will be limited to prevent unintentionally loud sounds or oscillation . You may find this function convenient in high-volume situations, such as in a club or live performance . Parameters that are affected by Effect Limit mode are marked by a 1. Hold.down.[FUNC].button.and.press.the.pad.[8]. - Page 43 No . Type CTRL.1.function.(display) PHASER DEPTH ( Creates modulation by adding a Adjusts the depth of modulation . phase-shifted sound . TREMOLO/PAN DEPTH ( Cyclically varies the volume or Adjusts the amount of change in panning . volume/panning . DISTORTION DRIVE ( Intensely distorts the sound .
- Page 44 No . Type C .CANCELER Cancels the vocal or other sound located in the center . SUBSONIC Adds a low-frequency sine wave based on the volume being input to the effect (*3) . BPM LOOPER Loops the input sound over a short period .
-
Page 45: Error.message.list
* Don’t remove the card while the power is on . The SD card is locked . The SP-404SX will be unable to function properly if the SD card is locked . (“L o C” will appear in the Lock display .) Make sure that the SD card is not locked (p . - Page 46 Some devices have a setting that turns MIDI clock transmission on/off . Also, some external devices, such as sequencers, transmit MIDI clock only during playback . The SP-404SX can synchronize to a tempo in the 40–200 range . It may be unable to synchronize to a tempo that is outside this range .
-
Page 47: About.midi
“MIDI Implementation Chart” (p . 48) is a chart that provides an easy way of checking which MIDI messages the SP-404SX is able to receive . By comparing the MIDI implementation charts of the SP-404SX and some other MIDI device, you can see which messages are compatible between the two devices . -
Page 48: Midi Implementation Chart
MIDI Implementation Chart Model SP-404SX Function... Basic Default Channel Changed Default Mode Messages Altered Note Number : True Voice Note On Velocity Note O After Key’s Touch Channel’s Pitch Bend Control Change Program : True Number Change System Exclusive : Song Position... -
Page 49: Specifications
Sampling.Time.. (Total.Time.for.All.Samples) 1.GB 2.GB 4.GB Since the 1 GB SD card included with the SP-404SX contains preload data, the available sampling time will be less than the time above . Data.Format 16-bit Linear ( .wav/aiff ) Sampling.Frequency 44 .1 kHz Maximum recordable notes: Approx . -
Page 50: Index
SAMPLING 16, 25 SAMPLING TIMES 25 SD CARD 10, 22, 35 SECURITY SLOT 5 SHUFFLE QUANTIZE 32 SLEEP SETTING 40 SP-404SX WAVE CONVERTER 22 SPEAKERS 8 START/END/LEVEL BUTTON 27 STEREO BUTTON 18 SUB PAD 12 TAP TEMPO BUTTON 15 TEMPO 15... -
Page 51: Using.the.unit.safely
(except when this manual provides specific instructions directing you to do so) . Refer all servicing to your retailer, the nearest Roland Service Center, or an authorized Roland distribu- tor, as listed on the “Information” page . -
Page 52: Important.notes
CD-ROM or equivalent means . The sound recordings contained in this product are the original works of Roland Corporation . Roland is not responsible for the use of the sound recordings contained in this product, and assumes no liability for any infringe- ment of any copyright of any third party arising out of use of the sounds, phrases and patterns in this product . - Page 53 For China For EU Countries...
- Page 54 This product complies with the requirements of EMC Directive 2004/108/EC. FEDERAL COMMUNICATIONS COMMISSION RADIO FREQUENCY INTERFERENCE STATEMENT This equipment has been tested and found to comply with the limits for a Class B digital device, pursuant to Part 15 of the FCC Rules.