
Related Manuals for Toshiba TEC B-850 Series


Summary of Contents for Toshiba TEC B-850 Series
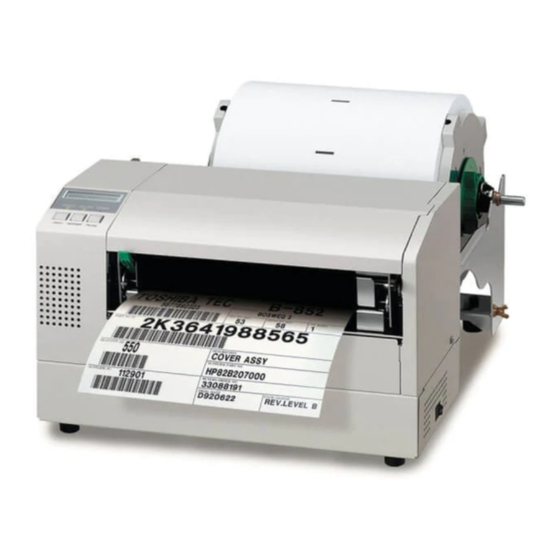
- Page 1 TOSHIBA TEC Bar Code Printer B-850 Series Key Operation Specification First Edition: December 8, 2000 Second Edition: February 9, 2001 Third Edition: July 19, 2002...
-
Page 2: Table Of Contents
TABLE OF CONTENTS Page 1. SCOPE............................2. OUTLINE ............................. 3. OPERATION PANEL........................4. GENERAL VIEW OF KEY OPERATION..................5. ONLINE MODE..........................5.1 KEY FUNCTION ........................5.2 LED FUNCTION ........................5.3 LCD FUNCTION ........................5.4 ONLINE MODE OPERATION EXAMPLE ................5.5 THRESHOLD SETTING......................5.5.1 Outline of Threshold Setting..................... - Page 3 Page 7. SYSTEM MODE .......................... 26 7.1 OUTLINE OF SYSTEM MODE....................26 7.2 SELF-TEST ..........................28 7.2.1 Self-test Operation Example .................... 28 7.2.2 Self-test Items ........................31 7.2.3 Self-test Results Printout Samples................... 33 7.2.4 Self-test Printout Contents ....................35 7.3 VARIOUS PARAMETERS SETTING ..................44 7.3.1 Various Parameters Setting Operation Example .............
-
Page 4: Scope
1. SCOPE This specification applies to the key operations for the keys and the LCD panel of the B-850 Series General-purpose Thermal Label/Tag Printer. 2. OUTLINE Keyboard operations are roughly classified as the online mode, in which a pause/restart is carried out and error messages are displayed when the printer is connected to the host such as a PC, and the system mode, in which the self-test and setting of various parameters are performed. -
Page 5: General View Of Key Operation
4. GENERAL VIEW OF KEY OPERATION [Power OFF] Online mode Turn the power on. [Online] [FEED] key [Feeds one label.] [RESTART] key [PAUSE] key [Pause] Hold down the [PAUSE] key for a few seconds. [Transmissive sensor threshold setting mode] [FEED] key [Lower reflective sensor threshold setting mode] Hold down the [RESTART] key... -
Page 6: Online Mode
5. ONLINE MODE 5.1 KEY FUNCTION [FEED] key: (1) Feeds one sheet of paper. This key can be used to eject one sheet of paper. This key can also be used to adjust the paper to the proper position when the paper is not properly positioned. -
Page 7: Online Mode Operation Example
5.4 ONLINE MODE OPERATION EXAMPLE Power ON * This message is displayed while the L I N E printer is idling or printing normally. An error occurs. * The message is displayed when an error P A P E R 1 2 5 occurs during printing, then printing is stopped. -
Page 8: Threshold Setting
5.5 THRESHOLD SETTING 5.5.1 Outline of Threshold Setting When a label is printed, the printer detects the gap between the labels using the transmissive sensor, and corrects the print position automatically to obtain a constant print position. However, when a preprinted label is used, however, some inks may prevent proper positioning correction. In this case, determine the transmissive sensor threshold manually by key operation and store the value in the non-volatile memory (EEPROM). - Page 9 (12) The printer feeds the label until the T R A N S M I S S I V E [PAUSE] key is released. (13) When the [PAUSE] key is released after 1.5 sheets or more of the label are fed, the printer stops feeding the label.
-
Page 10: Reset
5.6 RESET Power ON (1) Idling or printing normally L I N E (2) Press the [PAUSE] key. [PAUSE] * If the [PAUSE] key is pressed during P A U S E printing, this message is displayed and printing is stopped. (3) Hold down the [RESTART] key for 3 seconds or more while the printer is in a [RESTART]... -
Page 11: Parameter Setting
5.7 PARAMETER SETTING 5.7.1 Parameter Setting Operation Example Power ON (1) Idling or printing normally L I N E (2) Press the [PAUSE] key. [PAUSE] * If the [PAUSE] key is pressed during P A U S E printing, this message is displayed and printing is stopped. - Page 12 (18) Transmission control method selection: X O N + R E A D Y A U T O Select the transmission control method using the [FEED] and [RESTART] keys. [PAUSE] (19) Press the [PAUSE] key. (20) Language selection for LCD messages: L C D E N G L I S H Select the language for LCD messages...
- Page 13 (34) Centronics ACK/BUSY timing setting: A C K / B U S Y T Y P E Set the ACK/BUSY timing using the [FEED] and [RESTART] keys. (35) Press the [PAUSE] key. [PAUSE] (36) Web printer function setting: W E B P R I N T E R O F F Set the function for a web printer using...
-
Page 14: Setting Contents
5.7.2 Setting Contents For details, refer to “7.3 Various Parameters Setting” in the system mode section. (1) Character code selection (FONT CODE) • PC-850 • PC-852 • PC-857 • PC-8 • PC-851 • PC-855 • PC-1250 • PC-1251 • PC-1252 •... - Page 15 (6) RS-232C transmission control method selection (XON/XOFF, READY/BUSY) • XON/XOFF protocol (An XON is not output when the power is on and an XOFF is not output when the power is off.) • READY/BUSY (DTR) protocol (An XON is not output when the power is on and an XOFF is not output when the power is off.) •...
- Page 16 (12) Euro code setting (EURO CODE) 20H to FFH (13) Automatic head broken dots check setting (AUTO HD CHK) • ON (Head broken dots check is automatically performed when the power is turned on.) • OFF (Head broken dots check is not automatically performed if the power is turned on.) (14) Centronics ACK/BUSY timing setting (ACK/BUSY) •...
-
Page 17: Fine Adjustment Value Setting
5.8 FINE ADJUSTMENT VALUE SETTING 5.8.1 Fine Adjustment Value Setting Operation Example Power ON (1) Idling or printing normally L I N E (2) Press the [PAUSE] key. [PAUSE] * If the [PAUSE] key is pressed during P A U S E printing, this message is displayed and printing is stopped. - Page 18 (18) Print density fine adjustment (Thermal T O N E A D J . < T > transfer print mode): Set the fine adjustment value using the [FEED] and [RESTART] keys. [PAUSE] (19) Press the [PAUSE] key. (20) Print density fine adjustment (Direct T O N E A D J .
-
Page 19: Setting Contents
5.8.2 Setting Contents For details, refer to “7.4 Various Fine Adjustment Values Setting” in the system mode section. (1) Feed fine adjustment (FEED ADJ.) -50.0 mm to +50.0 mm (in 0.5 mm units) (2) Cut position (or stop position of the strip issue) fine adjustment (CUT ADJ.) -50.0 mm to +50.0 mm (in 0.5 mm units) (3) Back feed fine adjustment (BACK ADJ.) -9.5 mm to +9.5 mm (in 0.5 mm units) -
Page 20: Dumping Of Receive Buffer
5.9 DUMPING OF RECEIVE BUFFER 5.9.1 Operation Example of Receive Buffer Dumping Power ON (1) Idling or printing normally L I N E (2) Press the [PAUSE] key. [PAUSE] * When the [PAUSE] key is pressed during printing, this message P A U S E displayed and printing is stopped. - Page 21 Data in the receive buffer is printed out in the format below. 7B 41 58 3B 2B 30 30 30 2C 2B 30 30 30 2C 2B 30 {AX;+000,+000,+0 30 7C 7D 7B 44 30 37 37 30 2C 31 31 30 30 2C 30 0|}{D0760,1100,0 37 34 30 7C 7D 7B 43 7C 7D 7B 4C 43 3B 30 30 33 740|}{C|}{LC;003...
-
Page 22: Lcd Messages And Led Indications
5.10 LCD MESSAGES AND LED INDICATIONS Restoration Acceptance LED Indication of Status LCD Messages Printer Status [RESTART] Request Reset Yes/No Command POWER ON LINE ERROR Yes/No ON LINE In the online mode ON LINE In the online mode – (In the PCL emulation mode) ON LINE In the online mode –... - Page 23 Restoration Acceptance LED Indication of Status LCD Messages Printer Status [RESTART] Request Reset Yes/No Command POWER ON LINE ERROR Yes/No FORMAT ERROR An erase error has occurred in formatting the ATA card or flash memory card. FLASH CARD FULL Saving failed because of the insufficient capacity of the ATA card or flash memory card.
- Page 24 NOTE 1: When a command error is found in the command sent, 16 bytes of the command code of the error command are displayed. (However, [LF] and [NUL] are not displayed.) [Example 1] [ESC] PC001; 0A00, 0300, 2, 2, A, 00, B [LF] [NUL] Command error LCD display PC001;0A00,0300,...
-
Page 25: Lcd Messages In Different Languages
5.11 LCD MESSAGES IN DIFFERENT LANGUAGES ENGLISH GERMAN FRENCH ON LINE ON LINE PRETE HEAD OPEN KOPF OFFEN TETE OUVERTE PAUSE **** PAUSE **** PAUSE **** COMMS ERROR UEBERTR.-FEHLER ERR. COMMUNICAT. PAPER JAM **** PAPIERSTAU **** PB. PAPIER **** CUTTER ERROR**** MESSERFEHL. - Page 26 Italian PRONTA TESTA APERTA PAUSA **** ERR. COMUNICAZ. CARTA INCEP.**** ERR. TAGL. **** NO CARTA **** TESTA APERTA**** ERROR TESTA 10 TEMP. TESTA ALTA 11 ERR. NASTRO **** 12 SALVA ### &&&& SALVA %%%%%%% 13 ERR.SCRITT.CARD 14 ERR. FORMATTAZ. 15 MEM. CARD PIENA 16 POWER FAILURE 17 EEPROM ERROR 18 SYSTEM ERROR...
-
Page 27: Download Mode
6. DOWNLOAD MODE (1) Power off state Power OFF (2) Turn the power on by pressing the [FEED] [RESTART] [PAUSE] [FEED], [RESTART] and [PAUSE] keys at the same time. (3) Download mode display D O W N L O A D M O D E [FEED] (4) Press the [FEED] key. - Page 28 Either of two modes for the timing for BUSY-ACK, can be selected. (1) DOWNLOAD MODE (Default) Data 1~8 (Host → Printer) nStrobe (Host → Printer) Busy (Host ← Printer) nAck (Host ← Printer) (2) DOWNLOAD MODE 2 Data 1~8 (Host → Printer) nStrobe (Host →...
-
Page 29: System Mode
7. SYSTEM MODE 7.1 OUTLINE OF SYSTEM MODE In this mode, the printer self-test operation and parameter setting operation are performed. Described below is the key operation procedure performed regarding the system mode. • System mode for service persons or system administrators (All menus of the system mode are operable.) Power OFF While holding the [FEED] and [PAUSE] keys down, turn the power on. - Page 30 • System mode for users (Operable menus of the system mode are limited.) Power OFF While holding the [FEED] and [RESTART] keys down, turn the power on. [RESTART] Maintenance counter/Various parameters printout, <1> Self-test Printer self-test operation and results printout, Thermal head broken dots check [RESTART] [FEED]...
-
Page 31: Self-Test
7.2 SELF-TEST 7.2.1 Self-test Operation Example (1) Maintenance Counter/Various Parameters Printout, Automatic Self-test Printout Power OFF (1) Power off state (2) While pressing [FEED] [FEED] [PAUSE] [PAUSE] keys, turn the power on. (3) System mode menu display < 1 > D I A G . V 1 . - Page 32 Print type setting mode (PRT TYPE) RESTART • TRANSFR (Thermal transfer print mode) • DIRECT (Direct thermal print mode) FEED NOTE: When an error occurs while printing the results of the self-test, the error message is displayed and printing is stopped. The error is cleared by pressing the [PAUSE] key, then the system mode menu is displayed again.
- Page 33 (2) Head Broken Dots Check (1) Power off state Power OFF (2) While pressing [FEED] [FEED] [PAUSE] [PAUSE] keys, turn the power on. (3) System mode menu display (Self-test) < 1 > D I A G . V 1 . 0 A (The program version is displayed.) [PAUSE] (4) Press the [PAUSE] key.
-
Page 34: Self-Test Items
7.2.2 Self-test Items (1) Maintenance counter/various parameters printout Maintenance counter • Total label distance covered (cannot be cleared) • Label distance covered • Print distance • Cutting count • Ribbon motor drive time • RS-232C hard error count • System error count •... - Page 35 • IP address settings • Socket communication port setting • Storage area setting • PCL emulation setting • Print speed for PCL emulation • Sensor type for PCL emulation • Print type for PCL emulation • Issue type for PCL emulation •...
-
Page 36: Self-Test Results Printout Samples
7.2.3 Self-test Results Printout Samples (1) Maintenance counter/Various parameters printout TOTAL FEED 1.1km FEED 1.1km PRINT 0.5km RIBBON 232C ERR SYSTEM ERR POWER FAIL [PC] [KEY] FEED +2.0mm FEED +0.0mm +0.0mm +1.0mm BACK +0.0mm BACK +0.0mm TONE(T) +0step TONE(T) +0step TONE(D) +0step TONE(D) +0step... - Page 37 (2) Automatic self-test printout PROGRAM B-850 01NOV2000 V1.0A FMRM0051402:1A00 BOOT B-850 16NOV2000 V1.0 FMRM0051601:8500 FONT 5600 KANJI 9D00 EEPROM SDRAM CARD SLOT 1 SLOT 2 SENSOR1 00000000,00000000 SENSOR2 [H]20°C [A]22°C [S]25°C [R(U)]4.2V [R(L)]4.0V [T]2.5V EXP.I/O NG KEY BRD NG PCL KIT BOOT V1.0 09MAR2001 FMRM0063001:8E00...
-
Page 38: Self-Test Printout Contents
7.2.4 Self-test Printout Contents (1) Maintenance counter Item Contents Range TOTAL FEED Total label distance covered 0.0 to 2000.0 km (cannot be cleared) FEED Label distance covered 0.0 to 181.9 km PRINT Print distance 0.0 to 200.0 km Cut count 0 to 1000000 RIBBON Ribbon motor drive time... - Page 39 (2) Various parameters check contents Item Contents Remarks [PC] FEED Feed fine adjustment -50.0 mm to +50.0 mm Cut position (or stop position of the -50.0 mm to +50.0 mm strip issue) fine adjustment BACK Back feed fine adjustment -9.9 mm to +9.9 mm TONE(T) Print density fine adjustment -10 to +10 step...
- Page 40 Item Contents Remarks CODE Control code type AUTO: Automatic selection ESC LF NUL: ESC LF NUL method { | }: { | } method ×× Any set code (Described in hex. code) SPEED Communication speed selection 2400: 2400 bps 4800: 4800 bps 9600: 9600 bps...
- Page 41 Item Contents Remarks FORWARD WAIT Forward feed standby after an Performed issue (The stop position fine adjustment value is also printed.) OFF: Not performed FEED KEY [FEED] key function setting FEED: One label is fed. PRINT: Data in the image buffer is printed on one label.
- Page 42 Item Contents Remarks SENSOR Sensor type selection for PCL NONE: No position detected emulation REFLECT: Lower reflective sensor TRANS.: Transmissive sensor –: When PCL emulation setting is OFF. PRINT TYPE Print type for PCL emulation TRANSFR: Thermal transfer print mode DIRECT: Direct thermal...
- Page 43 (3) Memory check contents Model name: B-850 series: B-852-QQ/QP: 8” head/300 DPI Creation date (Day-Month-Year) Checksum of the program area PROGRAM B-850 01NOV2000 (Sum of all data in program area) V1.0A FMRM0034806:1A00 Part number Version V1.0 A Revision Version Name PROGRAM: Program area Model name: B-850 series: 8”...
- Page 44 EEPROM OK: Data in the check area can be properly read/written. NG: Data in the check area cannot be properly read/rewritten. Back up memory (EEPROM) SDRAM Capacity of SDRAM Memory for the system and drawing CARD SLOT 1 ATA: ATA card is installed. SLOT 2 LAN: LAN card is installed.
- Page 45 Sensor 2 [H]20°C [A]25°C [S]25°C [R(U)]3.3V [R(L)]4.0V [T]2.4V Transmissive sensor status (0.0 to 5.0 V) Lower reflective sensor status (0.0 to 5.0 V) Upper reflective sensor status (0.0 to 5.0 V) Heat sink sensor status (25 °C, 80 °C, 90 °C) Open-air temperature sensor status (0 to 86 °C, --°C if it cannot be detected) Thermal head temperature sensor status...
- Page 46 (6) DIN check for keyboard (KB-80) connection KEY BRD OK: Normal data NG: Abnormal data, or the loop-back jig is not connected DIN for connecting to the keyboard (KB-80) (7) PCL kit check contents PCL emulation kit (B-7708-QM) Boot area Creation date (Day-Month-Year) PCL KIT BOOT V1.0...
-
Page 47: Various Parameters Setting
7.3 VARIOUS PARAMETERS SETTING 7.3.1 Various Parameters Setting Operation Example (1) Power off state Power OFF [FEED] [PAUSE] (2) While pressing [FEED] [PAUSE] keys, turn the power on. (3) System mode menu display < 1 > D I A G . V 1 . - Page 48 (19) Language selection for LCD messages: L C D E N G L I S H Select the language for LCD messages using the [FEED] and [RESTART] keys. [PAUSE] (20) Press the [PAUSE] key. (21) Setting for forward feed standby after F O R W A R D W A I T O F F...
- Page 49 (35) Web printer function setting: W E B P R I N T E R O F F Set the function for a web printer using the [FEED] and [RESTART] keys. [PAUSE] (36) Press the [PAUSE] key. (37) Silent printing function setting: S I L E N T P R I N T Set the silent printing function using the...
-
Page 50: Setting Contents
7.3.2 Setting Contents (1) Character code selection (FONT CODE) • PC-8 • PC-857 • PC-852 • PC-850 • Arabic • LATIN9 RESTART • PC-1257 • PC-1254 FEED • PC-1253 • PC-1252 • PC-1251 • PC-1250 • PC-855 • PC-851 (2) Font “0” selection (ZERO FONT) RESTART •... - Page 51 (5) RS-232C parity selection (PARITY) RESTART • EVEN • ODD FEED • NONE (6) RS-232C transmission control method selection (XON/XOFF, READY/BUSY) • XON/XOFF AUTO: XON/XOFF protocol (XON output when the power is on, XOFF output when the power is off) •...
- Page 52 (8) Setting for forward feed standby after an issue (FORWARD WAIT) • OFF: Forward feed standby is not performed. FORWARD WAIT OFF [FEED] [RESTART] • ON: Forward feed standby is performed. FORWARD WAIT [PAUSE] [FEED] POSITION +0.0mm [FEED] [RESTART] Stop position fine adjustment value for automatic POSITION +0.5mm forward standby:...
- Page 53 (9) Control code selection (CODE) CODE AUTO [RESTART] [FEED] CODE ESC,LF,NUL [RESTART] [FEED] CODE {,|,} [RESTART] [FEED] CODE MANUAL CONTROL CODE1 02 [PAUSE] [RESTART] [FEED] CONTROL CODE1 1B CONTROL CODE1 01 [PAUSE] [FEED] [RESTART] CONTROL CODE2 0A CONTROL CODE1 00 [PAUSE] [FEED] [RESTART]...
- Page 54 (13) Automatic head broken dots check setting (AUTO HD CHK) RESTART • OFF: Head broken dots check is not automatically performed. • ON: Head broken dots check is automatically performed. FEED (14) Centronics ACK/BUSY timing setting (ACK/BUSY) RESTART • TYPE 1 •...
- Page 55 Supplementary Explanation • When the [RESTART] and [FEED] keys are pressed at the same time, the display shows the system mode menu. • If the [RESTART] or [FEED] key is held down for 0.5 seconds or more when a parameter is being set, the printer enters the repeat mode, in which the key is entered repeatedly.
-
Page 56: Various Fine Adjustment Values Setting
7.4 VARIOUS FINE ADJUSTMENT VALUES SETTING 7.4.1 Various Fine Adjustment Values Setting Operation Example (1) Power off state Power OFF [FEED] [PAUSE] (2) While pressing [FEED] [PAUSE] keys, turn the power on. (3) System mode menu display < 1 > D I A G . V 1 . - Page 57 (19) Print density fine adjustment T O N E A D J . < D > (Direct thermal print mode): Set the fine adjustment value using the [FEED] and [RESTART] keys. [PAUSE] (20) Press the [PAUSE] key. (21) Ribbon motor drive voltage fine R B N A D J <...
-
Page 58: Setting Contents
7.4.2 Setting Contents (1) Feed fine adjustment (FEED ADJ.) +0.0 mm +50.0 mm +49.5 mm Print start One label position RESTART +0.5 mm +0.0 mm +3.0 mm -0.5 mm FEED Print start One label position -49.5 mm -50.0 mm -3.0 mm Paper feed direction One label Print start position... - Page 59 [Fine adjustment of stop position of the strip issue] +0.0 mm Stop position of the strip issue (End of the strip shaft) +3.0 mm Stop position of the strip issue (End of the strip shaft) - 3.0 mm Paper feed direction Stop position of the strip issue (End of the strip shaft) Printing in strip issue mode for the auto labeler, stops at the 4 mm...
- Page 60 (3) Back feed fine adjustment (BACK ADJ.) +0.0 mm +9.5 mm +9.0 mm Print start position (Home position after a back feed) +0.5 mm RESTART +0.0 mm -0.5 mm FEED +3.0 mm Print start position -9.0 mm (Home position after a back feed) -9.5 mm -3.0 mm Paper feed direction...
- Page 61 (5) Print density fine adjustment (Thermal transfer/Direct thermal print modes) (TONE ADJ.) Darker +10 step +9 step RESTART +1 step Standard +0 step -1 step FEED -9 step -10 step Lighter ([Step] is not displayed.) (6) Ribbon motor drive voltage fine adjustment setting (Rewind) [RESTART] [FEED] RBN ADJ <BK>...
- Page 62 (7) Ribbon motor drive voltage fine adjustment setting (Back tension) [RESTART] [FEED] RBN ADJ <BK> +10 +10 step (5% × +10 = +50%) [RESTART] [FEED] +9 step (5% × +9 = +45%) RBN ADJ <BK> [RESTART] [FEED] +1 step (5% × +1 = +5%) RBN ADJ <BK>...
- Page 63 Supplementary Explanation • When the [RESTART] and [FEED] keys are pressed at the same time, the display shows the system mode menu. • If the [RESTART] or [FEED] key is held down for 0.5 seconds or more when a fine adjustment value is being set, the printer enters the repeat mode, in which the key is entered repeatedly.
-
Page 64: Test Print
7.5 TEST PRINT 7.5.1 Test Print Operation Example (1) Normal Test Print Power OFF (1) Power off state (2) While pressing [FEED] [FEED] [PAUSE] [PAUSE] keys, turn the power on. (3) System mode menu display < 1 > D I A G . V 1 . - Page 65 (25) Issue type setting mode T Y P E [ S ] N O C U T [PAUSE] (26) Press the [PAUSE] key. (27) Label size setting mode L A B E L L E N . 7 6 m m [PAUSE] (28) Press the [PAUSE] key.
- Page 66 (2) Test Print for Assembly Process (1) Power off state Power OFF (2) While pressing [FEED] [FEED] [PAUSE] [PAUSE] keys, turn the power on. (3) System mode menu display < 1 > D I A G . V 1 . 0 A (Self-test) (4) Press the [FEED] key.
- Page 67 (21) Assembly process automatic printout A U T O P R I N T ( T R A N ) mode (Transmissive sensor) (22) Press the [PAUSE] key. [PAUSE] One label feed 3-dot slant line: 5 labels are printed. (23) Assembly process automatic printout A U T O P R I N T ( T R A N ) mode (Transmissive sensor)
-
Page 68: Setting Contents
7.5.2 Setting Contents (1) Test print mode selection • PRINT CONDITION (Test print condition parameter setting) • SLANT LINE (1DOT) (1-dot slant line printout) • SLANT LINE (3DOT) (3-dot slant line printout) • CHARACTERS (Character printout) RESTART • BARCODE (Bar code printout) •... - Page 69 (5) Sensor selection (SENSOR) RESTART • NONE (No position detected) • REFLECT. (Lower reflective sensor) FEED • TRANS. (Transmissive sensor) (6) Print type (PRT TYPE) RESTART • TRANSFR (Thermal transfer print mode) • DIRECT (Direct thermal print mode) FEED (7) Issue type (TYPE) RESTART •...
- Page 70 (10) Initial parameter values when turning the power on • Menu selection: Test print condition parameter setting • Issue count setting (ISSUE COUNT): 1 • Print speed (PRINT SPEED): 4 inches/sec. • Sensor selection (SENSOR): Transmissive sensor • Issue type (TYPE): Batch issue (without cutting) •...
- Page 71 • Magnification of slant lines is as follows: 1-dot slant line (Black area ratio: 16.7%) 3-dot slant line (Black area ratio: 16.7%) - 68 -...
-
Page 72: Test Print Samples
7.5.3 Test Print Samples Samples below are reduced by 70%. 1-dot slant line printout 3-dot slant line printout - 69 -... - Page 73 Character printout Bar code printout - 70 -...
- Page 74 Line printout for the assembly process - 71 -...
-
Page 75: Sensor Display/Adjustment
7.6 SENSOR DISPLAY/ADJUSTMENT 7.6.1 Sensor Display/Adjustment Operation Example Power OFF (1) Power off state (2) While pressing [FEED] [FEED] [PAUSE] [PAUSE] keys, turn the power on. (3) System mode menu display < 1 > D I A G . V 1 . 0 A (Self-test) (4) Press the [FEED] key. - Page 76 (21) Lower reflective sensor adjustment [ R E F . < L > ] 2 . 8 V value display: Load tag paper. (The black mark should not cover the sensor.) (22) Hold down the [RESTART] or [FEED] [RESTART] key for 3 seconds or more. (23) “*”...
-
Page 77: Display Contents
7.6.2 Display Contents (1) Sensor adjustment value display [ H ] 2 0 ° C [ A ] 2 2 ° C Open-air temperature sensor status (0 °C to 86 °C) Thermal head temperature sensor status (0 °C to 86 °C) [ S ] 4 0 °... -
Page 78: Ram Clear
7.7 RAM CLEAR 7.7.1 RAM Clear Operation Example Power OFF (1) Power off state (2) While pressing the [FEED] and [FEED] [PAUSE] [PAUSE] keys, turn the power on. (3) System mode menu display < 1 > D I A G . V 1 . -
Page 79: Ram Clear Contents
7.7.2 RAM Clear Contents (1) RAM clear mode RESTART • NO RAM CLEAR • MAINTE.CNT CLEAR FEED • PARAMETER CLEAR (2) Selection of destination type RESTART • QP TYPE (for Europe/Asia) • QQ TYPE (for North/South America) FEED * The initial values for the RS-232C data length, parity, transmission control method, and language for LCD messages, differ accroding to the type. - Page 80 (5) Initial values after parameter clear Parameter Initial Value Feed fine adjustment (PC) 0 mm Cut position (or stop position of the strip issue) fine 0 mm adjustment (PC) Back feed fine adjustment (PC) 0 mm Print density fine adjustment: Thermal transfer print mode (PC) Print density fine adjustment: Direct thermal print mode (PC)
- Page 81 Parameter Initial Value Automatic head broken dots check [FEED] key function FEED (One label is fed.) Status response With Label pitch 76.2 mm Effective print length 74.2 mm Effective print width 216.8 mm Print type Thermal transfer print mode Sensor type Transmissive sensor Feed speed 4”/sec...
-
Page 82: Ip Address Setting
7.8 IP ADDRESS SETTING 7.8.1 IP Address Setting Operation Example Power OFF (1) Power off state (2) While pressing the [FEED] and [FEED] [PAUSE] [PAUSE] keys, turn the power on. (3) System mode menu display < 1 > D I A G . V 1 . - Page 83 (25) Printer IP address setting mode P R I N T E R A D R E S [PAUSE] (26) Press the [PAUSE] key. (27) Printer IP address display 1 9 2 . 1 6 8 . 0 1 0 . 0 1 0 [RESTART] (28) Press the [RESTART] key.
- Page 84 (49) Setting for the next 8 bits 1 5 7 . 0 6 9 . 0 4 6 . 0 1 0 [PAUSE] (50) Press the [PAUSE] key. (51) The 8 bits are entered and the setting 1 5 7 . 0 6 9 . 0 4 6 . 0 1 0 goes on to the next 8 bits.
- Page 85 (73) Set a value for the 4th digit. P O R T 1 8 0 0 0 [FEED] (74) Press the [FEED] key. (75) Confirm a set value for the 4th digit. P O R T 1 7 0 0 0 [PAUSE] (76) Press the [PAUSE] key.
-
Page 86: Pcl Emulation Setting
7.9 PCL EMULATION SETTING 7.9.1 PCL Emulation Setting Operation Example Power OFF <1>DIAG. V1.0A [FEED] <2>PARAMETER SET [FEED] <3>ADJUST SET [FEED] <4>TEST PRINT [FEED] <5>SENSOR ADJ. [FEED] <6>RAM CLEAR [FEED] <7>IP ADDRESS [FEED] <8>PCL EMULATION [PAUSE] [RESTART] EMULATION EMULATION [FEED] [PAUSE] [PAUSE] [RESTART]... -
Page 87: Setting Contents
7.9.2 Setting Contents (1) Emulation setting (EMULATION) RESTART • OFF: PCL emulation is not enabled. FEED • ON: PCL emulation is enabled. (2) Print speed (PRINT SPEED) RESTART • 4”/sec (4 inches/sec) FEED • 2”/sec (2 inches/sec) (3) Sensor selection (SENSOR) RESTART •... -
Page 88: Basic Setting
7.10 BASIC SETTING 7.10.1 BASIC Setting Operation Example Power OFF (1) Power off state (2) While holding the [FEED] and [PAUSE] [FEED] [PAUSE] keys down, turn the power on. (3) System mode menu display < 1 > D I A G . V 1 . - Page 89 (23) BASIC file browser F I L E M A I N T E N A N C E [RESTART] (24) Press the [RESTART] key. (25) BASIC trace setting mode T R A C E S E T T I N G [RESTART] (26) Press the [RESTART] key.
- Page 90 (49) BASIC file browser F I L E M A I N T E N A N C E [RESTART] (50) Press the [RESTART] key. (51) BASIC trace setting mode T R A C E S E T T I N G [PAUSE] (52) Press the [PAUSE] key.