Table of Contents
Advertisement
Quick Links
Advertisement
Table of Contents

Related Manuals for Bosch HLL09.020U


Summary of Contents for Bosch HLL09.020U
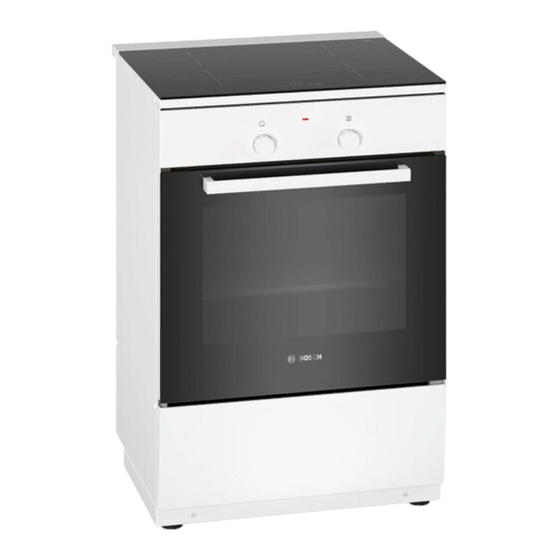
- Page 1 Free standing cooker HLL09.020U User manual [en]...
-
Page 2: Table Of Contents
en Safety ¡ Under supervision. Never leave the appli- Table of contents ance unattended when cooking for short periods. Safety .............. 2 ¡ In private households and in enclosed Preventing material damage ....... 5 spaces in a domestic environment. Environmental protection and saving en- ¡... - Page 3 Safety en 1.3 Safe use WARNING ‒ Risk of burns! The appliance and its parts that can be WARNING ‒ Risk of fire! touched become hot during use, particularly The appliance will become hot. the hob surround, if fitted. ▶ Do not keep combustible objects or aero- ▶...
-
Page 4: Safety
en Safety An ingress of moisture can cause an electric WARNING ‒ Risk of scalding! shock. The accessible parts of the appliance become ▶ Do not use steam- or high-pressure clean- hot during operation. ers to clean the appliance. ▶ Never touch these hot parts. The insulation on cables of electrical appli- ▶... -
Page 5: Preventing Material Damage
Preventing material damage en 1.5 Halogen bulb WARNING ‒ Risk of electric shock! When changing the bulb, the bulb socket con- WARNING ‒ Risk of burns! tacts are live. The bulbs in the cooking compartment get ▶ Before replacing the bulb, ensure that the very hot. There is still a risk of burning for appliance is switched off in order to pre- some time after they have been switched off. -
Page 6: Environmental Protection And Saving En- Ergy
en Environmental protection and saving energy Damage Cause Measure Stains Unsupervised cooking process. Monitor the cooking process. Stains, blisters Spilled food, especially food with a high Remove immediately with a glass scraper. sugar content. Stains, blisters or Defective cookware, cookware with melted Use suitable cookware that is in a good con- fractures in the glass enamel or cookware with copper or alu-... -
Page 7: Suitable Cookware
Suitable cookware en Note: Cover saucepans with suitable lids. The appliance requires: ¡ Cooking without a lid consumes considerably more ¡ A maximum of 1 W when the appliance is in opera- energy. tion with the display switched on Lift lids as infrequently as possible. ¡... -
Page 8: Installation And Connection
en Installation and connection 5 Installation and connection You can find out where and how best to install your ap- 5.2 Setting up the appliance pliance here. You will also learn how to connect your Place the appliance on a smooth surface. appliance to the power supply. -
Page 9: Familiarising Yourself With Your Appliance
Familiarising yourself with your appliance en Unscrew the screw and remove the door lock. Close the appliance door. 6 Familiarising yourself with your appliance 6.1 Your appliance Explanation You can find an overview of the parts of your appliance here. Control panels Note: On certain models, specific details such as col- Cooling fan our and shape may differ from those pictured. -
Page 10: Accessories
en Familiarising yourself with your appliance Control Explanation Control Explanation Use the temperature se- You can use the four hot- Temperature selector Hotplate control lector to set the temperat- plate switches to control ure for the type of heating the output provided by and select settings for each individual hotplate. -
Page 11: Powerboost
Familiarising yourself with your appliance en Temperature and setting levels There are different settings for the types of heating and functions. Symbol Function Zero setting The appliance does not heat up. 50–275 Temperature range Set the temperature in the cooking compartment in °C. 1, 2, 3 Grill settings Depending on the appliance type, set the grill settings for the grill, for the large... - Page 12 en Accessories ¡ Always keep the control panel clean and dry. Mois- You can remove the rails, e.g. for cleaning. ture impairs the function. → "Rails", Page 20 ¡ Do not place any cookware near the indicators or sensors. The electronics may overheat. Cooking zone Before you start cooking, check whether the size of the cookware fits the cooking zone that you want to use for...
- Page 13 You will find a comprehensive range of products for side facing the appliance door and your appliance in our brochures and online: the curved lip facing downwards. www.bosch-home.com Accessories vary from one appliance to another. When Baking tray Slide the tray in with the sloping purchasing accessories, always quote the exact E.g.
- Page 14 en Operating the hotplate 9 Operating the hotplate You can find out everything you need to know about 9.3 Cooking recommendations operating your hotplate here. The table shows which power level ( ) is suitable for which food. The cooking time ( ...
-
Page 15: Basic Settings
Time-setting options en Small baked items, e.g. dough- 4 - 5 nuts, beer-battered fruit Without lid Turn frequently 10 Time-setting options Your hob has various functions for setting the cooking Touch . time: To change the cooking time, touch or or set it ¡... -
Page 16: Cookware Test
en Cookware test Display Setting Value Audible signals – Confirmation and fault signals are switched off. – Only the fault signal is switched on. – Only the confirmation signal is switched on. ... -
Page 17: Basic Operation
Basic operation en 14.1 Procedure for checking the cookware 14.2 Checking the result Set the cookware at room temperature with approx. In the following table, you can check the result for the 200 ml water in the centre of the cooking zone quality and speed of the cooking process: whose diameter best fits the diameter of the base of Result the cookware. - Page 18 en Cleaning and servicing 17 Cleaning and servicing Do not use cleaning products with a high alcohol To keep your appliance working efficiently for a long ▶ content. time, it is important to clean and maintain it carefully. Do not use hard scouring pads or cleaning ▶...
- Page 19 Cleaning and servicing en Cooking compartment Area Suitable cleaning agents Information Enamelled sur- ¡ Hot soapy water Soak any heavily soiled areas and use a brush or steel wool. faces Leave the appliance door open to dry the cooking compartment ¡ Vinegar water after cleaning it.
- Page 20 en Cleaning aid Dry with a soft cloth. 18 Cleaning aid The cleaning aid is a fast alternative for occasionally 18.2 Cleaning the cooking compartment cleaning the cooking compartment. The cleaning aid after using it evaporates soapy water and therefore softens dirt. This means that dirt can be removed more easily.
- Page 21 Appliance door en and insert it into the socket at the front. 19.2 Attaching the rails First insert the rail into the rear socket, press it to the back slightly The rails fit both on the left and right sides. Shelf po- sitions 1 and 2 are located at the bottom and shelf positions 3, 4 and 5 are located at the top.
- Page 22 en Appliance door Close the oven door as far as the limit stop. Grip Lift the panel up and out. the left and right hand sides of the door with both hands. Close the door slightly more and remove it. 20.4 Fitting the door panes When fitting the panes, ensure that the lettering "top 20.3 Removing the door panes right"...
-
Page 23: Troubleshooting
Troubleshooting en Close both locking levers again. 20.5 Attaching the appliance door Reattach the oven door in the reverse sequence to re- moval. WARNING ‒ Risk of injury! The oven door might accidentally fall or a hinge may suddenly snap shut. In this case, do not hold onto the hinge. Call cus- ▶... - Page 24 en Troubleshooting Fault Cause and troubleshooting The appliance is not The circuit breaker is faulty. working. Check the circuit breaker in the fuse box. ▶ There has been a power cut. Check whether the lighting in your kitchen or other appliances are working. ▶...
-
Page 25: Transportation And Disposal
Transportation and disposal en Turn the glass cover anti-clockwise to remove it. WARNING ‒ Risk of burns! Pull out the halogen bulb without turning it. The appliance and its parts that can be touched be- come hot during use. Caution should be exercised here in order to avoid ▶... -
Page 26: Customer Service
en Customer Service 23 Customer Service If you have any queries on use, are unable to rectify The contact details for Customer Service can be found faults on the appliance yourself or if your appliance in the enclosed Customer Service directory or on our needs to be repaired, contact Customer Service. - Page 27 How it works en ¡ Remove any accessories that are not being used Notes from the cooking compartment. This allows you to ¡ When baking on several layers, use hot air. Different achieve optimal cooking results and save up to 20% food that is placed in the oven at the same time will in energy.
- Page 28 en How it works Recommended settings Cakes in tins Meal Accessory/cookware Shelf posi- Type of Temperature Cooking tion heating in °C time, minutes Sponge cake, simple Vienna ring tin/loaf tin 2 160–180 50–60 Sponge cake, simple, 2 levels Vienna ring tin/loaf tin 3+1 ...
- Page 29 How it works en Meal Accessory/cookware Shelf posi- Type of Temperature Cooking tion heating in °C time, minutes Muffins, 2 levels Muffin tray on wire 160–170 30–40 rack Small baked items Universal pan 150–170 25–35 Viennese whirls, 2 levels Universal pan ...
- Page 30 en How it works Tips for next time you bake Topic If something goes wrong when baking, you can find Your cake is cooked on ¡ Reduce the baking some tips here. the outside but is not fully temperature and in- baked through on the in- crease the baking Topic...
- Page 31 How it works en Meal Accessory/cookware Shelf posi- Type of Temperature Cooking tion heating in °C time, minutes Bread, 1500 g, in a loaf tin or free-form Universal pan 180–200 60–70 Loaf tin Flatbread Universal pan 240–250 25–30 Flatbread, frozen Universal pan ...
- Page 32 en How it works ¡ Universal pan: Shelf position 2 24.8 Bakes and gratins You can cut energy use by cooking different items at How well cooked the bake is will depend on the size of the same time. Position baking tins next to one another the ovenware and the thickness of the bake.
- Page 33 How it works en in an enamelled or dark-coloured metal roasting WARNING ‒ Risk of scalding! dish, it will need a little more liquid than if cooked in Very hot steam may escape when the lid is opened glass cookware. after cooking. Steam may not be visible, depending on ¡...
- Page 34 en How it works Recommended settings Poultry Food Accessories/cook- Shelf posi- Type of Temperature Cooking ware tion heating in °C/grill time in mins setting Chicken, 1.3 kg, unstuffed Cookware without lid 200–220 60–70 Small chicken portions, 250 g each Cookware without lid ...
- Page 35 How it works en Tips for next time you roast Topic If roasting is not successful the first time, you can find Your roasting juices are ¡ Select a smaller item some tips here. burnt. of cookware. ¡ When roasting, add Topic more liquid.
- Page 36 en How it works Recommended settings Yoghurt Meal Accessory/cookware Shelf position Type of Temperature Cooking heating/ in °C time, function minutes Yoghurt Cup/jar Cooking compartment 4–5 hours floor 24.12 Tips for keeping acrylamide levels to 24.13 Drying a minimum when cooking You can achieve outstanding drying results for the food using hot air.
- Page 37 How it works en Place a damp rubber seal and a lid on each jar. 24.14 Preserving food Seal the jars with the clips. You can preserve fruit and vegetables by heating them and sealing them in air-tight jars. Preserving fruit or vegetables ¡...
- Page 38 en How it works Meal Accessory/ Shelf posi- Type of Temperature Cooking time, minutes cookware tion heating in °C Stone fruit, e.g. cherries, 1-litre pre- 1. 170–180 1. Until bubbling starts apricot, peach, grapes, serving jars 2. - 2. Residual heat: 30 gooseberries, damsons Pomes, e.g.
- Page 39 How it works en Recommended settings Defrosting Meal Accessory/cookware Shelf position Type of Temperature Cooking heating in °C time, minutes Baked items, cake and Wire rack bread, fruit, veget- ables, meat products ¡ Baking tins on the wire rack: 24.17 Test dishes First wire rack: Shelf position 3 These overviews have been produced for test institutes Second wire rack: Shelf position 1...
- Page 40 en How it works Meal Accessory/cookware Shelf posi- Type of Temperature Cooking tion heating in °C time, minutes Small cakes, 2 levels Universal pan 25–35 Baking tray Small cakes, 3 levels 5+3+1 35–45 Baking tray Universal pan Hot water sponge cake Springform cake tin, ...
- Page 44 Expert advice for your Bosch home appliances, help with problems or a repair from Bosch experts. Find out everything about the many ways Bosch can support you: www.bosch-home.com/service Contact data of all countries are listed in the attached service directory.