Advertisement
Quick Links
Advertisement

Related Manuals for Sonos Beam


Summary of Contents for Sonos Beam
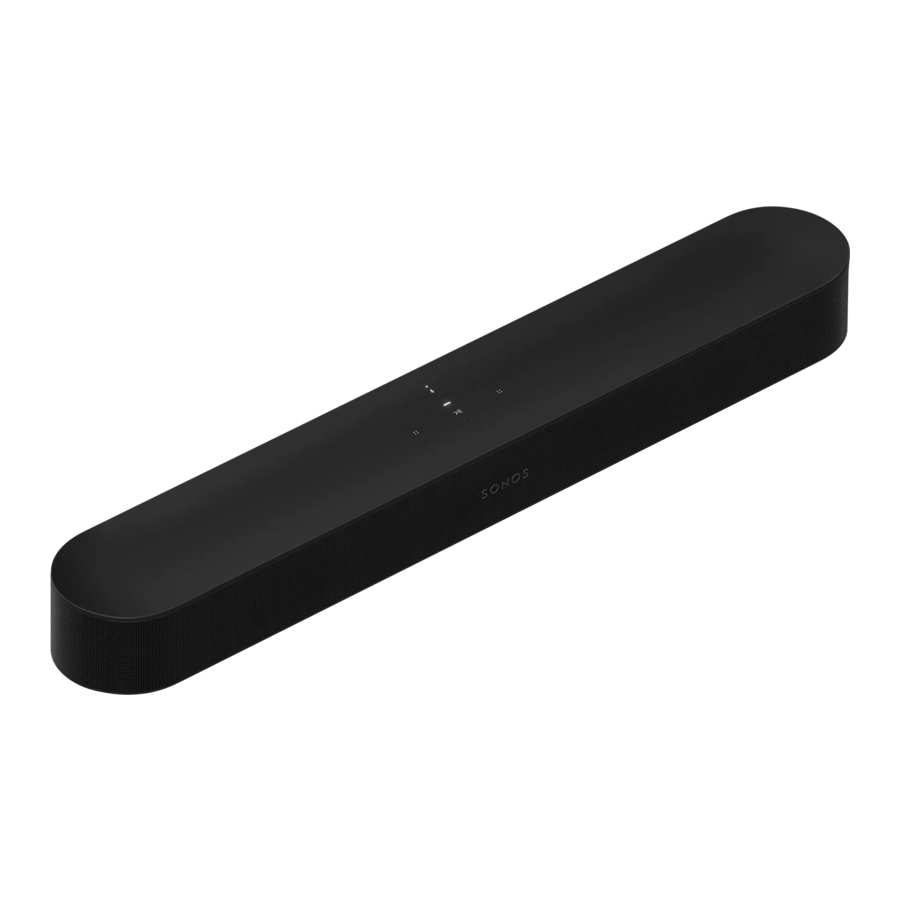
- Page 1 Sonos Beam Wall Mount Quickstart Guide...
- Page 2 Sonos, Inc. © 2022 Sonos, Inc. All rights reserved. Sonos*, Sonos Beam, and Beam are trademarks or registered trademarks of Sonos, Inc. *Reg. U.S. Pat. & TM Off.
- Page 3 [EN] Contents: wall mount bracket, 4 wall anchors, 4 wall screws, 2 screws. Do not discard the template. It may look like packing material. [DA] Indhold: Vægbeslag, Papskabelon til montering, 4 rawlplugs, 4 vægskruer, 2 monteringsskruer. Smid ikke skabelonen ud. Den kan ligne indpakningsmateriale. [DE] Inhalt: Wandhalterung, Pappschablone, 4 Dübel, 4 Wandschrauben, 2 Montageschrauben.
- Page 4 [EN] Tape the cardboard template to the wall above or below your TV. Use a level. Keep 1” (25mm) space (minimum) for access to Beam’s touch controls. (Do not install your Sonos Beam vertically.) Mark the center of the mounting holes and remove the template.
- Page 5 Aderir o molde de cartão na parede acima ou abaixo do seu televisor. Utilize um nível de bolha. Deixe um espaço de 25 mm (mínimo) para ter acesso aos controles de toque do Beam. (Não instale o seu Sonos Beam na vertical.) Marque o centro dos orifícios de montagem e tire o molde.
- Page 6 [EN] Use a 5/16” drill bit to drill pilot holes (see Wall mounting information on page 11). [DA] Brug et 8 mm bor til at bore for (se vejledning til vægmontering på side 11). [DE] Verwende einen 8-mm-Bohrer, um Löcher vorzubohren (sie Informationen zur Wandmontage auf Seite 11).
- Page 7 [EN] Insert and secure the wall anchors (don’t use the anchors if drilling into wood). [DA] Indsæt, og fastgør rawlplugs. (Brug ikke rawlplugs, hvis du monterer på træ). [DE] Setze die Wanddübel ein, und sichere sie (verwende die Dübel nicht, wenn du in Holz bohrst). [ES] Inserta y fija las zapatas (no utilices las zapatas si perforas en madera).
- Page 8 [EN] Place the bracket on the wall and loosely tighten the wall screws to secure the bracket. Check with a level and then tighten the screws. [DA] Placér beslaget på væggen, og stram vægskruerne let for at fastgøre beslaget. Justér placeringen med et vaterpas, og stram skruerne.
- Page 9 [SE] Sätt fästet på väggen och dra löst åt väggskruvarna för att säkra fästet. Kontrollera med vattenpass och dra sedan åt skruvarna. [CH] 将托架安放在墙上,然后稍稍拧紧墙螺栓以将其固定。用水平仪检查,然后拧紧螺栓。 [JP] ブラケットを壁面に置いて、壁掛けネジをざっくり取り付けて下さい。レベルを使って確 認して、螺子を締めて下さい。...
- Page 10 Sluit het netsnoer en de HDMI-kabel aan op de Beam. [NO] Koble strøm- og HDMI-kablene til Beam. [PT-BR] Conecte o cabo de alimentação e os cabos HDMI ao Beam. [SE] Anslut strömmen och HDMI-kablarna till Beam. [CH] 将电源和 HDMI 电缆连接到 Beam。...
- Page 11 [EN] Place Beam on the bracket. [DA] Placér Beam på beslaget. [DE] Setze den Beam auf die Halterung. [ES] Coloca Beam en el soporte. [FR] Placez le Beam sur le support. [IT] Posiziona il Beam sulla staffa. [NL] Plaats de Beam op de beugel.
- Page 12 [ES] Inserta y aprieta Beam en el soporte mediante los tornillos de montaje. [FR] Insérez les vis de montage et serrez-les pour fixer le Beam au support. [IT] Inserisci e stringi il Beam sulla staffa utilizzando le viti di montaggio.
- Page 13 Wall mounting information WALL MATERIAL PRE-DRILL USE WALL ANCHORS USE SCREWS Wood stud 1/8” / 3mm bit Drywall (no stud) 5/16” / 8mm bit Hard wallboard or 5/16” / 8mm bit double board Plaster 5/16” / 8mm bit No, requires toggle bolt Yes Concrete or Brick 5/16”...
- Page 14 Información de montaje MATERIAL DE PARED TALADRE UTILICE ZAPATAS UTILICE TORNILLOS PREVIAMENTE PARA PARED Pernos de madera con broca de 3 mm Sí Mampostería sin con broca de 8 mm Sí Sí mortero (sin perno) Panel de yeso duro o con broca de 8 mm Sí...
- Page 15 Informatie over wandmontage SOORT MUUR VOORBOREN PLUG SCHROEF Houten muur 3 mm boor (skeletbouw) Stenen muur 8 mm boor (geen skeletbouw) Hardboard of dubbel 8 mm boor gipsplaatmuur Gestucte muur 8 mm boor Beton/Baksteen 8 mm boor Informasjon om veggmontering VEGGMATERIELL FORHÅNDSBORING BRUK VEGGANKERE...
- Page 16 Väggmonteringsinformation VÄGGMATERIAL FÖRBORRNING ANVÄND ANVÄND SKRUVAR VÄGGANKARE Vertikalregel av trä med 3 mm borrspets Gipsskiva (ingen med 8 mm borrspets vertikalregel) Hård väggplatta eller med 8 mm borrspets dubbelplatta Väggputs med 8 mm borrspets Betong/Tegel med 8 mm borrspets 墙壁安装信息 墙体材料...
- Page 17 硬い人造壁板ま 3/16” はい はい たは二重板 (4.5mm) ビッ ト 石こう 1/4” (6.5mm) いいえ はい ビット コンクリートま 1/8” (3mm) はい はい たはレンガ ビット...
-
Page 18: Terms Of Use
Credentials”). During the set-up process, the Sonos App will ask You to set up an account and register Your Product with Sonos. As part of registration, You will need to set up a Sonos account (“Sonos Account”). It is Your responsibility to ensure confidentiality and security of Your Login Credentials. By registering, You agree that You are fully responsible for all activities that occur under Your Sonos Account. - Page 19 (the Original Product Software and Product Software Updates are collectively referred to as the “Product Software” or “Software”) are licensed, not sold, to You by Sonos, Inc. for use only under the terms of this Agreement. For clarity, Software includes Sonos Application (collectively, the “Sonos App” or “App”) which means all Sonos applications (e.g.
-
Page 20: Grant Of License
(i) Your failure to implement all bug fixes or error corrections to the Product which are made available by Sonos; (ii) any use of the Product in a manner for which it was not designed or as not authorized under this Agreement;... -
Page 21: Limitation Of Liability
Limit on Indemnity. The foregoing notwithstanding, Sonos shall have no liability for a Claim to the extent based on: (i) the use by You of any Product more than thirty (30) days after Sonos notifies You in writing that continued use of the Product may give rise to such Claim and offers, in return for You ceasing all further use of the Product, to refund the price paid by You for the Product less amounts attributable to Your prior use;... - Page 22 IF YOU DO NOT WISH TO BE BOUND BY THE BINDING ARBITRATION AGREEMENT THEN: (1) you must notify Sonos in writing within sixty (60) days of the date that you purchased a single Sonos Product; (2) your written notification must be mailed to Sonos at 614 Chapala St., Santa Barbara, CA 93101, Attn: Legal Department or emailed to arb-opt-out@sonos.com and (3) your written notification must include (a) your name, (b) your...
- Page 23 Credentials”). During the set-up process, the Sonos App will ask You to set up an account and register Your Product with Sonos. As part of registration, You will need to set up a Sonos account (“Sonos Account”). It is Your responsibility to ensure confidentiality and security of Your Login Credentials. By registering, You agree that You are fully responsible for all activities that occur under Your Sonos Account.
- Page 24 (the Original Product Software and Product Software Updates are collectively referred to as the “Product Software” or “Software”) are licensed, not sold, to You by Sonos, Inc. for use only under the terms of this Agreement. For clarity, Software includes Sonos Application (collectively, the “Sonos App” or “App”) which means all Sonos applications (e.g.
- Page 25 (i) Your failure to implement all bug fixes or error corrections to the Product which are made available by Sonos; (ii) any use of the Product in a manner for which it was not designed or as not authorized under this Agreement;...
- Page 26 Limit on Indemnity. The foregoing notwithstanding, Sonos shall have no liability for a Claim to the extent based on: (i) the use by You of any Product more than thirty (30) days after Sonos notifies You in writing that continued use of the Product may give rise to such Claim and offers, in return for You ceasing all further use of the Product, to refund the price paid by You for the Product less amounts attributable to Your prior use;...
- Page 27 GB/T 26572-2011 standard. 所有 Sonos 的产品有 10 年的 “ 环保使用期限 ”(EPUP)。 All Sonos products have an EPUP “environment protection use period” of 10 years. 此表中带X命名的所有部件都符合欧盟RoHS II 2011/65/EU指令。 All parts named in this table with an X are in compliance with the European Union RoHS II...
- Page 28 Hver Sonos-afspiller udvider rækkevidden af SonosNet-netværket, idet hver enhed kun skal være inden for rækkevidde af mindst én Sonos-afspiller og ikke behøver at være inden for rækkevidde af et centralt adgangspunkt. Udover at kunne udvide rækkevidden mellem Sonos-produkter kan SonosNet udvidde rækkevidden af andre datanetværksforbundne enheder i huset, som f.eks.
- Page 29 Each Sonos player expands the range of SonosNet mesh network because while each device must be within range of at least one other Sonos player, they do not need to be within range of a central access point. In addition to extending the range between Sonos products, SonosNet can extend the range of other data networking devices within the home, such as Android devices directly connected to SonosNet.
- Page 30 καθώς, ενώ κάθε συσκευή Sonos SonosNet πρέπει να είναι εντός του εύρους τουλάχιστον μίας άλλης συσκευής αναπαραγωγής της Sonos, δεν χρειάζεται να είναι εντός του εύρους ενός κεντρικού σημείου πρόσβασης. Επιπροσθέτως της επέκτασης του εύρους μεταξύ προϊόντων της Sonos , η...
- Page 31 Sonos extinde raza de acţiune a reţelei de tip plasă SonosNet deoarece, în timp ce fiecare dispozitiv trebuie să fie în raza de acţiune a cel puţin unui program de redare Sonos, acestea nu trebuie să fie în raza de acţiune a punctului de acces central.
- Page 32 SonosNet es la arquitectura de red de malla inalámbrica de propiedad diseñada para proporcionar una transmisión sólida de música digital en alta fidelidad. Todos los reproductores Sonos dentro de la red de malla SonosNet actúan como cliente y punto de acceso simultáneamente. Cada reproductor Sonos amplía el...
- Page 33 • Increase the separation between the equipment and receiver. • Connect the equipment into an outlet on a circuit different from that to which the receiver is con- nected. Caution: Modifications not expressly approved by the manufacturer may void the user's authority to operate the equipment under FCC rules.
- Page 34 .ﺍﻓﺼﻞ ﻫﺬﺍ ﺍﻟﺠﻬﺎﺯ ﻋﻦ ﻣﺼﺪﺭ ﺍﻟﺘﻴﺎﺭ ﺍﻟﻜﻬﺮﺑﻲ ﺃﺛﻨﺎء ﺍﻟﻌﻮﺍﺻﻒ ﺍﻟﺮﻋﺪﻳﺔ ﺃﻭ ﻋﻨﺪ ﻋﺪﻡ ﺍﺳﺘﺨﺪﺍﻣﻪ ﻟﻔﺘﺮﺍﺕ ﺯﻣﻨﻴﺔ ﻁﻮﻳﻠﺔ ﺭﺟﻰ ﺍﻟﺮﺟﻮﻉ ﺇﻟﻰ ﻣﻮﻅﻒ ﺻﻴﺎﻧﺔ ﻣﺆﻫﻞ ﻟﺪﻯSonos ﺇﺫﺍ ﻛﻨﺖ ﺑﺤﺎﺟﺔ ﺇﻟﻰ ﺇﺟﺮﺍء ﺃﻳﺔ ﺃﻋﻤﺎﻝ ﺻﻴﺎﻧﺔ. ﻳﻠﺰﻡ ﺇﺟﺮﺍء ﺃﻋﻤﺎﻝ ﺍﻟﺼﻴﺎﻧﺔ ﻟﻠﺠﻬﺎﺯ ﻋﻨﺪ ﺗﻠﻔﻪ ﺑﺄﻱ...
- Page 35 12. Sve popravke mora obaviti kvalificirano servisno osoblje tvrtke Sonos. Servisiranje je potrebno ako je uređaj na bilo koji način oštećen, kao što je primjerice oštećenje mrežnog kabela, ulazak tekućine ili drugih predmeta u uređaj, ukoliko je uređaj bio izložen kiši ili vlazi, ako ne radi normalno ili ako je pao.
- Page 36 6. Hold Beam-stoffet fri for støv, dyrehår og andre fine partikler. Brug en støvsuger med en slange eller en ikke-bevægelig børste til rengøring af stoffet. Støvsug ikke med en roterende børste. En fnugbørste kan anvendes til at udjævne synlige streger på stoffet. Rengør ikke stoffet med en fnugbørste.
- Page 37 5. Do not use this apparatus near water. 6. Keep the Beam fabric free from dust, pet hair, and other fine particles. Use a vacuum with a hose or non-moving bristle attachment to clean the fabric. Do not vacuum with a rotating bristle attachment.
- Page 38 6. Puhastage ainult kuiva ja pehme riidest lapiga. Majapidamises kasutatavad puhastusvahendid või lahustid võivad Sonose detailide viimistlust vigastada. 7. Ärge tõkestage ventilatsiooniavasid. Järgige paigaldamisel tootjapoolseid juhiseid. 8. Ärge paigaldage soojusallikate (nagu näiteks radiaatorid, küttekanalite avad, ahjud või muud soojusallikad) lähedusse. 9.
- Page 39 4. Befolgen Sie alle Anweisungen. 5. Verwenden Sie das Gerät nicht in der Nähe von Wasser. 6. Halten Sie die Beam frei von Staub, Tierhaaren und anderen Partikeln. Verwenden Sie einen Staubsauger mit Saugschlauch oder einem Aufsatz mit feststehenden Bürsten zum Reinigen des Stoffs.
- Page 40 10. Verwenden Sie ausschließlich die durch den Hersteller spezifizierten Zubehörprodukte. 11. Trennen Sie das Gerät bei Gewitter oder längeren Nutzungspausen von der Stromversorgung. 12. Lassen Sie alle Wartungsarbeiten von qualifiziertem Sonos-Service-Personal durchführen. Eine Wartung ist erforderlich, wenn das Gerät beschädigt wurde, z. B. bei beschädigten Netzkabeln oder Steckern, wenn Flüssigkeit über dem Produkt verschüttet wurde oder Objekte hineingefallen sind,...
- Page 41 5. Non utilizzare questo dispositivo in prossimità dell'acqua. 6. Mantenere il tessuto della Beam libero da polvere, peli di animali ed altre particelle fini. Utilizzare un aspirapolvere dotato di apposito tubo o accessorio con spazzola fissa per pulire il tessuto. Non aspirare utilizzando l'accessorio con spazzola rotante.
- Page 42 11. Scollegare il dispositivo dalla presa di corrente durante temporali o se non viene utilizzato per lunghi periodi di tempo. 12. Rivolgersi per l'assistenza solo a personale qualificato Sonos. L'assistenza è necessaria quando il dispositivo subisce qualsiasi tipo di danno, ad esempio al cavo di alimentazione o alla spina, se si versano liquidi o cadono oggetti sul dispositivo, se il dispositivo è...
- Page 43 4. .Laikykitės visų nurodymų. 5. Nenaudokite šio prietaiso šalia vandens. 6. Saugokite Beam nuo dulkių, gyvūnų plaukų ir kitų smulkių dalelių. Audinį valykite dulkių siurbliu su žarna ar nesisukančiu antgaliu su šereliais. Nesiurbkite besisukančiu antgaliu su šereliais. Matomas audinio linijas išlyginkite pūkų šepečiu. Audinio nevalykite pūkų voleliu. Audiniu nepadengtas Beam dalis valykite tik sausu minkštu audeklu.
- Page 44 4. Segwi l-istruzzjonijiet kollha. 5. Tużax dan it-tagħmir qrib l-ilma. 6. Żomm id-drapp Beam ħieles mit-trab, xagħar tal-pets, u materjal fin ieħor. Uża vacuum b’hose jew non-moving bristle attachment biex tnaddaf id-drapp. Tagħmilx vaccuum b‘rotating bristle attachment. Tista’ tintuża lint brush biex tillixxa linji viżibbli fid-drapp. Tnaddafx id-drapp b’lint roller.
- Page 45 4. Følg alle instruksjoner. 5. Bruk ikke dette apparatet nært vann. 6. Hold Beam-stoffet fri for støv, hår fra kjæledyr og andre fine partikler. Bruk en støvsuger med slange eller ikke-bevegende børste til å rengjøre stoffet. Ikke støvsug med et roterende børstehode.
- Page 46 Uma escova de pelos pode ser usada para suavizar as linhas visíveis no tecido. Não limpe o tecido com um rolo de pano. Limpe as partes sem tecido da Beam apenas com um pano macio e seco.
- Page 47 5. Nu folosiţi acest aparat lângă apă. 6. Materialul Beam-ului trebuie să fie ferit de praf, păr animal şi alte particule fine. Folosiţi un aspirator cu furtun sau un accesoriu ataşat imobil pentru a curăţa materialul. Nu aspiraţi cu un accesoriu ataşat rotativ.
- Page 48 3. 注意所有警告。 4. 遵循所有说明。 5. 切勿在近水的地方使用本设备。 6. 请确保本设备远离灰尘、宠物毛发和其他细微颗粒物。请使用带软管或固定鬃毛附件的真空吸尘器 清洁纤维表面。请勿使用带旋转鬃毛附件的真空吸尘器进行清洁。可使用吸毛刷清扫纤维表面中的线 头。请勿使用撕纸式粘刷清洁纤维表面。 对于一体式播放器的非纤维表面部分,仅请使用干燥的软布进行清洁。 7. 切勿阻塞任何通风口。按照厂家提供的说明书进行安装。 8. 切勿将本设备安装在热源 (例如散热器、热暂存器、炉子)或其他会产生热的装置附近。 9. 防止电源线被踩到或夹到,尤其要小心保护插头、电源插座及其在本设备上的出口点。 10. 只使用厂家指定的附件 / 配件。 11. 雷雨天气或长期不使用本设备时,应拔出其电源插头。 12. 本设备的一切维修应由合格的 Sonos 维修人员执行。一旦本设备受到任何损坏,就需要进行维 修 —— 损坏情况包括:电源线或插头损坏;有液体渗入或异物落入到本设备中;本设备接触到雨水 或湿气,不能正常工作,或被摔落。 13. 电源插头应能随时从插座拔出。 14. 警告: 为了降低火灾或触电风险,切勿让本设备接触到雨水或湿气。 15. 不要让本设备接触到滴落物或溅出物,不要将装有液体的物体 (例如花瓶)放在本设备上。...
- Page 49 4. Dodržujte všetky pokyny. 5. Tento prístroj nepoužívajte v blízkosti vody. 6. Látku Beam urdžujte čistú od prachu, zvieracej srsti a iných jemných čiastočiek. Na čistenie látky používajte vysávač s hadicou alebo nepohybujúcim sa nástavcom. Nevysávajte s rotujúcim nástavcom. Na vyčistenie viditeľných čiar na látke môžete použiť kefku na vlákno. Nečistite látku čistiacim valčekom.
- Page 50 5. No utilice este aparato cerca del agua. 6. Mantenga el tejido del Beam limpio de polvo, pelo de mascotas y otras partículas finas. Utilice una aspiradora con un mango o un accesorio de pelo que no se mueva para limpiar el tejido. No aspire con un accesorio de pelo giratorio.
- Page 51 4. Följ alla instruktioner. 5. Använd inte apparaten nära vatten. 6. Håll Beam-väven fri från damm, djurhår och andra fina partiklar. Använd dammsugare med slang- eller icke-roterande dammborsttillbehör för att rengöra väven. Dammsug inte med roterande borsttillbehör. En luddborste kan användas för att jämna ut synliga streck i väven. Rengör inte väven med en klädvårdsrulle.
- Page 52 11. Gök gürültülü fırtınalarda ve uzun süre kullanılmayacaksa cihazın prizle olan bağlantısını kesin. 12. Tüm servis işlemlerini Sonos’un vasıflı servis personeline bırakın. Güç besleme kablosunun veya fişinin zarar görmesi, cihazın üzerine sıvı dökülmesi veya cisim düşmesi, cihazın yağmura veya neme maruz kalması, normal çalışmaması...