Table of Contents
Advertisement
Advertisement
Table of Contents

Related Manuals for Panasonic KX-TS4100


Summary of Contents for Panasonic KX-TS4100
-
Page 1: Operating Instructions
Operating Instructions Integrated Telephone System KX-TS4100 Model No. Please read these Operating Instructions before using the unit and save for future reference. For assistance, visit our website: http://www.panasonic.com/phonehelp for customers in the U.S.A. or Puerto Rico. -
Page 2: Table Of Contents
..... . . 16 Connecting four single-line telephone jacks ....17 If you subscribe to a DSL service..18 Connecting 2 two-line telephone jacks . - Page 3 Warranty ..... . 55 Index Index......57 For assistance, please visit http://www.panasonic.com/phonehelp...
-
Page 4: Introduction
Introduction Introduction Introduction Thank you for purchasing a Panasonic integrated telephone. We recommend keeping a record of the following information for future reference. Serial No. Date of purchase (found on the bottom of the unit) Name and address of dealer Attach your purchase receipt here. -
Page 5: Accessory Information
9 V Alkaline (6LR61) back-up battery Use standard store bought 9 V Alkaline battery Sales and support information L To order additional/replacement accessories, call 1-800-332-5368. L TTY users (hearing or speech impaired users) can call 1-866-605-1277. For assistance, please visit http://www.panasonic.com/phonehelp Handset Order No. PQJXC0401Z (Black) 4-wire telephone line cord Order No. -
Page 6: Important Safety Instructions
Take the product to an authorized service center when service is required. Opening or removing For assistance, please visit http://www.panasonic.com/phonehelp covers may expose you to dangerous voltages or other risks. Incorrect reassembly can cause electric shock when the product is subsequently used. - Page 7 L Discard the “dead” battery as soon as possible. The “dead” battery may leak in the product. For assistance, please visit http://www.panasonic.com/phonehelp L Do not store the product, or the battery provided with or identified for use with the product, in high temperature areas.
-
Page 8: For Best Performance
5 °C (41 °F) or greater than 40 °C (104 °F). Damp basements should also be avoided. Routine care L Wipe the outer surface of the product with a soft moist cloth. Do not use benzine, thinner, or any abrasive powder. For assistance, please visit http://www.panasonic.com/phonehelp... -
Page 9: Preparation
“Ringer Type” Example: Select “Phone Setup”. {V} {^} {<} {>} Display Example: For assistance, please visit http://www.panasonic.com/phonehelp Meaning The words in the brackets indicate button names on the unit. The words in quotations indicate the menu on the display. Press {V} or {^} to select “Phone Setup”. -
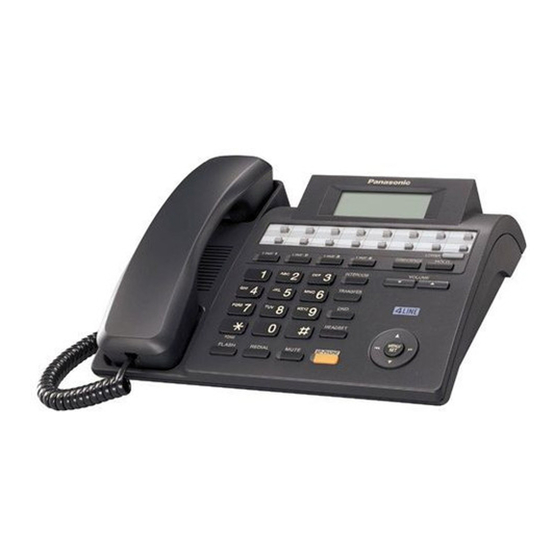
Page 10: Location Of Controls
C Speed dial (extension) buttons D Display E {*} (TONE) F {FLASH} G {REDIAL/PAUSE} H {MUTE} MUTE indicator For assistance, please visit http://www.panasonic.com/phonehelp I {SP-PHONE} (Speakerphone) SP-PHONE indicator J {HEADSET} HEADSET indicator K {MENU/SET} L Navigator key ({V}{^}{<}{>}) M {CONFERENCE}... - Page 11 R {INTERCOM} INTERCOM indicator S {TRANSFER} Memory card: Remove the memory card and use it as a name index for speed dialer or extensions. For assistance, please visit http://www.panasonic.com/phonehelp T {DND} (Do Not Disturb) DND indicator U MIC (Microphone) Cover...
-
Page 12: Battery Installation
If the battery level is too low, all LEDs might light up or flash For assistance, please visit http://www.panasonic.com/phonehelp and the unit is not guaranteed to perform as normal during a power failure. Replacing with a fresh battery will restore normal function. -
Page 13: Setup
You can attach the wall mounting adaptor to slope this unit. On the wall See “Wall mounting” on page 45 for details. For assistance, please visit http://www.panasonic.com/phonehelp L To attach the wall mounting adaptor, push it in the direction of the arrows... -
Page 14: Connecting The Handset And Ac Adaptor
Panasonic T-adaptor KX-J66 (see “Connecting a standard telephone” on page 47). Emergency power can be supplied to the unit by installing a 9 V Alkaline (6LR61) back-up battery (see “Additional/replacement accessories”... -
Page 15: Connecting The Telephone Line Cords
Connecting the units to individual two-line telephone jacks Note: L If a non-system phone is connected to the system phone (KX-TS4100/KX-TS4200/ KX-TS4300), the line indicators of this unit will not function for that telephone. DSL Internet connection and KX-TS4100/KX-TS4200/KX-TS4300 Intercom work at similar frequencies. -
Page 16: Connecting 2 Two-Line Telephone Jacks
Connecting 2 two-line telephone jacks DSL Internet connection and KX-TS4100/KX-TS4200/KX-TS4300 Intercom work at similar frequencies. Please contact Panasonic at 1-800-211-PANA (1-800-211- 7262) for special wiring configurations. For assistance, please visit http://www.panasonic.com/phonehelp... -
Page 17: Connecting Four Single-Line Telephone Jacks
Connecting four single-line telephone jacks For this connection, please purchase two Panasonic 2-line adaptors KX-J24 and two 2- wire telephone line cords (Order No. PQJA10075Z) (see “Additional/replacement accessories” on page 5). *1 2-line adaptor merges a 2-wire (single line) telephone outlet with another 2-wire (single line) telephone line onto a single 4-wire (2-line) telephone line cord. -
Page 18: If You Subscribe To A Dsl Service
– Noise is heard during conversations. Connecting 2 two-line telephone jacks For this connection, please purchase a Panasonic 2-line splitter KX-J42 and two 2-wire telephone line cords (Order No. PQJA10075Z) (see “Additional/replacement accessories” on page 5). -
Page 19: Connecting Four Single-Line Telephone Jacks
Connecting four single-line telephone jacks For this connection, please purchase a Panasonic 2-line adaptor KX-J24 and three 2- wire telephone line cords (Order No. PQJA10075Z) (see “Additional/replacement accessories” on page 5). Example: DSL line is LINE2. *1 2-line adaptor merges a 2-wire (single line) telephone outlet with another 2-wire (single line) telephone line onto a single 4-wire (2-line) telephone line cord. -
Page 20: Setting Up The Line Group
Setting up the line group If you have more than 2 system phones (KX-TS4100/KX-TS4200/KX-TS4300) and use more than 4 lines in your system phones, you can set up the line group to work correctly with the units. To program the line group, see “Line group” on page 43. - Page 21 Example: *1 This unit uses the LINE1/2 (with 4-wire telephone line cord) and LINE3/4 (with 4-wire telephone line cord) jacks. *2 This unit uses the LINE1/2 (with 4-wire telephone line cord), LINE3/4 (with 2-wire telephone line cord), and LINE4 (with 2-wire telephone line cord) jacks.
-
Page 22: Connecting A Communication Device
Connecting a communication device After connecting the telephone line cords to two-line telephone jacks, you can connect a communication device (computer, modem, fax, etc.) through this unit using the LINE2 or LINE4 jacks. Note: L If the communication device is in use, use LINE1 or LINE3 to make or answer other calls. -
Page 23: Setting The Unit Before Use
{MENU/SET} 2 times, press {V}, press {MENU/SET}, select the desired language, then press {MENU/SET}. For assistance, please visit http://www.panasonic.com/phonehelp Extension No. Assign the extension number (“11” to “26”) to the unit to use the intercom feature. The default setting is “11”. -
Page 24: Date And Time
L If you make a mistake when entering the date and time, press {<} or {>} to move the cursor, then make the correction. For assistance, please visit http://www.panasonic.com/phonehelp Dialing mode If you cannot make calls, change this setting depending on your telephone line service. -
Page 25: Making/Answering Calls
L The SP-PHONE and the line indicators go out. L The length of the call will remain on the display for a few seconds. For assistance, please visit http://www.panasonic.com/phonehelp Note: L The line indicator flashes while another phone is using the line. -
Page 26: Answering Calls
L A 3.5 second pause is inserted each time {REDIAL/PAUSE} is pressed. Press repeatedly to insert longer pauses. For assistance, please visit http://www.panasonic.com/phonehelp Answering calls When a call is being received, the unit rings and the called line indicator flashes rapidly. -
Page 27: Ringer Type
{MENU/SET}. Select “Ringer Type”, then press {MENU/SET}. ➔Ringer Type Line Group Reset All [V/^]:Scroll For assistance, please visit http://www.panasonic.com/phonehelp Select the line you want to set, then press {MENU/SET}. ➔Line1 Ring Type Line2 Ring Type Line3 Ring Type [V/^]:Scroll Select the desired setting, then press {MENU/SET}. -
Page 28: Making/Answering Another Outside Call During A Conversation
L To establish a conference call, see “Conference calls” on page 38. For assistance, please visit http://www.panasonic.com/phonehelp Useful features during a call Call privacy Call privacy allows you to prevent other extensions from joining your conversations with outside callers. -
Page 29: Hold Reminder
Hold Reminder = 60 Seconds [SET]:Save [V/^]:Change Press and hold {MENU/SET} to return to standby mode. For assistance, please visit http://www.panasonic.com/phonehelp Note: L To return to the previous menu, press {<}. MUTE button While mute is turned on, you can hear the other party, but the other party cannot hear you. -
Page 30: Flash Time
PBX functions (transferring a call, etc.). Consult your PBX installer for the correct setting. For assistance, please visit http://www.panasonic.com/phonehelp Temporary tone dialing (for rotary/pulse service users) You can temporarily switch the dialing... -
Page 31: Speed Dialer
Select the desired setting, then press {MENU/SET}. SPD Preference =CO Call [SET]:Save [V/^]:Change For assistance, please visit http://www.panasonic.com/phonehelp Press and hold {MENU/SET} to return to standby mode. Note: L To return to the previous menu, press {<}. Adding/editing names and... -
Page 32: Storing Items From The Redial List Into The Speed Dialer
{MENU/SET}. Press and hold {MENU/SET} to return to standby mode. Note: L To return to the previous menu, press {<}. For assistance, please visit http://www.panasonic.com/phonehelp Character table Character - ’ & . A B C a b c 2... -
Page 33: Erasing A Stored Entry
{MENU/SET}. Press {REDIAL/PAUSE} to return to standby mode. Note: L To return to the previous menu, press {<}. For assistance, please visit http://www.panasonic.com/phonehelp Erasing a stored entry Important: L Make sure that the unit is in standby mode. Press {MENU/SET}. -
Page 34: Calling Someone With The Speed Dialer
({1} to {16}). Press {LOWER}, then press the desired speed dial button ({1} to {16}). L You can review the entries by pressing {V} or {^}. Lift the handset or press {SP-PHONE} or a line button. For assistance, please visit http://www.panasonic.com/phonehelp... -
Page 35: Multi-Unit Operation
Using the speakerphone Press {INTERCOM}. L The INTERCOM indicator lights. L The SP-PHONE indicator lights and the speakerphone turns on. For assistance, please visit http://www.panasonic.com/phonehelp Press the speed dial (extension) button or enter the extension number. To end the intercom call, press {SP-PHONE} or {INTERCOM}. -
Page 36: Paging A Designated Extension
Important: L Make sure that the unit is in standby mode. Press {MENU/SET}. Select “Phone Setup”, then press {MENU/SET}. For assistance, please visit http://www.panasonic.com/phonehelp Select “Auto Mute”, then press {MENU/SET}. ➔Auto Mute Tone/Pulse Flash Time [V/^]:Scroll Select the desired setting, then press {MENU/SET}. -
Page 37: Room Monitor
Do Not Disturb (DND) on. L The monitored extension user can stop being monitored by pressing {SP-PHONE} or {INTERCOM}. For assistance, please visit http://www.panasonic.com/phonehelp Transferring calls You can transfer an outside call to another extension. The speed dial (extension) buttons “1, 2, 3...15, 16”... -
Page 38: Answering Transferred Calls
Any extensions can answer a transferred call directed to another extension. Press the relevant line button. For assistance, please visit http://www.panasonic.com/phonehelp Conference calls Conference call with two outside calls While you are talking with an outside caller, you can make or answer a 2nd call on the other line, and then combine the calls to establish a conference call. - Page 39 60 or 120 seconds, an alarm tone starts to sound (hold reminder). To turn off the hold reminder, see “Hold reminder” on page 29. L If a call is kept on hold for more than 5 minutes, the call is disconnected. For assistance, please visit http://www.panasonic.com/phonehelp...
-
Page 40: Programming
Sub-menu 1 Speed Dial Language Extension No. Date & Time Auto Mute Tone/Pulse Flash Time Hold Reminder Handsfree Mode Prime Line For assistance, please visit http://www.panasonic.com/phonehelp Sub-menu 2 SPD Preference Edit/View SPD – – – – – – – –... -
Page 41: For Assistance, Please Visit Http://Www.panasonic.com/Phonehelp
Advanced Setup Sub-menu 1 Ringer On/Off Ringer Type Line Group Reset All For assistance, please visit http://www.panasonic.com/phonehelp Sub-menu 2 Line1 Ringer Line2 Ringer Line3 Ringer Line4 Ringer Line1 Ring Type Line2 Ring Type Line3 Ring Type Line4 Ring Type –... -
Page 42: Programming The Phone Setup Features
Note: L To return to the previous menu, press {<}. For assistance, please visit http://www.panasonic.com/phonehelp Handsfree mode You can use this phone in “Handsfree” mode by using the speakerphone on the unit or a headset (optional). -
Page 43: Programming The Advanced Setup Features
L To return to the previous menu, press {<}. L Transferring a call to a different line group through line 4 is not allowed. For assistance, please visit http://www.panasonic.com/phonehelp Reset all Return all features to default settings, and all numbers set to speed dial are erased. -
Page 44: Useful Information
L If you misdial when making a call, press {HEADSET} and start again from step 1. To hang up, press {HEADSET}. For assistance, please visit http://www.panasonic.com/phonehelp To adjust the headset receiver volume (5 levels) While using the headset, press {-} or {+}. -
Page 45: Wall Mounting
Connect the AC adaptor, and dress the AC adaptor cord as shown. Dress the telephone line cord as shown.Tuck the telephone line cord inside the wall mounting adaptor, then push it in the direction of the arrows (1 and 2). For assistance, please visit http://www.panasonic.com/phonehelp... - Page 46 Connect the telephone line cord. Mount the unit, then slide down. For assistance, please visit http://www.panasonic.com/phonehelp To temporarily set the handset down during a conversation, place it as shown here.
-
Page 47: Connecting A Standard Telephone
If the backup battery has been discharged during a power failure, the unit will not work. If required, you can connect a standard telephone on LINE 2 or LINE 4 of this unit using the Panasonic T-adaptor KX-J66. To order, call the accessories telephone number on page 5. -
Page 48: Error Messages
If the unit detects a problem, one of the following messages is shown on the display. Display message LOW BATT PowerFail For assistance, please visit http://www.panasonic.com/phonehelp Cause/solution L No battery is installed. L The battery may need to be replaced with a new one (see “Battery replacement”... -
Page 49: Troubleshooting
AC adaptor” on page 14). L Confirm the telephone line cord is properly connected (page 15, 16, 17). L Disconnect the unit from the telephone line and connect a known working telephone. If the working telephone operates properly, contact our service personnel to have the unit repaired. - Page 50 L Make sure that the unit is in standby mode. Cause/solution L If your unit is connected to a telephone line with DSL service, we recommend connecting a noise filter between the unit and the telephone line jack (see “Connecting 2 two-line telephone jacks”...
-
Page 51: Fcc And Other Information
REN for the product is part of the product identifier that has the format US:AAAEQ# #TXXXX. The digits For assistance, please visit http://www.panasonic.com/phonehelp represented by # # are the REN without a decimal point (e.g., 03 is a REN of 0.3). - Page 52 If this equipment does cause harmful interference to radio or television reception, which can be For assistance, please visit http://www.panasonic.com/phonehelp determined by turning the equipment off and on, the user is encouraged to try to correct the interference by one or more of the following measures: –...
-
Page 53: Specifications
L Design and specifications are subject to change without notice. L The illustrations in these instructions may vary slightly from the actual product. For assistance, please visit http://www.panasonic.com/phonehelp 5 °C – 40 °C (41 °F – 104 °F) Approx. height 105 mm x width 245 mm x depth 225 mm... -
Page 54: Customer Services
Useful Information Customer services For assistance, please visit http://www.panasonic.com/phonehelp... -
Page 55: Warranty
Panasonic Services Company Customer Servicenter 4900 George McVay Drive Suite B Door #12 McAllen, TX 78503 For assistance in Puerto Rico call Panasonic Puerto Rico, Inc. (787)-750-4300 or fax (787)-768-2910. When shipping the unit carefully pack, include all accessories, and send it prepaid, adequately insured and preferably in the original carton. - Page 56 Consumer Affairs Department at the addresses listed for the warrantor. PARTS AND SERVICE, WHICH ARE NOT COVERED BY THIS LIMITED WARRANTY, ARE YOUR RESPONSIBILITY. For assistance, please visit http://www.panasonic.com/phonehelp...
-
Page 57: Index
Ringer on/off: 26 Ringer type: 27 Room monitor: 37 Rotary service: 30 S Speed dial preference: 31 Speed dialer: 31 For assistance, please visit http://www.panasonic.com/phonehelp SP-phone: 25 T Tone service: 30 Transferring calls: 37 Troubleshooting: 49 TTY: 5, 60 V Volume... - Page 58 Notes For assistance, please visit http://www.panasonic.com/phonehelp...
- Page 59 Notes For assistance, please visit http://www.panasonic.com/phonehelp...
- Page 60 L Send the unit to Panasonic Services Company Customer Servicenter, prepaid and adequately insured. L Do not send your unit to Panasonic Consumer Electronics Company listed below or to executive or regional sales offices. These locations do not repair consumer products.