Table of Contents
Advertisement
Dear customer
Thank you for purchasing this product.
Before connecting, operating or adjusting this product, please read these
instructions completely.
Please keep this manual for future reference.
PC
En Cf
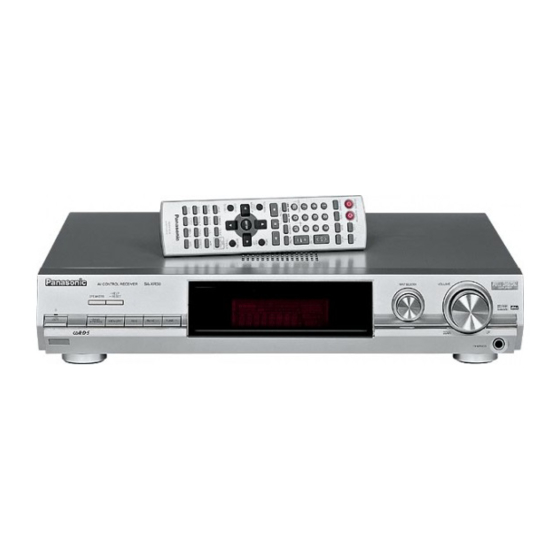
Operating Instructions
AV Control Receiver
Model No.
Table of contents
Before use
IMPORTANT SAFETY INSTRUCTIONS ................................. 2
Listening caution.................................................................... 2
Supplied accessories ............................................................ 3
The remote control ................................................................ 3
Home Theater connections.... 4
1
Other connections .................. 6
2
etc.
Settings.................................... 8
3
Basic operations................... 10
4
Operations
Control guide ........................................................................ 12
The radio ............................................................................... 14
Audio settings....................................................................... 16
Other functions..................................................................... 18
Making a recording............................................................... 18
Reference
Specifications ....................................................................... 19
Product Service .................................................................... 20
Maintenance.......................................................................... 20
Troubleshooting guide ......................................................... 21
Warranty ................................................................................ 22
SA-XR30
• Speakers
• AC power supply
cord
• Antennas
• Adjusting speaker
output level
RQT7512-Y
H0204RF0
Advertisement
Table of Contents

Related Manuals for Panasonic SA-XR30


Summary of Contents for Panasonic SA-XR30
-
Page 1: Table Of Contents
Other functions... 18 Making a recording... 18 Reference Specifications ... 19 Product Service ... 20 Maintenance... 20 Troubleshooting guide ... 21 Warranty ... 22 SA-XR30 • Speakers • AC power supply cord • Antennas • Adjusting speaker output level RQT7512-Y... -
Page 2: Important Safety Instructions
IMPORTANT SAFETY INSTRUCTIONS Read these operating instructions carefully before using the unit. Follow the safety instructions on the unit and the applicable safety instructions listed below. Keep these operating instructions handy for future reference. Read these instructions. Keep these instructions. Heed all warnings. -
Page 3: Supplied Accessories
The model number and serial number of this product can be found on either the back or the bottom of the unit. Please note them in the space provided below and keep for future reference. SA-XR30 MODEL NUMBER SERIAL NUMBER... -
Page 4: Step
Step Home Theater connections Before connecting Stereo connection cable White (L) Video connection cable Turn off all components before making any connections. Note • Use a digital connection to enjoy Dolby Digital or DTS (á page 10). • Use an analog connection to enjoy sources that cannot be decoded on this unit and to record a source (á... - Page 5 Speakers/ AC power supply cord Front speakers ( left right) Place on the left and right of the TV at seated ear height so that there is good coherency between the picture and sound. Center speaker ( ) Place underneath or above the center of the TV.
-
Page 6: Other Connections
Step Other connections Stereo connection cable White (L) Turn off all components before making any connections. Note • Do not sharply bend the optical fiber cable. • Use a digital connection to enjoy Dolby Digital or DTS (á page 10). •... - Page 7 CD player LOOP ANT 75Ω GND LOOP FM ANT AM ANT AUDIO Antennas LOOP ANT LOOP ANT 75Ω GND LOOP FM ANT AM ANT AUDIO FM outdoor antenna • Disconnect the FM indoor antenna. • The antenna should be installed by a competent technician.
-
Page 8: Step Settings
Step Settings Setup Change the settings to suit your equipment to the environment in which you are using it. Before making any changes, read the descriptions of the settings, note the factory settings and ranges, and refer to the equipment’s instructions. SPEAKERS POWER 8 Switch on. -
Page 9: Select The Speakers
Note regarding PCM FIX mode In rare cases, the unit may have trouble recognizing the digital signals on discs. With the PCM signals on CDs, this may cause the beginning of a track to be cut off. Engage the PCM FIX mode if this occurs. When PCM FIX mode is on, the unit cannot process other signals. -
Page 10: Step
Step Basic operations SPEAKERS POWER 8 HELP SPEAKERS RESET POWER 8 Switch on. POWER 8 Turn SPEAKERS on. SPEAKERS Select input. INPUT SELECTOR TUNER DVR/VCR Start play of the source. The unit sets the sound mode (stereo or multi-channel) to suit the input signal. - Page 11 You can adjust the effect of MUSIC and PANORAMA with the center width and dimension controls. Center Width Control – C-WDTH This adjustment helps you realize a more natural sound image when listening to music. Move sound out into the front speakers to improve the overall front image, or add sound to the center speaker to fix the center image.
-
Page 12: Control Guide
Control guide Main unit Standby indicator [^] When the unit is connected to the AC mains supply, this indicator lights up in standby mode and goes out when the unit is turned Standby/on switch [POWER 8] Press to switch the unit from on to standby mode or vice versa. - Page 13 Remote control Buttons not explained on this page are used only to operate other equipment. Refer to the separate booklet, “Remote Control Operation Guide”, for remote control operation details. [^, RECEIVER] Standby/on button. [1, 2, 3, 4, 5, 6, 7, 8, 9, 0] To enter radio frequencies and channels.
-
Page 14: The Radio
The radio Manual tuning SPEAKERS BAND FM MODE POWER 8 Select “TUNER”. INPUT SELECTOR Select “FM” or “AM”. Tune to the station. TUNE 2 Tuning intervals: FM-0.2 MHz, AM-10 kHz Automatic tuning Hold down [TUNE 2 or 1] until the frequency begins to scroll. Tuning stops when a station is found. -
Page 15: Presetting Stations
Preset tuning MEMORY HELP SPEAKERS RESET POWER 8 Presetting stations. (á below, “Automatic presetting” or “Manual presetting”) Select the preset channels. When using the numbered buttons To select a two digit number e.g. 21: [ ≧ 10, ENTER] → [2] → [1] n Presetting stations Automatic presetting Preparation:... -
Page 16: Audio Settings
Audio settings Subwoofer level You can adjust the volume of the subwoofer while listening to a source. Select SW – – – to stop output. The factory setting is SW 10. • Sound can be distorted if you raise the volume while the subwoofer level is high. -
Page 17: Dynamic Range Compression
SPEAKERS BAND POWER 8 A/D attenuator Turn the A/D attenuator on if “OVERFLOW” lights frequently when using 2-channel analog input. The factory setting is OFF. Dynamic range compression Change this setting to listen to software recorded with Dolby Digital at low volume (such as late at night) maintaining audio clarity. -
Page 18: Other Functions
Other functions HELP SPEAKERS RESET HELP SPEAKERS RESET POWER 8 Dimmer Dim the display for better viewing in a darkened room. The factory setting is OFF. Sleep timer The sleep timer can turn the unit off after a set time. It does not control any other components. -
Page 19: Specifications
Specifications (IHF’78) n AMPLIFIER SECTION Rated minimum sine wave RMS power output 20 Hz-20 kHz both channels driven 0.09 % total harmonic distortion 1 kHz continuous power output both channels driven 0.09 % total harmonic distortion Total harmonic distortion rated power at 20 Hz-20 kHz Power bandwidth both channels driven, –3 dB Power output each channel driven... -
Page 20: Product Service
• Before using chemically treated cloth, read the instructions that came with the cloth carefully. Product information For product information or assistance with product operation: Contact Panasonic Canada Inc. Customer Care Centre at 905-624-5505, or visit the website (www.panasonic.ca), or an authorized Servicentre closest to you. -
Page 21: Troubleshooting Guide
Before requesting service, make the below checks. If you are in doubt about some of the check points, or if the remedies indicated in the chart do not solve the problem, contact Panasonic Canada Inc. Customer Care Centre at 905-624-5505, or visit the website (www.panasonic.ca), or an authorized Servicentre closest to you. -
Page 22: Warranty
Warranty Panasonic Canada Inc. 5770 Ambler Drive, Mississauga, Ontario L4W 2T3 www.panasonic.ca 2004 Matsushita Electric Industrial Co., Ltd Printed in Malaysia...