
Related Manuals for Muratec M F X - 5 5 5 5


Summary of Contents for Muratec M F X - 5 5 5 5
- Page 1 M F X - 4 5 5 5 / 5 5 5 5 P r o f e s s i o n a l E d i t i o n U s e r ' s G u i d e D E P L O Y.
-
Page 2: Features Of Your New Laser Mfp
features of your new laser MFP Thank you for purchasing this multifunctional product. Your machine provides printing, copying, scanning, and faxing functions. With the machine, you can: SPECIAL FEATURES Some features are optional. Please check the specifications sections. (See "Specifications" on page 112.) Print with excellent quality and speed •... - Page 3 FEATURES BY MODELS The machine is designed to support all of your document needs – from printing and copying, to more advanced networking solutions for your business. Basic features of this machine include; FEATURES USB 2.0 USB Memory DADF (Duplex Automatic Document Feeder) Hard Disk Network Interface Enthernet 10/100/1000 Base TX wired LAN Duplex (2-sided) printing...
-
Page 4: Finding More Information
FINDING MORE INFORMATION You can find information for setting up and using your machine from the following resources, either as a print-out or onscreen. Quick Install Guide Provides information on setting up your machine and this requires that you follow the instructions in the guide to prepare the machine. Online User’s Guide Provides you with step-by-step instructions for using your machine’s full features, and contains information for maintaining your machine, troubleshooting, and installing accessories. -
Page 5: Safety Information
safety information IMPORTANT SAFETY SYMBOLS AND PRECAUTIONS What the icons and signs in this user manual mean: Hazards or unsafe practices that may result in severe personal injury or death. WARNING Hazards or unsafe practices that may result in minor personal injury or property damage. CAUTION To reduce the risk of fire, explosion, electric shock, or personal injury when using your laser MFP, follow these basic safety precautions:... - Page 6 13. Unplug the machine from the telephone jack, PC and AC wall outlet and refer servicing to qualified service personnel under the following conditions: • When any part of the power cord, plug or connecting cable is damaged or frayed. •...
-
Page 7: Ozone Safety
OZONE SAFETY During normal operation, this machine produces ozone. The ozone produced does not present a hazard to the operator. However, it is advisable that the machine be operated in a well ventilated area. If you need additional information about ozone, request your nearest Samsung dealer. MERCURY SAFETY Contains Mercury, Dispose According to Local, State or Federal Laws.(U.S.A. -
Page 8: Radio Frequency Emissions
RADIO FREQUENCY EMISSIONS FCC Information to the User This device complies with Part 15 of the FCC Rules. Operation is subject to the following two conditions: • This device may not cause harmful interference, and • This device must accept any interference received, including interference that may cause undesired operation. This equipment has been tested and found to comply with the limits for a Class A digital device, pursuant to Part 15 of the FCC Rules. - Page 9 FCC Regulations state that changes or modifications to this equipment not expressly approved by the manufacturer could void the user’s authority to operate this equipment. In the event that terminal equipment causes harm to the telephone network, the telephone company should notify the customer that service may be stopped. However, where prior notice is impractical, the company may temporarily cease service, providing that they: a) promptly notify the customer.
- Page 10 DECLARATION OF CONFORMITY (EUROPEAN COUNTRIES) Approvals and Certifications The CE marking applied to this product symbolizes Samsung Electronics Co., Ltd. Declaration of Conformity with the following applicable 93/ 68/EEC Directives of the European Union as of the dates indicated: January 1, 1995: Council Directive 2006/95/EC Approximation of the laws of the member states related to low voltage equipment. January 1, 1996: Council Directive 2004/108/EC (92/31/EEC), approximation of the laws of the Member States related to electromagnetic compatibility.
- Page 11 ORIGINAL SSLEAY LICENSE Copyright (C) 1995-1998 Eric Young (eay@cryptsoft.com) All rights reserved. This package is an SSL implementation written by Eric Young (eay@cryptsoft.com). The implementation was written so as to conform with Netscapes SSL. This library is free for commercial and non-commercial use as long as the following conditions are aheared to. The following conditions apply to all code found in this distribution, be it the RC4, RSA, lhash, DES, etc., code;...
-
Page 13: Table Of Contents
contents LOADING ORIGINALS AND PRINT MEDIA Features of your new laser MFP Safety Information INTRODUCTION Printer overview Front view Rear view Control panel overview Introducing the touch screen and useful buttons Touch screen Machine Setup button Job Status button Power Saver button Interrupt button Understanding the Status LED Menu overview... - Page 14 contents COPYING Understanding the Copy screen Basic tab Advanced tab Image tab Copying originals Changing the settings for each copy Changing the size of originals Reducing or enlarging copies Copying on both sides of originals (Duplex) Deciding the form of copy output (Collated / Staple) Selecting the type of originals Changing the darkness Using special copy features...
- Page 15 Scan to Edge Quality File Format Scan Preset BASIC PRINTING Printing a document Canceling a print job FAXING (OPTIONAL) Preparing to fax Understanding the Fax screen Basic tab Advanced tab Image tab Sending a fax Setting the fax header Sending a fax Sending a fax manually (On Hook Dial) Automatic resending Redialing the last number...
- Page 16 contents USING USB MEMORY DEVICE MACHINE STATUS AND ADVANCED SETUP Forwarding a sent fax to other destination by an email Forwarding a received fax to other destination by an email Forwarding a sent fax to other destination by server Forwarding a received fax to other destination by server Setting up the end Fax tone About USB memory Understanding the USB screen...
- Page 17 INSTALLING ACCESSORIES Cleaning the scan unit Maintaining the Toner cartridge Toner cartridge storage Handling instructions Use of non-Muratec and refilled toner cartridge Estimated cartridge life Replacing the toner cartridge Maintaining the imaging unit Expected cartridge life Replacing the imaging unit...
- Page 18 CONTACT SAMSUNG WORLDWIDE SPECIFICATIONS 112 General specifications 112 Printer specifications 113 Copier specifications 113 Scanner specifications 113 Facsimile specifications (optional) GLOSSARY INDEX...
-
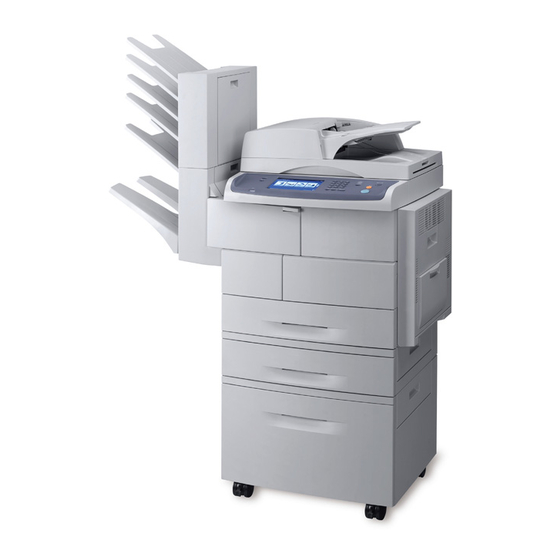
Page 19: Front View
introduction These are the main components of your machine: This chapter includes • Printer overview • Control panel overview • Introducing the touch screen and useful buttons • Understanding the Status LED PRINTER OVERVIEW Front view DADF document width Side cover guides DADF cover Multi-purpose tray... -
Page 20: Control Panel Overview
CONTROL PANEL OVERVIEW Leads you to the machine setup and advanced Machine Setup settings. (See "Machine Setup" on page 72.) Shows the jobs currently running, queued jobs or Job Status completed jobs. Shows the status of your machine. (See Status "Understanding the Status LED"... -
Page 21: Introducing The Touch Screen And Useful Buttons
INTRODUCING THE TOUCH SCREEN AND USEFUL BUTTONS Touch screen The touch screen allows for user-friendly operation of the machine. Once you press the home icon ( ) on the screen, it shows the Main screen. • Shows Help. You can find the explanation by feature contents. -
Page 22: Interrupt Button
Interrupt button When you press this button, the machine goes into interrupt mode which means it stops a printing job for urgent copy job. When the urgent copy job completes, the previous printing job continues. STATUS DESCRIPTION The machine is not in interrupt printing mode. Blue The machine is in interrupt printing mode. -
Page 23: Scanning
MENU OVERVIEW The control panel provides access to various menus to set up the machine or use the machine's functions. These menus can be accessed by pressing Machine Setup, Job Status, or touching menus on the display screen. Refer to the following diagram. Main screen The Main screen is shown on the display screen on the control panel. -
Page 24: Job Status Button
Admin Setting General tab Setup tab (Page 73) (Page 75) Device Info Copy Setup Date & Time Fax Setup Default Settings Network Setup Measurement Authentication Timers Optional Service Language Document Box Power Saver Management Tray Management Altitude Adjustment Output Option Contention Management Sound Supplies Management... -
Page 25: Supplied Software
SUPPLIED SOFTWARE You must install the printer and scanner software using the supplied CD after you have set up your machine and connected it to your computer. This CD provides you with the following software. CONTENTS Printer software Windows • Printer driver: Use this driver to take full advantage of your printer’s features. -
Page 26: Setting Up The Network
getting started This chapter gives you step-by-step instructions for setting up the machine. This chapter includes: • Setting up the hardware • Setting up the network • System requirements SETTING UP THE HARDWARE This section shows the steps to set up the hardware which is explained in the Quick Install Guide. -
Page 27: Configuring Network Protocol Via The Machine
Configuring network protocol via the machine You can set up TCP/IP network parameters, follow the steps listed below. 1. Make sure your machine is connected to the network with an RJ-45 Ethernet cable. 2. Make sure you have turned on the machine. 3. -
Page 28: Linux
Linux ITEM REQUIREMENTS Operating system Red Hat 8 ~ 9 Fedora Core 1 ~ 4 Mandrake 9.2 ~ 10.1 SuSE 8.2 ~ 9.2 Pentium IV 1 GHz or higher 256 MB or higher free HDD space 1 GB or higher Connection USB interface or Network interface Software... -
Page 29: Machine's Basic Settings
To verify your machine’s IP address or the MAC address, print a Network Configuration page. (See "Printing a report" on page 79.) • To find a shared network printer (UNC Path), select Shared Printer [UNC] and enter the shared name manually or find a shared printer by clicking the Browse button. -
Page 30: Setting Job Timeout
Setting job timeout When there is no input for a certain period of time, the machine exits the current location. You can set the amount of time the machine will wait. 1. Press Machine Setup on the control panel. 2. Press Admin Setting. 3. -
Page 31: Understanding The Keyboard
Setting network values 1. Print the machine’s network configuration report to find your machine’s MAC address. (See "Printing a report" on page 79.) 2. From the Windows Start menu, select All Programs > Network Printer Utilities > SetIP. 3. Click to open the TCP/IP configuration window. -
Page 32: On The Scanner Glass
loading originals and print media This chapter introduces you to how to load originals and print media into your machine. This chapter includes: • Loading originals • Selecting print media LOADING ORIGINALS You can use the scanner glass or DADF to load an original for copying, scanning, and sending a fax. -
Page 33: Selecting Print Media
Some print media may meet all of the guidelines in this section and still not produce satisfactory results. This may be the result of improper handling, unacceptable temperature and humidity levels, or other variables over which Muratec has no control. • Before purchasing large quantities of print media, ensure that it meets the requirements specified in this user’s guide. -
Page 34: Specification On Print Media
Specification on print media TYPE SIZE Plain paper Letter Legal Folio Oficio JIS B5 ISO B5 Executive Statement Envelope Envelope B5 Envelope Monarch Envelope No. 10 Envelope DL Envelope C5 Envelope C6 Transparency Letter, A4, Oficio Labels Letter, Legal, Folio, A4, JIS B5, ISO B5, Executive, A5, Statement, Oficio, A6... -
Page 35: Media Sizes Supported In Each Mode
Media sizes supported in each mode MODE SIZE Copy mode Letter, A4, Legal, Oficio, Folio, Executive, JIS B5, A5, Single side printing All sizes supported by the machine Letter, A4, Legal, Folio, Duplex printing Oficio, JIS B5, ISO B5, Executive, A5, Statement Letter, A4, Legal Fax mode... -
Page 36: Changing The Size Of The Paper In The Paper Tray
MEDIA TYPE GUIDELINES Transparencies • To avoid damaging the machine, use only transparencies designed for use in laser printers. • Transparencies used in the machine must be able to withstand 180 °C, the machine’s fusing temperature. • Place them on a flat surface after removing them from the machine. -
Page 37: Loading Paper
2. After inserting paper into the tray, while pinching the paper width guide as shown, move it toward the stack of paper until it lightly touches the side of the stack. Do not press the guide too tightly to the edge of the paper;... -
Page 38: In The Multi-Purpose Tray
In the multi-purpose tray The multi-purpose tray can hold special sizes and types of print material, such as postcards, note cards, and envelopes. It is useful for single page printing on letterhead or colored paper. Tips on using the multi-purpose tray •... -
Page 39: Setting The Paper Size And Type
4. Squeeze the multi-purpose tray paper width guides and adjust them to the width of the paper. Do not force too much, or the paper will be bent, which will result in a paper jam or skew. Depending on the media type you are using, keep the following loading guidelines: •... -
Page 40: Basic Tab
copying This chapter gives you information about using your machine as a copy machine. This chapter includes • Understanding the Copy screen • Copying originals UNDERSTANDING THE COPY SCREEN When you press Copy on the Main screen, the Copy screen appears which has several tabs and lots of copying options. -
Page 41: Image Tab
Image tab • Erase Edge: Allows you to erase punch holes, staple marks, and fold creases along any of the four documents edges. (See "Erasing edges" on page 45.) • Erase Background: Prints an image with no background. (See "Erasing background images" on page 45.) •... -
Page 42: Reducing Or Enlarging Copies
paper, and 3rd page is the letter-sized paper, then the machine prints the output first letter, legal, and letter in order from several trays. • Other preset values: Allows user to easily select commonly used values. Reducing or enlarging copies Press the Basic tab >... -
Page 43: Deciding The Form Of Copy Output (Collated / Staple
Deciding the form of copy output (Collated / Staple) Press the Basic tab > Output, then use left/right arrows to select Collated or Stapled. This feature is supported only when the original is on the DADF. If you want to copy originals on the scanner glass and copy both sides of originals, the message Another Page? appears after the first page copied. -
Page 44: Copying Id With The Manual Id Copy Option
• If the original is larger than the printable area, some portions may not be printed. • If this option is grayed out, select the Duplex option to 1 -> 1 Sided, the Output option to Collated. Copying ID with the manual ID copy option If you want to copy several ID cards on a paper, or adjust the copying position of the page, follow the next steps. -
Page 45: Clone Copying
1. Place a single original face down on the scanner glass. (See "Loading originals" on page 31.) 2. Press Copy from the Main screen. 3. Select the tray in Paper Supply. 4. Press the Advanced tab > Poster Copy. This feature is available only when the options in the Basic tab are selected as below;... -
Page 46: Cover Copying
6. Press OK. 7. Press Start on the control panel to begin copying. This feature is possible only with A4, Letter, Legal, Folio, Oficio, JIS B5, ISO B5, Executive, A5 and Statement sized paper. Cover copying The machine automatically adds covers to your copied set using stock taken from a different tray. -
Page 47: Watermark Copying
1. Place the originals face up in the DADF. Or place a single original face down on the scanner glass. (See "Loading originals" on page 31.) 2. Press Copy from the Main screen. 3. Press the Image tab > Margin Shift 4. -
Page 48: Understanding The Scan Screen
scanning Scanning with your machine lets you turn pictures and text into digital files that can be stored on your computer. Then you can fax or email the files, upload them to your website, or use them to create projects that you can print. This chapter gives you information about the scanning method and the different ways to send the scanned file to the destination. -
Page 49: Advanced Tab
Basic tab This section explains the Basic tab of Scan to Email and Scan to Server, and NetScan's basic screen. Scan to Email • From: Sender's email address. • To/Cc/Bcc: Recipients' addresses. Cc is for copies to an additional recipient and Bcc is for the same as Cc but without their name be displayed. -
Page 50: Output Tab
• Color Mode: Adjusts the color options of the scan output. If the original is color and you want to scan in color, press Color Mode. (See "Color Mode" on page 54.) • Darkness: Adjusts the degree of darkness of the scan output. Use left/right arrow to adjust the values. -
Page 51: Entering Email Addresses By The Address Book
4. Click Machine Settings > E-mail Setup > Individual Address Book. Then the screen shows Individual Address Book on the right side of the screen. 5. Click Add. 6. When the Add E-Mail screen appears, select the Index number, enter User Name and E-mail Address. 7. -
Page 52: Scanning Originals And Sending Via Network Scan Manager
SCANNING ORIGINALS AND SENDING VIA NETWORK SCAN MANAGER (NETSCAN) You can scan an image on the machine via the Network Scan program which is installed in your networked computer. Preparation for network scanning Make sure the printer software is installed on your computer using the Printer Software CD-ROM, since the printer software and should include the Network Scan program. - Page 53 4. Enter the server port number, from 1 to 65535. The default port number is 88. 5. You can add a backup domain as a previous step. 6. Click Apply. Network user authorized by SMB 1. Enter the domain that is used for SMB login. 2.
-
Page 54: Scanning Originals And Sending Via Smb/Ftp (Scan To Server
14. Enter the Scan File Folder under shared folder for storing the scanned image. 15. Click Apply. SCANNING ORIGINALS AND SENDING VIA SMB/ FTP (SCAN TO SERVER) You can scan an image and send it to a total of 5 destinations via the SMB or FTP. -
Page 55: Original Size
FEATURE RESOLUTION (DPI) Scan to Email 100, 200, 300, 400, NetScan 100, 200, 300, 400, Scan to Server 100, 200, 300, 400, Original Size You can specify the scanning area on the originals by selecting the pre- defined size, or putting in the margin value or Auto. If you set this option to Auto, the machine senses and determines the size of the original. -
Page 56: File Format
Scan to Edge You can set the machine to scan full size of a page as it is. Usually, the machine scans a page except edges, which means the margin, especially when you do the copy job with certain sized paper in the tray. But if you scan and sent it right away via the network, as the file, the machine does not need to exclude the edges from the originals. -
Page 57: Basic Printing
For Windows XP/2003, select Printers and Faxes. For Windows Vista, select Control Panel > Hardware and Sound > Printers. 3. Double-click the Muratec MFX-4555 Series PCL 6 icon. (Or Muratec MFX-4555 Series PS) 4. From the Document menu, select Cancel. -
Page 58: Faxing (Optional)
faxing (optional) This chapter gives you information about using your machine as a fax machine. This chapter includes: • Preparing to fax • Understanding the Fax screen • Sending a fax • Receiving a fax • Adjusting the document settings •... -
Page 59: Sending A Fax
• Duplex: Selects whether the machine send faxes on one side of the original, or both sides of the original. • Resolution: Adjusts the resolution options. Advanced tab • Original Size: Selects the size of the original document. Press OK to update current setting. -
Page 60: Sending A Fax Manually (On Hook Dial)
7. Press Start on the control panel. The machine starts to scan and send a fax to destinations. • When you want to cancel a fax job, press Stop before the machine start transmission. Or press the Job Status button, and select the job you want to delete, press Delete. -
Page 61: Receiving A Fax
Sending a priority fax This function is used when a high priority fax need to be sent ahead of reserved operations. The original is scanned into memory and immediately transmitted when the current operation is finished. In addition, priority transmission will interrupt a sending to multiple destinations between stations (example, when the transmission to station A ends, before transmission to station B begins) or between redial attempts. -
Page 62: Receiving Faxes In Memory
Receiving faxes in memory Since your machine is a multi-tasking device, it can receive faxes while you are making copies or printing. If you receive a fax while you are copying or printing, your machine stores incoming faxes in its memory. Then, as soon as you finish copying or printing, the machine automatically prints the fax. -
Page 63: Storing Individual Fax Numbers (Speed Dial No)
Storing individual fax numbers (Speed Dial No.) 1. Press Fax > the Basic tab > Individual. • Edit: Changes the ID, Speed Dial No., and Fax No.. • New: Creates the new Speed Dial No.. • Delete: Deletes the selected Speed Dial No.. •... -
Page 64: Storing The Originals For Polling
4. Receiver presses Start to receive the stored fax. Storing the originals for polling 1. Press Fax from the Main screen. 2. Place the originals face up in the DADF. Or you can use the scanner glass with a single original document, face down. 3. -
Page 65: Faxing To A Remote Mailbox
4. Press the down arrow to scroll down, if necessary. 5. Press Mailbox Setup. 6. Press Mailbox Configuration. Then the screen displays Mailbox List. 7. Select a Mailbox on the Mailbox List. 8. Press Edit Mailbox. 9. Press Mailbox ID and enter ID with number keypad on the control panel. Up to 20 numbers you can enter. -
Page 66: Printing A Report After Sending A Fax
5. Enter Remote Fax No, Mailbox No., and Passcode. All these field are filled with information from the receiver. 6. Press OK. PRINTING A REPORT AFTER SENDING A FAX You can set the machine to print a report whether a fax transmission is successfully completed or not. - Page 67 4. Press down arrow on the right side. 5. Press Fax Forward Settings > Forward to Fax Setting > Send Forward. 6. Press On and enter a fax number using the keypad on the control panel. 7. Press OK. Forwarding a received fax to another fax destination With this feature, you can forward every fax you received to another destination by faxing.
-
Page 68: Plugging In A Usb Memory Device
using USB memory device This chapter explains how to use a USB memory device with your machine. This chapter includes: • About USB memory • Understanding the USB screen • Plugging in a USB memory device • Scanning to an USB memory device ABOUT USB MEMORY USB memory devices are available with a variety of memory capacities to give you more room for storing documents, presentations, downloaded... -
Page 69: Scanning To An Usb Memory Device
• Do not remove the USB memory device while the machine is in operation, or writing to or reading from USB memory. The machine warranty does not cover damage caused by use’s misuse. • If your USB memory device has certain features, such as security settings and password settings, your machine may not automatically detect it. - Page 70 • Scan Preset: Automatically changes some scan options such as file format, resolution, and more. You can adjust options to fit each specific purpose. (See "Scan Preset" on page 70.) • File Format: Selects the file format of the scan output. (See "File Format"...
-
Page 71: File Policy
Darkness You can select the degree of darkness of the scanned output. If your original document is light or faded, press the right arrow to make the output darker. Press USB > Scan to USB > the Image tab > Darkness. Press right arrow to enhance the darkness degree then, press OK. -
Page 72: Printing From A Usb Memory Device
• Overwrite:You can set the machine to delete previous job information on USB as you store new job information. PRINTING FROM A USB MEMORY DEVICE You can directly print files stored on a USB memory device. You can print TIFF, BMP, JPEG, and PRN files. Direct Print option supported file types: •... -
Page 73: Machine Setup
machine status and advanced setup This chapter explains how to browse the current status of your machine, and the method of setting for the advanced machine setup. Please read this chapter carefully in order to use your machine's diverse features. This chapter includes: •... - Page 74 BROWSING THE MACHINE’S STATUS You can browse the machine information and validate some features of the machine. 1. Press Machine Setup on the control panel. 2. Press Machine Status > the Machine Info tab. OPTION DESCRIPTION Machine Details This option shows the customer support information on the email address and the phone number you stored from Admin Setting.
- Page 75 OPTION DESCRIPTION Power Saver You can reduce energy consumption by setting these features. Power Saver has three options, first Scan Power Save turns off the scanner lamp under the glass. And Power Save turns off all the fans within the machine after a certain time. Low Power Save turns off the fans within the machine except a core fan for the fuser unit.
- Page 76 COPY SETUP For copy output, you can set up several options in advance. 1. Press Machine Setup on the control panel. 2. Press Admin Setting. When the login message pops up, enter password and press OK. 3. Press the Setup tab > Copy Setup. OPTION DESCRIPTION Page Number...
- Page 77 OPTION DESCRIPTION Redial The machine can automatically redial a remote fax machine, if it was busy. You can set the number of redial attempts and an interval between attempts. Selecting 0 for Redial Times means that the machine will not use this feature. Speaker Volume This controls the sound when a fax actually starts to transfer data.
- Page 78 NETWORK SETUP You may set up the network with the machine's touch screen. Before doing that, you must have the information concerning the type of network protocols and computer system you use. If you are not sure which setting to use, contact your network administrator to configure this machine network.
-
Page 79: Optional Service
OPTION OPTION Authentication Foreign Device • Internal Credits: It is used Mode Interface when you cancel the job or when the job is cancelled by the (Continue) (Continue) device due to insufficient credits (coin) or is canceled by user’s request. If you select Enable, the machine deposits a credit equal to the number of sheets that did not print out correctly,... -
Page 80: Printing A Report
PRINTING A REPORT You can print a report on the machine's configuration or font list, etcetera. 1. Press Machine Setup on the control panel. 2. Press Admin Setting. When the login message pops up, then enter password and press OK. 3. -
Page 81: Maintenance
maintenance This chapter provides information for maintaining your machine and the toner cartridge. This chapter includes • Printing a machine report • Monitoring the supplies life • Finding the serial number • Sending the toner reorder notification • Sending the imaging unit reorder notification •... -
Page 82: Checking Document Box
CHECKING DOCUMENT BOX The machine shows the document box list of the print or fax job. Press Document Box on the Main screen. If the screen displays an other menu, press ( ) to go to the Main screen. • User Box tab: Create the box where you can save the document such as the file you have printed, sent by email or scanned. -
Page 83: Maintaining The Toner Cartridge
82 _Maintenance Use of non-Muratec and refilled toner cartridge Muratec does not recommend or approve the use of non-Muratec brand toner cartridges in your printer including generic, store brand, refilled, or remanufactured toner cartridges. -
Page 84: Maintaining The Imaging Unit
3. Turn the cartridge locking lever toward the right until you hear a 'click', to release the toner cartridge. 4. Lift the locking lever and pull the toner cartridge out. 5. Remove the new toner cartridge from its bag. 6. Thoroughly roll the cartridge five or six times to distribute the toner evenly inside the cartridge. -
Page 85: Replacing The Imaging Unit
Replacing the imaging unit 1. Open the side cover. 2. Open the front cover. 3. Turn the cartridge locking lever toward the right until you hear a 'click', to release the toner cartridge. 84 _Maintenance 4. Lift the locking lever and pull the toner cartridge out. The toner cartridge must be removed to replace the imaging unit. -
Page 86: Maintenance Parts
10. Slide the toner cartridge in until it locks in place. 11. Turn the cartridge locking lever toward the left until you hear a 'click'. 12. Close the front cover, then the side cover. After replacing the toner cartridge, wait for several minutes without powering off until the machine enters to standby mode. -
Page 87: Troubleshooting
troubleshooting This chapter gives helpful information for what to do if you encounter an error. This chapter includes: • Tips for avoiding paper jams • Clearing document jams • Clearing paper jams TIPS FOR AVOIDING PAPER JAMS By selecting the correct media types, most paper jams can be avoided. When a paper jam occurs, follow the steps outlined on page 86. -
Page 88: Misfeed Of Exiting Paper
Misfeed of exiting paper 1. Remove the remaining documents from the DADF. 2. Open the DADF cover. 3. Open the document input tray upwards and pull the document gently out of the DADF. 4. Close the DADF cover and the document input tray. Then place the documents back in the DADF. -
Page 89: Clearing Paper Jams
5. Close the white document background and the scanner lid. Then load the removed pages back into the DADF. CLEARING PAPER JAMS When a paper jam occurs, the warming message appears on the display screen. Refer to the table below to locate and clear the paper jam. MESSAGE LOCATION OF JAM Paper Jam in tray 1,... -
Page 90: In The Optional Tray
Do not touch the shiny imaging unit surface. Scratches or smudges will result in poor print quality. 4. Carefully remove the misfeed paper in the direction shown. 5. Close the side cover and insert the paper tray. Lower the rear part of the Tray to align the rear edge with the corresponding slot of the machine, then insert it completely. -
Page 91: In The Optional High Capacity Feeder
in this area, stop and go to step 4. 4. Pull out the optional tray 2. 5. Lift the front part of the tray slightly up to release the tray from the machine. If the paper does not move when you pull, or if you do not see the paper in this area, stop and go to step 6. - Page 92 3. Pull the jammed paper out, in the direction shown, pulling gently and slowly in order to avoid tearing the paper. If the paper does not move when you pull, or if you do not see the paper in this area, stop and go to step 4. 4.
-
Page 93: In The Multi-Purpose Tray
In the multi-purpose tray 1. If the paper is not feeding properly, pull the paper out of the machine. 2. Open and close the side cover. Printing automatically resumes. In the fuser area or around the toner cartridge The fuser area is hot. Take care when removing paper from the machine. -
Page 94: In The Duplex Unit Area
In the duplex unit area If the duplex unit is not inserted correctly, paper jam may occur. Make sure that the duplex unit is inserted correctly. 1. Open the side cover. 2. Release the guide to pull the jammed paper easily. 3. -
Page 95: Understanding Display Messages
3. Remove the jammed paper. 4. Pull up on the stacker lever and then close the stacker front cover. Paper jam at exit of finisher 1. Gently pull the paper out through the exit area. 94 _Troubleshooting UNDERSTANDING DISPLAY MESSAGES Messages appear on the Smart Panel program window or on the control panel display to indicate machine status or errors. - Page 96 Install the fuser unit. Call for service. Original paper jam Replace the imaging in front of scanner unit with a Muratec- genuine toner cartridge. duplex path (See "Replacing the imaging unit" on Original paper jam page 84.)
- Page 97 Replace the toner cartridge with a Muratec -genuine toner cartridge. (See "Replacing the toner cartridge" on page 82.) The toner cartridge is Ensure a replacement almost empty.
-
Page 98: Solving Other Problems
SOLVING OTHER PROBLEMS The following chart lists some conditions that may occur and the recommended solutions. Follow the suggested solutions until the problem is corrected. If the problem persists, please call for service. Touch screen problem CONDITION SUGGESTED SOLUTIONS The touch screen Turn the machine off and turn it on again. -
Page 99: Printing Problems
The machine is not Select Muratec MFX-4555 selected as the Series PCL 6 or Muratec MFX- default printer. 4555 Series PS as your default printer in your Windows. Check the machine for the following: •... -
Page 100: Printing Quality Problems
CONDITION POSSIBLE CAUSE SUGGESTED SOLUTIONS Pages print, but The toner cartridge Redistribute the toner, if is defective or out of necessary. they are blank. toner. If necessary, replace the toner cartridge. The file may have Check the file to ensure that blank pages. - Page 101 CONDITION SUGGESTED SOLUTIONS White Spots White spots appears on the page: • The paper is too rough and a lot of dirt from a paper falls to the inner devices within the machine, so the transfer roller may be dirty. Clean the inside of your machine.
-
Page 102: Copying Problems
CONDITION SUGGESTED SOLUTIONS Curl or wave • Ensure that the paper is loaded properly. • Check the paper type and quality. Both high temperature and humidity can cause paper curl. (See "Specification on print media" on page 33.) • Turn the stack of paper over in the tray. Also try rotating the paper 180°... -
Page 103: Scanning Problems
CONDITION SUGGESTED SOLUTIONS Copy image is • Ensure that the original is face down on the skewed. scanner glass or face up in the DADF. • Check that the copy paper is loaded correctly. Blank copies print Ensure that the original is face down on the scanner glass or face up in the DADF. -
Page 104: Fax Problems
Fax problems CONDITION SUGGESTED SOLUTIONS The machine is not • Unplug the power cord and plug it in again. working, there is no • Ensure that there is power being supplied to display and the the electrical outlet. buttons are not working. -
Page 105: Common Windows Problems
POSSIBLE PROBLEM CAUSE The machine It might take Try to print with the latest longer to print Adobe Reader program or does not staple when you print a print with turning on "Print as correctly when PDF file as an Image"... - Page 106 CONDITION SUGGESTED SOLUTIONS Some color images This is a known bug in Ghostscript (until GNU Ghostscript version 7.xx) when the base color come out in space of the document is indexed RGB color unexpected color. space and it is converted through CIE color space.
-
Page 107: Common Macintosh Problems
CONDITION SUGGESTED SOLUTIONS The machine does • Check if a document is loaded into the not scan. machine. • Check if your machine is connected to the computer. Make sure if it is connected properly if I/O error is reported while scanning. •... -
Page 108: Supplies
supplies and accessories This chapter provides information on cartridges and accessories available for your machine. This chapter includes: • Supplies • Accessories The optional parts or features may differ by countries. Contact your sales representatives whether the part you want is available in your country. - Page 109 ACCESSORY DESCRIPTION FDI (Foreign This card is installed inside the machine to Device Interface) allow a third party device such as a coin operated device or a card reader. Those devices allow the pay- for-print service on your machine. 4-Bin Mailbox You can load up to 100 sheets of paper in each stacker.
-
Page 110: Installing Accessories
installing accessories Your machine is a full-featured model that has been optimized to meet most of your printing needs. Recognizing that each user may have different requirements, however, makes several accessories available to enhance your machine’s capabilities. This chapter includes •... -
Page 111: Activating The Added Memory In The Ps Printer Properties
For Windows XP/2003, select Printers and Faxes. For Windows Vista, select Control Panel > Hardware and Sound > Printers. 4. Select the Muratec MFX-4555 Series PS printer. 5. Click the right mouse button on the printer icon and select Properties. 6. Select Device Settings. -
Page 112: Enabling Fax Feature After Installing The Fax Option Kit
ENABLING FAX FEATURE AFTER INSTALLING THE FAX OPTION KIT After installing the Fax kit, you have to set up the machine in order to use this function. 1. Press Machine Setup on the control panel. 2. Press Admin Setting. 3. When the login message appears, enter password with number keypad and press OK. -
Page 113: Specifications
This chapter guides you about this machine’s specifications such as various features. This chapter includes; • General specifications • Printer specifications • Copier specifications GENERAL SPECIFICATIONS Item Description DADF Up to 100 sheets 75 g/m DADF document • Width: 148.5 to 218 mm size •... -
Page 114: Copier Specifications
Please visit www.samsungprinter.com to download the latest software version. COPIER SPECIFICATIONS Item Description Up to 38/53 ppm in A4 (45/55 ppm in Letter) Copy speed Duplex copy •... -
Page 115: Glossary
glossary The following glossary helps you get familiar with the product by understanding the terminologies commonly used with printing as well as mentioned in this user's guide. An Automatic Document Feeder (ADF) is a mechanism that will automatically feed an original sheet of paper so that the machine can scan some amount of the paper at once. - Page 116 An emulator duplicates the functions of one system with a different system, so that the second system behaves like the first system. Emulation focuses on exact reproduction of external behavior, which is in contrast to simulation, which concerns an abstract model of the system being simulated, often considering its internal state.
- Page 117 Print Media The media like paper, envelopes, labels, and transparencies which can be used on a printer, a scanner, a fax or, a copier. Pages Per Minute (PPM) is a method of measurement for determining how fast a printer works, meaning the number of pages a printer can produce in one minute.
- Page 118 Subnet Mask The subnet mask is used in conjunction with the network address to determine which part of the address is the network address and which part is the host address. TCP/IP The Transmission Control Protocol (TCP) and the Internet Protocol (IP); the set of communications protocols that implement the protocol stack on which the Internet and most commercial networks run.
- Page 119 index ADF, load adjustment altitude 28 admin setting altitude adjustment answering machine/fax authentication network accounting 77 printing a report 73, 79 setting up 28, 73 auto center Book copy checking stored document cleaning inside 81 outside 81 scan unit 81 transfer unit 81 Clone copy collated...
- Page 120 Group Group fax number 62 ID copy ID stamp in copying imaging unit imaging unit reorder notification Individual email addresses for scanning 49 individual fax number 62 clearing paper from the duplex unit area clearing paper from the exit area 92 clearing paper from the fuser unit 92 clearing paper from the multi-purpose tray 92...
- Page 121 problem, solve Linux 104 printing quality 99 problems copying 101 display message 94 faxing 103 network scanning 102 paper feeder 97 PostScript 103 printing 98 scanning 102 touch screen 97 Windows 104 quality scanning 55, 70 remote code replacing components imaging unit 84 toner cartridge 82 replacing stapler...
- Page 122 © 2009 Muratec America, Inc. All rights reserved. This user’s guide is provided for information purposes only. All information included herein is subject to change without notice. Muratec is not responsible for any direct or indirect damages, arising from or related to use of this user’s guide.