Table of Contents
Advertisement
Quick Links
Advertisement
Table of Contents

Related Manuals for Mitsubishi SE2U


Summary of Contents for Mitsubishi SE2U
- Page 1 DATA PROJECTOR MODEL SE2U User Manual...
- Page 2 EXTENSION CORD, RECEPTACLE OR OTHER OUTLET UNLESS THE BLADES CAN BE FULLY INSERTED TO PREVENT BLADE EXPOSURE. NOTE: SINCE THIS PROJECTOR IS PLUGGABLE EQUIPMENT, THE SOCKET-OUTLET SHALL BE INSTALLED NEAR THE EQUIPMENT AND SHALL BE EASILY ACCESSIBLE. WARNING Use the attached specified power supply cord. If you use another power-supply cord, it may cause interference with radio and television reception.
-
Page 3: Table Of Contents
Contents Important Safeguards ... 1 Introduction ... 6 Shipping Contents ... 6 Projector Exterior View ... 7 Front / Upper Side ... 7 Rear Side ... 7 Bottom Side ... 7 Connector Panel ... 7 Controls and Functions ... 8 External Control Panel ... - Page 4 4. Advance Menu ... 29 5. Information Menu ... 30 Maintenance... 31 Cleaning the Lens ... 31 Cleaning the Projector Case ... 31 Storing the Projector ... 31 Transporting the projector ... 31 Lamp Information ... 32 Warning Message ... 32 Replacing the Lamp ...
-
Page 5: Important Safeguards
Do not block these openings or allow them to be blocked by placing the projector on a bed, sofa, rug, or bookcase. Ensure that there is adequate ventilation and that the manufacturer's instructions have been adhered to. - Page 6 13. Objects and liquids Never push objects of any kind through openings of this projector as they may touch dangerous voltage points or short-out parts that could result in a fire or electric shock. Never spill liquid of any kind on the projector.
- Page 7 Unplug immediately if there is something wrong with your projector. Do not operate if smoke, strange noise or odor comes out of your projector. It may cause fire or electric shock. In this case, unplug immediately and contact your dealer.
- Page 8 • Place the projector at least 50 cm (or 20 inch) away from the wall to prevent the air inlet grille and the air outlet grilles that emit hot air from being blocked.
-
Page 9: Declaration Of Conformity
DLP™, Digital Micromirror Device and DMD are all trademarks of Texas Instruments. Other brand or product names are trademarks or registered trademarks of their respective holders. SE2U MITSUBISHI ELECTRIC Mitsubishi Digital Electronics America, Inc. 9351 Jeronimo Road, Irvine, CA 92618 U.S.A... -
Page 10: Introduction
Introduction Shipping Contents The projector is shipped with the cables required for connection to a PC and to video equip- ment. Carefully unpack and verify that you have all of the items shown below. If any of these items are missing, please contact your place of purchase. -
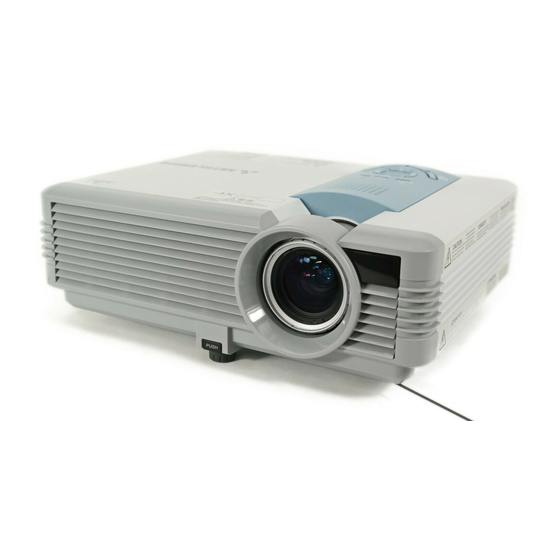
Page 11: Projector Exterior View
Projector Exterior View Front / Upper Side Air inlet grill Front adjuster button Rear Side Connector panel Air outlet grill Bottom Side Front adjuster foot Lamp door Rear adjuster foot Connector Panel Refer to page for more information on making connections to various equipment. -
Page 12: Controls And Functions
Used to hide the screen image and disable the audio. You can press Mute again to bring the image and audio back. POWER indicator light Lights up or flashes when the projector is under operation. TEMP (Temperature) warning light (Refer to page for more informa- tion.) -
Page 13: Remote Control Description
Manually corrects distorted images resulting from the angles of KEYSTONE projection. Refer to page PAGE UP and Connect the projector to your PC or notebook with a USB cable DOWN prior to using this function. You can operate your Power Point presentation moving forwards and backwards by pressing... -
Page 14: Remote Control Effective Range
MODE Remote Control Effective Range Infra Red (IR) remote control sensors are located on the front and the back of the projector. The remote control must be held at an angle within 30 degrees of the projector’s IR remote control sensors to function correctly. The distance between the remote control and the sen- sors should not exceed 6 meters (19.5 feet). -
Page 15: Connection
Connection When connecting a signal source to the projector, be sure to: Turn all equipment off before making any connections. Use the correct signal cables for each source. Ensure the cables are firmly inserted. Connecting to a Laptop or Desktop Computer Important: A Mac adapter is needed if you are connecting to Macintosh computers. -
Page 16: Connecting Equipment To The Component Video Input
Connecting Equipment to the Component Video Input AV equipment The projector is capable of displaying various High Definition TV display modes. Some of these sources are: • Digital-VHS (D-VHS) recorder • Satellite Dish HDTV receiver Most of these sources will provide an analog component video output, a standard VGA out- put, or a YP format. -
Page 17: Connecting To Display Devices
Video cable Important: If the selected video image is not displayed after the projector is turned on and the correct video source has been selected, check that the video source is turned on and operating cor- rectly. Also check that the signal cables have been connected correctly. -
Page 18: Installation
For further information on the four configurations, please refer to page 28. If you place the projector above or below the screen, you have to tilt it down or up to center the image on the screen, in these situations image distortion will occur. Use the Keystone function to correct the distortion. -
Page 19: Adjusting The Height
Adjusting the Height The projector is equipped with 1 quick-release adjuster foot and 2 rear adjuster feet. These adjusters change the image height and projection angle. To adjust the projector, Lift the projector up and press the adjuster button to release the adjuster. - Page 20 Screen size chart (4:3 aspect ratio) Screen Diagonal Width (W) size inch inch Screen size chart (16:9 aspect ratio) Screen Diagonal Width (W) size inch inch Important: The above numbers are approximate, and may be slightly different from the actual measure- ments.
-
Page 21: Operation
Turn on the wall socket switch (where fitted). Press and hold Power on the remote control or projector to start the unit. The Power indicator light flashes green and stays green when the power is turned on. -
Page 22: Shutdown
If the projector is not properly shut down, to protect the lamp, when you attempt to re-start the projector within a few minutes, the fans will run for a few minutes to cool down. Press Power again to start the projector after the fans stop. -
Page 23: Digital Keystone Correction
3. Press 6 Menu on the projector or MENU on the remote control. Go to ture --> Keystone and adjust the values by pressing 3 Left/ Right 4 on the projector or 3 / 4 on the remote control. -
Page 24: Source Selection
Source Selection To sequentially select input sources, press SOURCE on the projector control panel or the remote control. It may take you a few seconds when the projector is searching for input signals. The selected source will be displayed at the bottom right of the screen for 3 seconds. -
Page 25: Mute
PAGE UP or PAGE DOWN button on the remote control. Important: • Connect the projector to your PC or notebook with a USB cable prior to using this function. • Only the computers equipped with a USB port are supported. -
Page 26: Still
Still The image is frozen when Still is pressed. An icon in the lower right corner of the screen. To release the function, press any button except 5Up, 3Left / Right4, 6 Down buttons. Mode Selection Press MODE to select a operation mode that suits your need. There are several operation modes available for different types of signals. -
Page 27: Menu Operation
Menu Operation Menu System Please note that the menus vary according to the signal type selected. Sub-Menu Picture Pro-Picture Setting Advance Information Functions available when receiving different signal types... Mode Keystone Brightness Contrast Auto Resize Aspect Ratio H Position V Position Fine Sync. -
Page 28: Using The Menus
Using the Menus The projector is equipped with on-screen display (OSD) menus for making various adjust- ments and settings. There are 8 different menu languages. (Refer to page The following example describes the adjustment of the keystone. Press 6 MENU on the projector or MENU on the remote control to turn the on-screen menu on. -
Page 29: Picture Menu
1. Picture Menu PC signal input FUNCTION DESCRIPTION Preset modes are provided so you can optimize your projector image set-up to suit your program type. Mode Corrects any keystoning of the image. Refer to page Keystone mation. Adjusts the brightness of the image. The higher the value, the brighter the image. - Page 30 Video/ S-Video/ Component Video signal input FUNCTION DESCRIPTION As described in the previous table. Mode As described in the previous table. Keystone As described in the previous table. Brightness As described in the previous table. Contrast Increases or decreases the color intensity of the image. Color Adjusts the color tones of the image.
-
Page 31: Pro-Picture Menu
2. Pro-Picture Menu PC signal input FUNCTION DESCRIPTION Makes the best fit of the image to the screen. Auto Resize 1. On 2. Off There are two aspect ratio settings. Aspect Ratio 1. 4 : 3 (Standard) Adjusts the horizontal posi- tion of the projected image. -
Page 32: Setting Menu
3. Setting Menu FUNCTION DESCRIPTION Disable the audio. Audio Mute Adjusts the volume level. Volume Sets the length of time the OSD (On Screen Display) menu will remain OSD Time active after your last button press. The range is from 5 to 85 seconds. Returns settings to the factory preset values. -
Page 33: Advance Menu
FUNCTION DESCRIPTION The projector can be installed on a ceiling or behind a screen, or with one or more mirrors. Contact your dealer for the ceiling mount bracket (optional accessory) if you need to install the projector on your ceiling. -
Page 34: Information Menu
5. Information Menu This menu shows you the current operating status of the projector. PC signal input/ Component Video signal input FUNCTION DESCRIPTION Shows the current signal source. Source Shows the native resolution of the input signal. Resolution Mode Shows the selected mode in Displays the number of hours the lamp has been used. -
Page 35: Maintenance
If you need to store the projector for an extended time, please follow the instructions below. • Make sure the temperature and humidity of the storage area are within the recommended range for the projector. Please refer to the Spec. page in the manual or consult your dealer about the range. •... -
Page 36: Lamp Information
Do not touch the lamp directly. It may break and cause injury or burn. • Be sure not to drop the lamp lid screw into the projector. Also be sure not to put metal or any flammable objects inside because it may cause fire or electric shock. If any objects should fall inside, unplug and contact your dealer. -
Page 37: Replacing The Lamp
To reduce the risk of electrical shock, always turn the projector off and disconnect the power cord before changing the lamp. • To reduce the risk of severe burns, allow the projector to cool for at least 45 minutes before replacing the lamp. •... -
Page 38: Temp Information
(When the replacement message appears, the projector will not respond to any operations.) i. Press and hold the Exit 5 button on the projector for 5 sec- onds to display the total used lamp time. -
Page 39: Indicators
Power Temp Lamp Power events Status & Description (1) The projector needs 110 seconds to cool down as it was abnormally shut down without the normal cooling down process. Or (2) The projector needs to cool for 110 seconds after the power is turned off. - Page 40 Thermal events Maintenance Status & Description (1) The projector needs 110 seconds to cool down. Or (2) Please contact your dealer for assistance. The projector has shutdown automatically. If you try to re-start the projector, it will shutdown again. Please contact your dealer for assistance.
-
Page 41: Service Information
Service Information Accessories (included in the standard package) Description ..........Part Number Power cord (US) . -
Page 42: Troubleshooting
Troubleshooting Remedy Plug the power cord into the AC inlet on the projector, and plug the power cord into the power outlet. If the power outlet has a switch, make sure that it is switched on. Wait until the cooling down process has completed. -
Page 43: Specifications
Computer output RGB output USB mouse connector Speaker Projector SE2U 0.55” Single chip Digital Micromirror Device (DMD) F=2.6 to 3.1 200W lamp AC100 - 240V, 3.2A, 50/60 Hz (Automatic) 283 mm (W) x 107 mm (H) x 229 mm (D) 2.9 Kg... -
Page 44: Timing Chart
• Some computers aren't compatible with the projector. • The projector's maximum resolution is 800 x 600 pixels. It may not display images of higher resolutions than 800 x 600 correctly. • Images with SYNC on G (Green) signal may jitter. -
Page 45: Dimensions
Dimensions Unit: mm Dimensions... - Page 46 MITSUBISHI Projector Contact Information North America MESCA (Mitsubishi Electric Sales Canada Inc.) http://www.mitsubishielectric.ca Information Technologies Group, 4299 14th Avenue, Markham, Ontario L3R 0J2, Canada Sales Phone :+1-(905) 475-7728 :+1-(905) 475-7958 E-mail :projectors@mitsubishielectric.ca Technical Phone :+1-(905) 475-7728 :+1-(905) 475-7958 Customer Care E-mail :support@mitsubishielectric.ca...