Table of Contents
Advertisement
Advertisement
Table of Contents

Related Manuals for Gigabyte G24F2


Summary of Contents for Gigabyte G24F2
- Page 2 GIGABYTE. Changes to the specifications and features in this manual may be made by GIGABYTE without prior notice. No part of this manual may be reproduced, copied, translated, transmitted, or published in any form or by any means without GIGABYTE’s prior written permission.
-
Page 3: Safety Precautions
Safety Precautions Read through the following Safety Precautions before using the monitor. • Only use the accessories that are provided with the monitor or that which are recommended by the manufacturer. • Keep the plastic packaging bag for the product in a place that cannot be reached by children. -
Page 4: Stability Hazard Precautions
Stability Hazard Precautions The product may fall, causing serious personal injury or death. To prevent injury, this product must be securely attached to the floor/wall in accordance with the installation instructions. Many injuries, particularly to children, can be avoided by taking simple precautions such as: •... -
Page 5: Table Of Contents
Appendices ..........................32 Specifications ........................32 Supported Timing List ....................33 Troubleshooting ......................35 Basic Care .......................... 36 Notes on USB Charging ....................36 GIGABYTE Service Information ................. 36 Safety Information ........................37 Regulatory Notices ......................37 - 5 -... -
Page 6: Introduction
INTRODUCTION Unpacking Open the upper cover of the packaging box. Then observe the unpacking label attached on the inner cover. Making sure the box is in the correct orientation, carefully lay the box on the stable surface. Open the inner cover. Openings Grab the EPS foam assembly (through the openings) to pull it out of the box. - Page 7 Remove the items from the upper EPS foam. Remove the upper EPS foam. Then you can remove the monitor from the lower EPS foam. - 7 -...
-
Page 8: Package Contents
Package Contents The following items come with your packaging box. If any of them is missing, please contact your local dealer. Monitor Monitor Base Stand Power Cable HDMI Cable USB Cable Multilingual Installation Guide G24F Quick Start Guide Warranty Card Note: Please keep the packaging box and packing materials for future transportation of the monitor. -
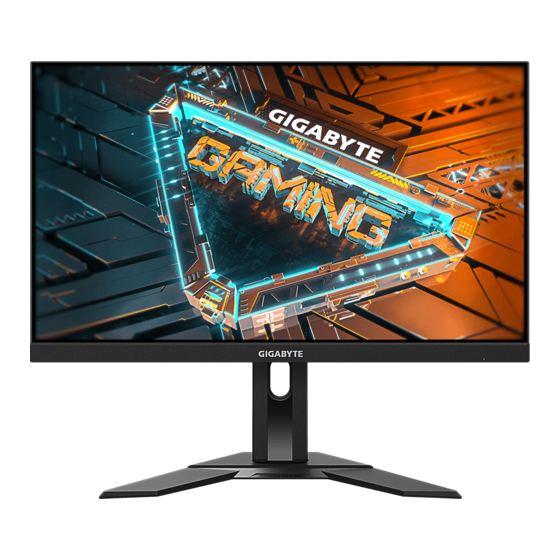
Page 9: Product Overview
Product Overview Front View Power LED - 9 -... - Page 10 Rear View HDMI-1 HDMI-2 USB 3.0 HDMI-1 HDMI-2 USB 3.2 Control button Headphone jack Kensington lock USB upstream port DisplayPort USB 3.2 ports (x2) HDMI ports (x2) AC IN jack Note: HDMI, the HDMI logo and High-Definition Multimedia Interface are trademarks or registered trademarks of HDMI Licensing LLC.
-
Page 11: Getting Started
GETTING STARTED Installing the Monitor Base Place the monitor on the lower EPS foam, with the screen facing down. Align and slide the upper hooks on the stand into the mounting slots on the rear of the monitor. Push the locking latch forward and then release to secure the lower hooks on the stand into the mounting slots on the rear of the monitor. - Page 12 Lift the screw ring and turn it clockwise to secure the monitor base in place. Lift the monitor to an upright position and place it on a table. - 12 -...
-
Page 13: Adjusting The Viewing Angle
Adjusting the Viewing Angle Note: Hold the monitor base so that the screen does not topple when you make the adjustment. Adjusting the Tilt Angle Tilt the screen forward or backward to the desired viewing angle (-5˚ to 20˚). 20° 5°... -
Page 14: Installing A Wall-Mount Bracket (Optional)
Installing a Wall-Mount Bracket (Optional) Use only the 100 x 100 mm wall mount kit recommended by the manufacturer. Place the monitor on the lower EPS foam, with the screen facing down. While pushing the locking latch forward, slide the stand backward to release the upper hooks from the mounting slots on the rear of the monitor. -
Page 15: Making Connections
Making Connections HDMI-1 HDMI-2 USB 3.2 DisplayPort cable USB (A-Male to B-Male) cable HDMI cable USB cable Headphone cable Power cable - 15 -... -
Page 16: Using The Device
USING THE DEVICE Turning the Power On/Off Power On Connect one end of the power cable to the AC IN jack at the rear of the monitor. Connect other end of the the power cable to a power outlet. Control Press the button to turn on the monitor. -
Page 17: User Comfort Recommendations
User Comfort Recommendations The Monitor adopts Flicker-Free technology which clears the eye visible monitor flicker and prevents users from suffering eye strain and fatigue. The following are some tips for comfortable viewing of your monitor: • Optimal viewing distances for monitors range from approximately 510 mm to 760 mm (20 in to 30 in). -
Page 18: Operations
OPERATIONS Quick Menu Hot Key Control By default, the button has been assigned with the specific function. Note: To change the preset hot key function, refer to the “Quick Switch” section on page 29. To access the hot key function, do the following: Control ) to enter the Black Equalizer •... - Page 19 Control ) to enter the Picture Mode • Move the button down ( menu. Control Move the button up/down ( ) to select the Picture Mode desired option and press the Control button to confirm. Standard RTS/RPG Movie Reader sRGB Select Exit Control...
- Page 20 Function Key Guide Control button to display the Main menu. Press the Settings SETTING Dashboard Game Assist DASHBOARD EXIT GAME ASSIST Exit Power Off POWER OFF Control Then use the button to select the desired function and configure the related settings. Dashboard When the Main menu appears on the screen, move the Control...
- Page 21 Once the Dashboard configuration is complete, it will transfer the system data to the SOC through the USB port and display the value of the selected function(s) on the screen. CPU Temperature CPU Frequency CPU Fan Speed CPU Usage Rate GPU Temperature GPU Frequency GPU Fan Speed...
- Page 22 • Game Info: Configure the FPS (First Person Shooting) game related settings. √ Select Gaming Timer to select countdown timer mode. To disable this function, set the setting to OFF. √ Select Gaming Counter or Refresh Rate to enable/disable the gaming counter or real-time refresh rate setting.
-
Page 23: Configure The Device Settings
Balance 60 HZ Picture Mode Standard Configure the Device Settings When the Main menu appears on the screen, move the Control button ) to enter the Settings menu. up ( Note: Use the Control button to navigate through the menu and make adjustments. - Page 24 Item Description Super Sharpen the low resolution images. Resolution Display Mode Select the aspect ratio of the screen. • Full: Scale the input image to fill the screen. Ideal for 16:9 aspect images. • Aspect: Display the input image without geometric distortion filling as much of the screen as possible.
- Page 25 Picture Configure the image related settings. Brightness Contrast Sharpness Gamma Color Temperature Gamma 3 Normal Picture Mode Standard Gaming Standard Brightness Picture Contrast Display RTS/RPG Color Vibrance System Movie Sharpness Language Reader Gamma Save Settings sRGB Color Temperature Reset All Custom 1 Exit Move/Adjust...
- Page 26 Item Description Color Select the color temperature. Temperature Note: Select User Define to customize the color temperature by adjusting the red (R), green (G), or blue (B) level according to your preference. Adjust the black level of the image to achieve the optimum contrast.
- Page 27 Display Configure the display screen related settings. Brightness Contrast Sharpness Gamma Color Temperature Gamma 3 Normal Picture Mode Standard Gaming Input HDMI 1 Picture Overclock HDMI 2 Display RGB Range DisplayPort System Overscan Language Save Settings Reset All Exit Move/Adjust Enter/Confirm Item Description...
- Page 28 System Configure the system related settings. Brightness Contrast Sharpness Gamma Color Temperature Gamma 3 Normal Picture Mode Standard Gaming Audio Volume Picture OSD Setting Mute Display Quick Switch System Other Settings Language Save Settings Reset All Exit Move/Adjust Enter/Confirm Item Description Audio Configure the audio settings.
- Page 29 Item Description Quick Switch Assign the function of the hot keys. Available options: Aim Stabilizer, Black Equalizer, Volume, Input, Contrast, Brightness, and Picture Mode. The default setting of the hot keys as below: D Up ( ): Black Equalizer D Down ( ): Picture Mode D Right ( ): Input...
- Page 30 Language Select an available language for the OSD menu. Brightness Contrast Sharpness Gamma Color Temperature Gamma 3 Normal Picture Mode Standard Gaming English Picture Display System Deutsch Language Français Save Settings Reset All 한국어 Exit Move/Adjust Enter/Confirm Save Settings Set the personalized OSD configurations for Setting1, Setting2, or Setting3.
- Page 31 Reset All Restore the monitor to its factory default settings. Brightness Contrast Sharpness Gamma Color Temperature Gamma 3 Normal Picture Mode Standard Gaming Picture Display System Language Save Settings Reset All Exit Move/Adjust Enter/Confirm - 31 -...
-
Page 32: Appendices
APPENDICES Specifications Item Specifications Panel Size 23.8-inch Aspect Ratio 16:9 Resolution 1920 x 1080 LED Life 30,000 hours Pixel Pitch 0.2745(H) x 0.2745(V) Brightness 300nits (typ.) Contrast Ratio 1100:1 (typ.) Color Depth 16.7M Active Display Area 527.04(H) x 296.46(V) Viewing Angle 178°(H) / 178°(V) Input/Output Terminals •... -
Page 33: Supported Timing List
Supported Timing List Timing List HDMI DisplayPort 720X400 / 70Hz 720X400 / 88Hz 640X480 / 60Hz 640X480 / 67Hz 640X480 / 72Hz 640X480 / 75Hz 800X600 / 56Hz 800X600 / 60Hz 800X600 / 72Hz 800X600 / 75Hz 832X624 / 75Hz 1024X768 / 87Hz 1024X768 / 60Hz 1024X768 / 70Hz... - Page 34 Timing List HDMI DisplayPort 1440X480 / 60Hz 1920X1080 / 50Hz 1920X1080 / 60Hz 1920X1080 / 100Hz 1920X1080 / 120Hz 1920x1080 / 144Hz 1920X1080 / 165Hz - 34 -...
-
Page 35: Troubleshooting
Troubleshooting Problem Possible Solution(s) No power • Make sure the power cable is properly connected to the power source and the monitor. • Check the cable and plug to make sure they are not broken. • Make sure the monitor is turned on. No image appears •... -
Page 36: Basic Care
When the Hub is connected to a PC, these devices cannot be charged using the USB cable. Vendor Device PID/VID Apple iPad PID_129A/VID_05AC Samsung GALAXY Tab2 10.1 PID_6860/VID_04E8 Samsung GALAXY TabPro PID_6860/VID_04E8 GIGABYTE Service Information More service information, please visit GIGABYTE official website: https://www.gigabyte.com/ - 36 -... -
Page 37: Safety Information
Model Number: G24F 2 Responsible Party – U.S. Contact Information: G.B.T. Inc. Address: 17358 Railroad street, City Of Industry, CA91748 Tel.: 1-626-854-9338 Internet contact information: https://www.gigabyte.com FCC Compliance Statement: This device complies with Part 15 of the FCC Rules, Subpart B, Unintentional Radiators. - Page 38 European Union (EU) RoHS (recast) Directive 2011/65/EU & the European Commission Delegated Directive (EU) 2015/863 Statement GIGABYTE products have not intended to add and safe from hazardous substances (Cd, Pb, Hg, Cr , PBDE, PBB, DEHP, BBP, DBP and DIBP). The parts and components have been carefully selected to meet RoHS requirement.
- Page 39 WEEE Symbol Statement The symbol shown below is on the product or on its packaging, which indicates that this product must not be disposed of with other waste. Instead, the device should be taken to the waste collection centers for activation of the treatment, collection, recycling and disposal procedure.
- Page 40 CE declaração de conformidade Este produto com a marcação CE estão em conformidade com das seguintes Diretivas UE: Diretiva Baixa Tensão 2014/35/EU; Diretiva CEM 2014/30/EU; Diretiva Conceção Ecológica 2009/125/CE; Diretiva RSP 2011/65/UE e a declaração 2015/863. A conformidade com estas diretivas é verificada utilizando as normas europeias harmonizadas.
- Page 41 ES Prohlášení o shodě Toto zařízení splňuje požadavky Směrnice o Elektromagnetické kompatibilitě 2014/30/EU, Směrnice o Nízkém napětí 2014/35/EU, Směrnice ErP 2009/125/ES, Směrnice RoHS 2011/65/EU a 2015/863. Tento produkt byl testován a bylo shledáno, že splňuje všechny základní požadavky směrnic. EK megfelelőségi nyilatkozata A termék megfelelnek az alábbi irányelvek és szabványok követelményeinek, azok a kiállításidőpontjában érvényes, aktuális változatában: EMC irányelv 2014/30/EU, Kisfeszültségű...
- Page 42 Japan VCCI Class B Statement クラスB VCCI 基準について この装置は、クラスB情報技術装置です。この装置は、家庭環境で使 用することを目的としていますが、この装置がラジオやテレビジョン 受信機に近接して使用されると、受信障害を引き起こすことがありま す。 取扱説明書に従って正しい取り扱いをして下さい。 VCCI-B China RoHS Compliance Statement 中国《废弃电器电子产品回收处理管理条例》提示性说明 为了更好地关爱及保护地球,当用户不再需要此产品或产品寿命终止时, 请遵守国家废弃电器电子产品回收处理相关法律法规,将其交给当地具有 国家认可的回收处理资质的厂商进行回收处理。 环保使用期限 Environment-friendly Use Period 此标识指期限(十年),电子电气产品中含有的有害物质不会 发生外泄或突变、电子电气产品用户正常使用该电子电气产品 不会对环境造成严重 污染或对其人身、财产造成严重损害的 期限。 - 42 -...
- Page 43 Declaration of the Presence Condition of the Restricted Substances Marking G24F 2 Equipment name Type designa on (Type) Restricted substances and its chemical symbols Unit Hexavalent Polybrominated Polybrominated Lead Mercury Cadmium chromium biphenyls diphenyls ethers (Pb) (Hg) (Cd) (PBB) (PBDE) 0.1 wt % 0.01 wt % Note 1...