Table of Contents
Advertisement
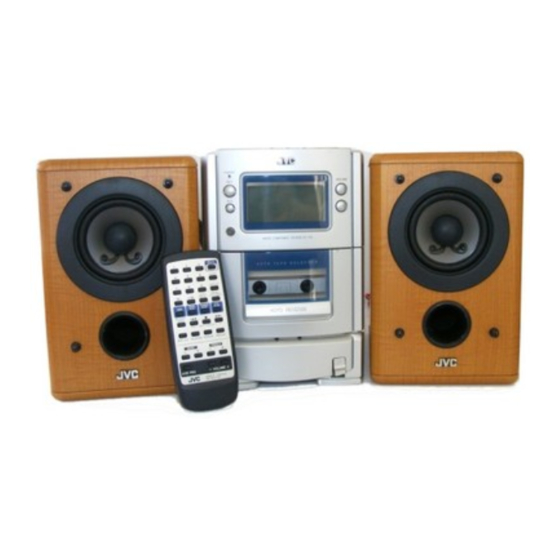
MICRO COMPONENT SYSTEM
SISTEMAS DE MICROCOMPONENTES
SISTEMA A MICROCOMPONENTI
UX-T55
UX-T55[E],LVT0277-002A
37
INSTRUCTIONS
INSTRUCCIONES
MANUALE DI ISTRUZIONI
For Customer Use:
Enter below the Model No. and Serial No.
which are located either on the rear, bot-
tom or side of the cabinet. Retain this
information for future reference.
Model No.
Serial No.
99.3.30, 8:05 PM
LVT0277-002A
[E]
Advertisement
Table of Contents

Related Manuals for JVC UX-T55


Summary of Contents for JVC UX-T55
- Page 1 MICRO COMPONENT SYSTEM SISTEMAS DE MICROCOMPONENTES SISTEMA A MICROCOMPONENTI UX-T55 INSTRUCTIONS INSTRUCCIONES MANUALE DI ISTRUZIONI UX-T55[E],LVT0277-002A For Customer Use: Enter below the Model No. and Serial No. which are located either on the rear, bot- tom or side of the cabinet. Retain this information for future reference.
-
Page 2: Table Of Contents
99.3.30, 7:58 PM ITALIANO Grazie per avere acquistato questo prodotto JVC. Si prega di leggere queste istruzioni con attenzione prima dell’uso per essere certi di ottenere prestazioni ottimali ed una lunga durata dell’unità. INDICE Caratteristiche ... -
Page 3: Features
AC outlet. 2. Do not handle the power cord with wet hands. UX-T55[E],LVT0277-002A REPRODUCCION DE ETIQUETAS Y SU UBICACION Name/Rating plate Placa de nombre/especificaciones... - Page 4 10 cm or more. Front view Vista frontal Visione anteriore 15 cm UX-T55 UX-T55[E],LVT0277-002A 3. Cuando lo desenchufa del tomacorriente de la pared, sujételo siempre por el enchufe, nunca por el cordón. 4. En caso de que el cordón sea afectado por daños, desconexión, o falso contacto,...
-
Page 5: Handling Precautions
● Do not listen at high volumes as this could damage your hearing. ● For safety, do not drive while listening to this unit. UX-T55[E],LVT0277-002A PRECAUCIONES DE MANIPULACION No utilice esta unidad bajo la luz directa del sol donde podría quedar expuesta a temperaturas superiores a 40°C. -
Page 6: Connections
● Install the antenna cord away from the power and speaker cords as these could generate noise. Do not install the loop antenna so that it touches the rear of the unit. UX-T55[E],LVT0277-002A CONEXIONES ● No conecte la alimentación hasta haber completado todas las conexiones. - Page 7 When they are placed directly on or adjacent to a TV, the TV’s picture could be distorted. Install the speakers more than 20 cm away from your TV. UX-T55[E],LVT0277-002A Conexión de los cordones de los altavoces œ Connect the Black cord to the terminal.
- Page 8 Regarding the connection with external units and their operations, refer to the instructions provided with those units. UX-T55[E],LVT0277-002A ● Cuando conecta el cordón del altavoz, asegúrese de que el núcleo del cable, y no la cubierta aislante, quede conectado al terminal del altavoz, de lo contrario no se escuchará...
-
Page 9: Power Supply
B. Funcionamiento con batería de automóvil (12 V de CC) Optional exclusive car adapter (JVC model CA-R120E) Adaptador exclusivo para automóvil opcional (JVC modelo CA-R120E) Adattatore esclusivo per automobile opzionale (modello JVC CA-R120E) ● Primero conecte el adaptador al jack DC IN... -
Page 10: Names Of Parts And Their Functions
FUNCTIONS CD player /General section Front Parta Lato STANDBY VOLUME MICRO COMPONENT SYSTEM UX-T55 A U T O T A P E S E L E C T O R AUTO REVERSE button and power STANDBY indicator AUX button Remote sensor section... - Page 11 Tuner/Deck section STANDBY MICRO COMPONENT SYSTEM UX-T55 A U T O T A P E S E L E C T O R AUTO REVERSE Display window Band indicator Radio frequency display MONO indicator STEREO indicator Recording indicator (REC) Tape direction indicator (1, 4)
-
Page 12: Remote Control Unit
● Do not expose the remote sensor to strong direct sunlight or artificial lighting. ● Make sure that there are no obstacles between the remote sensor and the unit. UX-T55[E],LVT0277-002A UNIDAD DE CONTROL REMOTO Preparativos antes usarla ● Instalación de las pilas en la unidad de control remoto 1. - Page 13 STEREO AUTO/MONO button AUTO PRESET botton REPEAT button RANDOM button ● Buttons not mentioned here have the same functions as those on the main unit. UX-T55[E],LVT0277-002A Las siguientes operaciones deben ser ejecutadas utilizando la unidad de control remoto. ● Compruebe detalladamente funcionamiento de los botones de operación y opérelos correctamente.
-
Page 14: Switching The Power On/Off
SWITCHING THE POWER ON/OFF STANDBY button Botón Tasto AUX button MICRO COMPONENT SYSTEM UX-T55 Botón AUX Tasto AUX A U T O T A P E AUTO REVERSE Switching the power on/off ● Switching on: STANDBY The STANDBY indicator goes out. -
Page 15: Volume, Tone And Other Controls
BASS PRO sound. OFF: The BASS indicator goes out. Set to this position when ACTIVE HYPER-BASS PRO sound is not required. UX-T55[E],LVT0277-002A Operación de un solo toque (COMPU PLAY) Cuando la alimentación está colocada en STANDBY, el presionar el botón mostrado abajo conecta la alimentación y selecciona la fuente. -
Page 16: Handling Cds
CDs shaped like a heart, flower, etc. (specially- shaped CDs) cannot be used with this unit. If this type of CD is loaded, it will cause a trouble. UX-T55[E],LVT0277-002A MANIPULACION DE CD Como los CD sucios, dañados o alabeados pueden dañar la unidad, tome precauciones en relación a lo siguiente:... -
Page 17: Playing Cds
48 minuti e 57 secondi. Eseguire le operazioni nell'ordine indicato STANDBY VOLUME MICRO COMPONENT SYSTEM UX-T55 A U T O T A P E S E L E C T O R AUTO REVERSE Premere il tasto per aprire il piatto del CD. - Page 18 ● To designate track numbers 1 to 10, press the track number button corresponding to the track number. UX-T55[E],LVT0277-002A ● No utilice la unidad en temperaturas excesivamente altas o bajas. Los límites de temperatura recomendados son de 5°C a 35°C.
- Page 19 Press the 4/6 button when programming is completed. Programmed play starts. UX-T55[E],LVT0277-002A ● Para designar el número de pista 11 o superior, presione el botón +10 el número necesario de veces, y luego un botón de número de pista.
- Page 20 Random play (using the remote control unit) Press the RANDOM button, and all tracks on a CD play once in random order. UX-T55[E],LVT0277-002A Para confirmar los detalles de un programa... Presione el botón PROGRAM; las pistas que componen el programa serán indicadas en el orden programado.
-
Page 21: Handling Cassette Tapes
Metal tape (EQ: 70 µs) ... Type IV (chrome) tape (EQ: 70 µs) ... Type II ● Cassettes without detection holes: Normal tape (EQ: 120 µs) ... Type I UX-T55[E],LVT0277-002A MANIPULACION DE CASSETTES DE CINTA Cassettes de cinta 1. La cinta floja puede causar problemas. -
Page 22: Cassette Playback
CASSETTE PLAYBACK Operate in the order shown STANDBY VOLUME MICRO COMPONENT SYSTEM UX-T55 A U T O T A P E S E L E C T O R AUTO REVERSE Load a cassette tape. Press to start playback. (The power is switched on and the TAPE mode is engaged to start tape playback.) -
Page 23: Radio Reception
UX-T55[E],LVT0277-002A RADIORRECEPCION Opere en el orden mostrado STANDBY OPEN MICRO COMPONENT SYSTEM UX-T55 A U T O T A P E S E L E C T O R Presione el botón TUNER/BAND. ● Se conecta la alimentación y aparece en el visor una banda y una frecuencia de radio. - Page 24 ● When listening to an AM (MW/LW) broadcast, noise may be heard if the remote control unit is used. UX-T55[E],LVT0277-002A Presintonización automática (utilizando la unidad de control remoto) Esta función busca la banda actual, detectando frecuencias usadas para señales de radiodifusión y almacena las primeras 30...
-
Page 25: Recording
Synchronized recording with the CD player ● In this system, the CD player starts play when the cassette deck enters the recording mode. UX-T55[E],LVT0277-002A ● Todas las estaciones presintonizadas se borran cuando se desconecta el cordón de alimentación u ocurre un corte de energía de más de 24 horas. - Page 26 Operate in the order shown STANDBY MICRO COMPONENT SYSTEM UX-T55 A U T O T A P E S E L E C T O R AUTO REVERSE Load a cassette with side A facing out. (Wind past the tape leader before starting recording.)
- Page 27 Recording from the radio or an external source connected to the AUX terminals Operate in the order shown STANDBY MICRO COMPONENT SYSTEM UX-T55 A U T O T A P E S E L E C T O R AUTO REVERSE Load a cassette with side A facing out.
-
Page 28: Clock Adjustment
TIMER/SNOOZE button MULTI JOG dial It is used to set the current time and perform timer setting. UX-T55[E],LVT0277-002A Botón BEAT CUT (utilizando la unidad de control remoto) Cuando graba una radiodifusión de AM, es posible que se escuchen compases inaudibles cuando escucha la radiodifusión. -
Page 29: Timer Operations
Press the TIMER/SNOOZE button for 2 seconds or more. TIMER/SNOOZE Set the start time. (Example: To set the timer to 12: 15.) UX-T55[E],LVT0277-002A Ajuste de la hora actual (Cuando se usa la unidad por primera vez) (Ejemplo: Para ajustar el reloj a las 13:15.) CLOCK Within the 2 minutes. - Page 30 Note: ● When the timer is set incorrectly or the correct mode is not selected, perform "Setting the timer" from the beginning. UX-T55[E],LVT0277-002A Ajuste la hora de desactivación. (Ejemplo: Para ajustar el temporizador a las 13:15.) TIMER/SNOOZE TIMER/SNOOZE ●...
- Page 31 ● Make sure that the safety tabs of the cassette ● Asegúrese de que las lengüetas de have not been broken off. Operations Operaciones STANDBY MICRO COMPONENT SYSTEM UX-T55 A U T O T A P E S E L E C T O R AUTO REVERSE Set the button to ON.
- Page 32 Timer playback ● Timer playback of tapes, broadcasts and CDs is possible. Operations STANDBY MICRO COMPONENT SYSTEM UX-T55 A U T O AUTO REVERSE Set the button to ON. Set the timer. (Refer to “Setting the timer” on page 29.)
- Page 33 However, when broadcast reception is selected for both sleep timer operation and timer playback, the station you heard at night will be tuned to the following morning. UX-T55[E],LVT0277-002A ● Para dormir 5 minutos más... Cuando se activa la reproducción por temporizador, presione el botón TIMER/ SNOOZE.
-
Page 34: Maintenance
● Use a blower (available from a camera store) to blow dust off the lens. ● If there are fingerprints, etc. on the lens, gently wipe clean with a cotton swab. UX-T55[E],LVT0277-002A MANTENIMIENTO ¡La limpieza es importante! Cuando la cinta está girando, el polvo magnético y el polvo se acumulan naturalmente... -
Page 35: Troubleshooting
AM (LW) 144-288 kHz Antennas : Loop antenna for AM (MW/ External antenna terminal for FM (75 ) UX-T55[E],LVT0277-002A DETECCION DE PROBLEMAS Lo que parece ser un problema no siempre es grave. Primero asegúrese... ● No es posible conectar la alimentación. - Page 36 FM wire antenna x 1 Loop antenna stand x 1 Design and specifications are subject to change without notice. EN,SP,IT UX-T55[E],LVT0277-002A Sección de la platina de cinta Sezione registratore Sistema de pistas : 4 pistas 2 canales Sistema registrazione : 4 piste, 2 canali stereo estereofónicos...