Advertisement
Quick Links
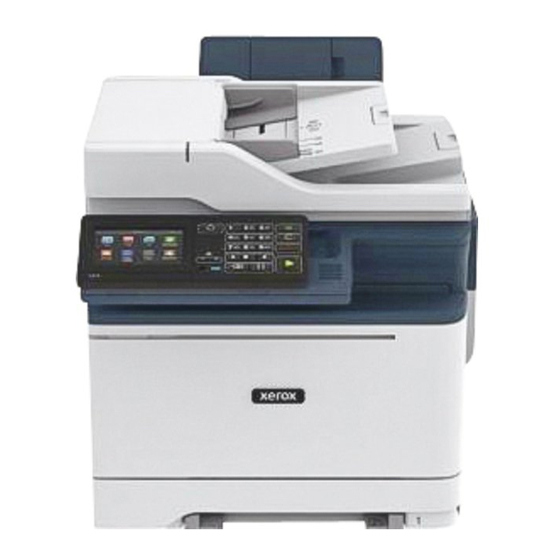
Xerox
C315 Color Multifunction
®
Printer Quick Reference Guide
Copy
M M a a k k i i n n g g C C o o p p i i e e s s
1. Load an original document into the ADF tray or on the scanner
glass.
Note:
To avoid a cropped image, make sure that the original
document and output have the same paper size.
2. From the home screen, touch Copy, and then specify the number
of copies.
If necessary, adjust the copy settings.
3. Copy the document.
Note:
To make a quick copy, from the control panel, press
the Start button.
C C o o p p y y i i n n g g o o n n B B o o t t h h S S i i d d e e s s o o f f t t h h e e P P a a p p e e r r
1. Load an original document into the ADF tray or on the scanner
glass.
2. From the home screen, touch Copy > Sides.
3. Adjust the settings.
4. Copy the document.
C C o o p p y y i i n n g g M M u u l l t t i i p p l l e e P P a a g g e e s s o o n n t t o o a a S S i i n n g g l l e e S S h h e e e e t t
1. Load an original document into the ADF tray or on the scanner
glass.
2. From the home screen, touch Copy > Pages per Side.
3. Adjust the settings.
4. Copy the document.
Email
C C o o n n f f i i g g u u r r i i n n g g t t h h e e E E m m a a i i l l S S M M T T P P S S e e t t t t i i n n g g s s
Configure the Simple Mail Transfer Protocol (SMTP) settings to send a
scanned document through e-mail. The settings vary with each email
service provider.
Before you begin, make sure that the printer is connected to a
network and that the network is connected to the Internet.
U U s s i i n n g g t t h h e e E E m m a a i i l l S S e e t t u u p p W W i i z z a a r r d d i i n n t t h h e e P P r r i i n n t t e e r r
Before using the wizard, make sure that the printer firmware is
updated. For more information, refer to
Updating
1. From the home screen, touch Email.
2. Touch and type your e-mail address.
3. Type the password.
• Depending on your e-mail service provider, type your account
password, app password, or authentication password. For
more information on the password, refer to the list of
Service
Providers, and then look for Device Password.
• If your provider is not listed, contact your provider and ask for
the Primary SMTP Gateway, Primary SMTP Gateway Port, Use
SSL/TLS, and SMTP Server Authentication settings.
4. Touch OK.
U U s s i i n n g g t t h h e e S S e e t t t t i i n n g g s s M M e e n n u u i i n n t t h h e e P P r r i i n n t t e e r r
1. From the home screen, touch Settings > E-mail > E-mail Setup.
2. Configure the settings.
• For more information on the password, refer to the list of
Email Service
• For email service providers that are not on the list, contact
your provider and ask for the settings.
U U s s i i n n g g t t h h e e E E m m b b e e d d d d e e d d W W e e b b S S e e r r v v e e r r
1. Open a web browser, and then type the printer IP address in the
address field.
• View the printer IP address on the printer home screen. The IP
address appears as four sets of numbers separated by periods,
such as 123.123.123.123.
• If you are using a proxy server, then temporarily disable it to
load the web page correctly.
2. Click Settings > Email.
3. From the Email Setup section, configure the settings.
• For more information on the password, refer to the list of
Email Service
• For email service providers that are not on the list, contact
your provider and ask for the settings.
4. Click Save.
Firmware.
E E m m a a i i l l S S e e r r v v i i c c e e P P r r o o v v i i d d e e r r s s
To determine the SMTP settings of your email service provider, use the
following tables.
Email
Gmail
™
Note:
Google account.
To enable two-step verification, go to the
page, log in to your account, then from the Signing in to Google
section, click 2-Step Verification.
SETTING
Primary SMTP
Gateway
Primary SMTP
Gateway Port
1
Providers.
Providers.
Make sure that two-step verification is enabled on your
Google Account Security
VALUE
smtp.gmail.com
587
Advertisement

Related Manuals for Xerox C315


Summary of Contents for Xerox C315
- Page 1 Xerox C315 Color Multifunction 2. Configure the settings. ® C C o o p p y y i i n n g g M M u u l l t t i i p p l l e e P P a a g g e e s s o o n n t t o o a a S S i i n n g g l l e e S S h h e e e e t t •...
- Page 2 SETTING VALUE SETTING VALUE SETTING VALUE Use SSL/TLS Required Device-Initiated E- Use Device SMTP Credentials Device UserID Your email address mail Device Password Account password or app Require Trusted Disabled Device UserID Your email address password Certificate • For accounts with two-step Device Password App password Reply Address...
- Page 3 Mail.com SETTING VALUE SETTING VALUE Device UserID Your email address Device UserID Your email address SETTING VALUE Primary SMTP smtp.mail.com Device Password App password Device Password App password Gateway To create an app To create an app Note: Note: Primary SMTP password, go to the password, go to the Gateway Port...
- Page 4 SETTING VALUE SETTING VALUE SETTING VALUE Device-Initiated E- Use Device SMTP Credentials SMTP Server Login/Plain SMTP Server Login/Plain mail Authentication Authentication Device UserID Your email address Device-Initiated E- Use Device SMTP Credentials Device-Initiated Use Device SMTP Credentials mail Email Device Password Account password or app password Device UserID...
- Page 5 SETTING VALUE SETTING VALUE SETTING VALUE Device UserID Your email address Device UserID Your email address Device UserID Your email address Device Password Authorization password Device Password Authorization password Device Password Independent password The authorization The authorization The independent Note: Note: Note: password is provided...
- Page 6 4. Click Scan. SETTING VALUE Scan Device UserID Your email address Device Authorization code S S c c a a n n n n i i n n g g t t o o a a C C o o m m p p u u t t e e r r Password To create an Note:...
-
Page 7: Maintain The Printer
1. From your Android mobile device, launch a compatible Maintain the Printer NUMBER USE THE application or select a document from your file manager. 2. Tap More OptionsPrint. LINE port Connect the printer to an active telephone line 3. Select a printer, and then adjust the settings, if necessary. A A t t t t a a c c h h i i n n g g C C a a b b l l e e s s through a standard wall 4. - Page 8 4. Insert the new toner cartridge. R R e e p p l l a a c c i i n n g g a a T T o o n n e e r r C C a a r r t t r r i i d d g g e e C C l l e e a a n n i i n n g g t t h h e e S S c c a a n n n n e e r r 1.
- Page 9 b. Scanner glass pad d. Scanner glass 6. Close the door. c. ADF glass 3. Close the scanner cover. L L o o a a d d i i n n g g T T r r a a y y s s If your printer has another ADF glass inside door C, then continue with the following steps.
- Page 10 2. Adjust the guides to match the size of the paper that you are 4. Load the paper stack with the printable side faceup, and then L L o o a a d d i i n n g g t t h h e e M M u u l l t t i i p p u u r r p p o o s s e e F F e e e e d d e e r r loading.
- Page 11 4. Load paper with the printable side facedown. 2. Load a sheet of paper with the printable side facedown. • Load letterhead with the printable side face down and the top • Load letterhead with the printable side facedown and the top edge entering the printer first for one-sided printing edge entering the printer first for one-sided printing.
- Page 12 Wi-Fi Direct-enabled printer following steps. without using an access point (wireless router). To get the latest firmware, go to www.xerox.com, and search for your printer model. 1. From the home screen, touch Settings > Network/Ports > Wi-Fi Direct.
-
Page 13: Clearing Jams
3. Navigate to the Configuration tab, and then select Update Now - Clearing Jams Ask Printer. 4. Apply the changes. A A v v o o i i d d i i n n g g j j a a m m s s F F o o r r M M a a c c i i n n t t o o s s h h U U s s e e r r s s 1. - Page 14 2. Remove the jammed paper. I I d d e e n n t t i i f f y y i i n n g g J J a a m m L L o o c c a a t t i i o o n n s s Note: Make sure that all paper fragments are removed.
-
Page 15: Caution-Hot Surface
2. Remove the jammed paper. P P a a p p e e r r J J a a m m i i n n D D o o o o r r A A P P a a p p e e r r J J a a m m i i n n t t h h e e F F u u s s e e r r Note: Make sure that all paper fragments are removed. - Page 16 2. Remove the jammed paper. 2. Open door A. P P a a p p e e r r J J a a m m i i n n t t h h e e D D u u p p l l e e x x U U n n i i t t Note: Make sure that all paper fragments are removed.
- Page 17 1. Remove paper from the multipurpose feeder. 2. Open door C. P P a a p p e e r r J J a a m m i i n n t t h h e e M M a a n n u u a a l l F F e e e e d d e e r r 1.
- Page 18 © 2021 Xerox Corporation. All rights reserved. Xerox is a trademark of Xerox Corporation in the United States and other countries. ® Apple , iPad , iPhone , iPod , iPod touch , AirPrint and the AirPrint Logo are trademarks or registered trademarks of Apple Inc. in the U.S. and other countries. Google Cloud Print web printing service, Gmail ®...