
Related Manuals for Clarke AIRMASTER 18/200


Summary of Contents for Clarke AIRMASTER 18/200
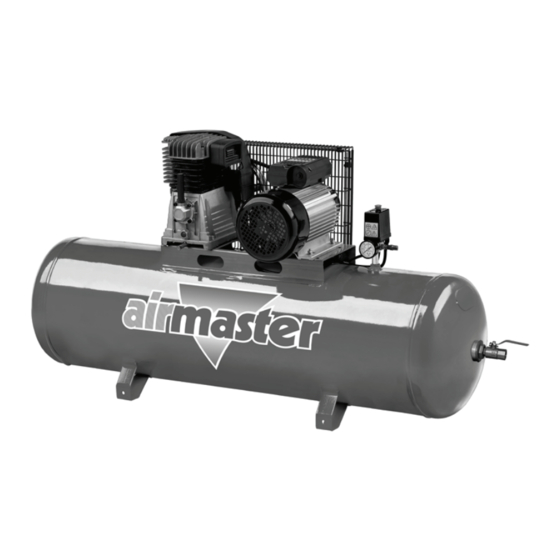
- Page 1 200L BELT DRIVEN AIR COMPRESSOR MODEL NO: AIRMASTER 18/200 PART NO: 2245311 OPERATION & MAINTENANCE INSTRUCTIONS ORIGINAL INSTRUCTIONS GC0122 rev 1...
-
Page 2: Environmental Recycling Policy
GUARANTEE This CLARKE product is guaranteed against faulty manufacture for a period of 12 months from the date of purchase. Please keep your receipt as proof of purchase. -
Page 3: Safety Precautions
2. DO NOT operate your compressor with the guard removed. 3. Repairs must only be carried out by a qualified engineer. If problems occur, contact your CLARKE dealer. 4. Before carrying out any maintenance make sure that the pressure is released from the air reservoir and that the compressor is disconnected from the electrical supply. -
Page 4: Safety Symbols
SAFETY SYMBOLS Read this instruction booklet carefully before positioning, operating or adjusting the compressor. Risk of electric shock. The compressor must be disconnected from the mains supply before removing any covers. DO NOT use in a damp environment. Risk of accidental start-up. The compressor could start automatically in the event of a power cut and subsequent reset. -
Page 5: Installation
INSTALLATION Before installing your machine, check that its air output is sufficient for the equipment to be used. The air output from the compressor must be more than the volume of air required. We recommend the following: 1. 1. Firm and level site, and the use of floor mountings for stationary compressors - anti-vibration pads. -
Page 6: Before Use
As the colours of the flexible cord of this appliance may not correspond with the coloured markings identifying terminals, proceed as follows: • Connect GREEN AND YELLOW coloured cable to terminal marked “E” or Earth Symbol or coloured Green and Yellow. •... -
Page 7: Operation
OPERATION If the compressor has not been used for more then 24 hours, open the drain valve (on the bottom of the reservoir) and drain any condensate which has collected. See page 10. MOVING THE AIR COMPRESSOR • Stop the compressor and disconnect it from the power supply before you move it. -
Page 8: Turning The Compressor On
TURNING THE COMPRESSOR ON 1. Plug the compressor into the power supply. 2. Lift the On/Off button. • The compressor will operate until the reservoir is fully pressurised. It will then shut down. • The compressor will start up again when the pressure in the reservoir decreases. -
Page 9: Removing Tools From The Air Hose
REMOVING TOOLS FROM THE AIR HOSE 1. Push down on the On/Off button to stop the compressor. 2. Turn the outlet valve handle to the off position. 3. Operate the tool to depressurise the air hose. 4. Disconnect the tool from the hose. TURNING THE COMPRESSOR OFF 1. -
Page 10: Draining The Reservoir
DRAINING THE RESERVOIR CAUTION: YOU MUST DRAIN THE RESERVOIR AFTER EACH DAYS USE AND BEFORE YOU PUT YOUR COMPRESSOR INTO STORAGE. 1. Turn the compressor off and disconnect from the power supply. 2. Put a container below the drain valve to collect the condensate. 3. -
Page 11: Maintenance
MAINTENANCE WARNING: MAKE SURE THAT THE COMPRESSOR IS DISCONNECTED FROM THE ELECTRICAL SUPPLY BEFORE CARRYING OUT ANY MAINTENANCE DRAIN THE RESERVOIR After use, always open the drain valve to make sure that any condensate is drained off. CHECKING THE OIL Ensure the oil level is between the min and max marks on the dipstick. - Page 12 REPLACING THE OIL After the first 100 hours use, replace the oil using SAE30 compressor oil. Then replace the oil after every 500 hours of operation or every 6 months. To empty the oil from the machine, remove the oil drain plug from the crankcase.
-
Page 13: Replacing The Drive Belt
REPLACING THE DRIVE BELT WARNING: MAKE SURE THAT THE COMPRESSOR IS DISCONNECTED FROM THE ELECTRICAL SUPPLY BEFORE REPLACING THE DRIVE BELT. 1. Rotate the clips on the front of the safety cage. 2. Remove the front of the cage and take out the worn or broken drive belt. -
Page 14: Troubleshooting
TROUBLESHOOTING CAUTION: DO NOT TRY TO REPAIR OR ADJUSTMENT IF YOU ARE UNCERTAIN. IF YOU HAVE ANY QUERIES, CONTACT YOUR CLARKE DEALER. PROBLEM PROBABLE CAUSE REMEDY The compressor Bad electrical 1. Check electrical has stopped connections. connections. and does not 2. -
Page 15: Component Parts
COMPONENT PARTS Parts & Service: 020 8988 7400 / E-mail: Parts@clarkeinternational.com or Service@clarkeinternational.com... -
Page 16: Component Parts List
COMPONENT PARTS LIST NO DESCRIPTION Crankcase Pressure Switch Cylinder block Power Cable Cylinder Head Motor Crankshaft Belt Guard Lower Cover Safety valve Kit Valve Holder Pump assembly Conrod Feet (set) Air Filter Assembly (complete) Drive pulley Air cooler Drive Belt End Cover Outlet Tap Bearing Retainer... -
Page 17: Specifications
SPECIFICATIONS MODEL AIRMASTER 18/200 Part Number 2245311 Motor size Voltage 230 VAC (50Hz) Air Displacement 504.8L/min (18 CFM) Max Pressure 10 Bar (145psi) Receiver Capacity 200 L Ingress Protection IP20 Duty cycle S3/50% Oil requirements Compressor oil SAE30 Oil capacity 0.4L... -
Page 18: Declaration Of Conformity
DECLARATION OF CONFORMITY Parts & Service: 020 8988 7400 / E-mail: Parts@clarkeinternational.com or Service@clarkeinternational.com... - Page 19 DECLARATION OF CONFORMITY Parts & Service: 020 8988 7400 / E-mail: Parts@clarkeinternational.com or Service@clarkeinternational.com...