Table of Contents
Advertisement
Quick Links
Operation, Parts, Repair
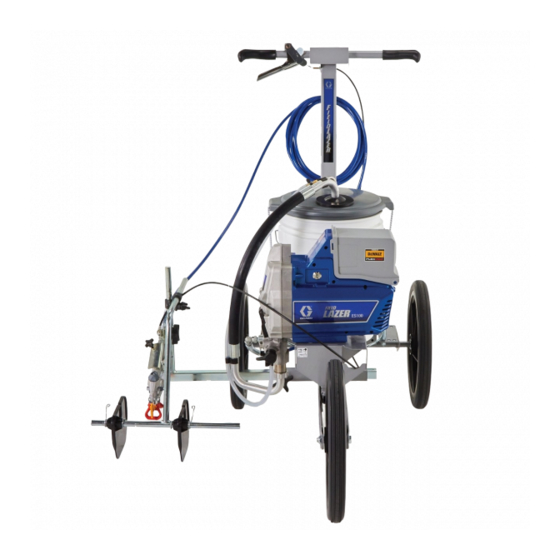
FieldLazer
For application of water-based field striping materials. For professional use only.
ES100 Models: 25U542, 25U543, 25U544
1750 psi (12.1 MPa, 121 bar) maximum working pressure.
Important Safety Instructions
Read all warnings and instructions in this manual
and all related manuals before using the
equipment. Save these instructions.
Related Manuals:
312830
Gun (SG2)
3A3172
Pump
Use only genuine Graco replacement parts.
The use of non-Graco replacement parts may void warranty.
™
ES100
3A9002A
www.graco.com/techsupport
EN
Advertisement
Table of Contents

Related Manuals for Graco FieldLazer ES100


Summary of Contents for Graco FieldLazer ES100
- Page 1 Read all warnings and instructions in this manual and all related manuals before using the equipment. Save these instructions. Related Manuals: 312830 Gun (SG2) 3A3172 Pump Use only genuine Graco replacement parts. The use of non-Graco replacement parts may void warranty. www.graco.com/techsupport...
-
Page 2: Table Of Contents
Graco Standard Warranty ......45 Graco Information ........46... -
Page 3: Models
ES100 USA/CA 25U542 ES100 EMEA/UK 25U543 ES100 ANZ/AP 25U544 The FieldLazer ES100 is compatible with the following DEWALT FLEXVOLT 54V and 60V batteries: • DCB606 - 60V/2ah (20V/6ah) • DCB546 - 54V/2ah (18V/6ah) • DCB609 - 60V/3ah (20V/9ah) • DCB547 - 54V/3ah (18V/9 ah) •... -
Page 4: Warnings
Check hoses and parts for signs of damage. Replace any damaged hoses or parts. • This system is capable of producing 1750 psi (121 bar, 12.1 MPa). Use Graco parts or accessories that are rated a minimum of 1750 psi (121 bar, 12.1 MPa). - Page 5 • Do not spray with a hose shorter than 25 feet. • Always replace cracked, broken or missing parts immediately with genuine Graco parts, see Parts, see page 36. • Do not alter or modify equipment. Alterations or modifications may void agency approvals and create safety hazards.
- Page 6 Warnings WARNING TOXIC FLUID OR FUMES HAZARD Toxic fluids or fumes can cause serious injury or death if splashed in the eyes or on skin, inhaled, or swallowed. • Read Safety Data Sheets (SDSs) to know the specific hazards of the fluids you are using. •...
-
Page 7: Component Identification
Component Identification Component Identification Gun Retainer Knob Striper Power Switch Push Prime Button Pressure Control Airless Spray Gun Spray Gun Control Lever Tip Guard Prime Valve Reversible Spray Tip Spray Gun Trigger Lock Gun Fluid Filter (optional, located in handle) Spray Shield Fluid Outlet Fitting Pump... -
Page 8: Fieldlazer Setup
FieldLazer Setup FieldLazer Setup Assemble shields to striper. When unpacking FieldLazer for the first time or after long term storage perform setup procedure. Remove FieldLazer from box. Unfold handle. ti6082a Loosen knob and slide spray gun outside of wheel. Tighten knob. Tighten knob and secure handle in place. - Page 9 FieldLazer Setup Fill wet cup with TSL to extend pump When unpacking FieldLazer for the first time, remove packaging materials from life. inlet strainer. After long term storage check inlet strainer for clogs and debris. Place suction tube in water pail. Ensure tip guard and SwitchTip are removed.
- Page 10 FieldLazer Setup Strain the Paint Previously opened paint may contain dried paint or other debris. To avoid priming problems and spray tip clogs it is recom- mended to strain the paint before using. Paint strainers are available where paint is sold.
-
Page 11: Battery Installation And Removal
Battery Installation and Removal Battery Installation and Removal Always start with a fully charged battery. Install battery by aligning the battery Do not splash or immerse battery or pack with the rails inside the FieldLazer charger in water. See battery and charger and sliding it in until the battery pack is information shipped with the FieldLazer. -
Page 12: Pressure Relief Procedure
Pressure Relief Procedure Pressure Relief Procedure Follow the Pressure Relief Turn pressure control to lowest setting. Procedure whenever you see this symbol. This equipment stays pressurized until pressure is manually relieved. To help Hold the gun firmly to a pail, point gun prevent serious injury from pressurized into pail. -
Page 13: Operation
Operation Operation Flush Storage Fluid FieldLazer This arrives from the factory with a small amount of test material in the system. It is important that you flush this material from the sprayer before using it for the first time. Perform Pressure Relief Procedure, page 12. - Page 14 Operation Install battery. See Battery Installation Place drain tube in waste pail. and Removal, page 11. Press PushPrime button twice to loosen inlet ball. Align setting indicator with low setting Submerge suction tube in a on Pressure Control Knob. grounded pail partially filled with water or flushing fluid.
-
Page 15: Fill Pump
Operation Fill Pump Increase pressure 1/2 turn to start motor. Allow paint or other material to circulate through FieldLazer until mate- Move suction tube to paint pail and rial flows out the drain tube. submerge suction tube in paint. When FieldLazer starts pumping, flush- ing fluid and air bubbles will be purged from system. -
Page 16: Fill Gun And Hose
Operation Fill Gun and Hose Trigger gun into waste pail until only paint comes out of the gun. Hold gun against waste pail. Point gun Release trigger. Engage trigger lock. into waste pail. Transfer drain tube to paint pail. Loosen gun retainer knob and remove spray gun from holder. -
Page 17: How To Spray
How to Spray How to Spray Use spray tip to align gasket and Spray Tip Installation seal in the tip guard. To avoid serious injury from skin injection, do not put your hand in front of the Spray Tip when installing or removing the Spray Tip or Spray Tip Guard. -
Page 18: Spray
How to Spray Spray Return spray gun to holder. Adjust spray shields for desired width. ti5859a ti6067a Place trigger guard in front of nut on gun holder. Tighten knob. Grasp shield with one hand and squeeze spring arms with the other hand. - Page 19 How to Spray Squeeze spray gun control and push Slide spray gun up or down. striper forward to spray a test stripe. ti5858a Adjust gun height so paint spray strikes shields 1/4 in. from bottom of shields. ti6089a Spray a test stripe before spraying the actual field.
-
Page 20: Stencil Spraying
How to Spray Stencil Spraying Return gun to holder. Loosen gun retainer knob. ti5859a ti5862a Tighten gun retainer knob. Remove gun from holder. ti5860a ti5863a Trigger spray gun over stencil pattern. ti5703a 3A9002A... -
Page 21: Spray Tip Selection
How to Spray Spray Tip Selection Understanding Tip Number The last three digits of tip number (i.e.: Selecting Tip Size LL5421) contain information about hole size and fan width on surface when gun is held 6 Spray tips come in a variety of hole sizes for in. -
Page 22: Clear Tip Clog
How to Spray Clear Tip Clog Engage trigger lock. Rotate spray tip back to spray position. Disengage trig- ger lock and continue spraying. In the event that particles or debris clog the spray tip, this sprayer is designed with a Spray reversible spray tip that quickly and easily clears the particles without disassembling... -
Page 23: Cleanup
Cleanup Cleanup Cleaning the FieldLazer after each use Place empty waste and water pails side results in a trouble free start-up the next time by side. the sprayer is used. Perform Pressure Relief Procedure, page 12. Remove tip guard and spray tip, see Spray Tip Installation, page 17. - Page 24 Cleanup Place Prime/Spray valve in PRIME posi- 13. While continuing to trigger gun, quickly tion. move gun to redirect spray into a waste pail. Continue triggering gun into waste pail until flushing fluid dispensed from gun is relatively clear. Press ON/OFF switch to power ON. But- ton is illuminated when ON.
- Page 25 Cleanup 16. Press ON/OFF switch to power OFF. But- 20. Remove battery, see Battery Installation ton is not illuminated when OFF. and Removal, page 11. 21. Wipe sprayer, hose, and gun with a rag soaked in water. ™ 17. Clean filters. See Cleaning InstaClean Fluid Filter, page 26.
-
Page 26: Cleaning Instaclean Fluid Filter
Cleanup Clean the Gun ™ Cleaning InstaClean Fluid Filter Perform Pressure Relief Procedure, page 12, and remove battery, see (Optional) Battery Installation and Removal, page 11. The InstaClean Fluid Filter prevents particles from entering paint hose. After each use, If optional gun filter is installed, clean remove and clean it to ensure peak gun fluid filter with water or flushing performance. -
Page 27: Storage
Storage Storage With proper storage, the FieldLazer will be Place Prime/Spray valve in PRIME ready to use the next time it is needed. position. Always circulate Pump Armor storage fluid through system after cleaning. Water left in sprayer will corrode and damage pump. Follow Cleanup, page 23, and Cleaning ™... -
Page 28: Quick Reference
Storage Quick Reference Name Description Striper power switch Turns sprayer ON and OFF. Pressure control knob Increases (clockwise) and decreases (counter-clockwise) fluid pressure in pump, hose, and spray gun. To select function, align symbol on pressure control knob with setting indicator, page Sprayer gun control Trigger located on sprayer handle that remotely operates gun trigger. -
Page 29: Maintenance
• See Pump Removal, page 29 and Pump Installation, page 31, or consult NOTICE a Graco authorized retailer, distributor, or service center. Protect the internal drive parts of this sprayer from water. Openings in shroud allow cooling of mechanical parts and Pump Removal electronics inside. - Page 30 Maintenance Inlet Valve Removal Slide pump assembly off the mounting pins. An integrated tool is included in the frame to remove the inlet valve assembly from the pump. If you suspect that the inlet valve is clogged or stuck, remove the valve assembly and clean or replace.
- Page 31 Maintenance Clean any debris and dried paint from Swing easy access door pump door the cavity and replace the ball and closed while pushing the entire door spring. Tighten inlet valve to pump towards the inlet end of the pump. using integrated tool on the frame.
-
Page 32: Troubleshooting
If paint has hardened in pump. See Pump Removal, page 29. If motor does not turn with pump repaired, consult a Graco authorized retailer, distributor, or service center. Motor or control is damaged. Consult a Graco authorized retailer, distributor, or service center. - Page 33 See Inlet Valve Removal, page 30. Make certain the outlet ball moves free in the housing before replacing. Prime/Spray Valve is worn or Take sprayer to Graco authorized obstructed with debris. service center. 3A9002A...
- Page 34 Troubleshooting Problem Cause Solution Pump is primed, but can not Spray tip may be partially Clear spray tip clog. See, Clear achieve good spray pattern. clogged. Tip Clog, page 22. Reversible spray tip is in UNCLOG Rotate arrow-shaped handle on position.
- Page 35 Choose spray tip with narrower fan. Make sure gun is close enough to surface. Fan pattern varies dramatically Pressure control switch is worn Take sprayer to Graco authorized while spraying. and causing excessive pressure service center. variation. Cannot trigger spray gun.
-
Page 36: Parts
FieldLazer ES100 Parts FieldLazer ES100 Parts Ref. Torque Ref. Torque Ref. Torque Tighten nut, back off 1/4 - 90-110 in-lb (10.2-12.4 N•m) 40-50 in-lb (4.5-5.6 N•m) 3/8 to allow free rotation 180-220 in-lb (20.3-24.9 115-135 in-lb (13-15.3 N•m) Hand tighten N•m) - Page 37 FieldLazer ES100 Parts List FieldLazer ES100 Parts List Ref. Part Description Qty. Ref. Part Description Qty. 15F645 HANDLE, field marker 115077 PAIL, plastic 116139 GRIP, handle 115489 CLAMP, drain tube 111017 BEARING, flange 19D359 FITTING, barb, 1/4 in. NPT 1...
- Page 38 ES100 Airless Sprayer Module Parts ES100 Airless Sprayer Module Parts Ref. Torque Ref. Torque Ref. Torque 110-120 in-lb (12-14 N•m) 35-45 in-lb (4-5 N•m) 30-35 in-lb (2.4-4 N•m) 23-27 in-lb (2.6-3 N•m) 8-10 in-lb (0.9-1.1 N•m) 80-90 in-lb (9-10.2 N•m) 3A9002A...
- Page 39 ES100 Airless Sprayer Module Parts List ES100 Airless Sprayer Module Parts List Ref. Part Description Qty. Ref. Part Description Qty. 19D435 Model 25U542 20A066 KIT, motor, includes 34 19D437 Model 25U543 17J869 KIT, gear and yoke, 19D439 Model 25U544 includes 5 57▲...
- Page 40 Pump Assembly Parts Pump Assembly Parts Ref. Torque Ref. Torque Ref. Torque 140-160 in-lb (15.8-18 N•m) 222-280 in-lb (25-31.6 N•m) 270-330 in-lb (30.5-37.3 N•m) 320-380 in-lb (36.2-43 N•m) 30-35 in-lb (3.4-4 N•m) 180-220 in-lb (20.3-24.9 N•m) 3A9002A...
- Page 41 Pump Assembly Parts List Pump Assembly Parts List Ref. Part Description Qty. Ref. Part Description Qty. 24Y327 KIT, repair outlet, 17G447 HOUSING, pump includes 12, 13 17D364 GUIDE, ball 17J880 KIT, outlet valve repair 128336 SPRING, compression includes 42 105445 BALL, 0.5 in.
- Page 42 Sprayer Shield Parts and List Sprayer Shield Parts and List 117a 117b 108b 108f 108g 108a 108d 108d 109b 109a 109c 109d 109e ti5713f Ref. Part Description Qty. Ref. Part Description Qty. 287529 KIT, gun holder 243011 GUN, spray, SG2, includes 109a GUN HOLDER optional filter 288749...
-
Page 43: Wiring Diagrams
Wiring Diagrams Wiring Diagrams 3A9002A... -
Page 44: Technical Specifications
Technical Specifications Technical Specifications FieldLazer ES100 Metric Sprayer Maximum fluid working pressure 1750 psi 12.1 MPa, 121 bar Maximum Delivery 0.30 GPM 1.1 LPM Maximum Tip Size 0.021 in. 0.053 mm Fluid Outlet npsm 1/4 in. 1/4 in. Power Requirements See page 2 for power requirements. -
Page 45: Graco Standard Warranty
With the exception of any special, extended, or limited warranty published by Graco, Graco will, for a period of twelve months from the date of sale, repair or replace any part of the equipment determined by Graco to be defective. This warranty applies only when the equipment is installed, operated and maintained in accordance with Graco’s written recommendations. -
Page 46: Graco Information
Graco Information Graco Information For the latest information about Graco products, visit www.graco.com. For patent information, see www.graco.com/patents. TO PLACE AN ORDER, contact your Graco distributor or call 1-800-690-2894 to identify the nearest distributor. 3A9002A... - Page 47 Graco Information 3A9002A...
- Page 48 All written and visual data contained in this document reflects the latest product information available at the time of publication. Graco reserves the right to make changes at any time without notice. Original instructions. This manual contains English. MM 3A9002...