Table of Contents
Advertisement
Quick Links
Advertisement
Table of Contents

Related Manuals for Pioneer Elite PRB-19RW


Summary of Contents for Pioneer Elite PRB-19RW
- Page 1 COMPACT DISC RECORDER PD-F19 PDR-19RW Operating Instructions...
- Page 2 IMPORTANT CAUTION RISK OF ELECTRIC SHOCK DO NOT OPEN The lightning flash with arrowhead symbol, within CAUTION: The exclamation point within an equilateral an equilateral triangle, is intended to alert the TO PREVENT THE RISK OF ELECTRIC SHOCK, DO triangle is intended to alert the user to the presence user to the presence of uninsulated "dangerous NOT REMOVE COVER (OR BACK).
- Page 3 A damaged power cord can cause a fire or give you an electric shock. Check the power cord once in a while. When you find it damaged, ask your nearest PIONEER authorized service center or your dealer for...
- Page 4 Hi-bit Legato Link Conversion Pioneer's unique Hi-bit Legato Link technology enhances sound quality on two fronts. First, it extends the effective frequency range of by continuously analyzing the digital data and intelligently adding back in high frequencies lost in the recording process.
-
Page 5: Table Of Contents
Contents Before You Start ..............6 Checking What's in the Box ............6 Using this Manual ................. 6 Putting the Batteries in the Remote Control ......... 6 Hints on Installation ..............7 Maintaining Your CD Recorder ............7 About CD, CD–R and CD–RW Discs ..........8 Connecting Up .............. -
Page 6: Before You Start
Before You Start Checking What’s in the Box Make sure that you’ve received the following supplied accessories with your PDR–19RW CD Recorder: Two ‘AA’ size R6P Remote Two sets of audio cords AC power cord batteries control unit ❖ Also included in the box is your warranty card and this instruction manual. -
Page 7: Hints On Installation
5 or 6 parts water, wring well, then wipe off the dirt. Use a nearest Pioneer authorized service center. Although lens cleaners for compact disc recorders are commercially dry cloth to wipe the surface dry. Do not use volatile... -
Page 8: About Cd, Cd-R And Cd-Rw Discs
'write once'. This means that having recorded something on CD-R CD-RW the disc it is permanent— it can't be ✔ ✔ Recordable Recordable re-recorded or erased. Pioneer markets the ✘ ✘ Erasable Erasable following blank discs: ✘ ✘... - Page 9 The PDR–19RW is designed for use with conventional, fully circular ’s only. Use of shaped ’s is not recom- mended for this product. Pioneer disclaims all liability arising in connection with the use of shaped ’s. Should a disc become marked with fingerprints, dust, etc., clean using a soft, dry cloth, wiping the disc lightly...
-
Page 10: Connecting Up
Connecting Up Connecting Up for Digital Playback & Recording The diagrams on this and the following page show match up the jack and the plug before inserting fully. When possible connections with various other components in connecting optical leads, take care not to bend the cable your system. -
Page 11: Connecting Up For Analog Playback & Recording
Connecting Up Connecting Up for Analog Playback & Recording Before you start, make sure that all the components are recorder (check the instruction manual that came with your switched off and disconnected from the wall outlet. amplifier if you’re unsure about which terminals to use). Next, connect this unit to your amplifier/receiver using the Using this set up you can make recordings from any other two sets of supplied audio leads—one set for playback,... -
Page 12: What's What
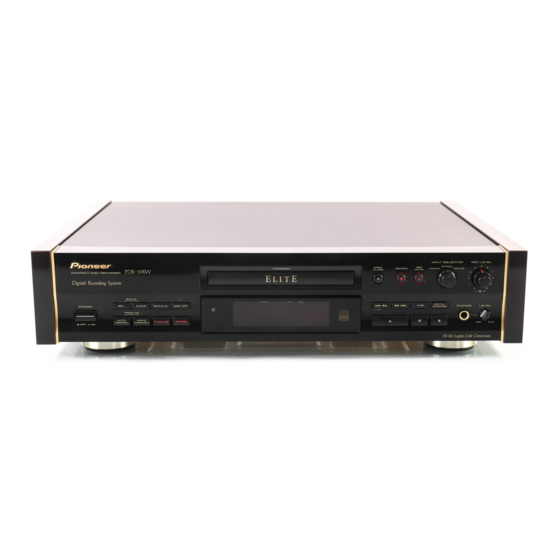
What’s What Front Panel ◊ÛB - ,/Bˆ Digital Recording System Hi-bit Legato Link Conversion 1 POWER switch (p.15) w TRACK NUMBER AUTO/MANUAL (p.28) Switches power to the unit on and off. Switches between automatic and manual track number- 2 SKIP ID SET (p.31) ing when recording a disc. -
Page 13: Display
What’s What Display 1 RPT / RPT–1 (p.16) q AUTO TRACK (p.28) Lights when disc repeat / track repeat mode is on. Lights when automatic track numbering is on during 2 PGM (p.25) recording. w REC (pp.20–24) Lights when program-play mode is active. 3 RDM (p.26) Lights to indicate recording or record-pause mode. -
Page 14: Remote Control
What’s What Remote Control 1 REC MUTE • (p.29) Records a blank section on a disc (for space between tracks, etc.) 2 TRACK NUMBER WRITE [MANUAL] (p.28) Press during recording to start a new track number (when in manual track numbering mode). 3 FADER (p.26, 30) Press to fade in or fade out during playback or recording. -
Page 15: Basic Playback And Recording
Basic Playback and Recording Switching On for the First Time The next few pages take you through switching on the PDR–19RW, playing discs and using the basic playback controls, and doing some basic recording. Before proceeding with this section you should have at least connected your recorder to an amplifier. -
Page 16: Choosing A Track To Play
Basic Playback and Recording Choosing a Track to Play You can select tracks to play in a couple of different ways. The track skip buttons jump through the tracks on a disc in sequence, either backwards or forwards. Alternatively, you can jump directly to a particular track number using the number buttons on the remote control unit. -
Page 17: Showing Disc Information
Basic Playback and Recording Showing Disc Information The PDR-19RW can display various kinds of disc and track information in both playback and recording modes. The TIME button (available from either the front panel or the remote) switches between the different display modes. Additionally, in stop mode, individual track information is available from the track skip buttons (4 and ¢). -
Page 18: Introduction To Cd Recording
Basic Playback and Recording Introduction to CD Recording Digital recording restrictions The PDR-19RW is designed to let you make extremely high quality digital recordings onto recordable compact This unit has been designed exclusively for recording and discs. For flexibility, you can use either rewritable discs playback of audio discs—... - Page 19 Basic Playback and Recording Digital recording from DAT Disc type display If you’re recording a tape that was recorded using the When you load a disc, the first thing the recorder does is machine's auto function, the s on the tape are to ascertain what kind of disc it is;...
-
Page 20: Automatically Recording One Track From A Digital Source
Basic Playback and Recording Automatically Recording One Track from a Digital Source If you want to record just a single track, or a few selected tracks, from another , an , this mode is ideal. The recorder starts and stops automatically, and there's no need to worry about recording levels—you'll get a perfect digital copy of the original. -
Page 21: Automatically Recording All Tracks From A Digital Source
Basic Playback and Recording Automatically Recording All Tracks from a Digital Source If you want to copy all the tracks from another , an , use this mode. Like the 1-track synchro recording mode, the recorder starts and stops automatically. When recording from , you can play the source in either normal play mode, or program play if you’d like the recorded tracks in a different order to the original. -
Page 22: Automatically Recording And Finalizing A Disc
Basic Playback and Recording Automatically Recording and Finalizing a Disc This is a variation on all-track synchro recording on the previous page. After all tracks on the source material has been recorded, the recorder automatically finalizes the disc. If you’re recording onto a –... -
Page 23: Manually Recording A Digital Source
Basic Playback and Recording Manually Recording a Digital Source If you are recording from a digital source other than —digital satellite, for example — synchro recording is not possible since there are no track numbers or start s to signal the start and end points of the recording. For these sources, use the manual recording method described here. -
Page 24: Recording An Analog Source
Basic Playback and Recording Recording an Analog Source Recording through the analog inputs follows much the same procedure as recording via a digital input. The only difference is that you’ll need to set the recording level. This determines how loud the recording will be when you play it back (for any given amplifier volume level). -
Page 25: Additional Playback Features
Additional Playback Features Programming the Track Order Programming the track order means telling the player precisely which tracks, and in what order, you want played. You can program a sequence of up to 24 steps (each step can contain either a track or a pause in the program), playing tracks more than once if you like. -
Page 26: Fading In And Fading Out
Additional Playback Features Fading In and Fading Out Pausing a disc during playback cuts the sound off abruptly. You can achieve a softer effect by using the fader feature to fade the track out over a few seconds before pausing. Likewise, when you resume playback, instead of a sudden burst of sound, you can have the player fade in the volume gradually. -
Page 27: Playing A Disc With Skip Ids
Additional Playback Features Playing a Disc with Skip IDs After recording a disc, you may decide that one or more of the tracks are unwanted. This may be due to a simple mistake or because a track didn't record successfully. Although you can't erase those tracks, you can set what are called 'skip s'. -
Page 28: Additional Recording Features
Additional Recording Features Checking a Disc for Digital Copy Protection (Serial Copy Management System) allows you SCMS to make digital copies of digital sources for your own use, Original source CD–R/ Digital but prevents further digital copies being made from the (CD, MD*, etc.) CD-RW copy... -
Page 29: Checking What's At The End Of A Disc
Additional Recording Features Checking What's at the End of a Disc You don't have to record a whole disc at once. Until you finalize the disc, further recording is possible from the end of the last track you recorded (assuming there are fewer than 99 tracks already on the disc). Here's how to check what's on the last recorded section of the disc before recording new material: Press ¶... -
Page 30: Monitoring A Digital Source
Additional Recording Features Monitoring a Digital Source If you have a set up like the figure below, you can monitor the source at any time, without changing the input function of the amplifier from the PDR–19RW (you could also monitor through a pair of headphones connected to the PDR–19RW's phones jack). When recording, or in record-pause mode, the digital source signal is always available for monitoring from the analog outs of the PDR–19RW. -
Page 31: Skipping Unwanted Tracks
Additional Recording Features Skipping Unwanted Tracks After recording a disc, you may decide that one or more of the tracks are unwanted. This may be due to a simple mistake or because a track didn't record successfully. Although you can't erase those tracks, you can set what are called 'skip s'. - Page 32 Additional Recording Features Clearing skip Press SKIP PLAY to switch off skip play mode. indicator in the display disappears. SKIP ON ❖ If the indicator did not light when you loaded the disc then SKIP ON there are no skip s present on that disc.
-
Page 33: Finalizing A Disc
Additional Recording Features Finalizing a Disc Before you can play a – on an ordinary player, the disc must go through a process called finalization. Once finalized, a – disc is no longer recordable, nor will you be able to set or clear skip s. -
Page 34: Erasing A Cd-Rw Disc
Additional Recording Features Erasing a CD–RW Disc Although more expensive than – discs, the great advantage of – is that the discs can be erased and reused. There are two basic erase options available: erase the last recorded track; and erase all tracks on a disc. If you haven’t yet finalized a disc, you can choose either option. - Page 35 Additional Recording Features Erasing all tracks on a disc Load a CD–RW. ◊ÛB - ,/Bˆ Press ERASE twice for a non-finalized CD–RW, Digital Recording System or once for a finalized disc. The recorder prompts you to confirm with the message ?, and the recorder function indicator blinks ALL TRACK ERASE orange to indicate erase standby mode.
-
Page 36: Additional Information
Confirm that you want to re-initialize the – p.35 PIONEER CD-R This display is for in-store demonstration purposes. The demonstration stops when any key or control is operated. If no key or control is pressed for about three minutes after the demonstration was stopped, it will start again. -
Page 37: Troubleshooting
A system error occurred, perhaps due Unplug the power cord and plug it in again. If the (blinking to noise or static electricity. same messages are displayed again, please contact display) a Pioneer authorized service center. Display messages relating to recording: Display Cause Remedy Reference... - Page 38 It’s often easy to mistake incorrect operation for trouble and malfunction of the unit. If you think there is something wrong with the component, check the points below first. If the problem persists, contact you nearest Pioneer-authorized service center and have them check over the unit.
-
Page 39: Specifications
Additional Information Specifications 1. General Model ................. Compact disc audio system Applicable discs .............. CDs, CD-Rs and CD-RWs Power supply ................AC 120 V, 60 Hz Power consumption ..................20 W Operating temperature ........+5 °C to +35 °C (+41 °F to +95 °F) Weight (without package) ............ -
Page 40: Letter To Customer
Should this product require service in the U.S.A. and you wish to locate the nearest Pioneer Authorized Independent Service Company, or if you wish to purchase replacement parts, operating instructions, service manuals, or accessories, please call the number shown below.