Table of Contents
Advertisement
Quick Links
Advertisement
Table of Contents

Related Manuals for Bushnell ONIX 110


Summary of Contents for Bushnell ONIX 110
- Page 1 ONIX 110 GPS NAVIGATOR Instruction Manual Model 36-1100 Lit# 98-1324/11-08...
-
Page 2: About This Manual
About This Manual Thank you for choosing the Bushnell ONIX 110 GPS Receiver. This manual will help you to familiarize yourself with this product and set it up to best suit your needs. Keep this manual for future reference. Copyright Information... - Page 3 OF THE FOLLOWING SOFTWARE LICENSE AGREEMENT. PLEASE READ THIS AGREEMENT CAREFULLY. Bushnell grants you a limited license to use the software embedded in this device (the “Software”) in binary executable form in the normal operation of the product. Title, ownership rights and intellectual property rights in and to the Software remain with Bushnell.
- Page 4 GPS equipment. All map data sources contain some level of inaccuracies or incomplete data. Bushnell strives to provide the most recent map information at a reasonable cost. Warning: This device is intended as a supplemental handheld navigation aide only. The user assumes all responsibility associated with the use of this product.
-
Page 5: Table Of Contents
Turning the GPS On/Off Viewing the Map Page Zooming In/Out Turning on the Backlight Adjusting the Screen Contrast Using the ONIX 110 in Simulation Mode Viewing the compass page Using Simple Mode Setting the Home Location Using the Navigation Feature... - Page 6 Nearest Search Using Waypoints Creating Waypoints Modifying Waypoints Deleting Waypoints Using Routes Creating a Route Editing Routes Using Trails Creating a Trail Log Viewing Trail Log Information Using the Shortcut On Feature Using Map Scale Feature Using the Set Location Feature Using Measure Distance Feature Viewing Trip Status Resetting Trip Data...
- Page 7 Table of Contents Setting the Timer Setting the Distance Setting the Pace Setting the Speed Setting the Lap Setting Auto Pause Miscellaneous Settings Start Training Viewing Training History Adjusting the User Settings Setting the Navigation Mode Changing the Map Direction Setting the Display Units Setting the DMS Format Setting the WAAS/EGNOS...
- Page 8 Transferring Data System Requirements Installing the USB Driver & PC Companion Making Connections Starting Data Transfer Using the PC Companion Program Features File Menu Show Menu Tools Menu List Menu Transfer Menu About Menu Context Menu Viewing Sports Logs Downloading Maps Downloading Trail Logs Downloading Waypoints and Routes Downloading Geocaching Coordinates...
-
Page 9: Product Overview
The sports mode acts as a personal training aid to help you set up training programs and calculate the calories you burn during training. The various features of the ONIX 110 make it your ideal companion for outdoor activities. -
Page 10: Package Contents
Software CD-Rom inc. AC Charger / USB cable * PC Companion/USB Driver/ PDF Manual * The USB cable is used both for battery charging (by connecting the AC Charger), and data transfer between the ONIX 110 and a computer (Windows PC only). - Page 11 ONIX 110 Features • Point tracking /Route recording • Object quick search • 4 gray level display • 20 parallel satellite-tracking channels for fast acquisition and reacquisition (TTFF) • Waterproof—ideal for outdoor sports • WAAS (North America) and EGNOS (Europe) GPS receiver with accuracy to 3 meters •...
-
Page 12: Main Features
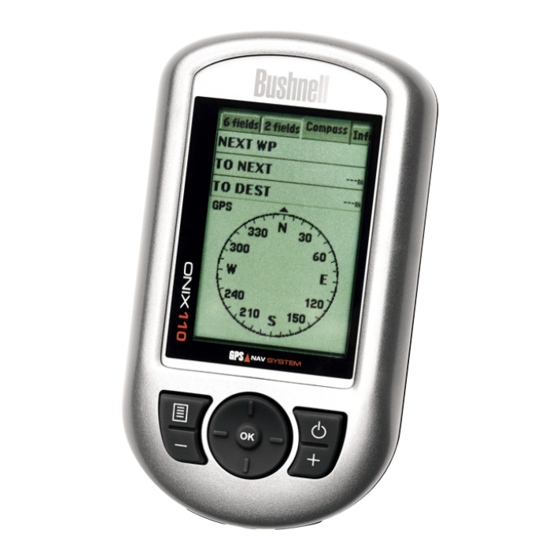
Hardware Components Take a moment to familiarize yourself with your ONIX 110 Handheld GPS Navigator. The following illustrations provide information about the components of the unit. Item Menu/ Backlight Zoom out Press to zoom out on a map page. Hold... -
Page 13: Rear View
Item Function Up arrow: Press to move the cursor up in Four way OSD menus or on the map page. Down naviga- arrow: Press to move the cursor down tion keys in OSD menus or on the map page. Left arrow: Press to move the cursor left in the OSD menus or on the map page. -
Page 14: Setting Up The Onix 110
Charging the ONIX 110 Battery Before using your ONIX 110 for the first time, the internal rechargeable battery must be fully charged, via the USB port on the unit. Connect the supplied USB cable to the ONIX 110, then connect the other end of the cable to the AC Charger. -
Page 15: Turning The Gps On/Off
Turning the GPS On/Off When the ONIX 110 is used indoors, the device may not receive a sufficient GPS signal and a warning message will appear on the screen. This warning message does not go off until GPS is turned off. -
Page 16: Zooming In/Out
4. Press OK to save the changes. The ONIX 110 features eight zoom levels. You can select from 50m, 100m, 200m, 500m, 1km, 2km, 5km, and 25km. -
Page 17: Using The Onix 110 In Simulation Mode
LCD contrast and to the left to decrease the contrast as required. Using the ONIX 110 in Simulation Mode In normal or navigation mode, the ONIX 110 tracks its position through satellite information. In simulation mode, the device stops acquiring data from the satellites. -
Page 18: Viewing The Compass Page
Fig. 8 Fig. 9 Fig. 10 Using the ONIX 110 in Simulation Mode (cont.) or Normal (for navigation mode) as required and press OK to save your settings (Fig. 7). Viewing the Compass Page (Fig. 8) The compass page displays information about the... -
Page 19: Setting The Home Location
Setting the Home Location To set your Home Location: 1. In Simple mode, press the Menu button to display the menu options. 2. Use the navigation keys to select Set Home and press OK (Fig. 11) . 3. You can set your home location with one of the following ways (Fig. -
Page 20: Using Advanced Mode
In Advanced mode, you can search for objects step by step or search for a “nearest” object. And you can set waypoints and create routes for important locations and store them in the ONIX 110 for future reference. Search Object You can search for objects including roads, hotels, banks, restaurants, etc. -
Page 21: Using Waypoints
Using Waypoints Read the following sections to learn how to utilize the waypoint function. NOTE: The ONIX 110 can save up to 1000 waypoints. Creating Waypoints To create a new waypoint using the map: 1. On the map page, position the cursor at the location where you want to set a waypoint. -
Page 22: Modifying Waypoints
Fig. 22 Fig. 23 Fig. 24 Creating Waypoints (cont.) keys to highlight each field and make changes as required. 7. Highlight the Active box and press OK to check the option. An active waypoint will be displayed on the map page. 8. -
Page 23: Deleting Waypoints
Deleting Waypoints To delete an unused waypoint: 1. On the map page, press the Menu button to display the menu options. 2. Use the navigation keys to select the My Waypoints option and press OK. 3. A list of all waypoints is displayed on the screen. The active waypoint which is currently used for navigation is denoted by an asterisk (*) sign next to it. -
Page 24: Creating A Route
Menu button to view the menu options. 10. Highlight the Set NAV option (Fig. 31) and press OK to confirm. The selected route is activated and the ONIX 110 switches to navigation mode. Editing Routes You can modify or delete all the routes that you created as required. -
Page 25: Using Trails
In the My Trails menu, you can configure trail settings, change the trail type, and view the trail information. Creating a Trail Log The ONIX 110 also features a trail function that records information about your trip to help you follow the same trail in the future. - Page 26 Fig. 35 Fig. 36 Creating a Trail Log (cont.) • Select Clear Trail to clear the current trail points (Fig. 35) . • Select Save Trail to save the current trail log to the system’s internal flash memory. Up to 8 trail logs can be saved.
-
Page 27: Viewing Trail Log Information
and the trail log setting will automatically be set to Show ON. If you select Wrap or Fill, the trail log setting will automatically be set to Show Off. Viewing Trail Log Information To view trail log information: 1. In Advanced mode, press the Menu button to display the menu options. -
Page 28: Using The Set Location Feature
Fig. 39 Fig. 40 Fig. 41 Using the Set Location Feature The Set Location feature enables the user to view a specified location where the user utilizes frequently. It can automatically go to the location you specified instead searching for it on the map. To enable the Set Location feature: 1. -
Page 29: Resetting Trip Data
1. From the map page, press the Page button to view the trip status information. 2. Use the navigation keys to toggle between the 6 fields (Fig. 41) and 2 fields (Fig. 42) tabs and choose the information you want to view: •... -
Page 30: Moving To The Next Waypoint
Fig. 45 Fig. 46 Fig. 47 Fig. 48 Changing the Fields (cont.) to display the menu options. 2. Highlight the Change Field option and press OK (Fig. 44) 3. Select the field you want to change and press OK to view the available options (Fig. 45) : •... -
Page 31: Using Geocaching Mode
Cache List (Fig. 50) . 3. Select a box to set up the location coordinates. You can set up to 3 cache boxes on the ONIX 110. 4. Use the navigation keys to highlight the field you want to change such as name, comment, coordinates, and radius. -
Page 32: Viewing The Geocaching Page
Press the Menu button again and select Log Continue to resume recording the trail log. Using Sports Mode The ONIX 110 features a sports mode which allows users to set up a training session and record their performance for post exercise evaluation. Training Setup... -
Page 33: Training Setup
time, distance, pace, speed, lap when you are taking a walk, jogging, or cycling, and view your exercise performance afterwards. Setting the Timer To set up the timer: 1. In Sports mode, press the Menu button to display the menu options. 2. -
Page 34: Setting The Speed
Fig. 58 Fig. 59 Setting the Pace (cont.) 2.Select Training Setup and press OK to display the menu options. 3. Highlight Pace and press the OK button. 4. Use the navigation keys to select the field you want to change and press the OK button. 5. -
Page 35: Setting Auto Pause
and press OK to confirm. 5. Use the navigation keys to adjust each field and press OK to confirm. 6. Highlight the √ option and press OK button to save changes (Fig. 60) . A message will pop up to inform the user when a lap has been completed. -
Page 36: Miscellaneous Settings
Fig. 63 Fig. 64 Fig. 65 To configure miscellaneous settings: 1. In Sports mode, press the Menu button to display the menu options. 2. Select Training Setup and press OK to display the menu options. 3. Highlight Misc. and press the OK button. 4. -
Page 37: Start Training
Start Training After you have configured training settings, you can start the training session and have your sports track and performance recorded. To start a training session: 1. On the map page, press OK to start training. The “Start Training Log” message pops up (Fig. 65) . The icon at the bottom of the screen indicates training is in progress. -
Page 38: Adjusting The User Settings
OK to confirm. Adjusting the User Settings The User Settings menu enables you to customize the ONIX 110 according to your needs. To view the system settings, do the following: 1. Press the Menu button twice to display the main menu and scroll to the System Settings option. - Page 39 North Up, the map will always display with north at the top of the screen. When set to Track Up, the map will rotate as the ONIX 110 is rotated and a North Indicator appears on the screen. To set the Map Direction: 1.
-
Page 40: Changing The Map Direction
Setting the DMS Format DMS format defines how Degrees, Minutes, and Seconds are displayed. You can either set the ONIX 110 to display degrees followed by minutes and fractions of a minute, or you can set it to display degrees and minutes followed by seconds and fractions of a second. -
Page 41: Setting The Waas/Egnos
5. Press OK to display the available settings. 6. Use the up/down navigation keys to select a setting (Fig. 76) . 7. Use the up/down navigation keys to highlight √ and press OK. Setting the WAAS/EGNOS To enable/disable the WAAS/EGNOS feature: 1. -
Page 42: Setting The Backlight
7. Use the up/down navigation keys to highlight √ and press OK. Setting the Startup Page You can choose to display or hide the startup page when turning on the ONIX 110. To enable/disable the startup page: 1. Press the Menu button twice to display the main menu. -
Page 43: Setting The Time
7. Use the up/down navigation keys to highlight √ and press OK. Setting the Time The local time can be set on the ONIX 110 using the Time setting function. Local time is set by entering the offset from Greenwich Mean Time. For instance, if... -
Page 44: Resetting To Factory Defaults
Fig. 82 Fig. 83 Fig. 84 Making a Cold Start (cont.) the previous, obsolete data from the memory. The Cold Start feature enables you to restart navigation by acquiring fresh positioning information from the available satellites as follows: 1. Press the Menu button twice to display the main menu. -
Page 45: Transferring Data
Install the software before connecting the ONIX 110 to your computer. Insert the supplied PC Companion CD-ROM into your PC’s CD Drive. When the “Getting Started with your ONIX 110 GPS” screen opens, click anywhere in the “PC Companion” box. Follow the on-screen directions to install the software on your PC, including the USB driver for the device, and US/Canadian base maps. -
Page 46: Making Connections
NOTE: Make sure that the USB cable is working properly and connected correctly to the ONIX 110 and the PC. If it is not, an error message will be displayed on the PC’s screen. You must connect the ONIX 110 to the PC and use the PC Companion program to upload or download data. -
Page 47: Using The Pc Companion Program
Using the PC Companion Program After connecting the ONIX 110 to the PC (see “Making Connections”) and setting it up with the Connect to PC menu (see “Uploading Data”) to select the type of data transfer, run the PC Companion program to start data transfer. -
Page 48: File Menu
File Menu Click File | Open to open map card files (*.ard) or map list files (*.arl, which contains a list of several map card files). Select a map list file (*.arl) from the File Open menu and click OK. The selected map file opens and the roads and points of interests are displayed on the map. -
Page 49: Tools Menu 49~50
• Display Icons – enables you to choose which points of interests are displayed on the map. You can select various types of locations (see list below) to be displayed on the map by selecting the required check boxes. • Show/Hide | My Trails – displays or hides details of a trail log (*.trl). •... - Page 50 Tools Menu (cont.) as a waypoint. You are prompted to specify the file in which you want to save the waypoints. Click Open to use an existing file or New to open a new file, specify the location to save the waypoint file and click Save. A new waypoint screen appears.
-
Page 51: List Menu
4. After adding all the required files, a map list file (*.arl) is created. Transfer Menu The transfer menu enables you to transfer data such as maps, trail logs, and waypoints and routes between the ONIX 110 and your host PC. -
Page 52: About Menu
(*.wpr) to ONIX 110. •PC->GPS | Geocaching – downloads geocache files (*.geo) to the ONIX 110. •GPS->PC | My Trails – uploads trail logs (*.trl) from the ONIX 110 to a host PC. •GPS->PC | Waypoints and Routes – uploads waypoint and route files (*.wpr) from the ONIX 110 to a host PC. -
Page 53: Viewing Sports Logs
2. The Open dialog window opens. Locate the desired map file (*.are) and click Open to copy a new map to the ONIX 110. 3. The selected map file is copied to the internal memory of the ONIX 110 through the USB cable. The correct USB port will be detected... -
Page 54: Downloading Trail Logs
Open to copy the trail log to the ONIX 110. 3. The selected trail log file is copied to the internal memory of the ONIX 110 through the USB cable. The correct USB port will be detected automatically. Download status is displayed on the screen while downloading is in progress. - Page 55 3. The selected geocaching file gets copied to the internal memory of the ONIX 110 through the USB cable. The correct USB port will be detected automatically. Download status is displayed on the screen while downloading is in progress. Uploading Data...
-
Page 56: Troubleshooting
What do I do to return to my current position on the map page after I have moved the map? The ONIX 110 fails to locate my current position Troubleshooting Possible Solution Make sure that you hold the power button for two seconds to turn it off. -
Page 57: Specifications
Item Navigation Performance Accuracy Dynamic Conditions Interface Physical Operating Temp. * The specifications are subject to change without notice. Specifications Description •Waypoints: Max. 1000 waypoints with name (symbol) coordinate and remarks •Route: 50 reversible and editable routes up to 150 waypoints each •Trail log: 8 tracking logs with 2500 points each Acquisition Time: •Cold Start: within 42 seconds... -
Page 58: Fcc Compliance Statement
The ONIX does not contain any user-serviceable parts. Repairs should only be made by an Authorized Bushnell repair center. Unauthorized repairs or modifications could result in permanent damage to the equipment, and will void your warranty and your authority to operate this device under Part 15 regulations. -
Page 59: One Year Limited Warranty
You may have other rights which vary from country to country. IN NO EVENT SHALL BUSHNELL BE LIABLE FOR ANY INCIDENTAL, SPECIAL, INDIRECT OR CONSEqUENTIAL DAMAGES, WHETHER RESULTING FROM THE USE, MISUSE, OR INABILITY TO USE THIS PRODUCT OR FROM DEFECTS IN THE PRODUCT. - Page 60 Customer Service: (800) 423-3537 www.bushnell.com ©2008 Bushnell Outdoor Products...