Viessmann Solar-Divicon PS10 Installation And Service Instructions Manual
Hide thumbs
Also See for Solar-Divicon PS10:
- Installation and service instructions manual (25 pages)

Related Manuals for Viessmann Solar-Divicon PS10


Summary of Contents for Viessmann Solar-Divicon PS10
- Page 1 VIESMANN Installation and service instructions for contractors Solar-Divicon and solar pump assembly Solar-Divicon and solar pump assembly Please keep safe. 5838732 GB 2/2019...
- Page 2 ■ Never touch the hot surfaces of uninsulated pipes and fittings. Repair work Please note Repairing components that fulfil a safety func- tion can compromise the safe operation of the system. Replace faulty components only with genuine Viessmann spare parts.
-
Page 3: Safety Instructions
Installing non-authorised components and making non-approved modifications or con- versions can compromise safety and may inva- lidate our warranty. For replacements, use only original spare parts supplied or approved by Viessmann. - Page 4 Index Index Information Disposal of packaging ................Symbols ....................Product information ................Versions ....................■ Components ..................■ Preparing for installation Installation information ................10 Dimensions ..................10 ■ Installing the locking ring fittings ............10 ■ Clearances ..................... 10 Installation sequence Installing the Solar-Divicon ..............
-
Page 5: Disposal Of Packaging
Information Disposal of packaging Please dispose of packaging waste in line with statu- tory regulations. Symbols Symbol Meaning Reference to other document containing further information Step in a diagram: The numbers correspond to the order in which the steps are carried out. Warning of material losses and environ- mental pollution Live electrical area... - Page 6 Information Product information (cont.) Solar control unit Circulation pump Without Vitosolic 100, SDIO/SM1A elec- Multi stage Highly efficient, type SD1 tronics module with PWM control Solar pump assembly — — — — — Components ■ Pre-assembled and sealed valve and safety assem- ■...
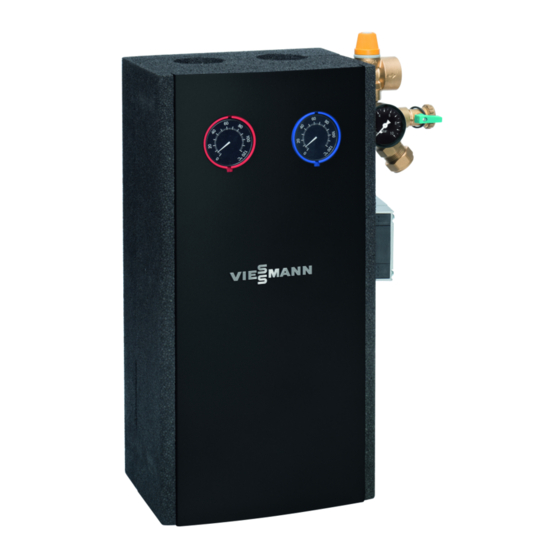
- Page 7 Information Product information (cont.) Fig. 1 Solar-Divicon Drain valve Solar pump assembly Flow indicator Thermometer Air separator Safety assembly Fill valve Circulation pump Expansion vessel connection Shut-off valves RT Return Non-return valves FL Flow Shut-off valve...
- Page 8 Information Product information (cont.) Function of the shut-off and non-return valves Left Flow line Right: Return line Operating position Vertical position Filling/flushing 90° 45° FL ball valve rotated clockwise by 45° RT ball valve rotated clockwise by 90° Drain outlet 45°...
- Page 9 Information Product information (cont.) Air separator Fig. 4 Air vent valve Hose connection...
- Page 10 Preparing for installation Installation information Dimensions Solar-Divicon Solar pump assembly Fig. 6 Fig. 5 Installing the locking ring fittings ■ All pipes must be cut at right angles and deburred. ■ Initially tighten union nut by hand, then tighten with Insert support sleeves into pipework.
-
Page 11: Installation Sequence
Use only bronze, brass or stainless steel fittings, ■ ■ unsuitable for direct contact with swimming pool copper or stainless steel pipes or Viessmann stain- water. less steel solar circuit pipes for the installation. ■ Every time the system is drained, flush the system Use hemp only in conjunction with pressure and tem- with heat transfer medium. - Page 12 Installation sequence Installing the Solar-Divicon (cont.) Ø10 Fig. 7 1. After you have removed the upper insulation shell, 9. Versions: remove the cardboard transport protection. Installation with copper pipes ■ Insert the support sleeves into the solar circuit 3. Remove the flow and return lines to make installa- pipes and secure with valve connections.
-
Page 13: Electrical Connections
Installation sequence Installing the Solar-Divicon (cont.) Information on the Solar-Divicon, type PS10 with solar control unit For maintenance and service work, the solar control unit can be hooked into the side of the circulation pump. Electrical connections Version with solar control unit: ■... - Page 14 Installation sequence Installing the solar pump assembly Observe the clearances on page 10. Ø10 Fig. 8 2. Remove the return line to make installation easier. 6. Versions: If you are installing a Solar-Divicon, type P20, ■ Installation with copper pipes remove the spring clip before removal.
-
Page 15: Replacing The Circulation Pump
Installation sequence Installing the solar pump assembly (cont.) Electrical connections Route the connecting cable for the circulation pump Solar control unit installation and service instruc- downwards through the cable trunking and connect it tions to the solar control unit. High limit safety cut-out (accessories) Systems with DHW heating: High limit safety cut-out installation instructions A high limit safety cut-out (accessories) must be instal-... - Page 16 Installation sequence Replacing the circulation pump (cont.) Pump curves 3-stage circulation pump Pump rate in m³/h 16.7 33.2 41.7 Pump rate in l/min Fig. 10 Pressure drop curve Head at output stage I Head at output stage II Head at output stage III HE circulation pump with PWM control, types PS10 and P10 Pump rate in m³/h 16.7...
- Page 17 Installation sequence Replacing the circulation pump (cont.) HE circulation pump with PWM control, types PS20 and P20 Pump rate in m³/h 16.7 33.2 41.7 Pump rate in l/min Fig. 12 Pressure drop curve Max. delivery head LED on the HE circulation pump Meaning Cause Remedy...
- Page 18 Installation sequence Replacing the circulation pump (cont.)
-
Page 19: Ordering Parts
Parts lists Ordering parts The following details are required when ordering parts: ■ Serial no. (see type plate ■ Assembly (from this parts list) ■ Position number of the individual part within the assembly (from this parts list) - Page 20 Parts lists Parts list for Solar-Divicon, type PS10 Without solar control unit 0017 0018 0006 0019 0007 0015 0013 0012 0008 0014 0009 0016 0011 0020 0005 0001 0001 0003 0010 0021 0002 0004 0022 0022 Fig. 13...
- Page 21 Parts list for Solar-Divicon, type PS10 (cont.) Pos. Part 0001 Insulation shell 0002 Gasket set 0003 Type plate for Solar-Divicon PS10 0004 Circulation pump connecting cable, 230 V~ 0005 Fixings 0006 Ball valve, return, DN 15 0007 Safety assembly 0008...
- Page 22 Parts lists Parts list for Solar-Divicon, type PS10, with SDIO/SM1A electronics module With SDIO/SM1A electronics module 0021 0022 0010 0004 0016 0012 0015 0017 0009 0014 0018 0013 0024 0011 0001 0006 0003 0001 0019 0002 0007 0008 0023 0020 0009 0026 0027...
- Page 23 Parts list for Solar-Divicon, type PS10, with… (cont.) Pos. Part 0001 Insulation shell 0002 SDIO/SM1A electronics module 0003 Type plate for Solar-Divicon PS10-SM1A 0004 Ball valve, flow, DN 15 0005 Connecting cable for collector circuit pump, 230 V~ 0006 Fixings 0007 Screws, SM1A...
- Page 24 Parts lists Parts list for Solar-Divicon, type PS10, with Vitosolic 100, type SD1 With Vitosolic 100, type SD1 0022 0021 0016 0005 0015 0010 0018 0011 0012 0017 0013 0023 0014 0028 0019 0002 0007 0029 0006 0001 0001 0003 0008 0026 0027...
- Page 25 Parts list for Solar-Divicon, type PS10, with… (cont.) Pos. Part 0001 Insulation shell 0002 Vitosolic 100, type SD1 0003 Type plate for Solar-Divicon PS10-SD1 0005 Ball valve, flow, DN 15 0006 Fixings 0007 Fixings for Vitosolic 100 0008 Cover panel...
- Page 26 Parts lists Parts for solar pump assembly, type P10 0006 0007 0012 0013 0008 0011 0014 0010 0005 0001 0001 0003 0016 0009 0004 0015 0002 Fig. 16...
- Page 27 Parts lists Parts for solar pump assembly, type P10 (cont.) Pos. Part 0001 Insulation shell 0002 Gasket set 0003 Type plate for solar pump assembly P10-HE 0004 Circulation pump connecting cable, 230 V~ 0005 Fixings 0006 Ball valve, return, DN 15 0007 Circulation pump 0008...
- Page 28 Parts lists Parts list for Solar-Divicon, type PS20 0017 0014 0018 0013 0003 0006 0019 0007 0016 0015 0008 0012 0004 0022 0005 0010 0012 0009 0020 0011 0021 0002 0001 Fig. 17...
- Page 29 Parts lists Parts list for Solar-Divicon, type PS20 (cont.) Pos. Part 0001 Connecting cable for circulation pump, 230 V~ 0002 Circulation pump connecting cable, PWM 0003 Ball valve, flow, DN 25 0004 Gasket set 0005 Air separator, DN 25 0006 Ball valve, return, DN 25 0007 Safety assembly...
- Page 30 Parts lists Parts list for pump assembly, type P20 0007 0010 0003 0013 0012 0004 0008 0016 0011 0005 0008 0014 0006 0009 0015 0001 0002 Fig. 18...
- Page 31 Parts lists Parts list for pump assembly, type P20 (cont.) Pos. Part 0001 Circulation pump connecting cable, 230 V~ 0002 Connecting cable for circulation pump, PWM 0003 Gasket set 0004 Circulation pump 0005 Flow indicator 0006 Fixings 0007 Locking ring fitting (2 pce) 0008 Insulation shell 0009...
- Page 32 Specification Specification Type PS10, P10 PS10, P10 PS20, P20 Wilo circulation pump ST15/6ECO PARA 15/7.0 PARA 15/7.5 Multi stage circula- High efficiency circulation pump with tion pump PWM control Rated voltage Power consumption Output stage I — — ■ Output stage II —...
-
Page 33: Final Decommissioning And Disposal
Appendix Final decommissioning and disposal Viessmann products can be recycled. Components and substances from the system are not part of ordi- nary household waste. For decommissioning the system, isolate the system from the power supply and allow components to cool down where appropriate. - Page 34 Keyword index Keyword index Air separator..............9 Parts – Pump assembly, type P10........26 – Pump assembly, type P20........30 Circulation pump replacement........15 – Type PS10...............20 Clearances..............10 – Type PS10, with SDIO/SM1A electronics module...22 Components..............6 – Type PS10, with Vitosolic 100, type SD1....24 –...
- Page 36 Viessmann Werke GmbH & Co. KG Viessmann Limited D-35107 Allendorf Hortonwood 30, Telford Telephone: +49 6452 70-0 Shropshire, TF1 7YP, GB Fax: +49 6452 70-2780 Telephone: +44 1952 675000 www.viessmann.com Fax: +44 1952 675040 E-mail: info-uk@viessmann.com...