Garmin GPSMAP 2006 Owner's Manual & Reference
Garmin gpsmap 2006: owners manual
Hide thumbs
Also See for GPSMAP 2006:
- Owner's manual (84 pages) ,
- Installation manual (8 pages) ,
- Install manual (2 pages)

Related Manuals for Garmin GPSMAP 2006


Summary of Contents for Garmin GPSMAP 2006
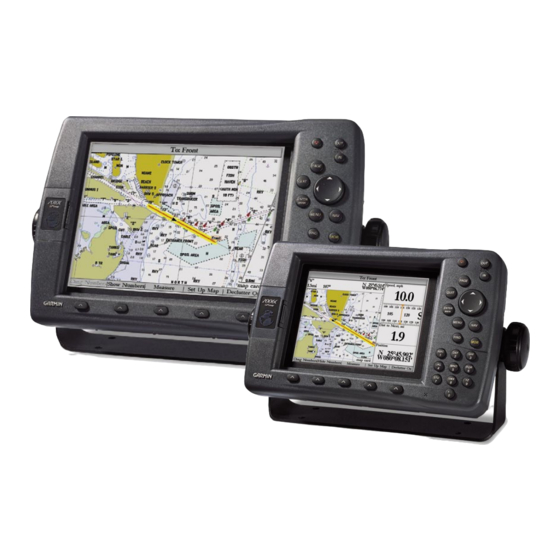
- Page 1 GPSMAP 2006/2010 chartplotters owner’s manual reference guide (GPSMAP 2006C and 2010C shown)
-
Page 3: Introduction
Garmin. Garmin hereby grants permission to download a single copy of this manual and of any revision to this manual onto a hard drive or other electronic storage medium to be viewed... -
Page 4: Customer Service & Product Registration
To get the most out of your new navigation system, take the time to go through this owner’ s manual and learn the operating procedures for your unit. This manual covers both the monochrome and color models of the GPSMAP 2006 and 2010, software version 5.2 and higher. This manual is broken down into two sections for your convenience. - Page 5 – and, as always, the user is responsible for their prudent use. Use the GPSMAP 2006/2010 at your own risk. To reduce the risk of unsafe operation, carefully review and understand all aspects of this Owner’ s Manual—and thoroughly practice operation using the simulator mode prior to actual use.
- Page 6 Garmin retains the exclusive right to repair or replace the unit or software or offer a full refund of the purchase price at its sole discretion. SUCH REMEDY SHALL BE YOUR SOLE AND EXCLUSIVE REMEDY FOR ANY BREACH OF WARRANTY.
- Page 7 Precision Performance • The GPSMAP 2006/2010 features a high-contrast, ten-level gray, 640 x 480 LCD display with adjustable contrast and backlighting. • The GPSMAP 2006C/2010C features a high resolution, 256-color, 640 x 480 color LCD display with adjustable brightness.
-
Page 8: Table Of Contents
Capabilities ... iv Table of Contents ... v “How To” Index ... vi Section One: Getting Started ... 1-13 Looking at the GPSMAP 2006/2010 ...1 Learning the Keypad ...2 Quick Start Tour - Learning the Basics ...3 Main Pages ...4 Activating the Simulator ...5... -
Page 9: How To" Index
Turn the unit on or off ......... .2, 3, 12 Initialize the GPS receiver (first time use) ......12-13 Adjust screen contrast or backlighting . -
Page 10: Section One: Getting Started
Data Card Slots Soft Keys Function Keys Power/Data Cable Port Data Entry Keys Getting Started Getting Started Looking at the 2006/2010 Main Page Sequence Mounting Knobs Data Port for future use... -
Page 11: Learning The Keypad
Getting Started Getting Started Main Page Sequence 2006/2010 Keys Function Keys Key — adjusts the map scale to show a smaller area with more detail. (Zooms in) Key — adjusts the map scale to show a larger area with less detail. (Zooms out) PAGE Key —... -
Page 12: Quick Start Tour - Learning The Basics
2006/2010 Basic Operation Before moving ahead to the features of the GPSMAP 2006/2010, you will need to learn basic opera- tions. Many times throughout this manual you will be prompted to press a key. When instructed, press, then release the key. If the key needs to be held down, the instructions will prompt you. -
Page 13: Main Page Sequence
first Main Page displayed is the Map Page. To scroll through the Main Display Pages: 1. Press the PAGE key. Each time the PAGE key is pressed the GPSMAP 2006/2010 will display the next Main Page. -
Page 14: Activating The Simulator
1. Press the MENU key. 2. With the ‘GPS Info’ tab displayed, at the lower left of the display will be a SOFT KEY label ‘Start Simula- tor’, press the SOFT KEY that corresponds with this option. Choose ‘No’ to the retail demonstration and press ENTER/MARK . -
Page 15: Creating Waypoints
Creating Waypoints There will be many times that you will need to enter data in the GPSMAP 2006/2010, an example is naming a waypoint. We have already taken a brief look at entering data, but let’ s practice some more. -
Page 16: Entering Data
2. Using the ARROW KEYPAD , highlight the ‘Information’ symbol and then press the ENTER/MARK key. We will enter a new waypoint name using the DATA ENTRY keys. Each DATA ENTRY key has mul- tiple characters assigned to it. Pressing the key one time will select the first character, twice will select the second character, three times the third character, and four times will select the number assigned to the key. -
Page 17: Soft Keys
Getting Started Getting Started Main Page Sequence Soft Keys The SOFT KEYS are located under the display on the front of the unit. The SOFT KEYS are used to change display options and show menus for the Main Page that is currently displayed. Labels showing the function of the SOFT KEYS are located along the bottom of the display. -
Page 18: Basic Navigation
Basic Navigation The main use of a GPS is to be able to navigate to a known position. We have already created a waypoint using the ENTER/MARK key. Let’ s create another waypoint using the Map Pointer and then begin navigation to that point. -
Page 19: Navigating To A Waypoint
5. With the ‘Go To’ button highlighted, press the ENTER/MARK key to begin navigation. For a GPS to navigate it has to be moving. When the Compass Page or Highway Page is displayed and the unit is in the Simulator Mode, you can set a simulated speed by pressing the ARROW KEYPAD ‘Up’. - Page 20 To head toward your destination, turn until the Bearing Pointer is realigned with the vertical line in the Compass Ring. The GPSMAP 2006/2010 will allow you to simulate a turn so you can see what will happen. To simulate a turn: 1.
-
Page 21: Initializing The Gpsmap 2006/2010
Point to your approximate location and press ENTER/MARK. Initializing the Receiver The first time you power up your new GPSMAP 2006/2010 and GPS 17 receiver, the receiver must be given an opportunity to collect satellite data and establish its present position. To ensure proper initializa- tion, the GPS 17 is shipped from the factory in AutoLocate mode, which allows the receiver to “find itself”... - Page 22 If the unit displays “Ready (2D) or (3D )” during this process, it is not necessary to initialize the unit. The GPSMAP 2006/2010 will now begin searching for the appropriate satellites for your region and should acquire a fix within a few minutes. When viewing the GPS Info, a signal strength bar for each satellite in view will appear on the bottom of the page, with the appropriate satellite number under each bar.
-
Page 23: Section Two: Reference
The GPSMAP 2006/2010 system (by default) powers up in the position mode, with your vessel centered on the map display. When sufficient map coverage is not available to keep the boat centered, the boat icon will move toward the edge of the display. - Page 24 When the cursor reaches the edge of the map, the unit may pause as it loads new map data. Using the Cursor The cursor allows you to pan away from your present position and scroll to other map areas around the world (even outside of your current detail coverage).
- Page 25 ‘overzoom’ warning will appear below the scale field. Map Page Options Many features of the GPSMAP 2006/2010 are SOFT KEY driven. Each of the main pages have SOFT KEY options, allowing you to custom tailor the corresponding page to your preferences and/or select special features that specifically relate to that page.
- Page 26 The GPSMAP 2006/2010’ s Map Page provides access to functions and features relating to the Map Page and the layout options. The available SOFT KEY options are Measure, Full Map/Show Data, Set Up Page, Set Up Map, and Declutter On/Off. Following are details on using each of these options.
- Page 27 • ETA AT DEST – Estimated Time of Arrival to final waypoint • ETA AT NEXT – Estimated Time of Arrival to next waypoint • GPS ACCURACY – Current accuracy of GPS receiver • HIGHWAY – Smaller version of the Highway Page •...
- Page 28 NOTE: COMPASS, HIGHWAY and POSITION will only be available on medium and large sized data fields. You may also choose to ‘split’ the default numbers to 4 smaller fields for more data or you may ‘merge’ the smaller fields back to their original size. All the Main Pages (except the Numbers and Active Route Pages) will have 4 medium sized fields, which may be split to a total of 16 small fields.
-
Page 29: Map Page Configuration
Reference Map Page Options Main Menu—Map Configuration Tab General Tab • Set Up Map— allows you to configure the map display to your preferences, including map detail, map orientation, automatic zoom, and various map items and points. The map set up option uses a ‘file tab’ feature, making it easier to organize the various settings for ease of use. - Page 30 Some types of data will only show up to certain zoom scales. (Spot Soundings On/Off only) Navaids Tab— Spot Soundings/Tide Stations/ Services Symbol Set— Auto, Garmin, NOAA, International: controls the desired navaid symbol set. Auto - BlueChart maps are drawn using symbols similar to the NOAA/NIMA standard.
- Page 31 Reference Main Page Sequence Nav Line Tab Track Tab Other Tab Nav Line Tab— Heading Line— On/Off: draws an extension from the end of the boat icon in the direction of travel. Bearing Line— On/Off: toggles the black/white line which points to the current navigation point. Course Line—...
- Page 32 4. To display detailed information and notes for each area, highlight the desired name and press ENTER/ MARK. To view the notes for that area, choose ‘Show Notes’. To scroll through the notes, you may either, highlight the notes, press ENTER/MARK and use the ARROW KEYPAD to scroll, up, down, left, and right or press the desired SOFT KEY scroll option.
-
Page 33: Sonar Page And Options
Depth Scale Sonar Page The Sonar Page is where your GPSMAP 2006/2010 becomes a powerful fishfinder. The top left of the screen contains information fields, while the Adjustments selection (see pg. 29) above the fields allows direct access to the settings most commonly changed while using the Sonar Page. The middle of the page contains a right-to-left moving sonar image of the water beneath your boat. - Page 34 The following options are available: • Pointer On/Off— allows you to reference sonar items and mark underwater waypoints. This makes it easier to find and use an object such as a stump for a future fishing location. When using this feature, the Sonar Page pauses.
-
Page 35: Sonar Page Configuration
Reference Sonar Page Options ‘Set Up Sonar’ Main Menu Tab Fish Symbols Off— All available information will be displayed. Suspended targets will display as fish symbols. Actual sonar information will also be displayed. Same as above with the target depth attached. Suspended targets display as fish symbols. - Page 36 Water Type— since sound waves travel through ‘Fresh’ and ‘Salt’ water at different rates, it is • necessary to select the ‘Water Type’ to ensure accurate readings on the unit. • Depth Number— controls the efficiency of the digital depth update rate.’ Fast Update’ will update quicker and is recommended for low-noise, deeper water (>50 ft.).
- Page 37 MARK on the speed field, enter a new speed and press ENTER/MARK. 4. You may also press the SOFT KEY labeled ‘Use GPS Spd’ to default back to ground speed or ‘Use No Cal’ to use the speed sensor’s uncalibrated speed.
-
Page 38: Adjustment Options
with and up and down arrow on each side of the name. There are 3 ways to access an adjustment option from the Sonar Page: • Press the ‘Adjustments’ SOFT KEY, to bring up a list of all options and their current settings. Use the ARROW KEYPAD to highlight an option and press ENTER/MARK or press the corresponding number on the DATA ENTRY KEYS. - Page 39 The left half shows a portion of the original picture at 1/2 depth scale. • 2X Zoom––Displays the 2X zoomed picture on the full GPSMAP 2006/2010 screen and does not show the original scale picture unless ‘Dual Frequency Display’ is set to ‘Split’, then a 50/200kHz split screen will show.
- Page 40 6. Whiteline— controls how the unit displays information about the bottom type (hard or soft). With the Whiteline ‘Off’, the bottom return will display as black (red). With Whiteline set at ‘Normal’ or 1- 100%, this option can be used to determine bottom hardness. See page 85 for more detail on this feature. 7.
-
Page 41: Compass Page And Options
Bearing Pointer Compass Page Whenever a Go To, Follow Track (TracBack), or Follow Route has been activated, the GPSMAP 2006/ 2010’ s Compass Page guides you to your destination with digital readouts and a graphic compass display, which includes a bearing pointer. Use this page when travelling at slower speeds, when making frequent directional changes, or where straight-line navigation is not possible due to obstructions or terrain. -
Page 42: Numbers Page And Options
17-19. Highway Page Whenever a Go To, TracBack, or Route has been activated, the GPSMAP 2006/2010’ s Highway Page will provide digital and graphic steering guidance to the destination. The right side of the Highway Page features user-selectable data fields that display useful navigation data. Additionally, a compass ribbon is displayed, across the top of the page, to show your current heading along with a dark, vertical bar (Orange on color models) that indicates the bearing to your course. - Page 43 • Saved Tracks— any saved track logs near the route. Active Route Page Whenever you have activated a route in the GPSMAP 2006/2010 system, the Active Route page will shows each waypoint of the active route, along with various, user-selectable types of data. For additional details on the Active Route Page, see page 52.
-
Page 44: Waypoints
You must have a valid position (2D or 3D) fix to mark your present position. (This can be determined by looking at the GPS tab on the Main Menu.) When you move the cursor over a map item, you will see a highlighted description of that... -
Page 45: Reviewing And Editing
Reference Creating/Editing Waypoints Map waypoint from non-map item Choose ‘Create Waypoint’ to use a map item for a new waypoint. Creating Waypoints Graphically Waypoints may also be quickly created from the map display, which allows you to ‘point and shoot’ at any map position to create a new waypoint. - Page 46 QUIT. Point Submenus The GPSMAP 2006/2010’ s Main Menu Page features two waypoint submenu tabs, ‘User’ and ‘Proxim- ity’, that let you manage a large number of waypoints quickly and efficiently. The submenu tabs also provide a continuously updated proximity waypoint alarm function that can be used to define an alarm circle around submerged hazards, shallow waters, etc.
- Page 47 Reference Waypoint Options Submenu Tabs Point List Status Waypoint List To access the Main Menu Page/Waypoint (Points) submenus: 1. Press MENU, then highlight the ‘Points’ tab using the ARROW KEYPAD, then highlight the desired submenu tab. User Waypoint List The first waypoint submenu list available from the ‘Points’ tab is the ‘User’ list, which displays a master list of all waypoints currently stored in memory.
-
Page 48: Proximity
To delete waypoints by symbol: 1. From the ‘User’ tab, press the ‘Delete By Symbol’ SOFT KEY. 2. Use the ARROW KEYPAD to highlight the symbol of the waypoint(s) to be deleted and press ENTER/MARK. 3. Press ENTER/MARK to confirm. You may also choose ‘Cancel’ or press QUIT to stop the deletion. To delete all waypoints or the entire waypoint list: 1. - Page 49 Reference Proximity Waypoints Proximity Waypoint List Proximity Waypoint Proximity Circle A circle (red) will appear showing the alert boundary for the proximity waypoints. To turn proximity alarms on or off: 1. Use the ARROW KEYPAD to highlight the field below “Proximity Alarm” and press ENTER/MARK. 2.
-
Page 50: Going To A Destination
(roads, rivers, cities, navaids, etc.), or a new map point (non-map item). If you are selecting a map item as the ‘Go To’ destination, the GPSMAP 2006/2010 automatically uses the name of the map item, but the point is not stored in the waypoint list. See page 36 for creating waypoints using map items. -
Page 51: Tracback
Reference TracBack Navigation ‘Go To MAP Point’ allows you to navigate to a spot on the map which is not a waypoint or map item. Press the ‘Save’ SOFT KEY to save an active track log. To activate an existing waypoint or map item as a ‘Go To’ from the map display: 1. - Page 52 3. If you wish to navigate from the end to the beginning (reverse) of your trip, press the ‘Invert’ SOFT KEY. Once a TracBack has been activated, the GPSMAP 2006/2010 takes the track log currently stored in memory and divides it into segments called ‘legs’. Up to 254 temporary ‘turns’ are created to mark the most significant features of the track log in order to duplicate your exact path as closely as possible.
-
Page 53: Mob
The MOB function allows you to quickly activate a navigation back to a location. The GPSMAP 2006/2010’ s Man OverBoard function (MOB) lets you simultaneously mark and set a course to a position for quick response to emergency situations. To activate the MOB function: 1. -
Page 54: Routes
The second way is to ‘Edit as Text’ from the Route Review page, which allows you to see a list of the waypoints as you create, review, or modify the route. All of the GPSMAP 2006/2010’ s route functions are accessed through the Main Menu page or the NAV key. - Page 55 Reference Creating Routes Choose the category you want to add a route point from. Choose a waypoint from either the ‘By Name’ or ‘Nearest From Current Position’ tab list. To create a route using text from the Route Review page: 1.
-
Page 56: Route List Page
Route List Page The GPSMAP 2006/2010 Route List page displays all the routes currently stored in memory, along with a descriptive name for each route. Once a route has been created, it can be activated and used for naviga- tion with the NAV key. A route may be followed in the same sequence as it was originally created, or you can invert the route and navigate from the end waypoint back to the beginning waypoint. -
Page 57: Reviewing And Editing
Reference Route Review Page/ Editing Routes Route Name Data Fields Route Points Data Totals Highlight a point and press ENTER/MARK to review it. Route Review Page Once you have created a route, the Route Review page allows you to review and modify the route displayed. - Page 58 4. If you are not inserting an existing waypoint, press ENTER/MARK to confirm the new waypoint. 5. Repeat steps 3 and 4 to insert additional waypoints, or press QUIT to finish. The GPSMAP 2006/2010’ s route edit mode also allows you to insert a new route waypoint in any route leg using the map cursor.
- Page 59 Reference Editing Routes Drag the route leg to an existing waypoint (shown), map item, or a blank spot on the map to create a new route point. Trip Planning Data Window • Add Before— Allows you to insert a waypoint into the list of route points or add a point(s) onto the end of the route.
- Page 60 • Plan— The Route Review and Active Route pages also display trip-planning information for each leg or the entire route. By entering your estimated speed, Fuel Flow, Departure Date, and Time, the unit calculates your trip information and display it in the data field on the far right of the Route Review and Active Route pages.
-
Page 61: Active Route Page
Active Route Page and SOFT KEY Options Active Route Page Whenever you have activated a route in the GPSMAP 2006/2010 system, the Active Route page shows each point (waypoint or map item) of the active route, with the point name, distance, and course. You may also select ETA, Fuel to point, Leg Distance, Leg Fuel, Leg Time, Sunrise and Sunset at point loca- tion, or Time To point for each point from your present position. -
Page 62: Find Feature
Find The FIND key allows you to search the units for user waypoints, map items, and any optional BlueChart or MapSource information loaded on a data card. By pressing the FIND key, the unit searches for items from your current location by default or you may also search from other locations. When you press FIND, a list of available items to search from appears. -
Page 63: Additional Information
Reference FIND Key Options Find Menu SOFT KEY options Additional Information Tabs Distance, Bearing, Coordinates of item Additional Additional Information Option Options Window Find Options Using the Find options, you may search from various map data and utilize a variety of nearest criteria for all items except waypoints. -
Page 64: Main Menu Page
“tab” format. The Main Menu page is avail- able from any page in the GPSMAP 2006/2010’ s system, and is accessed through the MENU key. See pages 6-8 for additional instructions changing settings and entering data. -
Page 65: Gps Info Tab
As soon as the GPS receiver has collected the necessary data from the best satellites in view to calculate a fix, the GPSMAP 2006/2010 status field will indicate a 2D or 3D status. The unit will then update the position, date, and time. - Page 66 WAAS satellites will be numbered 33 or higher when viewing the sky view on your GPSMAP 2006/2010. Initial reception of the WAAS signal may take up to 15-20 minutes, then 1-2 minutes afterwards. When WAAS differential correction has been received for GPS satellites (numbers 32 or below), ‘2D or 3D Differential’...
- Page 67 For DGPS beacon transmitter problems or to find the most updated list of fre- quencies and coverage areas, contact your local USCG, or see their web site at http://www.navcen.uscg.gov. The GPSMAP 2006/2010’ s GPS Info tab provides access to additional SOFT KEY options. The available SOFT KEY options are •...
- Page 68 3. Highlight the “Frequency” or “Bit Rate” field, press ENTER/MARK, then enter a frequency or bit rate. Press ENTER/MARK when done. Reference Main Menu: GPS Tab DGPS Setup Window You may also select ‘GPS Accuracy’ to display in any data field. See pages 16-18 for instructions changing data fields.
-
Page 69: Tide Tab
Reference Main Menu: Tide Tab Station Name Date Tide Chart Event Times Tide Tab You can select from a list of nearest stations. Tide Tab— shows a graphical chart that displays tide station information in a 24-hour span starting at midnight station time. - Page 70 To select the nearest tide station from your current location: 1. From the “Tide” tab, highlight the ‘At’ field and press ENTER/MARK. 2. Highlight the desired station of the list and press ENTER/MARK twice. If you are not within range of a tide station, you will see a message “None Found”. Use the ‘Nearest To Other’...
-
Page 71: Trip Tab
The moon phase displays the approximated current visible portion of the moon. You may display this data for your current GPS position or a point location. Also, you may select a different date and time, use the current date, or change the orientation of the skyview. -
Page 72: Tracks Tab
To change the skyview orientation to ‘Track Up’ or ‘North Up’: 1. From the Celestial tab, press the ‘Track Up’ or ‘North Up’ SOFT KEY as desired. Tracks Tab— lets you specify whether or not to record a track log (an electronic ‘breadcrumb trail’ recording of your path), define how it is recorded, or save track log data for future use. -
Page 73: Dsc Tab
DSC Tab— allows you to control the optional Digital Selective Calling (DSC) interface. Digital Selective Calling (DSC) uses marine VHF radio and Global Positioning System (GPS) technologies to transmit and receive location information. DSC is used by mariners to assist them in two major areas: Distress Calls and Position Reporting. - Page 74 Distress Call. In order to to obtain a Maritime Mobile Service Identity (MMSI) number, users must register their VHF radio with the FCC (Form 605). Garmin does not supply this number! Information to obtain this number can be found below.
- Page 75 When the Garmin GPSMAP 2006/2010 is connected to a VHF with DSC support, the GPS unit displays a Call List, Log, and a Directory available to store incoming information received from another user’ s DSC capable VHF/GPS combination.
-
Page 76: Dsc Directory
DSC Call List The DSC Call List displays the current calls received. The GPS can manage up to 50 calls. When ‘calls’ are received, they are updated constantly to give the most current information, even if the unit is left unat- tended. - Page 77 DSC users. DSC Setup Garmin chartplotters have the ability to turn DSC ‘On’ or ‘Off’. This option is beneficial for users who have more than one GPS chartplotter. If you only want DSC to display on a particular chartplotter, turn DSC off on the remaining Garmin chartplotters that support DSC.
-
Page 78: User Card Tab
MMSI number or the Name of the caller. User Card Tab— interface control for saving waypoints, routes, and tracks to a data card.When data is saved to a data card, it may be exchanged with other compatible units and Garmin’ s MapSource PC program. -
Page 79: Temp Tab
Reference Main Menu: Pages/Temp Tabs Temp Tab To select/deselect a main page: 1. Use the ARROW KEYPAD to highlight the box to the left of the page name. Press ENTER/MARK to select/ deselect that page. When a page is selected a ‘ ’ appears in the box. You must leave at least one page checked. -
Page 80: System Tab
• Setup Simulator— displays simulator options (only available when in simulator mode) See page 5. • Factory Setup— restores all settings to Garmin’ s original setup values for the entire unit. • Defaults— restores settings on System page to default values. -
Page 81: Units Tab
Reference Main Menu: Units Tab Units Tab Units Tab— defines Position Format, Map Datum, Heading, Distance, Speed, Altitude, Depth, and Temperature. The following settings are available: • Position Format— is used to change the coordinate system in which a given position reading is dis- played. - Page 82 Main Menu: Units Tab The Units tab settings will affect how navigation information is displayed on the GPSMAP 2006/2010. The ‘User’ datum is based on a WGS-84-Local datum and is an advanced feature for unlisted or custom datums. Setup is available for each by pressing the appropriate SOFT KEY option.
- Page 83 LORAN TD Feature The LORAN TD (Time Delay) feature eases the transition from using LORAN to using GPS. The GPSMAP unit automatically converts GPS coordinates to LORAN TDs for those who have a collection of LORAN fixes for favorite fishing spots and other waypoints recorded as TDs.
-
Page 84: Communication Tab
Because of this the unit can navigate to a TD coordi- nate anywhere in the world. For more information on Loran TDs, you may download Garmin’ s “Loran TD Position Format Hand- book” from the Garmin web site at http://www.garmin.com/support/userManual.jsp. -
Page 85: Advanced Nmea Output Setup
2. Use the ARROW KEYPAD to select the desired setting and press ENTER/MARK. To select a transfer mode: 1. Use the ARROW KEYPAD to select ‘Garmin Data Transfer’ in the ‘Serial Data Format’ field. 2. Highlight the ‘Transfer Mode’ field and press ENTER/MARK. -
Page 86: Alarms Tab
• Battery— sets an alarm to sound when the battery is reaching a critical state of discharge. • Differential GPS (DGPS) — DGPS alarm will sound when the unit loses a differential fix. • Accuracy — alarm will sound when the GPS position accuracy falls outside the user-set value. -
Page 87: Appendix A Time Offsets
Appendix A Time Offsets A simple way to determine your local time offset is how many hours you are behind or ahead of UTC (also called ‘Greenwich’ or ‘zulu’ time). Example: EST (Eastern Standard Time) is 5 hours behind UTC, so your offset would be -5. -
Page 88: Appendix B Messages
Arrival At Waypoint— You have arrived at the destination waypoint. Battery Alarm—Specified amount of input voltage has been detected. Can’t Unlock Maps— Data on data card is not unlocked for the unit. Contact your dealer or Garmin. Database Error— Tried to use an invalid or unavailable database point. - Page 89 Appendix B Off Course Alarm— You have exceeded the specified off-course distance. Messages Proximity Alarm— You have entered the alarm radius for the proximity waypoint indicated. Proximity Alarm Memory is Full— You have used all ten proximity waypoints. Proximity Overlaps Another Proximity Waypoint—The alarm radius specified overlaps the area speci- fied for another proximity waypoint.
-
Page 90: Appendix C Map Datums
Kerguelen Island Appendix C Map Datums Note that the GPSMAP 2006/2010’s built-in world-wide basemap is valid to 75º north and 60º south of latitude. The ‘User’ datum is based on a WGS-84-Local datum and is an advanced feature for unlisted or custom datums. To learn more, check your local library or on the world wide web for educational materials on datums and coordinate systems. - Page 91 Appendix C Map Datums Kertau 1948 West Malaysia, Singapore L. C. 5 Astro Cayman Brac Island Liberia 1964 Liberia 1964- Liberia Luzon Mindanao Luzon- Mindanao Island Luzon Philippine Luzon- Philippines (excluding Mindanao Isl.) Mahe 1971 Mahe 1971- Mahe Island Marco Astro Marco Astro- Salvage Isl.
-
Page 92: Appendix D: Navigation Terms
Appendix D Avg Speed— The average of all second-by-second speed readings since last reset. Navigation Terms Bearing (BRG)— The compass direction from your present position to a destination waypoint. Course— The desired course between the active ‘from’ and ‘to’ waypoints. Distance (Dist)—... - Page 93 Appendix D Speed— The current velocity at which you are travelling, relative to a ground position. Also referred Navigation Terms to as ‘ground speed’. Time To— The estimated time required to reach a Go To destination, or the next waypoint in a route. Also referred to as ‘estimated time en route’.
-
Page 94: Appendix E: Installing Data Cards
If you insert a data card and get a ‘card format not recognized’ message, try removing the card and reinserting it. If the card is still not recognized, contact the Garmin or your Garmin dealer for assistance. Data cards are not waterproof, should not be exposed to moisture or excessive static charges, and should be stored in the case supplied with the card. -
Page 95: Appendix F: Specifications/Interfacing
Position*: <15 meters (49 feet), 95% typical* Velocity: 0.05 meters/sec steady state DGPS (USCG) Accuracy: Position: 3-5 meters (10-16 feet) with optional Garmin DGPS receiver, 95% typical* Velocity: 0.05 meters/sec steady state DGPS (WAAS) Accuracy: Position: <3 meters (10 feet), 95% typical* Velocity: 0.05 meters/sec steady state... -
Page 96: Appendix G: Packing List/Accessories
Before installing and getting started with your unit, please check to see that your package includes the following items. If any parts are missing, please contact your Garmin dealer immediately. Standard Package: • GPSMAP 2006/2010 Unit • GPS 17 Antenna with 30’ cable •... -
Page 97: Appendix H: Understanding Sonar
This section is intended to help the novice user gain some understanding of how the GPSMAP 2006/2010 operates when combined with a GSD 20 Sonar Module and how it can help improve their fishing productivity. - Page 98 (200kHz frequency) approximately covers the area of a 6-foot diameter circle at a 30 foot depth. When using the GPSMAP 2006/2010 with GSD 20 in ‘Dual’ frequency mode, the unit transmits both 50kHz and 200kHz signals at the same time. The ‘Dual’ frequency capability of the GPSMAP 2006/2010 with GSD 20 allows you to have a large coverage area and still retain good bottom resolution.
-
Page 99: Understanding The Graph
Appendix H Understanding the Graph Remember that the sonar displays a 2-D picture of the underwater environment. The fish and tree could be located anywhere in the coverage area at that time. Understanding the Graph It is important to understand that the unit does not display a 3-D representation of the underwater environment. - Page 100 Whiteline The GPSMAP 2006/2010 with GSD 20 can help you to determine if the bottom is hard or soft. When the sonar soundwaves are reflected back by the bottom, a hard bottom will return a stronger signal than a soft bottom. A thin whiteline indicates a softer bottom while a thick whiteline indicates a harder bottom.
-
Page 101: Appendix I: Index
Follow Track ...42 Follow Route...52 Frequency (transducer)...31 Fuel Flow ...50 Full Screen Map (Maximize) ...18 Gain Adjustment...31 GPS Info Tab ...3, 12-13, 56-57 GPS Status ...12-13, 56-57 Go To Point ...10, 41 Going to a Destination ...10, 41 Heading ...73 Heading Line...22 Hide Numbers ...18... - Page 102 IN Key ...2 Initialization ...12-13 Installing Data Cards ...79 Interface Formats ...75-76, 86 Interfacing ...75-76, 86 Jump To Page ...69-70 Keel Offset...27 Keypad Usage ...2 Land Mode...20 Language Selection ...65 Local Time Offset ...69, 78 Loran TD ...74-75 Loran TD Setup ...75 Main Menu ...2, 4, 55-77 Main Menu Page ...55 Map Colors...20...
- Page 103 Appendix I Index Satellite Info...12-13, 56 Scale (Sonar)...27 Scroll (Sonar)...31 Serial Data Format ...76, 86 Serial Number ...iii Shallow Water Alarm ...77, 79 Show Numbers ...8, 19, 25 Show Sonar...25 Signal Strength Bars ...12-13, 56 Simulator ...5, 65 Simulator Speed ...10, 65 Size Split ...
- Page 104 For the latest free software updates (excluding map data) throughout the life of your Garmin products, visit the Garmin web site at www.garmin.com © 2001-2003 Garmin Ltd. or its subsidiaries Garmin International, Inc. 1200 East 151 Street, Olathe, Kansas 66062, U.S.A.