Viessmann Vitosol 200-T Installation Instructions Manual
Hide thumbs
Also See for Vitosol 200-T:
- Installation instructions manual (80 pages) ,
- Service instructions manual (24 pages) ,
- Service instructions for contractors (20 pages)
Table of Contents

Related Manuals for Viessmann Vitosol 200-T


Summary of Contents for Viessmann Vitosol 200-T
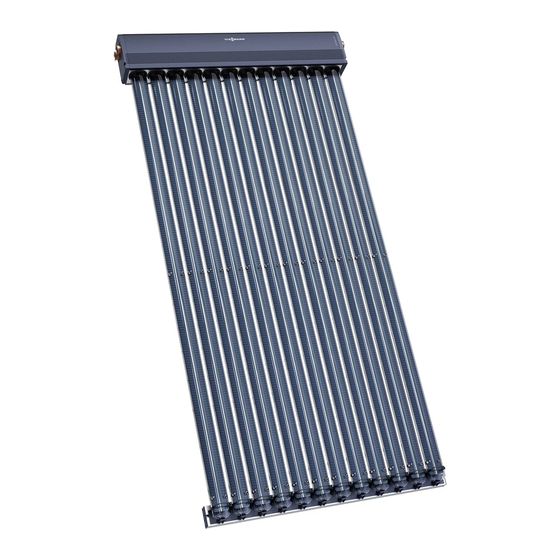
- Page 1 VIESMANN Installation instructions for contractors Vitosol 200-T Type SP2A Vitosol 300-T Type SP3B Vacuum tube collectors according to the heat pipe principle VITOSOL 200-T VITOSOL 300-T Dispose after installation. 5513 758 GB 11/2015...
- Page 2 Safety instructions Please follow these safety instructions closely to prevent accidents and material losses. Safety instructions explained Danger This symbol warns against the risk of injury. Please note This symbol warns against the risk of material losses and environmental pollution. Note Details identified by the word "Note"...
-
Page 3: Table Of Contents
■ Collector supports with variable angle of inclination ......54 ■ Level installation (only Vitosol 200-T) ............ 57 Installation on walls (only Vitosol 200-T) ..........61 Hydraulic connections ................63 Connecting the header casing ............63 ■ Fitting the connection set ..............64 ■... -
Page 4: Information Disposal Of Packaging
Disposal of packaging Disposal of packaging DE: Use the disposal system organised by Viessmann. Please dispose of packaging waste in line with statu- AT: Use the ARA statutory disposal system (Altstoff tory regulations. Recycling Austria AG, licence number 5766). CH: Packaging waste is disposed of by the HVAC contractor. -
Page 5: Intended Use
Intended use The appliance is only intended to be installed and operated in sealed unvented systems that comply with EN 12828 / DIN 1988, or solar thermal systems that comply with EN 12977, with due attention paid to the associated installation, service and operating instruc- tions. -
Page 6: Preparing For Installation Distribution Of Fixings On The Rafters
Distribution of fixings on the rafters Fixings: Example: ■ Rafter flanges (from page 8) ■ 3 collectors Rafter hooks (from page 15) ■ ■ Combination comprising 1 x 1.51 m Rafter anchors (from page 24) ■ 2 x 3.03 m ■... - Page 7 Distribution of fixings on the rafters (cont.) 3 collectors Combination Rafter spacing a in mm Rafters used 1, 2, 3, 6, 7, 9 ≤ 1 x 1.51 m 1, 2, 3, 5, 6, 8 ≤ 2 x 3.03 m 1, 2, 3, 4, 5, 7 ≤...
-
Page 8: Installation Sequence Pitched Roof Installation With Rafter Flanges
Pitched roof installation with rafter flanges For plain tiled and slate roofs Fig. 2 Rafter flange Seal Screws Mounting rail for vertical and horizontal installa- tion Vertical installation The vacuum tubes are positioned vertically to the roof ridge. Fig. 3 The tables from page 6 detail the rafters on which the rafter flanges should be mounted. - Page 9 Pitched roof installation with rafter flanges (cont.) Fig. 4 Fig. 5 90° Fig. 6...
- Page 10 Pitched roof installation with rafter flanges (cont.) 90° 90° Fig. 7...
-
Page 11: Horizontal Installation
Pitched roof installation with rafter flanges (cont.) 90° 90° Fig. 8 Continue with chapter "Hydraulic connections" (see page 63). Horizontal installation The vacuum tubes are positioned parallel to the roof ridge. Fig. 9... - Page 12 Pitched roof installation with rafter flanges (cont.) Combination mm d mm e mm f mm g 1053 1.51 m — — — 2061 1030 3.03 m — — — 1053 1053 1105 1630 1.51 m /1.51 m 1053 2061 1355 2385 1.51 m /3.03 m...
- Page 13 Pitched roof installation with rafter flanges (cont.) 90° Fig. 12 Rafter flange Mounting rail Tube retainer Rafter spacing k in mm Projection h in mm...
- Page 14 90° 90° 90° 90° 90° 90° Fig. 13 Note dimension b in the following table. Install the header casing offset against the tube Vitosol 200-T mm b retainer. This inclines the vacuum tubes towards the 1.51 m horizontal. 3.03 m...
-
Page 15: Pitched Roof Installation With Rafter Hooks
Pitched roof installation with rafter flanges (cont.) Ø9 90° Fig. 14 Note on step 12: Continue with chapter "Hydraulic connections" (see Use the centring groove on the back of the header page 63). casing as a drilling guide. Pitched roof installation with rafter hooks For tiled roofs Fig. -
Page 16: Fitting The Rafter Hooks
Pitched roof installation with rafter hooks (cont.) Fitting the rafter hooks Fitting rafter hooks applies to vertical and horizontal Please note collector installation. Take care to avoid breaking tiles. ■ Version I: The rafter hook must not be supported by the Fitting rafter hook onto counter batten with... -
Page 17: Vertical Installation
Pitched roof installation with rafter hooks (cont.) Fig. 17 Continue on page 17 or 20 Vertical installation The vacuum tubes are positioned vertically to the roof ridge. Fig. 18 The tables from page 6 detail the rafters to which the rafter hooks should be fitted. - Page 18 Pitched roof installation with rafter hooks (cont.) 90° 90° Fig. 19 90° 90° Fig. 20...
- Page 19 Pitched roof installation with rafter hooks (cont.) 90° 90° Fig. 21 Continue with chapter "Hydraulic connections" (see page 63).
-
Page 20: Horizontal Installation (Only Vitosol 200-T)
Pitched roof installation with rafter hooks (cont.) Horizontal installation (only Vitosol 200-T) The vacuum tubes are positioned parallel to the roof ridge. Fig. 22 Combination mm d mm e mm f mm g 1053 1.51 m — — — 2061 1030 3.03 m... - Page 21 Pitched roof installation with rafter hooks (cont.) 3 rafters are required for the overall width. Leave the centre rafter free. 90° Fig. 23 Rafter hook Mounting rail Tube retainer Rafter spacing k in mm Projection h in mm...
- Page 22 90° 90° 90° 90° 90° 90° Fig. 24 Note dimension b in the following table. Install the header casing offset against the tube Vitosol 200-T mm b retainer. This inclines the vacuum tubes towards the 1.51 m horizontal. 3.03 m...
- Page 23 Pitched roof installation with rafter hooks (cont.) Ø9 90° Fig. 25 Note on step 9: Continue with chapter "Hydraulic connections" (see Use the centring groove on the back of the header page 63). casing as a drilling guide.
-
Page 24: Pitched Roof Installation With Rafter Anchors
Pitched roof installation with rafter anchors For tiled roofs Vertical installation Rafter anchor Mounting rail Seal Plastic replacement tile if the existing tiles should not be trimmed to size. Use only on roofs with a pitch of at least 12°. Horizontal installation Rafter anchor Mounting rail... -
Page 25: Fitting Rafter Anchors
Pitched roof installation with rafter anchors (cont.) Fitting rafter anchors Rafter anchors are suitable for vertical and horizontal collector installation. Fig. 26 Note For spacing between rafter anchors, see chapter "Ver- tical installation" or "Horizontal installation" Rafter Batten... - Page 26 Pitched roof installation with rafter anchors (cont.) There are 2 installation options: ■ Using a plastic replacement tile Trimming the roof tiles with an angle grinder ■ Installation with plastic replacement tiles Fig. 27 Fig. 28...
- Page 27 Pitched roof installation with rafter anchors (cont.) Installation with trimmed tiles Fig. 29 Fig. 30...
-
Page 28: Vertical Installation
Pitched roof installation with rafter anchors (cont.) Vertical installation The vacuum tubes are positioned vertically to the roof ridge. Fig. 31 The tables from page 6 detail the rafters to which the rafter anchors should be fitted. 90° Fig. 32... - Page 29 Pitched roof installation with rafter anchors (cont.) 90° 90° Fig. 33...
- Page 30 Pitched roof installation with rafter anchors (cont.) 90° 90° Fig. 34 Continue with chapter "Hydraulic connections" (see page 63).
-
Page 31: Horizontal Installation (Only Vitosol 200-T)
Pitched roof installation with rafter anchors (cont.) Horizontal installation (only Vitosol 200-T) The vacuum tubes are positioned parallel to the roof ridge. Fig. 35 Combination mm d mm e mm f mm g 1053 1.51 m — — — 2061 1030 3.03 m... - Page 32 Pitched roof installation with rafter anchors (cont.) Fig. 36 3 rafters are required for the overall width. Leave the centre rafter free. 90° Fig. 37 Rafter anchor Mounting rail Tube retainer Rafter spacing k in mm Projection h in mm...
- Page 33 90° 90° 90° 90° 90° 90° Fig. 38 Note dimension b in the following table. Install the header casing offset against the tube Vitosol 200-T mm b retainer. This inclines the vacuum tubes towards the 1.51 m horizontal. 3.03 m...
-
Page 34: Pitched Roof Installation With Mounting Brackets
Pitched roof installation with rafter anchors (cont.) Ø9 90° Fig. 39 Note on step 10: Continue with chapter "Hydraulic connections" (see Use the centring groove on the back of the header page 63). casing as a drilling guide. Pitched roof installation with mounting brackets For sheet metal roofs Vertical installation The vacuum tubes are positioned vertically to the roof... - Page 35 Pitched roof installation with mounting brackets (cont.) Fig. 41 A distinction is made between the following two options for arranging the mounting brackets side by side: ■ Installation dependent on rafter spacing: The tables from page 6 detail the rafters to which the mounting brackets should be fitted.
- Page 36 Pitched roof installation with mounting brackets (cont.) Combination mm d mm e mm f mm g 1.51 m — — — — 1030 3.03 m — — — — 1105 1630 1.51 m /1.51 m 1610 1030 2385 1.51 m /3.03 m 1030 1030...
- Page 37 Pitched roof installation with mounting brackets (cont.) 90° 90° Fig. 44...
-
Page 38: Horizontal Installation (Only Vitosol 200-T)
Pitched roof installation with mounting brackets (cont.) 90° 90° Fig. 45 Continue with chapter "Hydraulic connections" (see page 63). Horizontal installation (only Vitosol 200-T) The vacuum tubes are positioned parallel to the roof ridge. Fig. 46... - Page 39 Pitched roof installation with mounting brackets (cont.) Fig. 47 Combination mm d mm e mm f mm g 1053 1.51 m — — — 2061 1030 3.03 m — — — 1053 1053 1095 1610 1.51 m /1.51 m 1053 2061 1350 2380...
- Page 40 Pitched roof installation with mounting brackets (cont.) Fig. 48 Mounting bracket Mounting rail Tube retainer Use on-site fixings to secure the mounting brackets. The installation is shown using standing seam profiles as an example. 90° Fig. 49 Mounting bracket Mounting rail Fixings and screws to be provided on site...
- Page 41 90° 90° 90° 90° 90° 90° Fig. 50 Note dimension b in the following table. Install the header casing offset against the tube Vitosol 200-T mm b retainer. This inclines the vacuum tubes towards the 1.51 m horizontal. 3.03 m...
- Page 42 Pitched roof installation with mounting brackets (cont.) Ø9 90° Fig. 51 Note on step 11: Continue with chapter "Hydraulic connections" (see Use the centring groove on the back of the header page 63). casing as a drilling guide.
-
Page 43: Pitched Roof Installation With Roof Hooks
Pitched roof installation with roof hooks For plain tiled, slate and corrugated sheet roofs Fig. 52 Roof hook for slate roofs Roof hook for corrugated sheet profiles 5 and 6 Zinc-plated countersunk chipboard screw (Spax-S) Roof hook for corrugated sheet profile 8 6 x 30 mm Mounting rail for vertical installation Roof hook for plain tile roofs... -
Page 44: Vertical Installation
Pitched roof installation with roof hooks (cont.) Plain tiled roof cover For dimensions, see from page 44 Fig. 55 Note Trim plain tiles; cut off approx. 30 mm with an angle grinder. Fig. 54 Corrugated sheet roof Ø8 Fig. 56 Sealing washer (on site) Existing roof batten For dimensions, see from page 44... - Page 45 Pitched roof installation with roof hooks (cont.) 90° Fig. 57 Roof hook Mounting rail Tube retainer Combination mm b mm c mm d mm e 1.51 m — — — — 1030 3.03 m — — — — 1105 1630 1.51 m /1.51 m 1610...
- Page 46 Pitched roof installation with roof hooks (cont.) 90° 90° Fig. 58 90° 90° Fig. 59...
-
Page 47: Horizontal Installation (Only Vitosol 200-T)
Pitched roof installation with roof hooks (cont.) Continue with chapter "Hydraulic connections" (see page 63). Horizontal installation (only Vitosol 200-T) The vacuum tubes are positioned parallel to the roof ridge. Fig. 60 Combination mm d mm e mm f mm g 1053 1.51 m... - Page 48 Pitched roof installation with roof hooks (cont.) 90° Fig. 61 Roof hook Mounting rail Tube retainer...
- Page 49 90° 90° 90° 90° 90° 90° Fig. 62 Note dimension b in the following table. Install the header casing offset against the tube Vitosol 200-T mm b retainer. This inclines the vacuum tubes towards the 1.51 m horizontal. 3.03 m...
-
Page 50: Installation On Collector Supports
Pitched roof installation with roof hooks (cont.) Ø9 90° Fig. 63 Note on step 9: Continue with chapter "Hydraulic connections" (see Use the centring groove on the back of the header page 63). casing as a drilling guide. Installation on collector supports Prevent shading if several collectors are installed 2. -
Page 51: Collector Supports With Fixed Angle Of Inclination
Observe the maximum load and distance from the The Viessmann "SOLSTAT" calculation program is edge of the roof for the on-site substructure to available at www.viessmann.com to assist with cal- DIN 1055. culations. Remove any gravel or similar from the installation For calculating dimension z, see page 50. - Page 52 Installation on collector supports (cont.) 8. 1. Fig. 65 Use the mounting feet as a drilling template. Support slab Collector support Collector area Installation angle 30° 2413 1.51 m 45° 2200 1200 3.03 m 60° 1838 Combination 1.51 m /1.51 m 1.51 m /3.03 m 3.03 m...
- Page 53 Installation on collector supports (cont.) Ø8,5 Fig. 66 Fig. 67 Continue with chapter "Hydraulic connections" (see page 63).
-
Page 54: Collector Supports With Variable Angle Of Inclination
Installation on collector supports (cont.) Collector supports with variable angle of inclination 50° 45° 40° 35° 30° 25° Fig. 68 Adjusting the angle of inclination α Fig. 69... - Page 55 Installation on collector supports (cont.) Fig. 70 Use cross braces as a drilling template. Support slab A Support slab B Collector area Combination 1.51 m 1.51 m /1.51 m 1010 3.03 m 1.51 m /3.03 m 1100 3.03 m /3.03 m...
- Page 56 Installation on collector supports (cont.) Ø8,5 Fig. 71...
-
Page 57: Level Installation (Only Vitosol 200-T)
Calculation of ballast and maximum load on the sub- ■ Fig. 73 structure according to DIN 1055-4: 2005-03 and DIN 1055-5: 2005-07. 4 support slabs are required for each collector. The Viessmann "SOLSTAT" calculation program is available at www.viessmann.com to assist with cal- culations. - Page 58 Level installation (only Vitosol 200-T) (cont.) 90° 90° Fig. 74 Screws to be provided on site. Support slab A Support slab B Combination mm b mm c 1.51 m — — 1030 3.03 m — — 1100 1625 1.51 m /1.51 m...
- Page 59 Level installation (only Vitosol 200-T) (cont.) 90° 90° 90° Fig. 75...
- Page 60 Level installation (only Vitosol 200-T) (cont.) 90° Fig. 76 Continue with chapter "Hydraulic connections" (see page 63).
-
Page 61: Installation On Walls (Only Vitosol 200-T)
Installation on walls (only Vitosol 200-T) 90° Fig. 77 Combination mm b mm c 1415 1.26 m 1.51 m — — 4070 3.03 m — — 1100 1625 1.51 m /1.51 m 1335 2405 1.51 m /3.03 m 1070 1880 2405 3.03 m... - Page 62 Installation on walls (only Vitosol 200-T) (cont.) 90° 90° 90° 90° 90° Fig. 78 Note dimension b in the following table.
-
Page 63: Hydraulic Connections
Installation on walls (only Vitosol 200-T) (cont.) Install the header casing offset against the tube Vitosol 200-T mm b retainer. This inclines the vacuum tubes towards the 1.26 m horizontal. 1.51 m 3.03 m 90° Ø9 Fig. 79 Note on step 10: Continue with chapter "Hydraulic connections"... -
Page 64: Fitting The Connection Set
Hydraulic connections (cont.) Fig. 80 Note on step 3: Note on step 6: Set the spring clips straight. Click collector fastening into place through the holes in the header casing. Fitting the connection set Components Fig. 81... -
Page 65: Fitting The Vacuum Tubes
■ Never use annealed copper pipes with locking ring fittings. Fig. 82 Note Use the diverter with air vent valve only with Vitosol 200-T for horizontal collector installations. RL Return VL Flow Fitting the vacuum tubes Danger Installation information The vacuum tubes can break if insufficient care ■... -
Page 66: Fitting The Collector Temperature Sensor
Fitting the vacuum tubes (cont.) For roofs deviating from due south, adjust the angle of Please note inclination of the absorber (see scale in diagram on On the Vitosol 300-T never align (rotate) the page 66). vacuum tubes whilst they are locked into posi- tion. - Page 67 Fitting the collector temperature sensor (cont.) Please note Route the sensor lead so that it does not come into contact with hot tubes. Route the lead through the slot in the thermal insulation. Fig. 85 Please note The collectors may be damaged if the solar ther- mal system is not filled with heat transfer medium immediately after installation.
-
Page 68: Installation
Soft solder could be weakened, particularly near the collectors, due to the high temperatures that occur there. Metal seal connections, locking ring fittings or Viessmann push-fit connections with double O-rings are the most suitable. Should alternative seals be used, such as flat gas-... - Page 69 Installation (cont.) Fig. 86 Solar-Divicon Fill valve Shut-off valves Stagnation heat sink Non-return valves Expansion vessel Solar circuit pump Drip pan Air separator Collector Shut-off valve (adjusting screw above flow indica- DHW cylinder Cylinder temperature sensor Drain valve Collector temperature sensor Flow indicator Solar control unit...
-
Page 70: Commissioning And
Commissioning and adjustment For commissioning the solar thermal system, see the "Vitosol-T" service instructions... - Page 72 Viessmann Werke GmbH & Co. KG Viessmann Limited D-35107 Allendorf Hortonwood 30, Telford Telephone: +49 6452 70-0 Shropshire, TF1 7YP, GB Fax: +49 6452 70-2780 Telephone: +44 1952 675000 www.viessmann.com Fax: +44 1952 675040 E-mail: info-uk@viessmann.com...