Advertisement
Quick Links
Please Contact Moen First
For Installation Help, Missing or
Replacement Parts
(USA)
1-800-BUY-MOEN (1-800-289-6636)
Mon - Fri 8:00 AM to 7:00 PM, Eastern
Sat. 9:00 AM to 3:00 PM Eastern
WWW.MOEN.COM
(Canada)
1-800-465-6130
Mon - Fri 7:30 AM to 7:00 PM, Eastern
WWW.MOEN.CA
Por favor, contáctese primero con Moen
Para obtener ayuda de instalación, piezas
faltantes o de recambio
01-800-718-4345
Lunes a viernes de 8:00 a 20:00 hs.
(Costa Este)
Sáb. 8:00 a 18:30 hs. (Costa Este)
WWW.MOEN.COM.MX
Veuillez d'abord contacter Moen
en cas de problèmes avec l'installation, ou pour
obtenir toute pièce manquante ou de rechange
1-800-465-6130
Du lundi au vendredi :
de 7 h 30 à 19 h, HE
WWW.MOEN.CA
HELPFUL TOOLS
HERRAMIENTAS
ÚTILES
For safety and ease of
faucet replacement,
Para que el cambio de
Moen recommends the
la llave sea fácil y
use of these helpful
seguro, Moen le
tools.
recomienda usar estas
útiles herramientas.
Installation Guide
Guía de Instalación
Guide d'installation
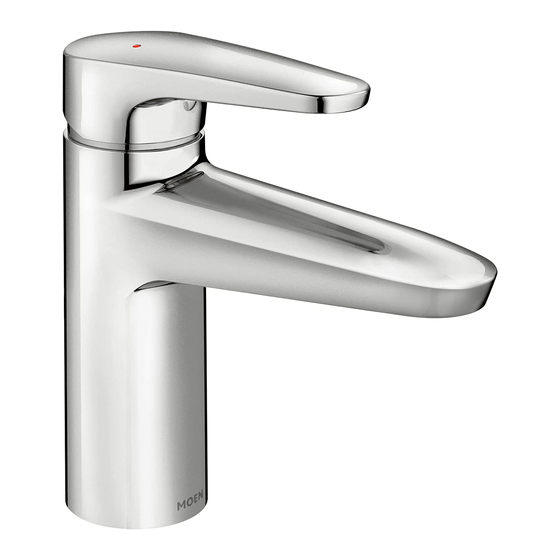
ONE-HANDLE LAVATORY FAUCET
MODELS 9417, 9419 Series
MEZCLADORA MONOMANDO PARA LAVABO
MODELOS 9417, 9419 Series
ROBINET DE LAVABO À UNE POIGNÉE
MODÈLES 9417, 9419
OUTILS UTILES
CAUTION — TIPS FOR REMOVAL OF OLD FAUCET:
Par mesure de sécurité
Always turn water supply OFF before removing existing faucet or disassembling the valve. Open
et pour faciliter
faucet handle to relieve water pressure and ensure that complete water shut-off has been
l'installation, Moen
accomplished.
suggère l'utilisation des
outils suivants.
PRECAUCIÓN — CONSEJOS PARA CAMBIAR LA LLAVE MEZCLADORA:
Siempre CIERRE la toma de agua antes de quitar la llave existente o desmontar la válvula. Abra la
llave para liberar la presión, y asegúrese de que esté bien cerrada el agua.
ATTENTION — SUGGESTIONS POUR ENLEVER L'ANCIEN ROBINET:
Toujours couper l'alimentation en eau avant d' e nlever ou de démonter le robinet. Ouvrir le robinet
pour libérer la pression d' e au et pour s'assurer que l'alimentation en eau a bien été coupée.
INS10410 - 4/15
Advertisement

Related Manuals for Moen 9417 Series


Summary of Contents for Moen 9417 Series
- Page 1 WWW.MOEN.COM (Canada) 1-800-465-6130 Mon - Fri 7:30 AM to 7:00 PM, Eastern WWW.MOEN.CA Por favor, contáctese primero con Moen Para obtener ayuda de instalación, piezas faltantes o de recambio 01-800-718-4345 Lunes a viernes de 8:00 a 20:00 hs. (Costa Este) Sáb.
-
Page 2: Parts List
Parts List Liste des pièces A. Faucet Body If Applicable Q. Drain Nut A. Corps du robinet Le cas échéant Q. Écrou de bonde B. Deck O-ring Lift Rod R. Drain Body B. Joint torique de plate- Tige de levage R. - Page 3 INS10410 - 4/15 Install Gasket (C) onto Mounting Shanks. Next, install Mounting Plate (D) onto gasket. Note, Place deck O-ring (B) under Faucet Body (A). Insert Faucet Body (A) into sink opening. may have to hold gasket and plate in place for next step. Coloque el anillo de caucho de la cubierta (B) debajo del cuerpo de la mezcladora (A).
- Page 4 Tighten Mounting Nuts (E) until secure, using Mounting Tool (H) and Phillips screwdriver. Ensure Mounting Nuts are secured against Mounting Bracket (D). Apriete las tuercas de montaje (E) hasta que estén firmes con la herramienta de montaje (H) y el destornillador Phillips. Asegúrese de que las tuercas de montaje queden firmes contra la ménsula de montaje (D).
- Page 5 INS10410 - 4/15 SÍ 1. Attach Drain Plug Shank (L) to Plug (J). Apply thread seal tape to threads of Waste Seat (M). Attach Drain Body (R) to waste seat. 2. Thread parts together until secure. Tighten Drain Body by hand. (Ensure drain body opening is facing back of sink.) 3.
- Page 6 Verify Pivot Rod Seat (X) is in place with beveled side facing out. Pivot Rod (W) can be installed in two ways. Circle illustration shows Pivot Rod (W) next to hole in Plug Shank (L). To prevent the plug from being easily removed after installation, use box illustration, which shows Pivot Rod (W) inserted into the hole of the Plug Shank (L).
- Page 7 INS10410 - 4/15 Cold Frio Froid 1/2" (125mm) 1/8" (31mm) Caliente Chaud 1. Loosen thumb screw on Lift Rod Strap (S). 1. Attach Faucet Supply Lines (G) to shut off stops. 2. Adjust Lift Rod (I) to allow at least 1/8" gap on faucet. Allow 1/2" gap for pop-up drain. 2.
- Page 8 à l’adresse indiquée ci-dessous, pour expliquer le défaut, and telephone number. de un estado a otro o de una provincia o nación a otra. Moen d’inclure une preuve d’achat, d’inscrire son nom, son adresse ainsi lo asesorará en el procedimiento a seguir para hacer válida esta que son indicatif régional et son numéro de téléphone.