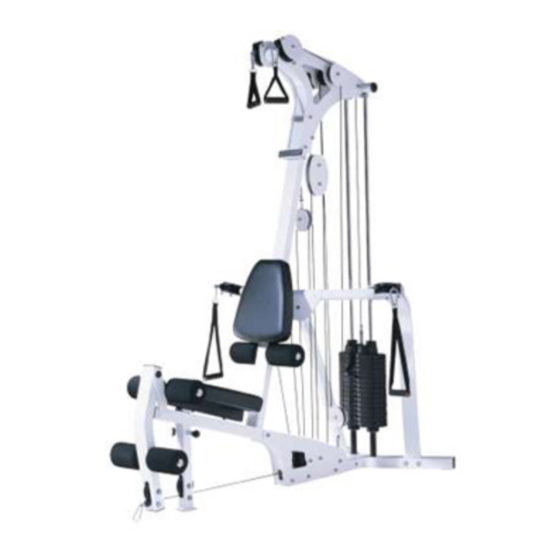
Summary of Contents for ParaBody 778
- Page 1 778 LEG PRESS ADAPTER KIT FOR 777 GYM SYSTEM WARNING: Read and follow all directions for each step to insure proper assembly of this product. USER’S GUIDE CLASS H Version: 778101 PART # 7031501 Revision: 02/28/01 REV. B...
- Page 2 3. Keep body and clothing free of all moving objects. DO NOT attempt to fix. Notify your authorized ParaBody dealer before use and have repairs made by 4. Inspect the machine before use. DO NOT use it if it an authorized service technician.
- Page 3 IMPORTANT NOTES Please note: * Thank you for purchasing the ParaBody 778 LEG PRESS ADAPTER KIT. Please read these instructions thoroughly and keep them for future reference. This product must be assembled on a flat, level surface to assure its proper function.
- Page 4 1’ 2’ 3’ 4’ 5’ 6’ 7’ 8’ 9’ 1’ 2’ 3’ 4’ 5’ 6’ 7’ 8’ 9’ 1 Square = 1’ X 1’ Minimum Required Usable Space Length = 90 inches (229 cm) 7’ 6” Width = 103 inches (262 cm) 8’ 7” Height = 84 inches (213.5 cm) 7”...
- Page 5 3102935 3/8 X 4-1/2” BOLT 6467001 2” COVER CAP NOTE: The LEG PRESS ATTACHMENT (100101) must be assembled before connecting it to the PARABODY 777 GYM SYSTEM WEIGHT STACK CABLE FIGURE 1 STEP 1: • Remove the WEIGHT STACK CABLE as shown in FIGURE 1. Discard the cable.
- Page 6 FIGURE 2 3/8 X 1-3/4” 9 STEP 2: • Screw the long threaded end of the new WEIGHT STACK CABLE (3) into the end of the WEIGHT PLATE SHAFT. See FIGURE 2. • Route the 120” CABLE (3) around the pulley in the BOOM PLATES as shown in FIGURE 2. (NOTE: Make sure the cable runs in the grooves of the pulleys.) •...
- Page 7 FIGURE 3 STEP 3 • Slide two 2” SQ. COVER CAPS (6) over the FRONT LEG (1) as shown in FIGURE 3. 3/8” LOCKNUT 3/8 X 3-3/4” BOLT FIGURE 4 STEP 4: • Remove the 3/8 X 3-3/4” BOLT and 3/8” LOCK NUT from the BASE PLATE as shown in FIGURE 4.
- Page 8 11 3/8 X 4-1/2” FIGURE 5 STEP 5: • SECURELY assemble the FRONT LEG (1) to the 777 Gym System using two 3/8 X 4-1/2” BOLTS (11), five 3/8” WASHERS (7), one previously removed 3/8” LOCK NUT and one 3/8” LOCK NUT (8) as shown in FIGURE 5.
- Page 9 STEP 6 FIGURE 6 • Remove one existing 3-1/2” PULLEY, two WASHERS, two 2” WHEELS and two SPACERS from the ADJUSTMENT TUBE on the 100 LEG PRESS OPTION by unfastening the 3/8 X 4-1/2” BOLT holding the pulley on. See FIGURE 6. (NOTE: The pulley will be used in STEP 9.) 3-1/2”...
- Page 10 10 3/8 X 3” 100 LEG PRESS FIGURE 8 STEP 8 • Securely fasten the 100 LEG PRESS to the FRONT LEG (1) using two 3/8 X 3” BOLTS (10), four 3/8” WASHERS (7), and two 3/8” LOCK NUTS (8) as shown in FIGURE 8.
- Page 11 3/8 X 1-3/4” 9 FIGURE 9 STEP 9: • SECURELY assemble the previously removed 3-1/2” PULLEY to the FRONT LEG (1) using one 3/8 X 1-3/4” BOLT (9) and one 3/8” LOCK NUT (8). See FIGURE 9. (NOTE: Loop the LEG PRESS CABLE around the pulley prior to assembling it.)
- Page 12 FIGURE 10 STEP 10 • Screw the threaded end of LEG PRESS CABLE (4) to the PULLEY BRACKET (2) as shown in FIGURE 10.
- Page 13 100 LEG PRESS into the last adjustment hole (so the LEG PRESS is spread apart) and perform several repititions at the leg press station.This will relax the cable system and prevent the HEAD PLATE from lifting up. • If further CABLE ADJUSTMENT is needed, reference the 777 GYM SYSTEM assembly instructions. THIS CONCLUDES THE ASSEMBLY OF THE 778 LEG PRESS ADAPTER KIT...

