Table of Contents
Advertisement
Quick Links
[INSTANT PRINT
User's Guide (Full version)
• This User's Guide (Full version) corresponds to firmware version Ver.1.01. Depending on the firmware version, the functions and screens
may differ from those described.
• There are two methods to upgrade the firmware. For details, refer to [FIRMWARE UPGRADE]. (p. 22)
model number: FI019
DIGITAL TECHNOLOGIES]
+
NA_EN
FI019-EN-NA-02
Advertisement
Table of Contents

Related Manuals for FujiFilm inxtax mini Evo FI019


Summary of Contents for FujiFilm inxtax mini Evo FI019
- Page 1 NA_EN [INSTANT PRINT DIGITAL TECHNOLOGIES] User’s Guide (Full version) • This User's Guide (Full version) corresponds to firmware version Ver.1.01. Depending on the firmware version, the functions and screens may differ from those described. • There are two methods to upgrade the firmware. For details, refer to [FIRMWARE UPGRADE]. (p. 22) model number: FI019 FI019-EN-NA-02...
-
Page 2: Table Of Contents
Table of Contents Before Using the Camera ��������������������������������������������������������� 3 Miscellaneous Actions ������������������������������������������������������������17 Changing the Brightness of the Image �������������������������������������� 17 Notes on Disposing of the Camera ���������������������������������������� 3 Using the Self-Timer to Take Photos������������������������������������������� 17 About This Camera �������������������������������������������������������������������� 3 Taking Photos with the Flash�������������������������������������������������������... -
Page 3: Before Using The Camera ��������������������������������������������������������� 3 Miscellaneous Actions
NA_EN Before Using the Camera About This Camera Before using the camera, check the following. Main Features Supplied Accessories ● Provides the best INSTAX image quality to date�* ● Provides up to 100 different expressions with 10 lens effect • Shoulder strap (1) options and 10 film effect options�... -
Page 4: Part Names ���������������������������������������������������������������������������������� 4 Taking A Photo Of Yourself (Selfie)
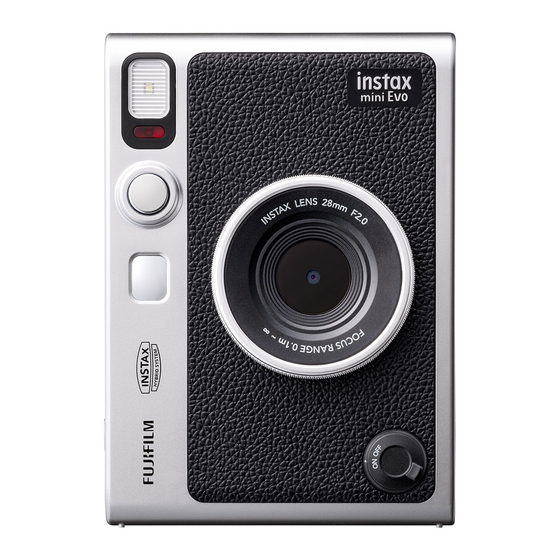
Part Names Front Film ejection slot The exposed INSTAX MINI instant film will be ejected from the film ejection slot during printing. Flash The flash operates depending on the setting. You can also set the flash to not operate. Self-timer lamp/Charging lamp The self-timer lamp/charging lamp blinks when you take a photo with the self-timer. - Page 5 NA_EN Lens dial Turn the lens dial to switch between 10 different lens effect options. Strap hook Pass the cord on the strap through the strap hook to attach the strap. Film door lock Slide the film door lock to the right to unlock and open the film door.
-
Page 6: Lcd Screen ���������������������������������������������������������������������������������� 6 Using Af/Ae Lock To Take Photos
LCD Screen Current date and time When the camera is turned on, the shooting screen appears on the LCD Screen. Lens effect • To switch from the shooting screen to the playback screen, press (Playback) button. Film effect • To switch from the playback screen to the shooting screen, press the Shutter button fully. -
Page 7: Using The Select Buttons ���������������������������������������������������������� 7 Printing From Print History
NA_EN Using the Select Buttons Attaching the Shoulder Strap (Up/Down/Left/Right) buttons are used to select Follow the steps below to attach the shoulder strap to the camera menu items and to use the functions assigned to the body. buttons. The [MENU/OK] button is used to display menus and Insert one end of the shoulder strap through the make selections. -
Page 8: Charging The Battery
Charging the Battery Power On/Off Turn off the camera before charging the battery. Battery will not Turn the power switch to the right to turn on the power. charge if the camera is powered on. Be careful to properly attach cable as indicated. Connect the camera and a USB AC adapter supplied with your Smartphone using the supplied USB cable, then connect the USB AC adapter to an indoor power outlet. -
Page 9: How To Check The Battery Level
NA_EN How to Check the Battery Level Configure the Initial Settings Press (Back) on the shooting or playback screen to display the When you turn on the camera for the first time after purchase, you remaining battery charge on the LCD Screen. will be automatically prompted to set the language, the date and Display Remaining battery charge... - Page 10 Set the year, month, and date in that order, and then Launch the INSTAX MINI EVO Smartphone App and press [MENU/OK]� tap [SETTINGS]� DATE/TIME YY.MM.DD DD.MM.YY MM/DD/YY SETTINGS Set the year, month, day, hour, and minute, and then press [MENU/OK]� Press to select the item to be set (year, month, day, hour, minute) and then press...
-
Page 11: Loading/Unloading The Instax Mini™ Instant Film Pack
NA_EN Tap [Connect] on the Smartphone App once the Loading/Unloading the INSTAX MINI™ Instant camera’s OWN NAME appears� Film Pack Loading the INSTAX MINI instant film pack Slide the film door lock and open the film door� Connect Insert an INSTAX MINI instant film pack by aligning the yellow marks�... -
Page 12: Unloading A Used Instax Mini Instant Film Pack
Unloading a Used INSTAX MINI instant film pack Basic Shooting and Playback Slide the film door lock and open the film door� Taking Photos This section explains the basic steps to take photos. Turn on the power� Set effects and other settings as desired� Compose the photo�... -
Page 13: Playing Back The Images You Have Taken
NA_EN Hold the Shutter button halfway down and then Changing the Display on the Playback Screen press it in (all the way down) to shoot the photo� You can zoom in on an image or change the number of frames After taking a photo, the image is stored in the internal displayed on the LCD Screen. -
Page 14: Printing A Photo
■ Changing the Number of Frames Displayed Printing a Photo When the playback screen is displayed, press (Playback) to change the number of frames displayed. Press the (Playback) button� Press on the Select button to select the photo you want to print� You can enlarge the photo or make other edits before printing�... -
Page 15: About The Remaining Film Sheets Display
NA_EN About the Remaining Film Sheets Display Adding Effects to Your Photos The number of remaining film sheets is indicated by a white dot at the bottom of the screen. Each time you print an image, this dot Selecting a Lens Effect turns gray. - Page 16 Selecting a Film Effect Specifying a Film and Lens Effect Combination Follow the steps below to select a film effect. You can set a combination of your favorite lens and film effects. Display the shooting screen� You can use a saved effect combination by pressing the + (Function) button.
-
Page 17: Changing The Brightness Of The Image
NA_EN Using the Self-Timer to Take Photos Miscellaneous Actions Use this function to take a group photo including the photographer or to prevent the camera from moving while the Changing the Brightness of the Image Shutter button is pressed. Adjust the brightness of the image. Use this function when the Press until [SELF-TIMER] appears on the subject is too bright or too dark, or when there is much contrast... -
Page 18: Taking Photos With The Flash
Taking Photos with the Flash Taking Macro Photos Use the flash when taking photos at night or in a dark room. You Use macro shooting when you want to get close to the subject. can also set the camera so that the flash does not fire. Press until [MACRO] appears on the shooting Press... -
Page 19: Matching The Light Source When Taking Photos
NA_EN Matching the Light Source when Taking Photos Taking a Photo of Yourself (Selfie) By setting the white balance to match the light source, such as You can use the selfie mirror to take photos of yourself. sunlight or artificial lighting, you can shoot with colors closer to Hold the camera securely so that your face comes 30 real life. - Page 20 Using AF/AE Lock to Take Photos Printing from Print History When taking a photo, pressing and holding the Shutter button You can display images that you printed previously and view the halfway to lock the focus is called “AF Lock,” and pressing and settings (image effects, etc.) used at that time.
-
Page 21: Inserting A Memory Card
NA_EN Inserting a Memory Card Using the Memory Card Open the card slot cover� The camera's internal memory can store about 45 still images, but you can store more images by using a memory card (sold separately). You will also need a memory card to upgrade the firmware. -
Page 22: Using The Shooting Menu
● Using the Camera instructions. 1. Download the latest firmware (FPUPDATE.DAT) from the FUJIFILM website below using a PC or other device, and copy it [PAIRING REGISTRATION]: to the root directory of the memory card When connecting the camera to your Smartphone via Bluetooth https://instax.com/mini_evo/en/support/firmware/... - Page 23 NA_EN [PRINTED IMAGE TRANSFER] Using the Playback Menu You can send images that were previously printed with the camera to the INSTAX MINI EVO App and save them as INSTAX frame You can use the Playback Menu to change various playback- images on your Smartphone.
-
Page 24: Smartphone App Functions
Smartphone App Functions Specifications The following functions are available when connected with the ■ Camera Function INSTAX MINI EVO Smartphone App. Image sensor 1/5-inch CMOS with primary color filter Number of recorded 2560 × 1920 pixels Storage media Internal memory, microSD/microSDHC memory card (sold separately) Storage capacity Approximately 45 images in internal... - Page 25 Please check the following items before considering a problem INSTAX-Rich Mode immediately after to be a malfunction. If the problem persists even after taking action, please contact the FUJIFILM service center for repair in your startup. country or visit the website below.
-
Page 26: Important Safety Notice
Never attempt to take this product apart. You may be injured. uneven. immediately after it is printed. All repairs should be handled solely by Fujifilm. Injury may result • Do not obstruct the film ejection slot. from attempts to self-assess or repair this camera. -
Page 27: Camera Care
This camera uses INSTAX MINI instant print film, sold separately. electronic products with your camera. These straps are usually See FUJIFILM INSTAX MINI instant film pack use instructions. too weak to hold your camera securely. For safety, use only Follow all instructions for safe and proper use, including: straps designed for and provided with your camera, and use 1. -
Page 28: Bluetooth® Device Cautions
■ Wireless data (images) may be intercepted by third parties� This transmitter must not be co-located or operated in conjunction FUJIFILM Corporation and its affiliates are not responsible for with any other antenna or transmitter. intercepted transmissions, or for unintended image uses. - Page 29 For more detailed information about recycling of this product, please contact your local city recycling office, your household waste disposal service or the authorized FUJIFILM dealer from which you purchased the product or contact Fujifilm at the address below. For proper disposal in the United States at product end-of-life, please contact 1-800-800-3854 Option #1 Help Desk.