Zenith HydroTap G5 Installation Instructions Manual
Hide thumbs
Also See for HydroTap G5:
- User manual (44 pages) ,
- Quick start installation manual (36 pages) ,
- Installation instructions manual (32 pages)

Related Manuals for Zenith HydroTap G5


Summary of Contents for Zenith HydroTap G5
- Page 1 Tap i Zenith HydroTap G5 Industrial Side Touch Tap Industrial Top Touch Tap Visit our website to download the manuals 808081NZ v1.00 03.21 Industrial Tap Instructions...
-
Page 2: Table Of Contents
Contents Before Installation ..............3 Installation: Top Touch Tap (sink) ........... 4 Installation: Side Touch Tap (sink) ...........5 Font Installation (optional) ............. 6 Side Touch Tap Template: Buttons on LHS ......8 Side Touch Tap Template: Buttons on RHS ......9 USB Connection ..............11 Connect to Command Centre .......... -
Page 3: Before Installation
Before Installation Tools needed for tap installation In addition to normal tools, the following (or equivalent) will be required. 35mm diameter sheet metal hole punch for sinks. • 35mm diameter hole saw for worktops. • Hole saw for font installation (optional - refer to font kit) •... -
Page 4: Installation: Top Touch Tap (Sink)
Installation: Top Touch Tap (sink) Top Touch Tap installation Black plastic spacer • Cut a Ø35mm hole in the worktop / sink. Ø35mm • Apply a light smearing of silicone sealant on the underside of the spacer to ensure a watertight fit. Black plastic spacer •... -
Page 5: Installation: Side Touch Tap (Sink)
Installation: Side Touch Tap (sink) Side Touch Tap installation • Use the template supplied on pages 6-7 Benchtop Cap screw to locate and cut the 35mm hole and 3x thickness 6.5mm clearance holes in the correct M6 x 35 (supplied) 14 - 18 mm orientation for either left or right hand M6 x 30 (not supplied) -
Page 6: Font Installation (Optional)
Font Installation (optional) Top Touch Tap Font Installation • Position the Font template (provided in the kit) on the bench, so that the Command Centre is within reach of the Industrial Top tap hoses and USB cable. Touch Tap • Cut the holes as shown in the template. Black plastic •... - Page 7 PULL OUT TEMPLATE FOR INDUSTRIAL SIDE TOUCH TAP INSTALLATION 808081NZ v1.00 03.21 Industrial Tap Instructions...
-
Page 8: Side Touch Tap Template: Buttons On Lhs
Side Touch Tap Template: Buttons on LHS 808081NZ v1.00 03.21 Industrial Tap Instructions... -
Page 9: Side Touch Tap Template: Buttons On Rhs
Side Touch Tap Template: Buttons on RHS 808081NZ v1.00 03.21 Industrial Tap Instructions... - Page 10 Font Installation (optional) Secure Font & Tap, attach drain (underneath) • Secure flexible drain pipe (not supplied) with a Mounting worm drive clamp. nut & • If required, use an elbow fitting under the Font washer to prevent hose kinks. Worm drive clamp Flexible drain pipe...
-
Page 11: Usb Connection
USB Connection Connect the cable from the tap to the black junction box, using the round 4-pin plug. Check the orientation of the USB plug and connect it to the undersink unit, without forcing the plug. Fix the junction box in an elevated position, so that any possible water leak will drip off the cable and will not run to the cable connection point. -
Page 12: Connect To Command Centre
Connect to Command Centre Familiarise yourself with the tap connections Boiling, Boiling Boiling chilled, Chilled ambient boiling tube BLUE boiling (BC, Chilled tube tube B only) (BC, C only) CLEAR CLEAR BLUE Vent Vent tube tube pipe (BC, B only) Refer to the HydroTap Command Centre installation instructions. -
Page 13: Commissioning
System Safety & Energy Settings Settings Security Saving (digits 7, 8, 11, 12, 13) comprise the 5-digit [ ] [ ] passcode. Contact Zenith service if further Info & Product Register Service ENTER CURRENT PASSCODE 12:12 PM Logs Serial No. -
Page 14: Tap Operation: Top Touch Tap
Tap Operation: Top Touch Tap Controls Boiling water Chilled water Press the RED and SAFETY buttons simul- Press the BLUE button to taneously, to dispense boiling water dispense chilled for 5 - 15 for 5 - 15 seconds (adjustable). Release seconds (adjustable). -
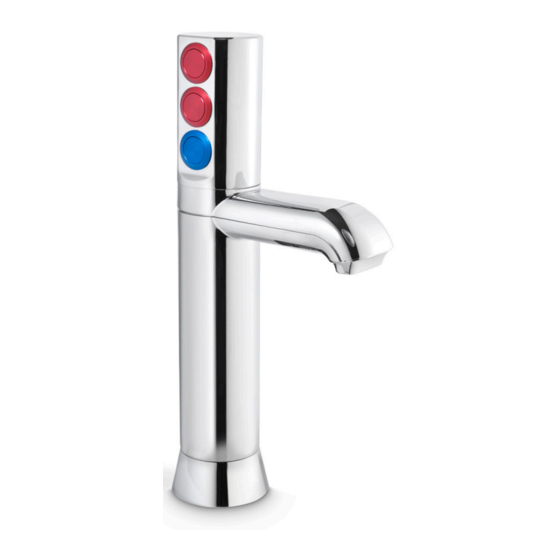
Page 15: Tap Operation: Side Touch Tap
Tap Operation: Side Touch Tap IMPORTANT: For the Industrial Side Touch Tap, to allow the dispensing of boiling water, the safety BOILING 12:12 PM °C lock setting must be DISABLED using the LCD touch screen on the Command MAIN MENU 12:12 PM Centre. - Page 16 Refer to User Guide for operation and maintenance. Zenith Heaters Limited IRD/GST No. 95 640 729 18 Kawakawa Place, Westgate, Auckland 0814 New Zealand Ph: +(64 9) 838 8612 | Free Call 0800 558 055 zenithwater.co.nz WMKA00099 AU02691 AS 3498...