Epson STYLUS PHOTO 1290 Setup Manual
Hide thumbs
Also See for STYLUS PHOTO 1290:
- User manual (241 pages) ,
- Daily use manual (76 pages) ,
- Setup manual (17 pages)
Table of Contents
Advertisement
Quick Links
Advertisement
Table of Contents

Related Manuals for Epson STYLUS PHOTO 1290


Summary of Contents for Epson STYLUS PHOTO 1290
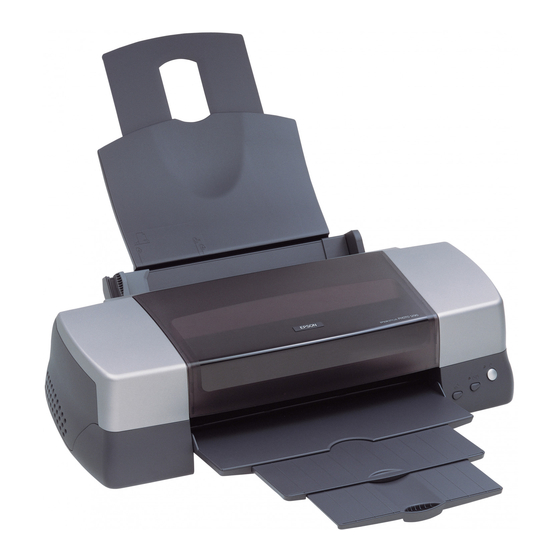
- Page 1 Checking the Installing the Package Contents Ink Cartridges Installing Unpacking the Printer the Printer Software Plugging In and Attaching the Connecting the Printer Printer Parts 4032767-01 Downloaded from: http://www.usersmanualguide.com/...
-
Page 2: Checking The Package Contents
Checking the Package Contents Daily Use Setup Guide black color paper manuals ink cartridges paper support power cord* printer * The power cord may come printer software & attached to the printer in Reference Guide CD-ROM certain locations. roll paper holder paper support adapter protective film The package contents may vary in certain locations. -
Page 3: Unpacking The Printer
Unpacking the Printer Remove all tape and protective materials from the printer. ➀ ➁ ➂ Downloaded from: http://www.usersmanualguide.com/... - Page 4 Attaching the Printer Parts Hold the paper support adapter so that the arrows on the adapter are toward the front of the printer, and insert the adapter into the slot at the rear of the printer. Insert the roll paper holder into the slots at the back of the paper support adapter, then insert the paper support into the slot at the rear of the paper support adapter.
- Page 5 ❏ If your computer has more than one USB port, you may plug the cable in wherever is convenient. Copyright© 2002 by SEIKO EPSON CORPORATION, Nagano, Japan. Printed in xxxx 02.xx-xx Downloaded from: http://www.usersmanualguide.com/...
- Page 6 Make sure that both the printer and the computer are turned off. Plug the power cord into a properly grounded electrical outlet. Plug the appropriate end of the cable into the USB port on the back of the printer. (The end that fits the printer has a different shape from the end that fits the computer.) Connect the other end of the cable to...
-
Page 7: Installing The Printer Software
Installing the Printer Software After connecting the printer to your computer, you need to install the software included on the “Printer Software for EPSON Stylus Photo 1290” CD-ROM shipped with your printer. Refer to the Photo Print Software Setup included in the online Reference Guide to install the Photo Print Software. - Page 8 . Then, click Install Reference Guide and follow the on- and then screen instructions. When the installation is complete, an ESP 1290 Guide icon appears in the EPSON folder. Double-click the icon to open the guide. ❏ The Problem Solver provides tips and instructions to help you solve most problems that you may encounter when printing.
-
Page 9: For Macintosh
When a message appears informing you that the installation is complete, click OK. Note: If an error message appears, either the printer software or the EPSON USB printer device driver is not installed correctly. See "Troubleshooting" in the Daily Use guide for details. -
Page 10: Selecting Your Printer In The Chooser
When background printing is on, you can use your Macintosh while it is preparing a document for printing. In order to use the EPSON Monitor3 utility to manage print jobs, background printing must be turned on. Close the Chooser. -
Page 11: Installing The Ink Cartridges
Installing the Ink Cartridges This printer uses ink cartridges equipped with IC chips. The IC chip accurately monitors the amount of ink used by each cartridge, so even if a cartridge is removed and inserted again, all of its ink can be used. However, some ink from both color and black ink cartridges is consumed each time a cartridge is inserted because the printer automatically checks reliability. - Page 12 Lower the output tray and open the printer cover. Turn on the printer by pressing the P power button. The print head moves to the left, which is the ink cartridge installation position. The P power light flashes and the error light comes on.
- Page 13 Caution: ❏ You must remove the yellow tape seals from the cartridges before installing them; otherwise, the cartridges will become unusable and you will be unable to print. ❏ If you have installed an ink cartridge without removing the yellow tape seal, you must remove the cartridge and install a new one.
-
Page 14: Checking The Printer
Caution: Always press the e ink cartridge replacement button to move the print head. Do not move the print head by hand. Doing so may damage the printer. While the ink is charging, the P power light flashes and the printer produces a variety of mechanical sounds. -
Page 15: Checking The Print Head Nozzles
Checking the print head nozzles Once paper is loaded, follow these steps to check the print head nozzles. For Windows users Click the Start button, point to Settings, and click Printers. Select the icon for your printer, then click Properties on the File menu. Then click the Utility tab. - Page 16 Caution: Never turn off the printer while the P power light is flashing. Doing so may damage the printer. If print quality hasn’t improved after repeating the nozzle checking and cleaning procedures four or five times, contact your dealer. Downloaded from: http://www.usersmanualguide.com/...
- Page 17 This file has been downloaded from: www.UsersManualGuide.com User Manual and User Guide for many equipments like mobile phones, photo cameras, monther board, monitors, software, tv, dvd, and othes.. Manual users, user manuals, user guide manual, owners manual, instruction manual, manual owner, manual owner's, manual guide, manual operation, operating manual, user's manual, operating instructions, manual operators, manual operator, manual product, documentation manual, user maintenance, brochure, user reference, pdf manual Downloaded from:...