Table of Contents
Advertisement
This is the full text and images from the manual. This may take 3 full minutes for all images to appear. If they
do not all appear. Try clicking the browser "refresh" or "reload button".
This camera manual library is for reference and historical purposes, all rights reserved.
This page may not be sold or distributed without the expressed permission of the producer
Most other places would charge you $10.50 for a electronic copy
This will allow me to continue to buy new manuals and maintain these pages.
If you use Pay Pal, use the link below. Use the above address for a check, M.O. or cash.
Introduction
Thank you for purchasing the Canon EOS 620/650. Designed with the most advanced and innovative technology
available, this high performance AF/AE SLR camera with a built-in motor drive offers you genuine, creative
freedom and picture-taking ease.
Enjoy Taking Photos More Comfortably
This is EOS' design theme. The EOS 620/650 has brilliantly made it come true thanks to the high speed, precise
auto-focus system and the built-in motor drive capable of winding film up to three frames per second which
maximizes your potential.
Needless to say film speed setting and film transportation have been completely automated. A few of the many
features of the EOS 620/650 are the evaluative metering function (Factor 6 light analysis system) in which the
camera automatically recognizes subject pattern and its size so correct exposure can be obtained in backlit
situations, and the intelligent program AE mode which selects the ideal program line according to the
characteristics of the lens in use.
In addition, your photographic options are further expanded by exclusive accessories such as the Speedlites
420EZ and 300EZ that respond to a wide range of illuminations from dark surroundings to fill-in flash, the
Canon EOS 620-650
Camera Manual
This page is copyright© by
I have no connection with any camera company
If you find this manual useful, how about a donation of $4 to:
M. Butkus, 29 Lake Ave., High Bridge, NJ 08829-1701
and send your E-mail address too so I can thank you.
or $20.00 for a hard to read Xerox copy.
It'll make you feel better, won't it?
To main Chinon/Ricoh manual site
POSTED 12-5-02
, M. Butkus, N.J.
Advertisement
Table of Contents

Related Manuals for Canon EOS 620-650


Summary of Contents for Canon EOS 620-650
- Page 1 If you use Pay Pal, use the link below. Use the above address for a check, M.O. or cash. Introduction Thank you for purchasing the Canon EOS 620/650. Designed with the most advanced and innovative technology available, this high performance AF/AE SLR camera with a built-in motor drive offers you genuine, creative freedom and picture-taking ease.
-
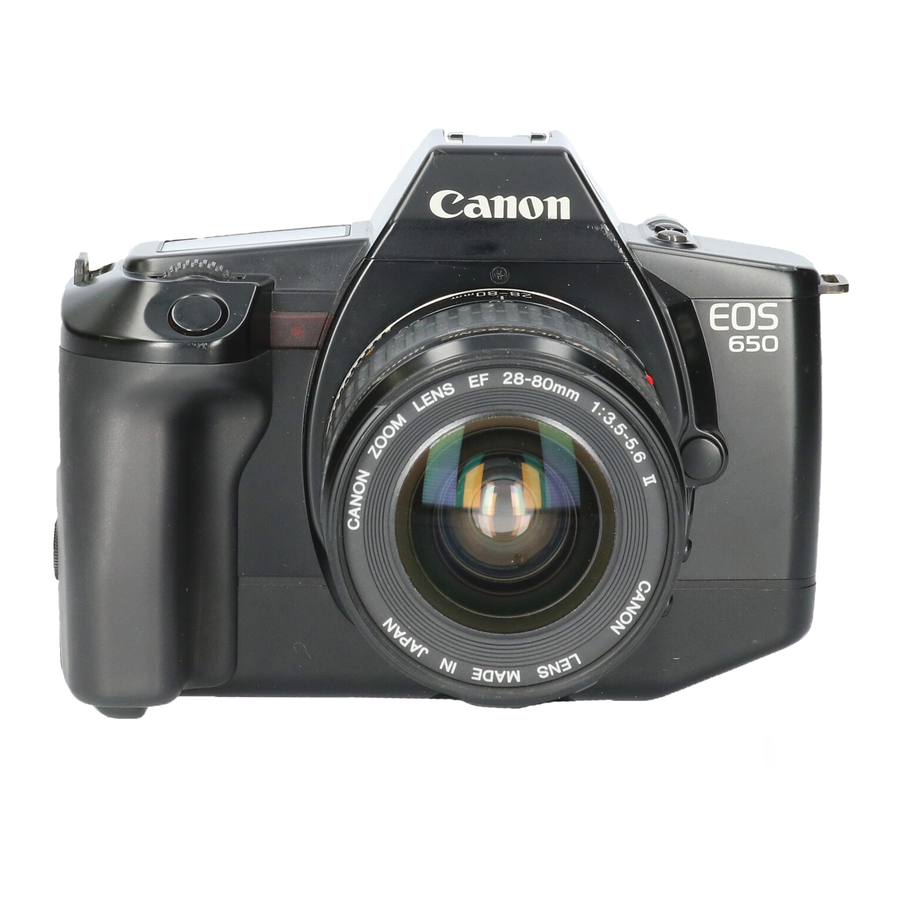
Page 2: Product View And Parts
Quartz Date Back E that imprints data, and the Technical Back E that memorizes exposure control data. For a full understanding of the EOS 620/650, please read this instruction booklet carefully before using the camera. While reading these instructions unfold the front and back flaps of this booklet for easy reference to the camera s parts. -
Page 3: Table Of Contents
Table of Contents Preliminary Preparations 1. Attaching the Lens 6 2. Loading the Battery 8 3. Checking the Battery 9 4. Loading the Film 10 [Automatic Film Speed Setting] 12 Basic Steps 1. Setting the Main Switch to the "Full Auto" Position 14 2. -
Page 4: Attaching The Lens
1. Attaching the Lens 1) Turn the rear lens cap in the direction of the arrow until it stops and remove it from the lens. · To attach the rear lens cap, align its ''O'' mark with the red dot on the lens. Then lightly push it in and turn it clockwise until it stops. -
Page 5: Checking The Battery
1) Remove the grip with a coin or similar object. 2) As shown in the photo, load the battery so that its terminals face in the direction of the camera. Make sure the battery is pushed in all the way until it is locked by the orange lever 3) Replace the grip securely. -
Page 6: Loading The Film
2) Open the switch cover on the back of the camera and press the battery check button( 4. Loading the Film 1) To open the back cover, push the back cover latch down while pressing the back cover lock button 2) Insert the upper-flat end of the film cartridge into the film chamber first. -
Page 7: Automatic Film Speed Setting
4) Make sure that the film has no slack and that its perforations are properly engaged with the sprocket teeth. 5) Close the back cover. The camera advances the film automatically and stops when "1" appears in the frame counter in the display panel. 6) During film advance, the film transport bars will appear at the bottom of the display panel moving in sequence from left to right. -
Page 8: Basic Steps
1. Setting the Main Switch to the "Full Auto" Position 1) Slide the lens focus switch to "AF" 2) Set the camera's main switch to the "Full Auto" position (the green " 0 " mark). The following displays will appear: ONE SHOT: One of the AF modes. -
Page 9: Exposure
1) Center the AF from ('[ ]" mark) over the main subject. Do not touch the lens' moving parts during AF focusing. 2) Press the shutter button halfway and automatic focus (AF) starts. When correct focus is obtained, the green AF in-focus indicator lights up in the viewfinder and the AF focus signal (short electronic beeper tone) sounds. -
Page 10: Automatic Film Rewind
5. Automatic Film Rewind The film automatically rewinds at the end of the roll. 1) During rewind the film transport bars move in sequence from right to left to indicate the function in progress while the frame counter counts in descending order. -
Page 11: Setting The Af Mode
((*)) (ON): In addition to being the same ON position as "A", the electronic beeper tone sounds in the following cases; 1) When correct focus is obtained. - AF focus signal (short beeper tone) 2) When the automatically-set shutter speed is too slow to hand-hold.--Camera-shake warning (long beeper tone) Various AE and AF modes described in "Making the Most of Your EOS 620/650"... -
Page 12: Setting The Film Winding Mode
To clear this status within eight seconds, press the shooting mode selector. AF can be done with the Canon Circular Polarizing Filter PL-C. When using a linear polarizing filter, use manual focusing. (see p.56) -
Page 13: Program Ae
(1 ) Program AE [Purpose] The camera automatically sets shutter speed/ aperture combinations according to subject brightness. This mode particularly suits first-time SLR users or those who prefer to concentrate on picture composition or candid snapshots. [SETTING] While pressing the shooting mode selector, turn the electronic input dial until "P"... - Page 14 [PURPOSE] With the EOS 620, you can change the automatically-set shutter speed/aperture combinations of the program AE mode. This function is particularly useful when you need a specific shutter speed or aperture while shooting in the program AE mode. Be sure to set the main switch to the "A" or "(' ')" position. (At the green " [ ] " position, the program shift function cannot be used.
-
Page 15: Shutter-Priority Ae
(3) Shutter-Priority AE [PURPOSE] In this mode the shutter speed is manually set and the camera automatically chooses the correct aperture for the lighting conditions. This mode is best for taking pictures of moving subjects by con trolling the shutter speed. Faster shutter speeds freeze subject motion while slower shutter speeds can produce artistic blur effects. -
Page 16: Aperture-Priority Ae
(4) Aperture-Priority AE [Purpose] In this mode, the aperture is set manually and the camera chooses correct shutter speed for the shutter-priority AE). Use this mode for portraits, landscapes and still-life photography where depth of field is an important factor. (see p. -
Page 17: Depth Of Field
Depth of Field When your subject is in focus, there is a certain area in front of it and behind it which will also be in focus. This range of sharpness is called "depth of field". Depth of field has the following characteristics: 1) The smaller the aperture, the wider the depth of field and vice versa. -
Page 18: Depth Of Field Ae
(5) Depth of Field AE (EOS 650 Only) 2) Compose the picture first. 3) Focus the subject in either the ONE SHOT or SERVO mode. 4) Center the AF frame ("[ ]") over the first point in the foreground (see illus. A). 5) Press the shutter button halfway to focus the "A"... - Page 19 When shooting continuously, it is not necessary to focus the same subject again provided you keep pressing the shutter button halfway after exposure. (To clear, press the shooting mode selector after you remove your finger from the shutter button.) [VIEW FINDER INFORMATION] Correct exposure- Exposure will be correct if continuously lit values display.
-
Page 20: Manual
· When you try to focus extremely near and far points the automatically-set shutter speed will be comparatively slower and the long beeper tone will sound to warn you of camera-shake. Hold the camera steady or use a tripod. · When using a zoom lens, do not change the lens focal length after focusing the first point Always be sure to compose the picture first. -
Page 21: Partial Metering
· Set a slower shutter speed if "OP" remains lit when the electronic input dial is turned to the lens maximum aperture. · Set a faster shutter speed if "CL" remains lit when the electronic input dial is turned to the lens minimum aperture. -
Page 22: Exposure Compensation
Sequential AE lock photography When shooting continuously with AE lock in the same lighting conditions, it is not necessary to meter the subject for each shot provided you keep pressing the shutter button halfway after each exposure. 6. Exposure Compensation Use exposure compensation for high-key (intentionally overexposed) or low-key (intentionally underexposed) shots. -
Page 23: Auto Exposure Bracketing
7. Auto Exposure Bracketing (EOS 620 Only) Use auto exposure bracketing when you want to choose the best exposure by changing the amount of exposure on film intentionally. The range of bracketing is up to +/- 5 steps in 1/2-step increments. 1) Open the switch cover and press both the AF mode selector and battery check button simultaneously to display the 0.0 and "AEB"... -
Page 24: Multiple Exposures
(Auto Exposure Bracketing Continued) Helpful Hints 1. Use the exposure compensation function if, for example, you want particular overexposing-bracket exposures such as +/- 0.5, + 1.5 and + 2.5. 2. With the Technical Back E, auto exposure bracketing can be done up to nine exposures in 1/4-step increments. -
Page 25: Difficult Subjects For Auto-Focus
1) Press both the shooting mode selector and the exposure compensation button simultaneously. The "ME" mark indicating multiple exposure status will then appear in the display panel and the frame counter will become " 1". 2) While pressing both turn the electronic input dial to the desired number of exposures. - Page 26 (Focus) Focus these subjects as follows: 1. Auto focus a substitute subject at the same distance from the camera as your main subject, and then recompose the picture (A) 2. Hold the camera vertically and focus the subject using auto-focus then recompose the picture (C) 3.
-
Page 27: Manual Focusing
10. Manual Focusing 3) Open the switch cover and press the blue film winding mode selector (see p. 26). 4) Turn the electronic input dial until " appears in the display panel. 1) Slide the lens focus mode switch to "M". ·... - Page 28 1/60 and 1/125 sec with the EOS 650 and between 1/60 and 1/250 sec with the EOS 620. (1) Use the Canon Speedlites 420e and 300 as fill-in flash in outdoor settings as well as for normal flash when shooting at night or in a dimly- lit room.
-
Page 29: Bulb [Long Exposure]
(due to their flash duration). Use a Canon Speedlite with this camera. Using a flash (usually with more than two contacts) or flash accessory of another manufacturer may cause the camera to work improperly or even damage the camera itself. -
Page 30: Shooting With Infrared Film
4. Shooting with Infrared Film Accessories When using black-and-white infrared film make a slight adjustment in focus with the red infrared index. For example, focus the subject first, then if the lens is focused at 5m on the distance scale, turn the manual focusing ring to align the 5m mark with the red dot and release the shutter. -
Page 31: Helpful Hint
Canon provides the following 13 different interchangeable lenses plus an extender exclusively for the EF 300mm f/2.8L for just as many applications. Canon EF lenses succeed the ED lens' established reputation for high resolution, superb color balance and easy handling. - Page 32 Quartz Date Back E Technical Back E / Interface Unit TB / Keyboard Unit The Quartz Date Back E is a fully automatic data back which imprints data on the film. 1. Auto date up through the year 2029. (automatic compensation for leap years and long/short months) 2.
-
Page 33: Caring For Your Camera
· The dioptric adjustment lens consists of a correction lens and removable rubber frame (eyecup). With the frame removed, the correction lens can be attached to the A-series and T series cameras. AF photography is possible with the Canon Circular Polarizing Filters PL-C. These are screw-in types available in three thread diameters: 52mm, 58mm and 72mm. -
Page 34: Other Notes
The liquid crystal may respond relatively slow in low temperatures about 0°C/32°F and the display may become dark in high temperatures about 60°C/140°F. Regular functioning resumes in temperatures about 20°C/68°F. Take your camera to the nearest Canon Service Facility for the replacement of the liquid crystal. (Replacement will be at owner's expense.) 2. -
Page 35: Appendix
1. LCD Panel Display This camera uses a liquid crystal display panel to indicate shooting information. The diagram below shows all the information for explanation. However, the display never actually looks like this. Normally, the panel displays only the information required at the time. Battery check Depth of field AE ISO film speed... - Page 36 Film winding mode Single exposure Continuous exposure Self-timer Film-load check Film rewind completion Film transport (wind/rewind) Film wind completion Battery check 2. Viewfinder Information Display The bright and easy-to-read viewfinder displays only necessary information outside the field of view. The diagram here shows all the information at the same time for explanation. Frame counter Sell-timer countdown Bulb exposure time...
- Page 37 (20°C/ 68°F) Normal Low (-20°C/- 4°F) (Based on Canon's Standard Test Method) 4. Evaluative Metering Characteristics As shown below, the evaluative metering system automatically measures light in six different zones, analyzing lighting conditions, subject pattern and subject size while putting an emphasis on the main subject.
- Page 38 5. Comparison between AF Mode and Film Winding Mode (in the evaluative metering mode) 6. Program Line (program characteristics) This camera is equipped with the advanced "Intelligent Program AK" which chooses the best shutter speed/aperture combinations, taking the lens focal length into account. When the automatically-set shutter speed becomes O to 0.5 steps below 1/focal length of the lens in use, the camera-shake warning sounds.
-
Page 39: Specifications
35mm auto-focus, single-lens reflex camera with electronically-controlled automatic exposure, focal plane shutter, and built-in motor drive. Format: 24x36mm Usable Lenses: Canon EF lenses (full aperture metering only) Standard Lens: EF 50 mm f/1.8 Lens Mount: Canon EF Mount (electronic signal transfer system) Viewfinder: Fixed eye-level pentaprism. -
Page 40: Dioptric Adjustment
5. Depth of Field AE (EOS 650 only) 6. Manual 7. Flash AE (A-TTL program flash AE and TTL program flash AE with specified Canon Speedlites) Camera-shake Warning: Operates for program AE, aperture-priority AE, and the EOS 650's depth of field AE modes. When automatically set shutter speed falls 0 to 0.5 steps below 1/focal length of the lens in use, the electronic beeper sounds. - Page 41 AF Working Range: EV 1 - 18 at ISO 100 AF Auxiliary Light: The ultra-bright red LED (peak sensitivity: 700 nm) is automatically projected with specified Canon Speedlites. Shutter: Vertical-travel focal plane shutter with soft-touch electromagnetic release. All speeds electronically controlled.
-
Page 42: Carrying The Camera
Dimensions: 148(W) x 108.3(H) x 67.5(D) mm (5-13/16" x 4-1/4 x 2-518 ) Weight: EOS 650--6609 (23-5/16 oz.) body only EOS620--7009 (24-11/16 oz.) body only (All data are based on Canon's Standard Test Method.) Subject to change without notice. This equipment has been tested and found to comply with the limits for a Class B computing device in accordance with the specifications set forth in Subpart J of Part 15 of the FCC Rules.
Need help?
Do you have a question about the EOS 620-650 and is the answer not in the manual?
Questions and answers