Table of Contents
Advertisement
Quick Links
Advertisement
Table of Contents

Related Manuals for Fujitsu Siemens Computers AMILO Xa 1526


Summary of Contents for Fujitsu Siemens Computers AMILO Xa 1526
- Page 1 Notebook English EasyGuide AMILO Xa Series...
- Page 2 Are there..any technical problems or other questions that you need help with? Please contact: • our Hotline/Help Desk (see the enclosed Help Desk List or the Internet: "www.fujitsu-siemens.com/helpdesk" • Your sales partner • Your sales office Additional information is contained in the Help Desk list and the "Warranty" manual.
- Page 4 This manual was produced by Xerox Global Services Published by Fujitsu Siemens Computers GmbH AG 10/06 Edition1 Order No.: 10600718746 Order No.: 440 N30762...
- Page 5 AMILO Xa Series EasyGuide Innovative technology... Ports and operating elements Important notes Using your notebook for the first time Working with the notebook Security functions Connecting external devices Removing and installing components during servicing Settings in BIOS Setup Utility Troubleshooting and tips Technical data Manufacturer’s notes Index...
- Page 6 All other trademarks referenced are trademarks or registered trademarks of their respective owners, whose protected rights are acknowledged. Copyright © Fujitsu Siemens Computers GmbH 2006 All rights, including rights of translation, reproduction by printing, copying or similar methods, in part or in whole, are reserved.
-
Page 7: Table Of Contents
Contents Innovative technology..............Are you missing information? . - Page 8 Removing the CD/DVD by hand (emergency removal) ........34 Regional codes for DVD films and DVD players .
- Page 9 Contents A beep sounds at a rate of one per second ..........61 The notebook’s LCD screen remains blank .
- Page 10 Contents 10600718746, edition 1...
-
Page 11: Innovative Technology
Innovative technology... and ergonomic design make your AMILO a reliable, convenient notebook. Your notebook is available in several different versions. Most of the sections in this manual apply to all models ‑ any differences are pointed out separately. Some of the illustrations and features in this manual may differ from your model and are for guidance only. -
Page 12: Notational Conventions
Cross-references to a different section, e.g. "Safety information". • Cross-references to an external source, e.g. an Internet address: For more information please go to " www.fujitsu-siemens.com". • Names of hard drives, CDs, DVDs and descriptions or titles of other materials, e.g.: "CD Drivers & Utilities" or the Safety manual. -
Page 13: Ports And Operating Elements
Ports and operating elements Touchpad Ports and operating elements Battery release Modem port Infrared interface LCD screen DC IN jack Monitor port Hard disk S-Video out socket ON/OFF switch Built-in loudspeakers Headphone port Loudspeaker port Bluetooth port Battery Wireless LAN SIM card Kensington Lock Touchpad buttons... -
Page 14: Important Notes
Important notes Notes Important notes Here you will find essential safety information regarding your notebook. The other notes provide helpful information on your notebook. Safety information Notes Safety information Please note the safety information provided in the "Safety" manual and in the safety notes below. Observe the sections in the manual marked with the symbol on the left. -
Page 15: Information Sources
Bluetooth Where? Accessories kit Accessories kit and/or on your notebook The manuals are located on your notebook under Start – Manuals. Alternatively, you can also download the latest versions from "www.fujitsu siemens.com/support/". In the software for these applications... -
Page 16: Travelling With Your Notebook
Travelling with your notebook Notebook Mobile operation Transport Notes Please observe the points listed below when travelling with your notebook. Before you travel ► Back up important data stored on your hard disk. Notebook Travel, notebook ► Switch off the radio component for data security reasons. With data traffic via a wireless connection, it is also possible for unauthorised third parties to receive data. -
Page 17: Cleaning The Notebook
Cleaning the Notebook Do not clean any interior parts yourself; leave this job to a service technician. Only use cleaning products designed for computers. Normal household cleaners and polishes can damage the markings on the keyboard and the device, the paintwork or the notebook itself. Ensure that no liquid enters the notebook. -
Page 18: Using Your Notebook For The First Time
Using your notebook for the first time Please read the chapter entitled Getting started Getting started Notebook Notebook Before you can use your notebook for the first time you need to charge the battery and install the supplied software. The Windows operating system and drivers required are already pre-installed. Upon delivery, the battery can be found in the battery compartment or in the accessories kit. -
Page 19: Location, Selecting The
Location, selecting the Location, selecting the Notebook Power adapter Select a suitable location for the notebook before setting it up. Consider the following points when selecting a location: • Never place the notebook on a soft surface (e.g. carpeting, upholstered furniture, bed). -
Page 20: Switching The Notebook On For The First Time
Switching the notebook on for the first time Switching on for the first time When you switch your notebook on for the first time, the supplied software is installed and configured. Due to the fact that this installation procedure must not be interrupted, you should set aside enough time for it to be fully completed and connect the notebook to the mains outlet using the mains adapter. -
Page 21: Working With The Notebook
Working with the notebook Notebook, operation Notebook This chapter describes the basics for operating your notebook. Please read the chapter entitled "Connecting external devices", Page 46 devices such as a mouse and a printer to the notebook. Please refer to the notes in Switching on the Notebook The power-on indicator is lit. - Page 22 Working with the notebook ► Close the LCD screen (1) so that it locks into place. 10600718746, edition 1...
-
Page 23: Status Indicators
Status indicators Status indicators The status indicators provide information about the status of the power supply, the drives and the keyboard functions. These indicators are not visible when the notebook is closed. Power indicator Battery indicator Silent Mode indicator (whisper mode) Drive indicator Touchpad indicator... - Page 24 Power indicator If the power adapter is connected: • Indicator lights up green: The notebook is switched on. • Indicator lights up amber: The notebook is switched off. • Indicator flashes: The notebook is in standby mode. When running off the battery: •...
-
Page 25: Keyboard
Keyboard Buttons Numeric keypad Keyboard Numeric keypad The keyboard of your notebook is subject to continuous wear due to normal use. The keyboard markings are subjected to particularly high loads. The keyboard markings can wear off in the course of using the notebook. The keyboard has been designed to provide all the functions of an enhanced keyboard. -
Page 26: Separate Numeric Keypad
Caps Lock key The Caps Lock key activates uppercase mode (CapsLK indicator lit). The Caps Lock function causes all the characters you type to appear in uppercase. In the case of overlay keys, the character printed on the upper left of the key appears when that key is pressed. To cancel the Caps Lock function, simply press the Caps Lock key again. -
Page 27: Key Combination
Illustration (example showing a German keyboard layout) Key combination Key combination The following description of key combinations refers to functions when using Microsoft Windows. Some of the following key combinations may not function in other operating systems and with some device drivers. Other key combinations are described in the relevant manuals supplied with your application programs. -
Page 28: Country And Keyboard Settings
Ctrl SysRq Key combinations with the Windows keys are contained in the man- ual for your operating system. Country and keyboard settings If you want to change the country and keyboard settings, proceed as follows: Country and keyboard settings ► Click on Start – Control Panel. Enabling/disabling the touchpad This key combination switches the touchpad of your notebook on and off. - Page 29 ► Double-click on Regional and Language Options. The current settings are displayed in the Regional Options tab. ► Select the country settings you want to use. ► Click on Apply. ► Click on the Details… button in the Languages tab. ►...
-
Page 30: Easy Launch Keys
Easy Launch keys Easy Launch keys Multimedia This button can be used to launch multimedia applications. Multimedia, Easy Launch key E-mail Use this button to start the standard e-mail programme for your system. E-mail, Easy Launch key Silent Mode (whisper mode) This key reduces the speed of the fan. -
Page 31: Touchpad And Touchpad Buttons
Touchpad and touchpad buttons Keep the touchpad clean. Protect it from dirt, liquids, and grease. Touchpad Touchpad Never touch the touchpad with dirty fingers. Do not rest heavy objects (e.g. books) on the touchpad or the touchpad buttons. The touchpad enables you to move the mouse pointer on the screen. The touchpad buttons allow you to select and execute commands. - Page 32 Dragging an object ► Select the desired object. Touchpad ► Press and hold the left button and drag the object to the desired position with the finger on the touchpad. The item will be moved. You can press the key combination not accidentally move the pointer on the screen (see also to switch off the touchpad so that you do "Key combination", Page...
-
Page 33: Lcd Screen
LCD screen Notes High-quality TFT displays are installed in notebooks from Fujitsu Siemens Computers GmbH. For technical reasons, TFT monitors are manufactured for a specific resolution. An optimal, clear picture can only be ensured in the resolution intended for the particular TFT monitor. A monitor resolution which differs from the specification can result in an unclear picture. - Page 34 Working with the notebook Changing the font size Changing the font size LCD screen Under Start – Control Panel - Appearance and Themes – Display – Advanced you can choose between a larger and a smaller font in the Font Size field. Synchronising the display on the LCD screen and an external monitor LCD screen Screen...
-
Page 35: Battery
Never store the batteries in the device. Removing and installing the battery Only use batteries approved by Fujitsu Siemens Computers for your notebook. Never use force when inserting or removing a battery. Make sure that no foreign bodies get into the battery connections. -
Page 36: Removing The Battery
Removing the battery ► Switch the notebook off and pull the power plug out of the mains socket. Battery ► Close the LCD screen so that it locks into place. ► Disconnect all cables connected to the notebook. ► Turn your notebook over and place it on a stable, sturdy, flat surface. If necessary, lay an anti-slip cloth on this surface to prevent the notebook from being scratched. -
Page 37: Using The Power-Management Features
Using the power-management features Energy Energy Battery The notebook uses less energy when the available energy saving functions are used. You will then be able to work longer when using the battery before having to recharge it. You can also use energy saving modes such as Standby or Hibernate for times when you are not using your notebook but want to keep coming back to it. -
Page 38: Expresscards
ExpressCards ExpressCard Slot An ExpressCard slot enables operation of an ExpressCard/34 or ExpressCard/54. Consult the documentation supplied by the ExpressCard’s manufacturer and follow the instructions provided. Never use force when installing or removing an ExpressCard. Make sure that no foreign objects enter the ExpressCard slot. ExpressCards ExpressCard Slot... -
Page 39: Removing The Expresscard
Please refer to the documentation for the ExpressCard for driver installation instructions. You should also read the help files on the CD, the information for the ExpressCard driver and the information provided by the operating system (e.g. Help and Support Center under Windows XP). Removing the ExpressCard ExpressCard You can stop the ExpressCard using the... -
Page 40: Memory Cards
Memory cards Slot Your notebook is equipped with a memory card slot. The memory card slot supports the following formats: • Secure Digital (SD Card) Memory Card Secure Digital • MultiMediaCard (MMC) MultiMediaCard Memory Card • Memory Stick / Memory Stick pro (Sony®) Memory Stick Pro Memory Card Please read the documentation supplied with the memory card for any special instructions. -
Page 41: Cd/Dvd
CD/DVD CD/DVD data storage media (certain devices only) CD/DVD Data storage media CD/DVD drives can either only read or both read and write different CDs or DVDs. The meaning of the respective CD and DVD types is described in the following: CD-ROM CD-ROM Abbreviation for Compact Disc –... -
Page 42: Handling Cd/Dvds
DVD+R DL / DVD-R DL (Double Layer) DVD+R DL / DVD-R DL Abbreviation for Digital Versatile Disc Recordable Double Layer or Digital Video Disc Recordable Double Layer. A DVD+R DL or a DVD-R DL is an optical data storage medium that can only be written once with a maximum of 8.5 GBytes of data. -
Page 43: Inserting Or Removing A Cd/Dvd
Multi-format DVD burner with double layer support DL support, Multi-format DVD burner CD/DVD drive Multi-format DVD burner, double layer support With the Multi-format DVD burner with double layer support you can read all optical data storage media named above. You can also write CD-Rs, CD-RWs, DVD+Rs, DVD+RWs, DVD-Rs, DVD-RWs and DVD+R DLs. -
Page 44: Removing The Cd/Dvd By Hand (Emergency Removal)
Removing the CD/DVD by hand (emergency removal) CD/DVD Removing by hand, CD/DVD Emergency removal, CD/DVD In the event of a power failure or damage to the drive it may be necessary to manually remove the CD/DVD. Regional codes for DVD films and DVD players DVD film Regional codes DVD films and DVD players (e.g. - Page 45 Proceed as follows: ► Click on Start and then My Computer. The My Computer window will appear. ► Select the CD / DVD icon you want to change and click it with the right-hand mouse or touchpad button. A context menu appears. ►...
-
Page 46: Microphone And Loudspeakers
Microphone and loudspeakers 1 = Built-in loudspeakers 2 = Built-in microphones Loudspeaker Microphone Two stereo loudspeakers, two microphones, one bass loudspeaker and one volume controller are installed in your notebook. The bass loudspeaker and the two loudspeakers form a so-called subwoofer system for true listening pleasure. -
Page 47: Integrated 56K Modem
Integrated 56k modem 56k modem Modem The integrated 56k modem supports all data communication applications, such as: • Modem operation: High-speed downloads at up to 56,000 bit/s (V.9x). Down- ward-compatible to V.34 modems. • Fax operation: Transmitting and receiving at up to 14,400 bit/s •... -
Page 48: Wireless Components (Wireless Lan/Bluetooth)
Wireless components (wireless LAN/Bluetooth) The installation of a wireless LAN/Bluetooth module not approved by Fujitsu Siemens Computers GmbH voids the permits (CE!) issued for this device. Bluetooth Wireless LAN Wireless LAN and Bluetooth (optional) are integrated in your notebook. Switching the wireless LAN/ Bluetooth module on and off Check whether the wireless LAN module is activated/deactivated in the installed wireless LAN software. -
Page 49: Ethernet And Lan
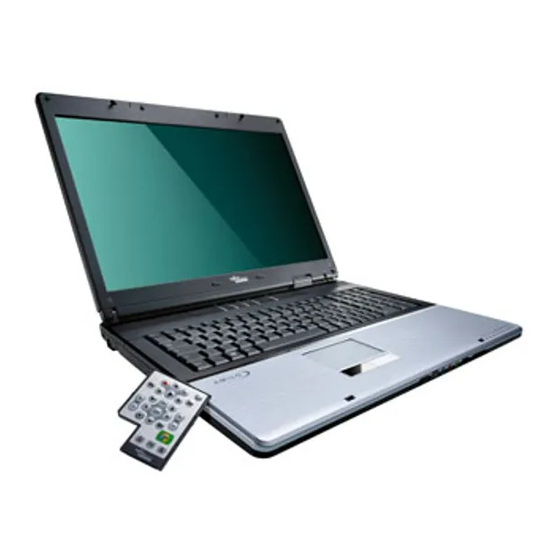
Ethernet and LAN Ethernet LAN The internal LAN module of your notebook supports Ethernet-LAN (10/100 Mbps). With the LAN module you can establish a connection to a local network (LAN = Local Area Network). Your network administrator can help you to configure and use the LAN-connections. Remote control for Windows XP Media Center Edition (optional) Remote control... -
Page 50: Removing Remote Control
Removing remote control Using the remote control Remote control The remote control (2) must be in the effective range (horizontally approx. 30°) of the notebook’s CIR interface (1). You may not be more than 5 to 7 m from the notebook. ►... - Page 51 REPEAT TITLE ON/OFF switch of the Notebook This button starts the notebook’s operating system. Multimedia This button can be used to launch multimedia applications. Increase/decrease volume This button increases or decreases the volume. Mute button This button switches the sound playback on and off.
-
Page 52: Security Functions
Security functions Security functions Your notebook has several security features that you can use to secure your system from unauthorised access. This chapter will explain how to use each function, and what the benefits are. Please remember that in some cases, for example, forgetting your password, you can be locked out and unable to access your data. -
Page 53: Configuring Password Protection In Bios Setup Utility
Configuring password protection in BIOS Setup Utility Before using the various options of password protection for your data security in the BIOS Setup Utility, please note the following hints: • Make a note of the passwords and keep them in a safe place. If you forget your supervisor password, then you will no longer be able to access your notebook. -
Page 54: Password Protection Of Operating System
Setting supervisor and user password ► Call up the BIOS Setup Utility and go to the Security menu. ► Highlight the Set Supervisor Password field and press the Enter key. The Enter new Password dialogue box then pops up and you are asked to enter a password. ►... - Page 55 Activating system protection ► Call up the BIOS Setup Utility and go to the Security menu. Operating system ► Select the Password on Boot option and press the Enter key. ► Select Enabled and press the Enter key. ► Under Exit, select Save Changes and Exit. The notebook restarts.
-
Page 56: Connecting External Devices
Connecting external devices Always refer to the safety information provided in connecting or disconnecting any devices to or from your notebook. Always read the documentation supplied with the device you wish to connect. Never connect or disconnect cables during a thunderstorm. Never pull at a cable when disconnecting it. -
Page 57: Ports
Ports 1 = Kensington Lock 2 = Modem port 3 = Line in 4 = Microphone port 5 = Headphones/SPDIF port (loudspeaker port / line out) Connecting an external monitor An external monitor can be connected to the notebook. Screen port Monitor Monitor port VGA connector... -
Page 58: Setting The Refresh Rate For Your External Monitor
Using the the external monitor and the notebook’s LCD screen. You can display the same picture on the external monitor and the LCD screen simultaneously. Setting the refresh rate for your external monitor Monitor The refresh rate must be correctly set so that the image does not flicker. If the refresh rate set is too high, the monitor may be damaged. -
Page 59: Connecting Firewire Devices
Connecting FireWire devices FireWire port Connecting digital video devices Connecting audio devices Connecting video devices Connecting digital audio devices Connecting high-speed devices External devices such as digital audio/video devices or other high-speed devices can be connected to the FireWire port. The FireWire port operates at a speed of 400 Mbit per second. FireWire devices are hot-pluggable. -
Page 60: Headphones/Spdif Port (Loudspeaker Port / Line Out)
Headphones/SPDIF port (loudspeaker port / line out) Connecting headphones Connecting audio devices Audio ports You can use the Headphones/SPDIF port to connect headphones, external loudspeakers or an audio device with a digital optical input to your notebook. If you connect headphones or external loudspeakers, the built-in loudspeakers are disabled. -
Page 61: Connecting An External Device To S-Video Out
Adjusting the volume ► Set the desired volume with the key combination Volume ► To adjust the volume use the Windows volume control which can be found under Start – Programs – Accessories – Multimedia and Volume Control. Connecting an external device to S-Video Out Connecting a television set Monitor Video output... -
Page 62: Removing And Installing Components During Servicing
Removing and installing components during servicing Only qualified technicians should repair your notebook. Unauthorised opening or incorrect repair may greatly endanger the user (electric shock, fire risk) and will invalidate your warranty. Servicing Components You may remove and install the components described in this chapter yourself after consulting the Hotline/Help Desk. -
Page 63: Removing And Installing The Hard Disk
Removing and installing the hard disk Removing the hard disk ► Switch the notebook off and pull the power plug out of the mains socket. ► Close the LCD screen so that it locks into place. ► Disconnect all cables connected to the notebook. ►... -
Page 64: Second Hard Disk (Certain Devices Only)
► Install the battery again (see ► Turn the notebook over and place it on a flat surface. ► Reconnect the cables that you disconnected before. Second hard disk (certain devices only) Second hard disk Additional hard disk Depending on your particular model, you may be able to install a second hard disk in your notebook. The second hard disk is installed and removed in exactly the same way as the first one (see "Removing and installing the hard disk", Page... -
Page 65: Memory: Expansion
Memory: expansion Memory upgrade Main memory System expansion System expansion Your notebook is equipped with 256 MB – 2 GB or 4 GB of main memory, depending on the upgrade level. The notebook will not start without memory modules, as no fixed main memory is installed. Installing and removing the memory expansion Memory module If you are asked by the Hotline/Help Desk to remove and install the memory... -
Page 66: Removing Cover
Removing cover Memory modules: removing Installing the memory module ► Remove the screws (1). Cover ► Lift the cover off the notebook (2). ► Carefully push the two mounting clips outwards (1). Memory expansion Memory module The memory module will snap upwards (2). ►... - Page 67 Mounting the cover ► Install the battery again (see ► Turn the notebook over and place it on a flat surface. ► Reconnect the cables that you disconnected before. 10600718746, edition 1 ► Attach the cover in the direction of the arrow (1).
-
Page 68: Settings In Bios Setup Utility
Settings in BIOS Setup Utility Setup System settings, BIOS Setup Utility Hardware configuration Configuration, BIOS Setup Utility BIOS Setup Utility System configuration In BIOS Setup Utility you can set the system functions and the hardware configuration of your notebook. When it is delivered, the notebook is set to factory default settings. You can change these settings in the menus of the BIOS Setup Utility. -
Page 69: Using The Bios Setup Utility
Using the BIOS Setup Utility BIOS Setup Utility Press the key to display help on using the BIOS Setup Utility . The description of the individual settings is shown in the right-hand window of the BIOS Setup Utility . With the key you can load the default settings of the BIOS Setup Utility . -
Page 70: Troubleshooting And Tips
PC if you are running processor-intensive gaming software, e.g. games with intensive 3D graphics. Updating your hardware with drivers which have not been approved by Fujitsu Siemens Computers may result in performance losses, data losses or malfunction of the equipment. A list of approved drivers and current BIOS versions can be downloaded from: "http://www.fujitsu-siemens.de/support/downloads.html"... -
Page 71: Restoring The Operating System, Drivers, Manuals And Special Software
Restoring the operating system, drivers, manuals and special software You can find information on how to restore the operating system, drivers, manuals and special software in the "Recovery Process" manual. The notebook’s date or time is incorrect Time not correct Time, daylight savings Buffer battery, load Time not correct... -
Page 72: The External Monitor Is Blank Or The Image Is Unstable
Cause Screen output is set to the notebook’s LCD screen The external monitor’s power cable or data cable is not connected properly. The external monitor is blank or the image is unstable Screen Screen Cause The wrong external monitor has been selected or the wrong screen resolution has been set for the application program. -
Page 73: The Notebook Stops Working
Cause The battery is dead. The power adapter is not connected correctly. The notebook stops working Disabling Standby mode Suspend mode Notebook Cause The notebook is in Standby or Suspend mode. An application programme has caused the malfunction. The battery is dead. 10600718746, edition 1 Troubleshooting ►... -
Page 74: Dvd Film Playback Stops
DVD film playback stops DVD film does not continue to play Cause Accelerated hardware decryption activated. Troubleshooting If the picture freezes when playing certain DVD films, deactivate the accelerated hardware decryption (it is activated by default; which is indicated by the tick in the corresponding checkbox). -
Page 75: The Printer Does Not Print
The printer does not print Printer does not print Cause The printer is not switched on. The printer is not connected correctly. The printer driver is faulty or not correctly installed, or it is the wrong printer driver. The radio connection to a network does not work The radio connection to a network does not work Cause The ON/OFF switch for the wireless... -
Page 76: Technical Data
Contains Lithium Battery. Must be Recycled or Disposed of Properly. Apparatus Claims of U.S. Patent Nos. Licensed for limited viewing uses only. Licensed for limited viewing uses only. Type designation (e.g. AMILO Xa 1526) reg no. XTB70 4.5A ME01 4,631,603; 4,819,098; 4,907,093; 5,315,448; and 6,516,132. -
Page 77: Notebook
Weight (depending on configuration) The data sheet of this notebook contains further technical data. The data sheet can be found on your notebook, or alternatively it is also available to download from the Internet at "www.fujitsu-siemens.com". Battery Technical data Charging time (when not in operation) -
Page 78: Manufacturer's Notes
Declaration of conformity You will find the Declarations of Conformity for the AMILO on the Internet at: "www.fujitsu-siemens.com". Hereby, Fujitsu Siemens Computers, declares that the AMILO is in compliance with the essential requirements and other relevant provisions of Directive 1999/5/EC. Copyright-protected technology... -
Page 79: Ce Marking
CE marking CE marking CE marking for devices without wireless component The shipped version of this device complies with the requirements of the EEC directives 89/336/EEC "Electromagnetic compatibility" and 73/23/EEC "Low voltage directive". CE marking for devices with radio component This equipment complies with the requirements of Directive 1999/5/EC of the European Parliament and Commission from 9 March, 1999 governing Radio and Telecommunications Equipment and mutual recognition of conformity. -
Page 80: Index
Index 56k modem 37 A beep sounds every second 61 Additional hard disk 54 Alt+Tab 18 Anti-theft protection 42 Audio ports 49–50 AutoPlay function 34 Backspace 15 Backtab 18 Battery 3, 25 care and maintenance 25 charge level 25, 27 charging 25 inserting 26 life 25... - Page 81 Disabling Standby mode 63 DL support, Multi-format DVD burner 33 Double layer with Label Flash support 33 Drive indicator 14 DVD 31 regional codes 34 DVD blank 32 DVD film regional codes 34 DVD film does not continue to play 64 DVD video 31 DVD+R 31 DVD-R 31...
- Page 82 Loudspeaker port 3 Loudspeakers switching off 18 switching on 18 Main memory see Memory expansion 55 Mechanical safety device 42 Memory card inserting 30 removing 30 Memory Card handling 30 Memory Stick Pro 30 MultiMediaCard 30 Secure Digital 30 Memory card slot 3 Memory expansion installing 56 removing 56...
- Page 83 Regional codes 34 Remote control 39 taking out 40 using 40 Removing by hand, CD/DVD 34 Return 15 S-Video out socket 3, 51 Safety information 4 Screen drifting display 62 no screen display 62 synchronising the display 24 Screen brightness decreasing 18 increasing 18 Screen port...
- Page 84 Volume adjusting 36, 51 decreasing 18 increasing 18 Warm restart 18 Whisper mode, Easy Launch key 14, 20 Wireless LAN 38 ON/OFF switch 3 Wireless LAN indicator 14 Wireless LAN/Bluetooth switching the module off 38 switching the module on 38 10600718746, edition 1...